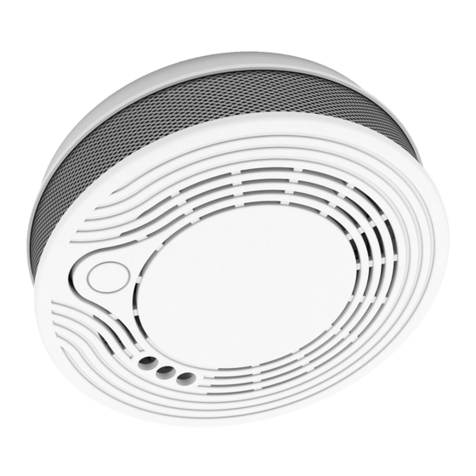
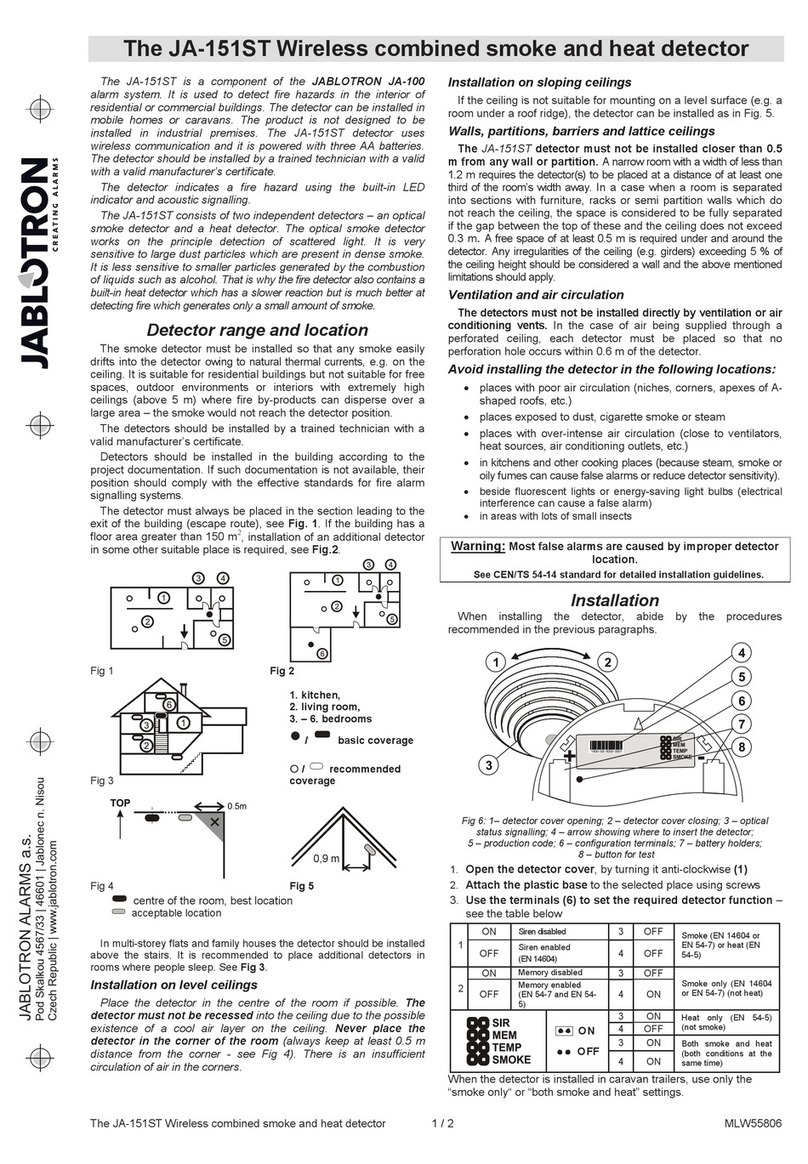
Elko AirSD-100NB User manual

1 / 3
AirSD-100
02-22/2018 Rev.: 0
1
1
1
8
44
44
7
2
2
2
2
6
5
3
3
3
ELKO EP, s.r.o.
Palackého 493
769 01 Holešov, Všetuly
Česká republika
Tel.: +420 573 514 211
e-mail: [email protected]
www.elkoep.cz Kouřový detektor
• Kouřový detektor slouží pro včasné varování před vznikajícím požárem v byto-
vých i komerčních objektech. Mimo to také informuje o aktuální teplotě, vlhkosti
a intenzitě osvětlení v daném prostoru.
• Detektor využívá metodu snímání pomocí optické komůrky, díky které má zvýše-
nou reakci na detekci kouře.
• Funkce autotestu upozorní na poruchu detektoru, čímž se eliminuje nefunkčnost
v případě požáru.
• Anti-sabotážní funkce (Tamper) – při jakémkoliv sejmutí detektoru ze základny je
odeslána zpráva na server.
• Díky bezdrátovému řešení a komunikaci Sigfox/LoRa/NB-IoT můžete pouze insta-
lovat na zvolené místo a ihned provozovat.
• V případě detekce kouře jsou data zasílána na server, ze kterého mohou být ná-
sledně zobrazena jako notikace v Chytrém telefonu, aplikaci nebo Cloudu.
• Informace o stavu baterie je zasílána formou zpráv na server.
• Napájení: 4 x 1.5V AA s životností min. 1 rok.
Charakteristika
Popis přístroje
CZ
Všeobecné instrukce
Internet věcí (IoT)
• Kategorii bezdrátových komunikačních technologií určených k IoT popisuje Low Po-
wer Wide Area (LPWA). Tato technologie je navržena tak, aby zajišťovala celoplošné
pokrytí vně i uvnitř budov, byla energeticky nenáročná a měla nízké náklady na provoz
jednotlivých zařízení. Pro využívání tohoto standardu jsou k dispozici jednotlivé sítě -
Sigfox, LoRa, NarrowBand.
Informace o síti Sigfox
• Síť podporuje obousměrnou komunikaci, ale s omezeným počtem zpětných zpráv. Vy-
užívá volné frekvenční pásmo dělené dle Radiofrekvenčních zón (RCZ).
• RCZ1 (868 MHz) Evropa, Omán, Jižní Afrika
• RCZ2 (902 MHz) Severní Amerika
• RCZ3 (923 MHz) Japonsko
• RCZ4 (920 MHz) Jižní Amerika, Austrálie, Nový Zéland, Singapure,
Taiwan
• Sigfox má rozsáhlejší pokrytí i napříč jednotlivými státy, proto je vhodnější pro moni-
torování zařízení na velké vzdálenosti.
• Více informací o této technologii se dozvíte na stránkách www.sigfox.com.
Informace o síti LoRa
• Síť je obousměrná a pro svou komunikaci využívá volné frekvenční pásmo.
• 865 - 867 MHz Indie
• 867 - 869 MHz Evropa
• 902 - 928 MHz Severní Amerika, Japonsko, Korea
• Výhodou této sítě je možnost volného nasazení jednotlivých vysílacích stanic i v míst-
ních lokalitách, čímž posílí svůj signál. Dá se proto efektivně využít v areálech rem
nebo například v místních částech měst.
• Více informací o této technologii se dozvíte na stránkách www.lora-alliance.org.
Informace o síti NarrowBand
• Síť zajišťuje obousměrnou komunikaci a jako jediná využívá licencované pásmo LTE.
Naše zařízení umožňují komunikaci přes Band 1 (2100 MHz), Band 3 (1800 MHz), Band 8
(900 MHz), Band 5 (850 MHz), Band 20 (800 MHz) a Band 28 (700 MHz).
• Pro svůj provoz využívá tato technologie SIM karty pro jednotlivá zařízení.
• Výhodou NarrowBand je využití již vystavěné sítě, čímž zajišťuje dostatečné pokrytí
vně i uvnitř budov.
• Více informací o této technologii se dozvíte na stránkách www.vodafone.cz
Upozornění pro správný provoz zařízení:
• Výrobky se instalují dle schématu zapojení uvedeného u každého výrobku.
• Pro správnou funkčnost zařízení je nutné mít dostatečné pokrytí vybrané sítě v místě
instalace.
• Zároveň musí být zařízení v síti registrováno. Úspěšná registrace zařízení v dané síti
vyžaduje zaplacení tarifu za provoz.
• Každá síť nabízí jiné možnosti tarifů - vždy záleží na počtu zpráv, které chcete ze zaří-
zení odesílat. Informace k těmto tarifům naleznete v aktuální verzi ceníku společnosti
ELKO EP.
1. Pozice dvoubarevné LED
2. Otvory pro zajišťovací segmenty
3. Baterie
4. Zajišťovací segmenty
5. DIP přepínač - pozice 1 - vypnutí
signalizace LED
6. Tlačítko SET
7. Pozice tamperu
8. Výstupek pro magnet snímající
tamper
Spodní strana
detektoru
Vnitřní strana
základny
Přední strana
detektoru
Přiřazení do Cloudu aplikace
Provádí se v aplikaci Vašeho Chytrého telefonu. Do aplikace zadejte příslušné údaje, které
jsou uvedeny na krytu detektoru.
Made in Czech Republic

1
4
2
+
-
+
-
+
-
+
-
5
3
ON
1 2 3
+
-
-
+
-
+
-
min. 30 cm
min. 15 cm
max. 30 cm
min. 150 cm
min. 30 cm
AirSD-100
AirSD-100AirSD-100
min. 15 cm
min. 50 cm - max. 600 cm
AirSD-100
AirSD-100
b)
a)
a)
b)
Funkce
Interiérový, bateriemi napájený kouřový detektor slouží ke včasnému zjištění doutnajících
a otevřených požárů z nichž uniká kouř. Je vybaven opticko-kouřovým snímacím prvkem
pro detekci kouře. Příkladem doutnajícího ohně je hořící cigareta na gauči nebo povlečení,
což bývá častou příčinou požárů.
Indikace a stavy detektoru:
Po vložení baterií odešle detektor úvodní zprávu, obsahující naměřené hodnoty teploty,
vlhkosti, intenzity osvětlení, stavu opticko-kouřového snímače a verzi rmware zařízení.
• Detektor snímá kouř každých 10 s, zelená LED problikává ve stejném intervalu (LED sig-
nalizaci lze vypnout DIP přepínačem). Každých 10 minut detektor snímá teplotu, vlhkost
a intenzitu osvětlení. Datovou zprávu o naměřených hodnotách odesílá v šestihodino-
vém intervalu. V případě detekce kouře nebo prudké změny teploty okamžitě.
• Alarm - čidlo detekuje kouř, červená LED bliká v intervalu 1 s, detektor vydává hlasité
přerušované „pípání“. Ukončení alarmu rozptýlením kouře. Zvukovou signalizaci lze vy-
pnout testovacím tlačítkem, v případě pozitivní detekce kouře se zvuková signalizace po
5 minutách obnoví.
• Vybitá baterie:
- odesílání zprávy na server
- každých 5 vteřin 3x problikne červená LED na detektoru.
• Porucha detektoru:
- odesílání zprávy na server
- indikací červené LED na detektoru a jedno krátké pípnutí každých 40 vteřin.
• Vyjmutí ze základny:
- odesílání zprávy na server
- každé 3 vteřiny 2x problikne červená LED na detektoru.
Doporučení pro umístění
Vhodné umístění
V nových budovách instalujte kouřové detektory dle projektu.
• Kouř a ostatní zplodiny hoření stoupají ke stropu a rozšiřují se vodorovně. V obytných
budovách doporučujeme instalaci detektorů kouře doprostřed stropu.
• Detekční oblast detektoru je 40 m3. Dejte pozor na to, aby byl detektor kouře umístěn
alespoň 15 cm od boční stěny a 50 cm od každého rohu místnosti (obr. a). Max. doporu-
čená instalační výška je 4 m.
• V místnostech se šikmým, špičatým nebo sedlovým stropem (např. půdní vestavby) se
montují kouřové hlásiče na strop ve vzdálenosti 90 cm od nejvyššího bodu.
• V případě instalace na stěnu, umístěte detektor ve vzdálenosti 15 - 30 cm pod stropem
(obr. b). Spodní část detektoru by měla být umístěna nad horním okrajem všech dveří,
oken a jiných otvorů.
• I když se jako nejvhodnější pro instalaci požárního hlásiče jeví umístění nad rizikové mís-
to, doporučujeme jej umístit do některé ze spojovacích místností, například na schodiště
nebo do chodby. Spuštění alarmu sice přichází o něco později, ale dojde k omezení pla-
ných poplachů od kouře z připálené pánve nebo kouře z krbu.
• Pro zvýšení bezpečnosti by měly být detektory instalovány v každé místnosti objektu.
Nevhodné umístění
• Místa, kde může dojít ke zkreslení snímaného množství kouře:
- prostor, kde vzniká turbulentní proudění vzduchu od ventilátorů, topení nebo dveří či
oken, apod.
- horní části sedlové střechy
- menší vzdálenosti než 30 cm od stěny při montáži na strop a 50 cm od rohu místnosti
- menší vzdálenosti než 30 cm od svítidel
- menší vzdálenosti než 150 cm od zářivkových svítidel
- pokud jsou v blízkosti detektoru umístěny objekty, které by mohly bránit v přístupu
kouře k detektoru (dekorace, apod.).
- ve všech směrech pod detektorem se musí udržovat volný prostor alespoň 50 cm.
• V místnostech s vysokou vlhkostí a místnostech s prudce se střídající teplotou (koupelny,
sprchy, prádelny, kuchyně, apod.).
• V prašném prostředí, v prostorech s větším množstvím cigaretového kouře (kotelny, ga-
ráže, apod.).
• V prostorách zamořených hmyzem.
• V místech kde by pravidelné testování nebo údržba byla nebezpečná.
Montáž
1. Základnu umístěte na požadované místo (na rovnou plochu). Základnu můžete použít
jako vrtací šablonu. Připevněte ji vhodným spojovacím materiálem* dle podkladu.
2. Do detektoru vložte baterie a překontrolujte jejich správné umístění (při vložení baterií
se do aplikace odešle zpráva o funkčnosti detektoru).
3. Dle požadavku nastavte DIP 1.
4. Detektor nasaďte na základnu tak, aby výstupek na základně směřoval do pozice tampe-
ru v krytu detektoru (a). Detektor zajistěte pootočením ve směru hodinových ručiček (b).
5. Stiskem testovacího tlačítka otestujte správnou funkci alarmu (viz kapitola Testování
detektoru).
* jako vhodný spojovací materiál může být použit např. vrut se zápustnou hlavou, Ø vrutu
3 mm
osvětlení
strop
zářivka
• Detektor je určen pro vnitřní použití. Používejte jej proto výhrad-
ně ke snímání v uzavřených, suchých a bezprašných prostorách.
• Dbejte na to, aby větrací otvory zůstávaly volné a nezastavujte je
dalšími přístroji, nábytkem nebo jinými předměty.
• Umístěte detektor na takové místo, aby mohl okolní vzduch
proudit skrz přístroj.
stěna
roh
místnosti
stěna
stěna
Důležitá upozornění
• Detektor Vás může včas varovat pouze pokud je správně nainstalován a dále řádně
udržován a testován dle návodu.
• POZOR: toto zařízení nedetekuje plameny, oxid uhelnatý nebo jiné nebezpečné plyny.
• Detektor není určen pro instalaci v průmyslovém prostředí.
• Vždy si uvědomte potenciální nebezpečí, rozvíjejte bezpečnostní povědomí a dbejte na
preventivní opatření, aby se zabránilo nebezpečí kdykoli a kdekoli je to nutné. Detektor
může snížit pravděpodobnost katastrofy, ale nedokáže zaručit 100% bezpečnost.

AirSD-100S AirSD-100L AirSD-100NB
3 / 3
Technické parametry
* frekvenční pásma B1 / B3 / B5 / B8 / B20 / B28
** dle pokrytí jednotlivých sítí
Varování
Před instalací přístroje a před jeho uvedením do provozu se seznamte s návodem k pou-
žití. Návod na použití je určen pro montáž a pro uživatele zařízení. Návod je vždy součástí
balení. Instalaci a připojení mohou provádět pouze pracovníci s příslušnou odbornou
kvalikací, při dodržení všech platných předpisů, kteří se dokonale seznámili s tímto ná-
vodem a funkcí prvku. Bezproblémová funkce prvku je také závislá na předchozím způ-
sobu transportu, skladování a zacházení. Pokud objevíte jakékoliv známky poškození,
deformace, nefunkčnosti nebo chybějící díl, tento prvek neinstalujte a reklamujte jej u
prodejce. S prvkem či jeho částmi se musí po ukončení životnosti zacházet jako s elek-
tronickým odpadem. Před zahájením instalace se ujistěte, že všechny vodiče, připojené
díly či svorky jsou bez napětí. Při montáži a údržbě je nutné dodržovat bezpečnostní
předpisy, normy, směrnice a odborná ustanovení pro práci s elektrickými zařízeními.
Nedotýkejte se částí prvku, které jsou pod napětím - nebezpečí ohrožení života. Z dů-
vodu prostupnosti radiového signálu dbejte na správné umístění prvků v budově, kde
se bude instalace provádět. Pokud není uvedeno jinak, nejsou prvky určeny pro instalaci
do venkovních a vlhkých prostor, nesmí být instalovány do kovových rozvaděčů a do
plastových rozvaděčů s kovovými dveřmi - znemožní se tím prostupnost radiofrekvenč-
ního signálu. iNELS Air se nedoporučuje pro ovládání přístrojů zajišťujících životní funkce
nebo pro ovládání rizikových zařízení jako jsou např. čerpadla, el. topidla bez termostatu,
výtahy, kladkostroje ap. - radiofrekvenční přenos může být zastíněn překážkou, rušen,
baterie vysílače může být vybita ap., a tím může být dálkové ovládání znemožněno.
Napájení
Bateriové napájení:
Životnost baterie:
Detektory
Detekce kouře:
Detekční podnět:
Detekční princip:
Doba reakce:
Měření teploty:
Citlivost:
Přesnost:
Měření vlhkosti:
Citlivost:
Přesnost:
Měření intenzity osvětlení:
Rozsah:
Nastavení
Detekce alarmu:
Zobrazení stavu baterie:
Tlačítko SET:
Přepínač DIP:
Ovládání
Detekční plocha:
Doporučená montážní výška:
Akustický signál:
Testovací tlačítko:
Komunikace
Komunikační standart:
Komunikační frekvence:
Dosah na volném prostranství:
Další údaje
Provozní vlhkost:
Pracovní teplota:
Skladovací teplota:
Pracovní poloha:
Upevnění:
Krytí:
Barva:
Rozměr:
Hmotnost:
baterie 4x 1.5 V AA
min. 1 rok
vestavěným senzorem
kouř z hoření
opticko-kouřová snímací technologie
několik vteřin po kontaktu s kouřem
vestavěným senzorem
-25 .. 70 °C
± 3 °C
vestavěným senzorem
0 .. 90 % RH
± 4 %
vestavěným senzorem
0.045 - 188 000 Lx
zpráva na server,
indikace LED, zvuková signalizace
zpráva na server,
indikace LED
test / nastavení / signalizace
pozice 1 - vypnutí signalizace snímání
max. 40 m3
max. 4 m
větší než 85 dB ve vzdálenosti 3 metry
ano
Sigfox LoRa NB-IoT
RCZ1 868 MHz 868 MHz LTE Cat NB1*
cca 50 km** cca 10 km** cca 30 km**
až 92% relativní vlhkosti (RH) / 10% až 85% RH,
žádná kondenzace, nebo námraza
0…+40°C
(dbát na pracovní teplotu baterií)
-30…+70°C
vodorovně (na strop) / svisle (na stěnu)
šrouby
IP20
bílá
Ø 120 x 36 mm
176 g (bez baterií)
Testování detektoru
Aby jste zajistili správnou funkci, je vhodné detektor udržovat v čistotě
• Alespoň jednou za 6 měsíců vyčistěte jeho povrch pomocí měkkého kartáče nebo had-
říku. Pomocí vysavače s kartáčovým nástavcem opatrně očistěte kryt a ventilační otvory
od prachu a nečistot.
• Nikdy nepoužívejte vodu, čisticí prostředky nebo rozpouštědla. Může dojít k poškození
detektoru.
• V blízkosti přístroje nepoužívejte žádné chemikálie (např. čistící prostředky, sprej na vla-
sy...), výpary mohou negativně ovlivnit funkci přístroje.
• Nenanášejte barvu na detektor. Při malování detektor sejměte a vraťte na místo až po
ukončení prací.
• Detektor nerozebírejte nepokoušejte se čistit jeho vnitřek.
• Po každém čištění detektor otestujte!
• Pokud nebudete detektor delší dobu používat, demontujte jej, vyjměte baterie. Detektor
zabalte a uložte na chladném a suchém místě.
Údržba a čištění
Výměna baterií
1. Pootočte detektor proti směru hodinových ručiček a sundejte jej ze základny.
2. Vyjměte původní baterie a do držáku baterií zasuňte baterie nové. Pozor na polaritu.
Červená LED na detektoru problikne.
3. Detektor nasaďte na základnu tak, aby výstupek na základně směřoval do pozice tampe-
ru v krytu detektoru. Detektor zajistěte pootočením ve směru hodinových ručiček.
4. Stiskem testovacího tlačítka otestujte správnou funkci alarmu (viz kapitola Testování
detektoru). POZOR - nemačkejte testovací tlačítko během výměny baterií, zařízení by
nemuselo pracovat správně.
Upozornění:
Používejte výhradně baterie určené pro tento výrobek, správně vložené do přístroje! Nepoužívejte
nabíjecí baterie! Slabé baterie neprodleně vyměňte za nové. Nepoužívejte současně nové a použité
baterie. V případě potřeby očistěte baterii a kontakty před jejich použitím. Vyvarujte se zkratování
baterií! Baterie nerozebírejte, nenabíjejte a chraňte je před extrémním zahřátím - nebezpečí vytečení!
Při kontaktu s kyselinou okamžitě vypláchněte postižené části proudem vody a vyhledejte lékaře.
Udržujte baterie mimo dosah dětí. Baterie musí být recyklovány či vráceny na vhodné místo (např.
sběrné nádoby) v souladu s místními ustanoveními.
Co dělat při detekci
Pokud zazní poplašný signál a požární alarm není právě testován, je detekován kouř. Je
vyžadována vaše okamžitá pozornost a akce. Postupujte dle požárně požární směrnice.
1. Zkontrolujte zdroj kouře.V rámci možnosti se pokuste zdroj požáru (kouře) zlikvidovat.
2. Pokud se požár nepodaří zlikvidovat, volejte tísňovou linku, kde vám po telefonu řek-
nou, co přesně máte v dané situaci dělat.
3. Opusťte objekt. Zjistěte zda prostor opustily všechny osoby.
4. Zajistěte vypnutí přívodů elektřin, plynu, topení..., odstranění nebezpečných mate-
riálů (např. tlakové láhve)...
5. V rámci možností se podílejte na evakuaci osob, zvířat, hašení požáru apod.
Dlouhým stiskem testovacího tlačítka spustíte test detektoru. V průběhu testu bliká zelená
LED (dvě bliknutí každou vteřinu). Nejprve se testuje činnost sirény - ozve se dlouhý tón.
Následuje test kouřové komory. Po úspěšném ukončení testu detektor třikrát blikne a píp-
ne. Do aplikace se automaticky odešle se zpráva o úspěšném dokončení testu.
V případě, detektor nesignalizuje správně překontrolujte správné sestavení detektoru,
umístění baterií, případně baterie vyměňte a test zopakujte.
VAROVÁNÍ
Je nutné pravidelně testovat každý kouřový detektor, abyste měli jistotu, že je správně
nainstalován a správně pracuje.
• Detektory testujte pravidelně minimálně jednou měsíčně. Doporučujeme test funkce
provádět také vždy před delším pobytem mimo detekovaný prostor (dovolená apod).
• K testování detektoru nikdy nepoužívejte otevřený plamen.
• Při testování zařízení udržujte vzdálenost na délku paže nebo použijte ochranu sluchu.
• Udržujte detektor čistý.
• Pokud nepracuje správně, okamžitě je vyměňte.

1 / 3
AirSD-100
02-22/2018 Rev.: 0
1
1
1
8
44
44
7
2
2
2
2
6
5
3
3
3
ELKO EP, s.r.o.
Palackého 493
769 01 Holešov, Všetuly
Czech Republic
Tel.: +420 573 514 211
e-mail: [email protected]
www.elkoep.com
EN
Made in Czech Republic
Characteristics General instrucions
Internet of Things (IoT)
• The IOT wireless communications category describes the Low Power Wide Area
(LPWA). This technology is designed to provide full-range coverage both inside and
outside buildings, energy-saving and low-cost operation of individual devices. Indivi-
dual networks - Sigfox, LoRa, NarrowBand - are available to use this standard.
Sigfox network information
• The network supports bidirectional communication but with a limited number of feed-
backs. It uses the free frequency band divided by Radio Frequency Zones (RCZ).
• RCZ1 (868 MHz) Europe, Oman, South Africa
• RCZ2 (902 MHz) North America
• RCZ3 (923 MHz) Japan
• RCZ4 (920 MHz) South America, Australia, New Zealand, Singapore, Taiwan
• Sigfox has more coverage across countries, so it is better suited for long distance mo-
nitoring.
• For more information on this technology, please visit www.sigfox.com.
LoRa network information
• The network is bidirectional and its communication uses free frequency band.
• 865 - 867 MHz India
• 867 - 869 MHz Europe
• 902 - 928 MHz North America, Japan, Korea
• The advantage of this network is the possibility of freely deploying individual stations
in local locations, thus strengthening their signal. It can therefore be used eciently in
company premises or, for example, in local parts of cities.
• For more information on this technology, please visit www.lora-alliance.org.
Information about the NarrowBand network
• The network provides two-way communication and the only one to use the licensed
LTE band. Our devices allow band 1 (2100MHz), Band 3 (1800MHz), Band 8 (900MHz),
Band 5 (850MHz), Band 20 (800MHz) and Band 28 (700MHz).
• It uses this SIM card technology for each device.
• The advantage of NarrowBand is the use of already built-up grids, which ensures su-
cient reception outside and inside buildings.
• For more information on this technology, please visit www.vodafone.cz
Caution for proper operation:
• Products are installed according to the wiring diagram given for each product.
• For proper device functionality, it is necessary to have sucient coverage of the selec-
ted network at the installation site.
• At the same time, the device must be registered in the network. Successful device re-
gistration on a given network requires a charge for trac.
• Each network oers dierent tari options - it always depends on the number of me-
ssages you want to send from your device. Information on these taris can be found in
the current version of the ELKO EP pricelist.
• The smoke detector is used for the early warning of an emerging re in residential
and commercial buildings and also measures the actual temperature, humidity
and light intensity in the room.
• The detector utilises a scanning method using an optical chamber, which has en-
hanced smoke detection responses.
• Self-test function highlights the failure of the detector, eliminating the malfunc-
tion in the event of a re.
• Anti-sabotage: If access to the device is unauthorized, a message is immediately
sent to the server.
• Thanks to the wireless solution and Sigfox / LoRa / NB-IoT communication, it can
communicate instantly to your chosen location and be operated immediately.
• Data is sent to the server from which it can be subsequently displayed as a smart-
phone, application, or Cloud notication.
• Battery power can be sent to the server when it is powered by a battery.
• Power supply: battery 4 x 1.5 V AA, the battery life is around 1 year.
Description
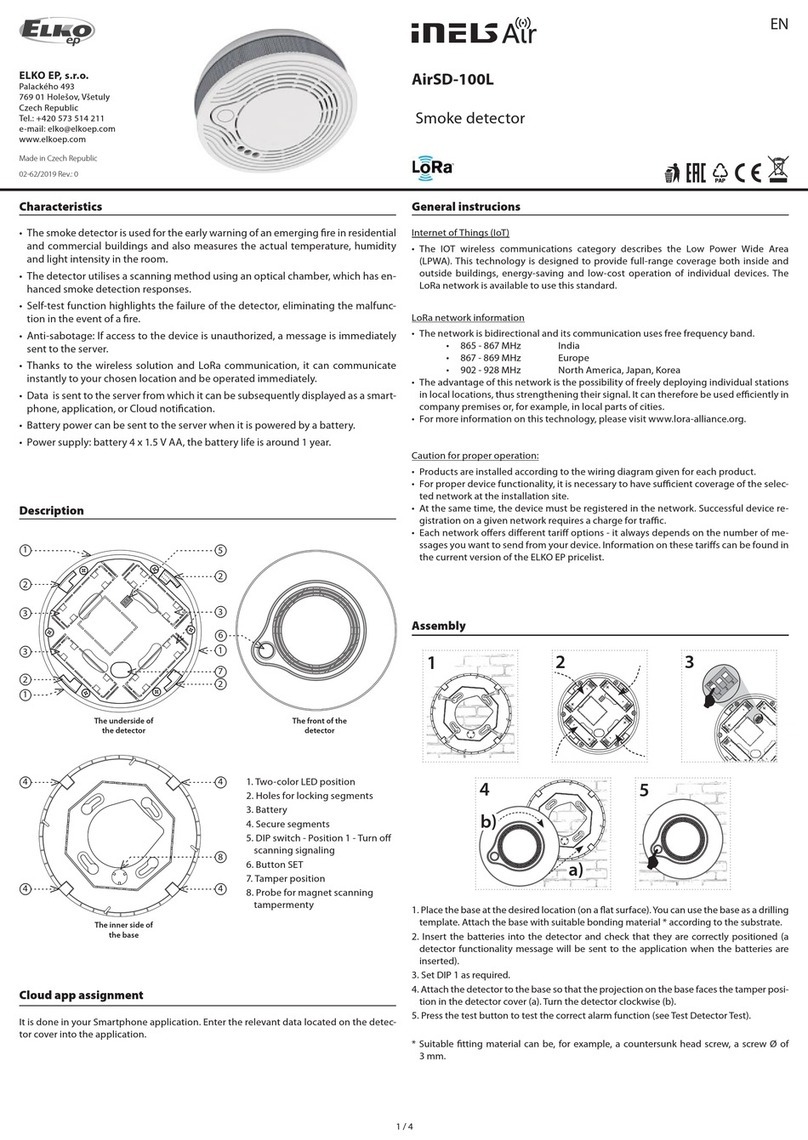
1. Two-color LED position
2. Holes for locking segments
3. Battery
4. Secure segments
5. DIP switch - Position 1 - Turn o
scanning signaling
6. Button SET
7. Tamper position
8. Probe for magnet scanning
tampermenty
The underside of
the detector
The inner side of
the base
The front of the
detector
Cloud app assignment
It is done in your Smartphone application. Enter the relevant data located on the detec-
tor cover into the application.
Smoke detector

1
4
2
+
-
+
-
+
-
+
-
5
3
ON
1 2 3
+
-
-
+
-
+
-
min. 30 cm
min. 15 cm
max. 30 cm
min. 150 cm
min. 30 cm
AirSD-100
AirSD-100AirSD-100
min. 15 cm
min. 50 cm - max. 600 cm
AirSD-100
AirSD-100
b)
a)
a)
b)
Function
An internal, battery-powered smoke detector combines the timely detection of smoul-
dering and open res from which smoke escapes. It is equipped with an optical smoke
detector for smoke detection. An example of a smouldering re is a burning cigarette on
a couch or bedding, which is a common cause of res.
Indicators and detector states
After inserting the batteries, the detector sends an introductory message containing the
measured temperature, humidity, light intensity, optical-smoke sensor status, and rm-
ware version of the device.
• The detector scans for smoke every 10 seconds, the green LED blinks at the same time
(the LED signalling can be switched o by the DIP switch). Every 10 minutes the detec-
tor senses temperature, humidity and light intensity. Displays the measured data re-
port at six hourly intervals. In the case of smoke detection or rapid temperature change
it is displayed immediately.
• Alarm - the sensor detects smoke, the red LED blinks within 1 second, the detector
emits a loud, intermittent „beep“. Terminate the alarm by scattering the smoke. The
audible alarm can be switched o by the test button, in the case of positive smoke
detection; the audible alarm is restored after 5 minutes.
• Dead battery:
- sending a message to the server
- every 5 s 3 times the red LED lights up on the detector.
• Detector failure:
- sending a message to the server
- Indication of the red LED on the detector and one short beep every 40 seconds.
• Removed from base:
- sending a message to the server
- every 3 seconds the red LED lights up on the detector.
Placement recommendations
Appropriate location
In new buildings, install smoke detectors according to the project.
• Smoke and other combustion products rise to the ceiling and expand horizontally. In
residential buildings we recommend installing smoke detectors in the middle of the
ceiling.
• Detector area is 40 m3. Make sure that the smoke detector is located at least 15 cm from
the side wall and 50 cm from each corner of the room (g. A). Max. The recommended
installation height is 4 m.
• In the rooms with a sloping, pointed or saddle roof (e.g. attics) the smoke detectors are
mounted on the ceiling at a distance of 90 cm from the highest point.
• When installing on a wall, place the detector 15 -30 cm below the ceiling (Figure b). The
bottom of the detector should be located above the top edge of all doors, windows
and other openings.
• Although it is most appropriate to install a re detector, it is recommended to place it in
a connection room such as a staircase or hallway. The triggering of the alarm is delayed,
but it will limit the number of the false alarms from the smoke of burnt pans or smoke
from the replace.
• To increase security, detectors should be installed in each room of the building.
Inappropriate location
• Places where smoke sensing can be distorted:
- Room where turbulent air ows from ventilators, heaters or doors or windows, etc.
- Top of the gable roof
- Less than 30 cm from the wall when mounted on the ceiling and 50 cm from the corner
of the room
- Less than 30 cm from the luminaires
- Less than 150 cm from uorescent lamps
- If there are objects near the detector that could prevent smoke accessing the detector
(decoration, etc.).
- A clearance of at least 50 cm must be maintained in all directions under the detector.
• Rooms with high humidity and rooms with alternating temperature (bathrooms, sho-
wers, laundries, kitchens, etc.).
• In dusty environments, in areas with heavy concentrations of cigarette smoke (boiler
rooms, garages, etc.).
• In places infested with insects.
• In places where regular testing or maintenance would be dangerous.
Assembly
1. Place the base at the desired location (on a at surface). You can use the base as a drilling
template. Attach the base with suitable bonding material * according to the substrate.
2. Insert the batteries into the detector and check that they are correctly positioned (a
detector functionality message will be sent to the application when the batteries are
inserted).
3. Set DIP 1 as required.
4. Attach the detector to the base so that the projection on the base faces the tamper posi-
tion in the detector cover (a). Turn the detector clockwise (b).
5. Press the test button to test the correct alarm function (see Test Detector Test).
* Suitable tting material can be, for example, a countersunk head screw, a screw Ø of
3 mm.
lighting
ceiling
uorescent
lamp
• The detector is intended for indoor use. Therefore, use it exclu-
sively for scanning in closed, dry and dust-free areas.
• Ensure that the ventilation openings remain free and do not
block it with other appliances, furniture or other objects.
• Place the detector in such a place that the ambient air can ow
through the device.
wall
corner of
the room
wall
wall
Important Notice
• The detector can only warn you in time if it is properly installed and properly main-
tained and tested according to the instructions.
• WARNING: This appliance does not detect re, carbon monoxide or other hazardous
gases.
• The detector is not intended for installation in an industrial environment.
• Always be aware of potential dangers, develop safety awareness, and take precautions
to avoid dangers whenever and wherever needed. The detector can reduce the likeli-
hood of catastrophe but cannot guarantee 100% safety.

AirSD-100S AirSD-100L AirSD-100NB
3 / 3
Technical parameters
* Multiple frequency bands of B1 / B3 / B5 / B8 / B20 / B28
** Depending on network coverage
Warning
Read the operating instructions before installing the device and putting it into opera-
tion. Instruction manual is designated for mounting and also for user of the device. It is
always a part of its packing. Installation and connection can be carried out only by a per-
son with adequate professional qualication upon understanding this instruction man-
ual and functions of the device, and while observing all valid regulations. Trouble-free
function of the device also depends on transportation, storing and handling. In case you
notice any sign of damage, deformation, malfunction or missing part, do not install this
device and return it to its seller. It is necessary to treat this product and its parts as elec-
tronic waste after its lifetime is terminated. Before starting installation, make sure that all
wires, connected parts or terminals are de-energized. While mounting and servicing ob-
serve safety regulations, norms, directives and professional, and export regulations for
working with electrical devices. Do not touch parts of the device that are energized – life
threat. To ensure the transmission of the radio signal, make sure that the devices in the
building where the installation is installed are correctly located. Unless otherwise stated,
the devices are not intended for installation in outdoor and damp areas, they must not
be installed in metal switchboards or in plastic cabinets with metal doors - this prevents
transmission of the radio frequency signal. iNELS Air is not recommended for control-
ling life-saving instruments or for controlling hazardous devices such as pumps, heaters
without thermostat, lifts, hoists, etc. - radio frequency transmission may be overshad-
owed by obstruction, interference, transmitter battery may be discharged etc., thereby
disabling the remote control.
Power supply
Battery power:
Battery life:
Input
Smoke Detection:
Detection:
Detection principle:
Response Time:
Temperature measuring:
Range:
Accuracy:
Humidity measuring:
Sensitivity:
Accuracy:
Light intensity measurement:
Range:
Setting
Alarm Detection:
Battery status view:
Button SET:
DIP switch:
Control
Detection area:
Recommended installation height:
Acoustic signal:
Test button SET:
Communication
Protocol:
Transmitter frequency:
Range in open space:
Other parameters
Humidity:
Working temperature:
Storage temperature:
Operation position:
Mounting:
Protection degree:
Color:
Dimension:
Weight:
battery 4x 1.5 V AA
approx. 1 year
built-in sensor
smoke from burning
optical-smoke scanning technology
a few seconds after contact with the smoke
built-in sensor
-25 .. 70 °C
± 3 °C
built-in sensor
0 .. 90 % RH
± 4 %
built-in sensor
0.045 - 188 000 Lx
message to the server,
indication LED, audible alarm
message to the server,
indication LED
Test / setting / signalling
Position 1 - Turn o scanning signaling
max. 40 m3
max. 4 m
greater than 85 dB at 3 meters
yes
Sigfox LoRa NB-IoT
RCZ1 868 MHz 868 MHz LTE Cat NB1*
Approx. 50 km** Approx. 10 km** Approx. 30 km**
up to 92% relative humidity (RH) / 10% to 85% RH, no
condensation or frost
0…+40°C (Pay attention to the operating
temperature of batteries)
-30…+70°C
Horizontal (ceiling) / Vertical (Wall)
screws
IP20
white
Ø 120 x 36 mm
176 g (without battery)
Testing the detector
To ensure proper operation, it is advisable to keep the detector clean.
• At least once every 6 months, clean the surface using a soft brush or cloth. Using a brush-
less vacuum cleaner, carefully clear the cover and the ventilation holes from dust and
dirt.
• Never use water, detergents or solvents. The detector may be damaged.
• Do not use any chemicals near the device (such as cleaning products, hair spray ...) fumes
can adversely affect the function of the device.
• Do not apply colour to the detector. When painting, remove the detector and return to
the location after the work has finished.
• Do not disassemble the detector; do not attempt to clean the inside of the detector.
• After every cleaning, test the detector!
• If you do not use the detector for a long time, remove it, remove the batteries. Wrap the
detector and store it in a cool, dry place.
Maintenance and cleaning
Replacing batteries
1. Rotate the detector counter clockwise and remove it from the base.
2. Remove the original battery and insert new batteries into the battery holder. Beware of
polarity. The red LED on the detector will blink.
3. Attach the detector to the base so that the projection on the base faces the tamper posi-
tion in the detector cover. Turn the detector clockwise.
4. Press the test button to test the correct alarm function (see Test Detector). WARNING -
do not damage the test button during battery replacement, the device may not work
properly.
Notice:
Only use batteries designed for this product correctly inserted in the device! Immediately replace
weak batteries with new ones. Do not use new and used batteries together. If necessary, clean the
battery and contacts prior to using. Avoid the shorting of batteries! Do not dismantle batteries, do
not charge them and protect them from extreme heating - danger of leakage! Upon contact with acid,
immediately rinse the aected area with a stream of water and seek medical attention. Keep batteries
out of the reach of children. Batteries must be recycled or returned to an appropriate location (e.g.
collection container) in accordance with local legal provisions.
What to do when smoke is detected
If an alarm sounds and the smoke alarm is not being tested, smoke is detected.Your imme-
diate attention and actions are required. Follow re precautions.
1. If it is safe to do so, check the source of the smoke, try to put out the source of the re
(smoke).
2. If the re fails to be extinguished, call the emergency line by phone and follow exactly
the instructions you are given in the situation.
3. Exit the area. Check if all people have left the area.
4. Ensure that electricity, gas, heating ... is turned o, remove hazardous materials (e.g.
cylinders)...
5. As far as possible, take part in the evacuation of persons, animals, and ghting the
re, etc.
Long press the test button to start the detector test. During the test, the green LED ash-
es (two ashes every second). The siren’s activity is rst tested - a long tone sounds. The
smoke chamber test follows. After a successful test, the detector ashes and beeps three
times. The application will automatically send a message about the successful completion
of the test.
If the detector does not signal properly, check the correct detector assembly, the battery
location, replace the batteries, and then repeat the test.
WARNING
Every detector must be tested regularly to ensure that it is properly installed and working
properly.
• Test the detectors regularly at least once a month. It is also recommended to perform
the function test even before long absences outside the detected area (holiday, etc.).
• Do not use an open flame to test the detector.
• When testing the device, keep the distance from the detector to the length of your arm
or use hearing protection.
• Keep the detector clean.
• If it does not work properly, replace it immediately.
Other manuals for AirSD-100NB
1
This manual suits for next models
3
Table of contents
Languages:
Other Elko Smoke Alarm manuals
