Elsys MI-Sins User manual


MI-Sins ©ELSYS Corp. 2022. All rights reserved.
2
CONTENT
1 Introduction.....................................................................................................................................3
1.1 Basic applications_________________________________________________________ 3
1.2 Computer and Camera Requirements________________________________________ 4
1.2.1 Basic parameters................................................................................................................ 4
1.2.2 Digital (web) camera requirements ................................................................................... 4
1.2.3 System requirements for computer.................................................................................... 4
1.3 Package contents _________________________________________________________ 4
1.4 Requirements for Blitz Judgment ___________________________________________ 5
2 MI-Sins software installation .........................................................................................................6
2.1 MI-Sins software activation ________________________________________________ 6
2.1.1 Standard activation............................................................................................................ 6
2.2 MI-Sins reinstallation _____________________________________________________ 7
2.3 First start _______________________________________________________________ 8
2.4 Camera’s setting_________________________________________________________ 10
2.4.1 Video camera choice ....................................................................................................... 10
2.4.2 Video capture filter.......................................................................................................... 10
2.4.3 Video capture format....................................................................................................... 12
2.4.4 Checking the settings on the test table............................................................................. 12
2.4.5 Video quality auto checking function.............................................................................. 13
3 MI-Sins. Users manual..................................................................................................................18
3.1 Basic window ___________________________________________________________ 18
3.1.1 Basic window design....................................................................................................... 19
3.1.2 Windows position control................................................................................................ 19
3.2 Main menu _____________________________________________________________ 20
3.2.1 Menu «File»..................................................................................................................... 20
3.2.2 Menu View...................................................................................................................... 21
3.2.3 Menu Settings.................................................................................................................. 24
3.2.4 Menu Action.................................................................................................................... 25
3.3 Tools and LD panel of MI-Sins program_____________________________________ 26
4 About Blitz Judgment method.....................................................................................................28
4.1 Base of Blitz Judgment method ____________________________________________ 28
4.2 Sins explanations ________________________________________________________ 29
5 MI-Sins results...............................................................................................................................31
5.1 ACC –main results ______________________________________________________ 31
5.2 Final test results VSR (virtue/sin ratio)______________________________________ 34
5.3 Graphs of PPS changes from M files ________________________________________ 35
5.4 Frequency histogram of PPS from M files ___________________________________ 36
5.5 Psychophysiological status of the person from M files__________________________ 36
5.6 Recording of technical test results. Excel file start_____________________________ 39
6 Warranty........................................................................................................................................41
6.1 Disclaimer of Warranties _________________________________________________ 41
6.2 Limitation of Liability ____________________________________________________ 42

MI-Sins ©ELSYS Corp. 2022. All rights reserved.
3
1 Introduction
Welcome to the VibraImage World! Thank you for using MI-Sins Blitz Judgment
Profiling System. This Manual is written to support detail profiling including detection of
positive and negative personality characteristics.
VibraImage technology measures micromovement (micro motion, vibration) of a person by
standard digital, web, IP or television cameras and image processing. Human head microvibration is
linked with the vestibular-emotional reflex (VER) of a person and indicates emotion status and
personality traits. MI-Sins system detects human emotions by the control of three-dimensional (3D)
head-neck movements and fluctuations, accumulated as frame difference in several video frames.
Blitz Judgment Profiling (MI-Sins) is the method of adaptive psychophysiological testing
with the use of neurolinguistic profiling with the presentation of multifactorial stimuli, individually
calculated at pretesting stage. Linear structure of negative personality characteristics and addictions
(vices, sins) is uniquely tied to the of multiple intelligences by extraversion level increases. The
method of positive and negative personality traits testing, using vibraimage technology and
presentation of text and visual 48 stimuli with the 5 seconds presentation period (blitz) gives high
accuracy profiling result in 250 second testing. The calculation of a person's vices (sins) profile and
personality righteousness (virtue/sins ratio) is based on the unconscious and conscious responses to
the presented stimuli. Blitz Judgment Profiling System increase the accuracy of personality
profiling by replacing psychophysiological prediction to the study on a psychophysiological
simulator, in which real personality characteristics are measured.
1.1 Basic applications
MI-Sins is psychometric program of adaptive psychophysiological testing with the use of
neurolinguistic profiling with the presentation of visual and text multifactorial stimuli.
Blitz Judgment Profiling System MI-Sins targets the following:
•detection of MI profile during pretesting;
•selection of two leading MI types;
•presentation of multifactorial stimuli tied with two leading MI types and 12 sins
(vices);
•detection of Sins (Vices) personal profile;
•detection of main personal sins (vices);
•calculation of personality righteousness (virtue/sins ratio).
More details about methods described in publications:
DOI: 10.25696/ELSYS.VC5.EN.03
DOI: 10.25696/ELSYS.VC5.EN.05

MI-Sins ©ELSYS Corp. 2022. All rights reserved.
4
1.2 Computer and Camera Requirements
1.2.1 Basic parameters
•Resolution, TVL, more than 400
•Noise level of vibraimage, bit, less than 0,1
•Frame speed, FPS, not less than 30
1.2.2 Digital (web) camera requirements
•Resolution, pixel, not less 640 x 480
•USB compatible USB 2.0, USB 3.0
•Frame speed, FPS, higher 30
•Exposition control main and auto
•Color mode (b/w preferable in settings) b/w
•Flicker mode Flicker 50 Hz and 60 Hz
1.2.3 System requirements for computer
•Operation System Windows 10 or later 64-bit only
•MS Office 2015 or later
•Processor Intel I5 or higher
•RAM more than 8 Gb
•HDD more than 100 Mb free space
•USB port 1 free USB ports version USB 2.0 or higher
•Video capture WDM-compatible video device
1.3 Package contents
1.
MI-Sins software
-
1
2.
Activation code or dongle
-
1
3.
User’s manual
-
1
4.
Digital USB camera (hardware)
-
1 (option)
5.
Microphone (hardware)
-
1 (option)
6.
Personal computer (hardware)
-
1 (option)

MI-Sins ©ELSYS Corp. 2022. All rights reserved.
5
Attention!
Hardware with the specified parameters isn’t included in the delivery. User gets the
hardware for the MI-Sins system themselves.
Recommended to use Microsoft LifeCam Studio webcam or similar with parameters not
worse than this webcam.
1.4 Requirements for Blitz Judgment
The basis of the MI-Sins program is vibraimage technology giving high-quality profiling
result only by analyzing high-quality video. Users must fulfill all requirements of points 1.2.1,1.2.2,
1.2.3. as:
-investigated person stand or sit in front of a camera and not leaning his head to any object;
-fix a camera (on the wall, on the tripod, etc.) in front of the tested person;
-face lighting should be uniform;
-camera should be focused on the person’s face
-facial image on a monitor must be contrast to background
Fig. 1.1 shows standard position of sitting subject in front of the camera, and fig. 1.2 –the
standard image of the subject in the frame.
Fig. 1.1 Test conditions
Fig. 1.2 Image of a subject in the frame
For convenience by default, the automatic video Quality Test is enabled (see section 2.4.5),
then an assessment as a percentage of video quality will appear on the right side of the program.

MI-Sins ©ELSYS Corp. 2022. All rights reserved.
6
2 MI-Sins software installation
It is necessary to execute the following actions for MI-Sins program installation on your
computer:
1. Go to Web page http://www.psymaker.com/support/downloads/
2. Download file setupMI_Sins.exe by link
http://www.psymaker.com/downloads/ setupMI_Sins.exe
3. Run file setupMI_Sins.exe
4. Select language for installation procedure.
5. Press button «Next» in the appeared window of the beginning installation.
6. Accept the license agreement and to press button «Next» in the appeared window.
7. In the appeared window, specify a way to the catalogue where files of the program will be
written down, then to press button «Next».
8. Press button «Next» in the appeared window, allows installation of software files on your
computer.
9. Selecting an additional icon allows to display the icon on the computer desktop.
10. Press button «Install» at the start of installation.
11. Press button «Finish» at the end of installation.
12. MI-Sins program icon appears after the end of installation in system menu on desktop of your
computer.
13. To reboot a computer.
14. Verify that the camera is connected to the computer and run the program.
2.1 MI-Sins software activation
Note: MI-Sins has 5 free starts without activation procedure however with requirement an
access to the Internet.
1. Procedure of activation is done once at the first start of the program.
2. Before the program activation it is need to buy this version of the program in the online store
Psymaker http://www.psymaker.com/store/
3. Activation procedure requests access to the Internet for receiving answer code from server.
4. Activation code has the structure VI10_xxxxxxxx_MIS
5. MI-Sins supports dongle of Vibraimage PRO and MiSins dongle.
2.1.1 Standard activation
1. Run MI-Sins program to begin an activation.
2. At the first start of the program, the activation window could be displayed (Fig. 2.1).

MI-Sins ©ELSYS Corp. 2022. All rights reserved.
7
Fig. 2.1. Activation window.
3. In the field «Request» it is necessary to enter the activation code received by e-mail or
specified by the seller (Fig.2.1)
Attention!
Please, be careful and paste code without additional gaps!
4. After input of activation code to press the button «OK».
5. The activation code will be checked up through the Internet and, MI-Sins will start
automatically in case of successful end of activation procedure.
6. Start to work with the system in accordance with this manual.
2.2 MI-Sins reinstallation
Note, it is recommended to uninstall the MI-Sins program before any upgrade software
or hardware on PC and to reinstall after this upgrade.
For this purpose, it is necessary to execute the following actions:
1. Connect to the Internet a computer on which one of MI-Sins has been installed.
2. Start program to reinstall on a new computer.
3. In the menu «Help» (Fig. 2.2) choose the item «About MI-Sins…» (Fig. 2.2).
Fig. 2.2. Menu «Help»
4. In the opened window press the button «Unregister key» (Fig. 2.3).
5. Close the program.
6. Connect a new computer to Internet.
7. On the new computer install the program and make registration of an «old» modification
activation code through the Internet, according to recommendations of section 2.1.
8. After successful program registration the given activation code will be fixed to the given
computer.
MI-Sins ©ELSYS Corp. 2022. All rights reserved.
8
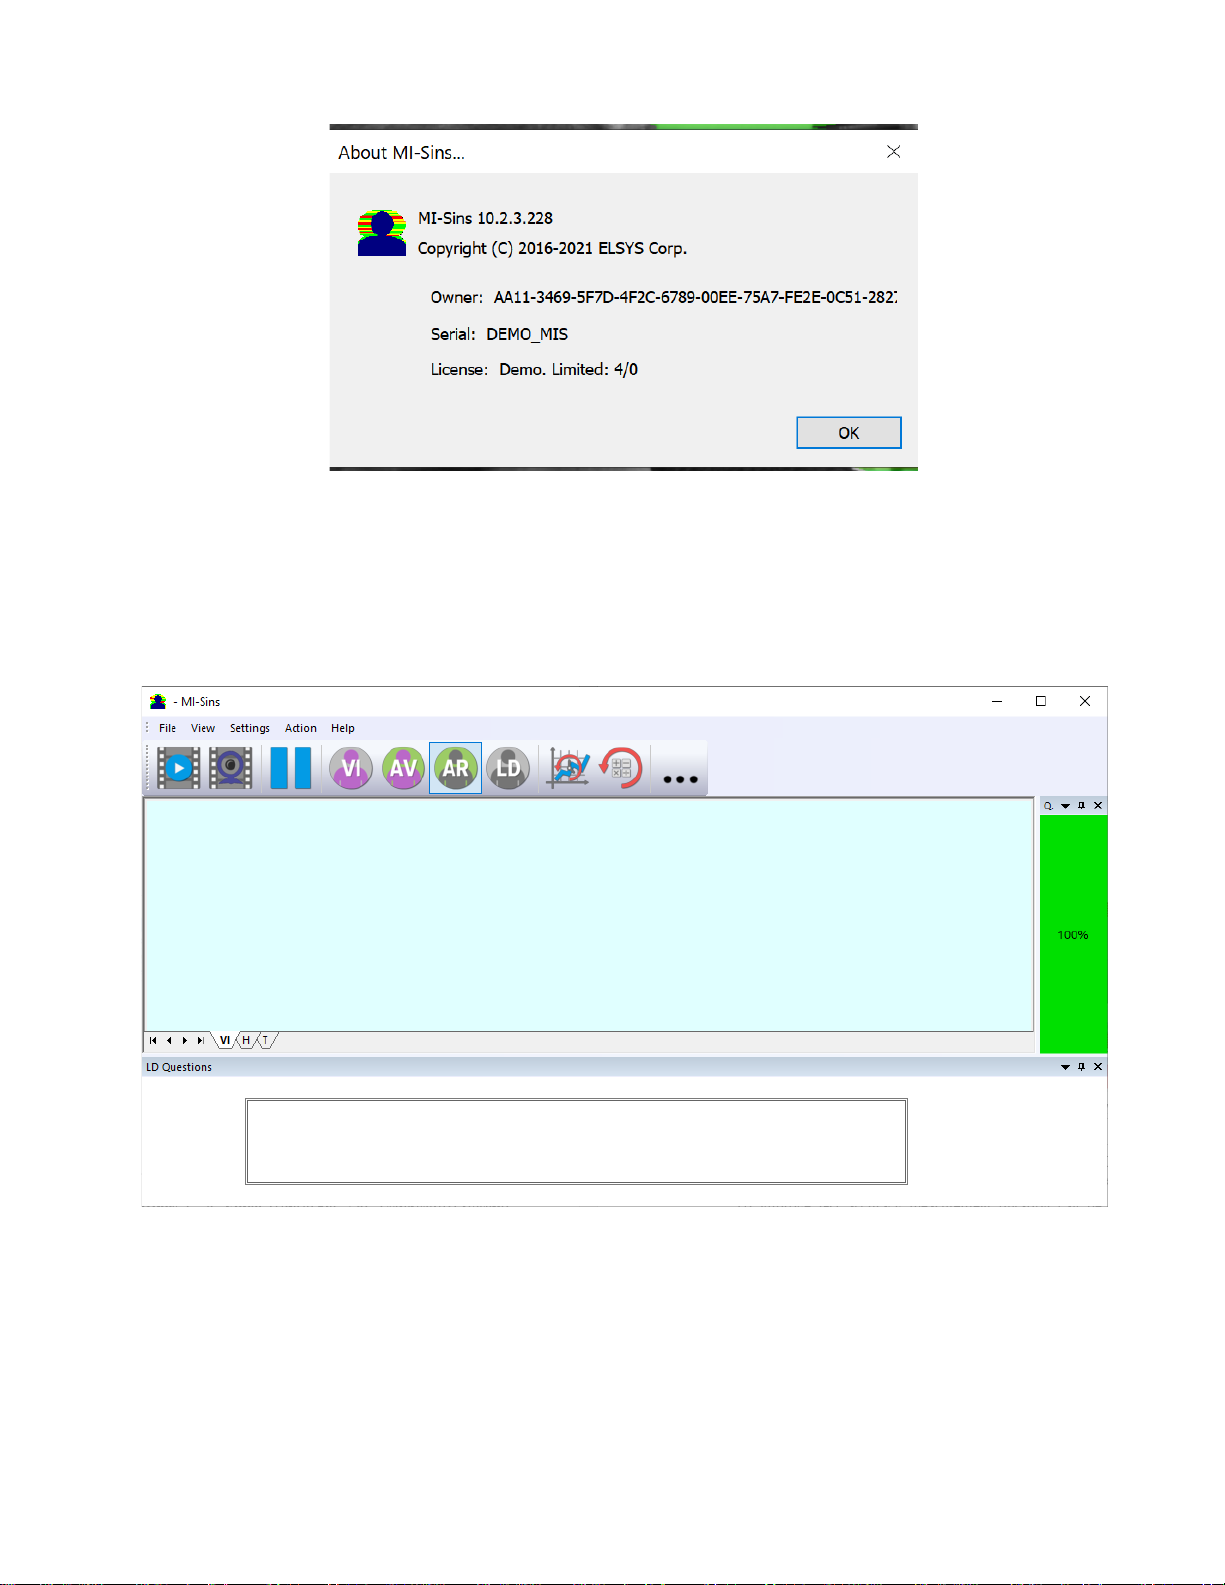
Fig. 2.3. Information about MI-Sins program by DEMO start
2.3 First start
1. After successful activation of the program at the first start, if camera was not connected to PC,
you will see the program window shown on Fig. 2.4.
Fig. 2.4. First start
2. Select program language (Fig. 2.5) in the menu "Settings" => "Language". Default language
is English.

MI-Sins ©ELSYS Corp. 2022. All rights reserved.
9
Fig. 2.5. Selecting a language
3. Select a camera in the menu “Settings” => “Video” (on a Fig. 2.6 –Microsoft Lifecam
Cinema).
If the program does not see your camera, check the connection of the camera to the computer.
After selecting a camera, an image will appear on the screen.
Fig. 2.6. Selecting a camera
4. Set the camera parameters (see section 2.4).
5. Check video quality (see section 2.4.5). It should be more than 80 %, that is, the column on
the left side of the program should be green and, if necessary, eliminate the causes of low-
quality video (1-5 errors).
6. Select a questionnaire 12_VICE_EN as shown in fig. 2.7. Or select questionnaire from your
language. Current MI-Sins program includes questionnaires on Chinese, English and Russian
languages.

MI-Sins ©ELSYS Corp. 2022. All rights reserved.
10
Fig. 2.7. Selecting a questionnaire
7. Place the test person in front of the camera as recommended here (see section 1.3)
8. Press the button in the low left part of the screen. Questions and stimuli will appear on the
screen.
9. Open the folder with the results of the program by clicking in the toolbar.
10. Open the corresponding Excel file with the test results.
11. Analyze the results (see paragraph 4).
After end of the test program MI-Sins automatically creates result file
YYY-MM-DD hh_mm_ss_M.xml in the directory «C:\Users\user\Documents\MI-Sins». In all files
in names YYYY-MM-DD and hh_mm_ss date and time of measurement.
2.4 Camera’s setting
Correct camera settings are very important for the next vibraimage processing, because
mistakes in image quality have great influence to the vibraimage processing results.
2.4.1 Video camera choice
It is necessary to select in the main menu «Settings» => «Video» => «.../name used
camera/...». In figure 2.6 the process of selecting camera «Microsoft LifeCam Cinema» is shown. If
the camera is connected, selected and works, then on the left of the name there will be an icon «»
(Fig. 2.6), and the menu will be extended with the «Video capture filter...» and «Video capture
format...».
MI-Sins system allows to processing as the «alive» video signal acting from a video camera,
and the video data, before written down and saved as an AVI-file. On default the system works with
a signal from a video camera. Subitems «AVI File … F3» and «AVI File (no sound)… Ctrl+F3 »
are intended for a choice for the analysis of an external videofile.
2.4.2 Video capture filter
Select «Video capture filter......» in the submenu «Video» (Fig. 2.6) for open menu of the
camera settings. Item «Video capture filter...» appears in the menu only in case of the correct
installation of camera drivers and correct choice of operating camera.
After a choice of the «Video capture filter...» the window «Settings» will open. Settings
window differs depends on camera type. The first tab of this window is usually devoted to the image
setup (Brightness, Contrast, etc.). In a figure 2.8 the window «Settings» for the camera «Microsoft
LifeCam Cinema» is shown. Camera Microsoft LifeCam Cinema has low noise level and is

MI-Sins ©ELSYS Corp. 2022. All rights reserved.
11
preferable for vibraimage applications among webcams., even better to use «Microsoft LifeCam
Studio».
After a choice of the “Video capture filter…" the window “Settings” will open. Settings
window differs depends on camera type. Figure 2.8 shows the “Properties” window for the Microsoft
LifeCam Cinema.
Fig. 2.8. Windows with settings for «Microsoft LifeCam Cinema»
When adjusting the camera settings, you must fulfill the following general requirements:
•The «Brightness», «Contrast» and others parameters should be configured so that the image
of the object was the maximum contrast.
•Switch on «Flicker» mode for setting lighting power line frequency (repayment flicker),
in most countries it is 50 Hz.
•If your camera supports, then switch on the black-and-white image «B/W mode».
If the camera works only in color mode, it is recommended to set «Saturation» parameter
to minimum value.
•Depending on the experimental conditions and light to use automatic or manual setting
«Exposure» parameter. If constant lighting, it is recommended to use the manual adjustment.
If changes (for example, an object depends on the lighting street lighting), it is better to use
the automatic adjustment mode setting.
Parameters «Zoom» and «Focus» is recommended to use in the manual mode and change
their values not due to electronic image processing, but by approaching/removing the camera from
the object.
Note, program settings are set by default at each new turn on the camera. If the video
conditions don’t change it is recommended to save your settings using item «Save Settings» from the
submenu «Video» (Fig. 2.6).
MI-Sins ©ELSYS Corp. 2022. All rights reserved.
12
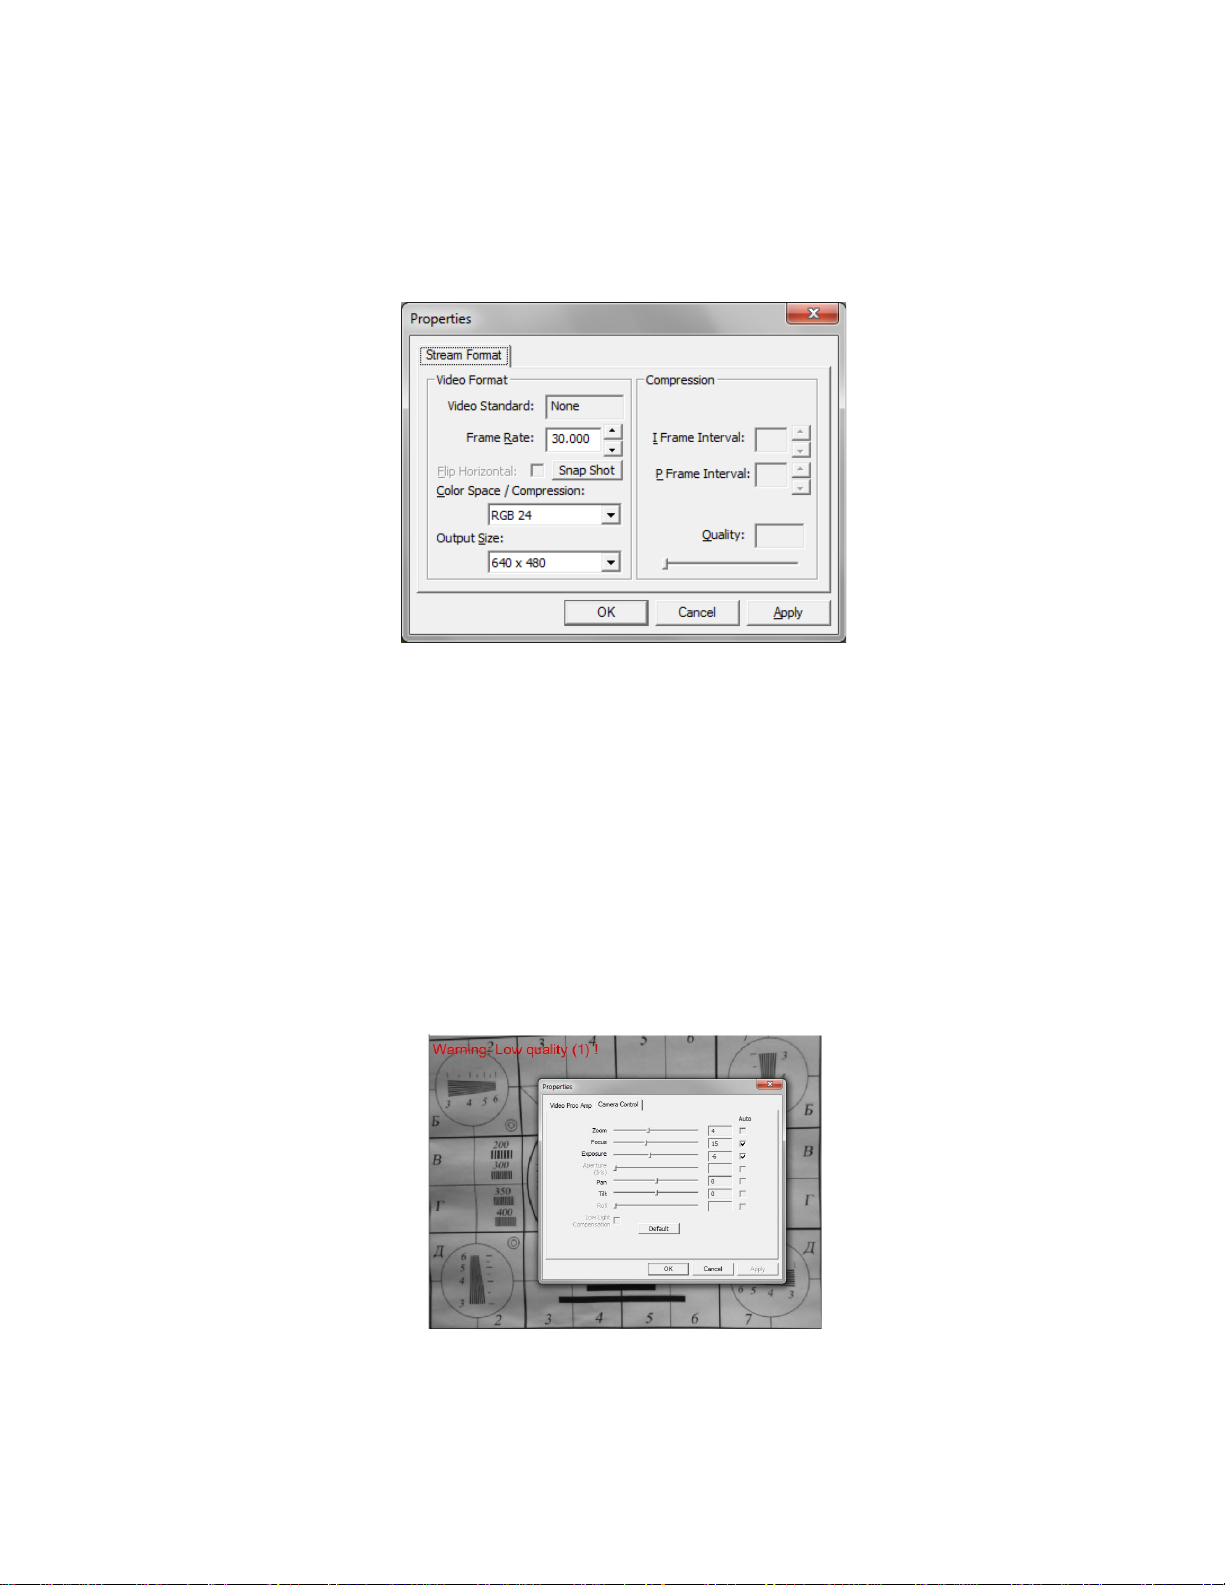
2.4.3 Video capture format
Select «Video capture filter...» in the submenu «Video» (Fig. 2.6) for open menu of the
camera settings. Item «Video capture format...» appears in the menu only in case of the correct
installation of drivers of the camera and a choice of the working camera. Frame rate is necessary to
set 30 and the frame size to set («Output Size») not less than 640 x 480 px (Fig. 2.9).
Fig. 2.9. Window «Video capture format».
Note, after changing camera settings in the program MI-Sins frame rate «In» must be in the
range of 25 –30 FPS.
2.4.4 Checking the settings on the test table
During the first start of Vibraimage system and periodically it is recommended to test image
quality by the test table. It is required to place a test pattern opposite to the camera so that the image
of the table occupies the entire space of the frame. To achieve the optimal contrast range of object is
need to stand in camera settings auto regulation of illumination in case of unstable illumination
(Fig. 2.10) and manual regulation of illumination in case of a constant illumination (Fig. 2.11). The
inscription «Warning! Low quality (1)» in the upper left corner of the image is normal, because there
is no a person's face on the video.
Fig. 2.10. Checking the camera settings on the test table, automatic regulation of the exposure
(mode is recommended for unstable object illumination).

MI-Sins ©ELSYS Corp. 2022. All rights reserved.
13
Fig. 2.11. Checking the camera settings on the test table, manual regulation of the exposure (mode
is recommended for stable object illumination).
2.4.5 Video quality auto checking function
The MI-Sins program has built-in automatic quality control function image quality control
during the test. Since the calculation of human reaction using the video image, the quality control for
the processed video is necessary to obtain a correct test result. Error message and the low quality of
video will appear on top of the QT column on the right side of the program (Fig. 2.12).
The final result will be correct only if there is no video error message for more than 80 % of
the measurement time.
Fig. 2.12. “Quality test”
Program gives error indication if the image quality is lower than standard vibraimage requests:

MI-Sins ©ELSYS Corp. 2022. All rights reserved.
14
•Error 1 –indicates when facial image is lower than necessary. For cancel this error is need
to move checked person closer to camera (it is recommended) or start zoom function on
camera. (Fig. 2.13).
Fig. 2.13. Error 1 at the low video quality. Checking the cause is convenient in AR mode.
•Error 2 –indicates when camera noise level is higher than necessary. The reason of this error
could be low illumination, incorrect camera settings or camera vibration. (Fig. 2.14).

MI-Sins ©ELSYS Corp. 2022. All rights reserved.
15
Fig. 2.14. Error 2 at the low video quality. Checking the cause is convenient in AV mode.
•Error 3 –indicates when computer input frame rate is lower than necessary. Requested norm
for processed frame rate is more than 25 f/s. This errors indication was done for deleting
unqualified staff influence during results control. If the actual input speed is less than 25, then
the program will show error 3 (Fig. 2.15).
Fig. 2.15. Error 3 at the low video quality. Checking the cause is convenient in AR mode.
•Error 4 –error-contrast image (Fig. 2.16).

MI-Sins ©ELSYS Corp. 2022. All rights reserved.
16
Fig. 2.16. Error 4 at the low video quality. Checking the cause is convenient in AR mode.
•Error 5 –due to nonuniformity lighting of the face (Fig. 2.17)
Fig. 2.17. Error 5 at the low video quality. Checking the cause is convenient in LD mode.
Error 1
The size of the person's head image in the picture elements (pixels), which determines the
accuracy of recorded vibrations, requires constant monitoring during testing. When tested with a
video image analysis there are no severe restrictions on the movement of the test person, as required
by the contact method. This person feels natural, which increases the accuracy of test results.
However, the natural behavior can lead to the fact that during the test response deviates from
the camera and the size of the human head image becomes less than required. To resolve this issue
vibraimage system constantly monitors a person's head size of the image and displays an error
message (1) in the window "QT" in the case of reducing the size below the limit. In addition,
vibraimage program includes a permanent face detection algorithm, which ensures elimination of
errors from a lack of a real image of the person in the frame during testing.
Error 2
Temporary noise signal from the video camera includes a video camera noise and illumination
instability and can significantly affect the test results. In this case, at the slightest noise level exceeds
the specified threshold, the system automatically displays an error message (2) in "QT" column.
Error 3
Despite the fact that the television camera may transmit to 30 frame/sec with the set resolution,
it does not guarantee that the computer receives and processes the incoming video data in real time.
And any deviation from the information processing in real time resulting in a loss of information and
hence reduce the reliability of the test. By reducing the actual input frames frequencies and processing

MI-Sins ©ELSYS Corp. 2022. All rights reserved.
17
frequencies below the set limit, the system automatically displays a warning error (3). To fix the error,
reduce the Zoom of the camera, if you used it to increase the size of the face. Check the processor
load of your computer, close the resource-intensive programs.
Error 4
It occurs with uneven illumination of a person’s face. For example, light falls on the side. Try
turning the test person to the light or changing the angle of incidence of the light from the lamp. Also
occurs if the test person is at an angle to the camera.
Error 5
It occurs if the image is not contrast, for example, when the camera is not properly focused.
To fix the cause of the error manually or automatically adjust the focus of the camera.
Note, before the start of the test should ensure that the program processed the image of a
human WITHOUT ERRORS or disable the quality test.

MI-Sins ©ELSYS Corp. 2022. All rights reserved.
18
3 MI-Sins. Users manual
Video from camera or video file are displayed in basic window after starting the MI-Sins.
3.1 Basic window
In heading of the basic window the following information is indicated (Fig. 3.1):
•type of video source: Video camera or AVI file;
•model of video source: Video camera model or AVI file name;
•name of the program.
Fig. 3.1. Basic window MI-Sins
Note, double-clicking with the left mouse button in the image area resets all accumulated
information about the inter-frame difference and starts a new cycle of data accumulation.
7
1
2
3
5
4
6

MI-Sins ©ELSYS Corp. 2022. All rights reserved.
19
3.1.1 Basic window design
In total in the main window of the program in addition to the video area, you can see an
additional 8 windows that display information about the parameters of mental and emotional state of
a person, and program settings (on Figure 3.1 the windows labeled corresponding numbers):
1. Questionnaire panel
2. Tabs for choosing type of image
3. Name and type of a videosource
4. File, View, Settings, Action, Help –main menu.
5. Main toolbar.
6. Heading of the basic window
7. QT –image quality window
3.1.2 Windows position control
The user can add or remove the window on the screen using the submenu «View» -
«Toolbar».
The user also can control the placement of additional windows on the screen and the size using
the controls elements on the left side of each window title.
Each window can be temporarily minimized and moved to the border of the main program
window (Fig. 3.2). Figure 3.3 shows additional windows hidden and moved to the border of the main
window and they icons are highlighted in orange color.
Fig. 3.2. Control element «hide window»

MI-Sins ©ELSYS Corp. 2022. All rights reserved.
20
Fig. 3.3. All additional windows are hidden.
3.2 Main menu
The main menu contains the following items:
•«File»
•«View»
•«Settings»
•«Action»
•«Help»
3.2.1 Menu «File»
Menu «File» (fig. 3.4) contains following items:
Fig. 3.4. Menu «File»
Item «LD load text…» – load questionnaire file.
Item «Exit» – allows quitting the program.
Table of contents
Other Elsys Measuring Instrument manuals


