Hardware acclimation
Systems and components must acclimate to the operating environment before power is
applied to them. Once unpackaged, the system must reside in the operating environment
for up to 16 hours to thermally stabilize and prevent condensation.
If the last 24 hours of the
TRANSIT/STORAGE environment was this:
…and the OPERATING
environment is this:
…then let the system or component
acclimate in the new environment
this many hours:
Temperature Relative Humidity
Nominal
68-72°F (20-22°C)
Nominal
40-55% RH
Nominal
68-72°F (20-22°C) 40-55% RH
0-1 hour
Cold <68°F (20°C) Dry <30% RH <86°F (30°C) 4 hours
Damp >30% RH
Hot >72°F (22°C) Dry <30% RH
Humid 30-45% RH
Hot >72°F (22°C) Humid 45-60% RH <86°F (30°C) 8 hours
Hot >72°F (22°C) Humid >60% RH <86°F (30°C) 16 hours
Unknown
IMPORTANT:
lIf there are signs of condensation after the recommended acclimation time has
passed, allow an additional eight (8) hours to stabilize.
lSystems and components must not experience changes in temperature and humidity
that are likely to cause condensation to form on or in that system or component. Do
not exceed the shipping and storage temperature gradient of 45°F/hr (25°C/hr).
lTo facilitate environmental stabilization, open both front and rear cabinet doors.
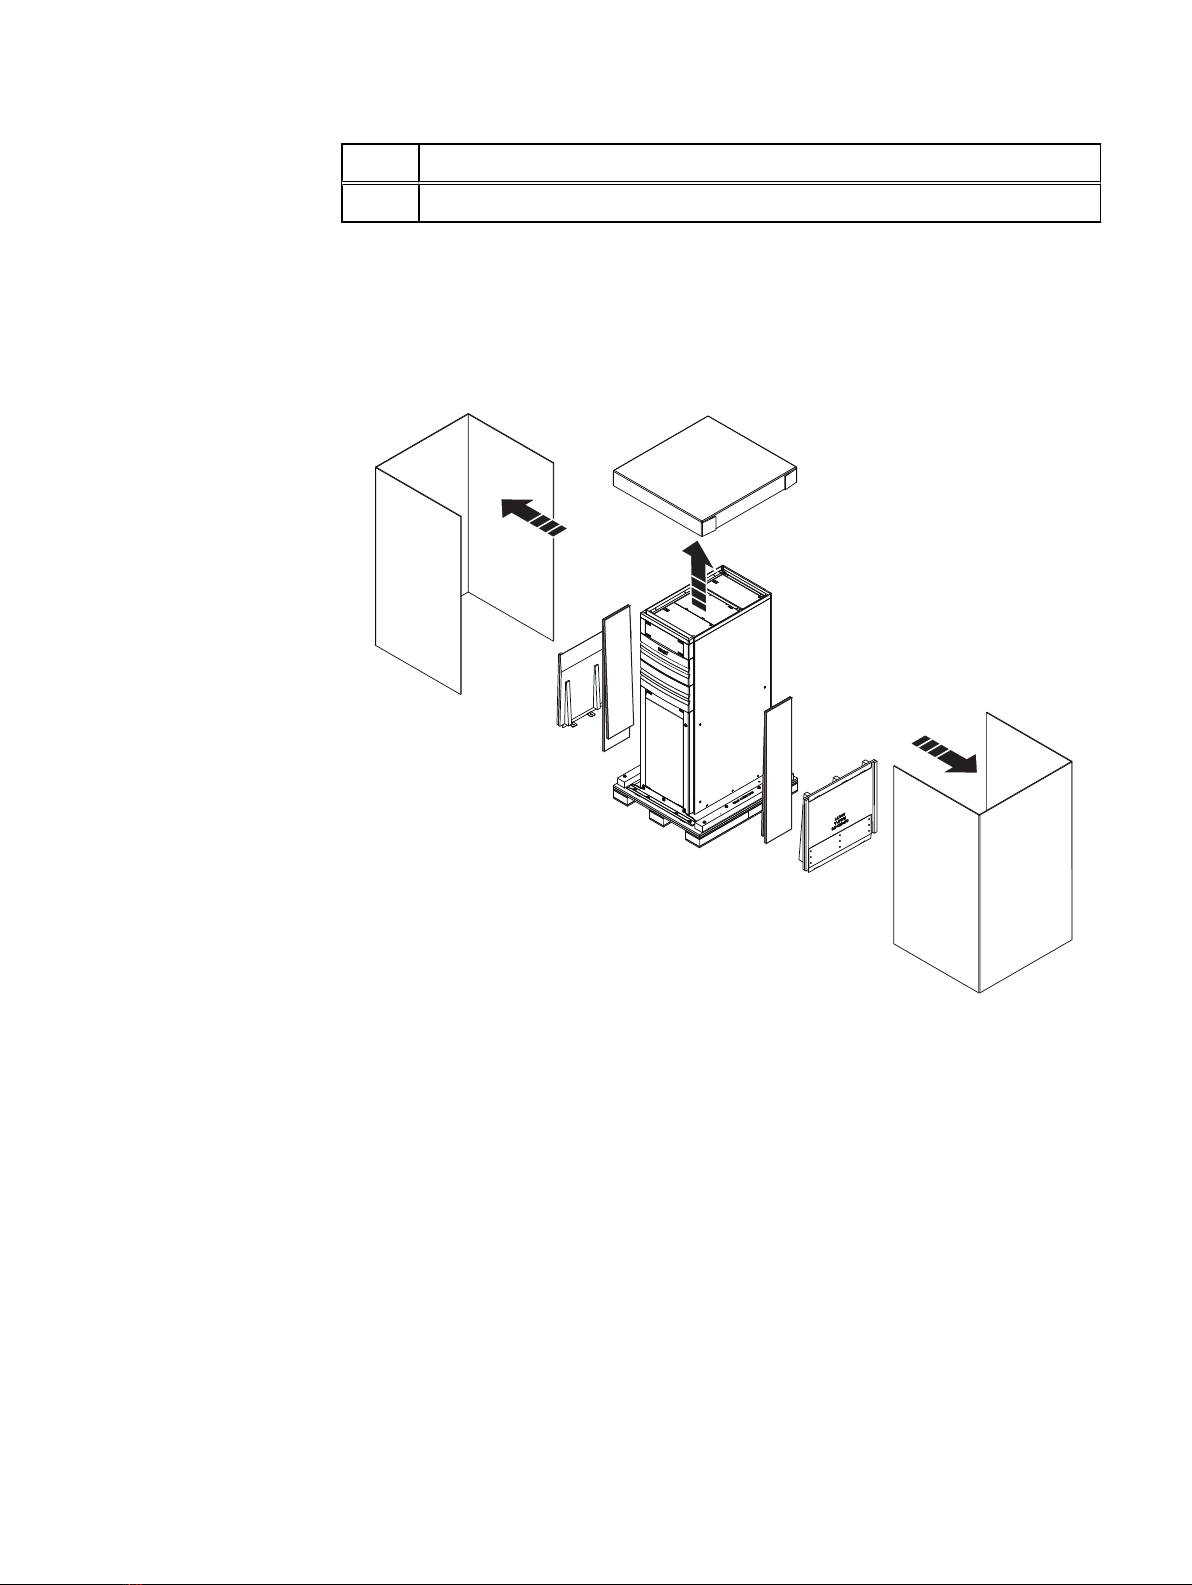
Steps to unpack and setup cabinet
The steps to unpack, setup and repackage the shipping material are listed in the
following table:
Step Task
1Remove the ramp and shipping material from the cabinet on page 4
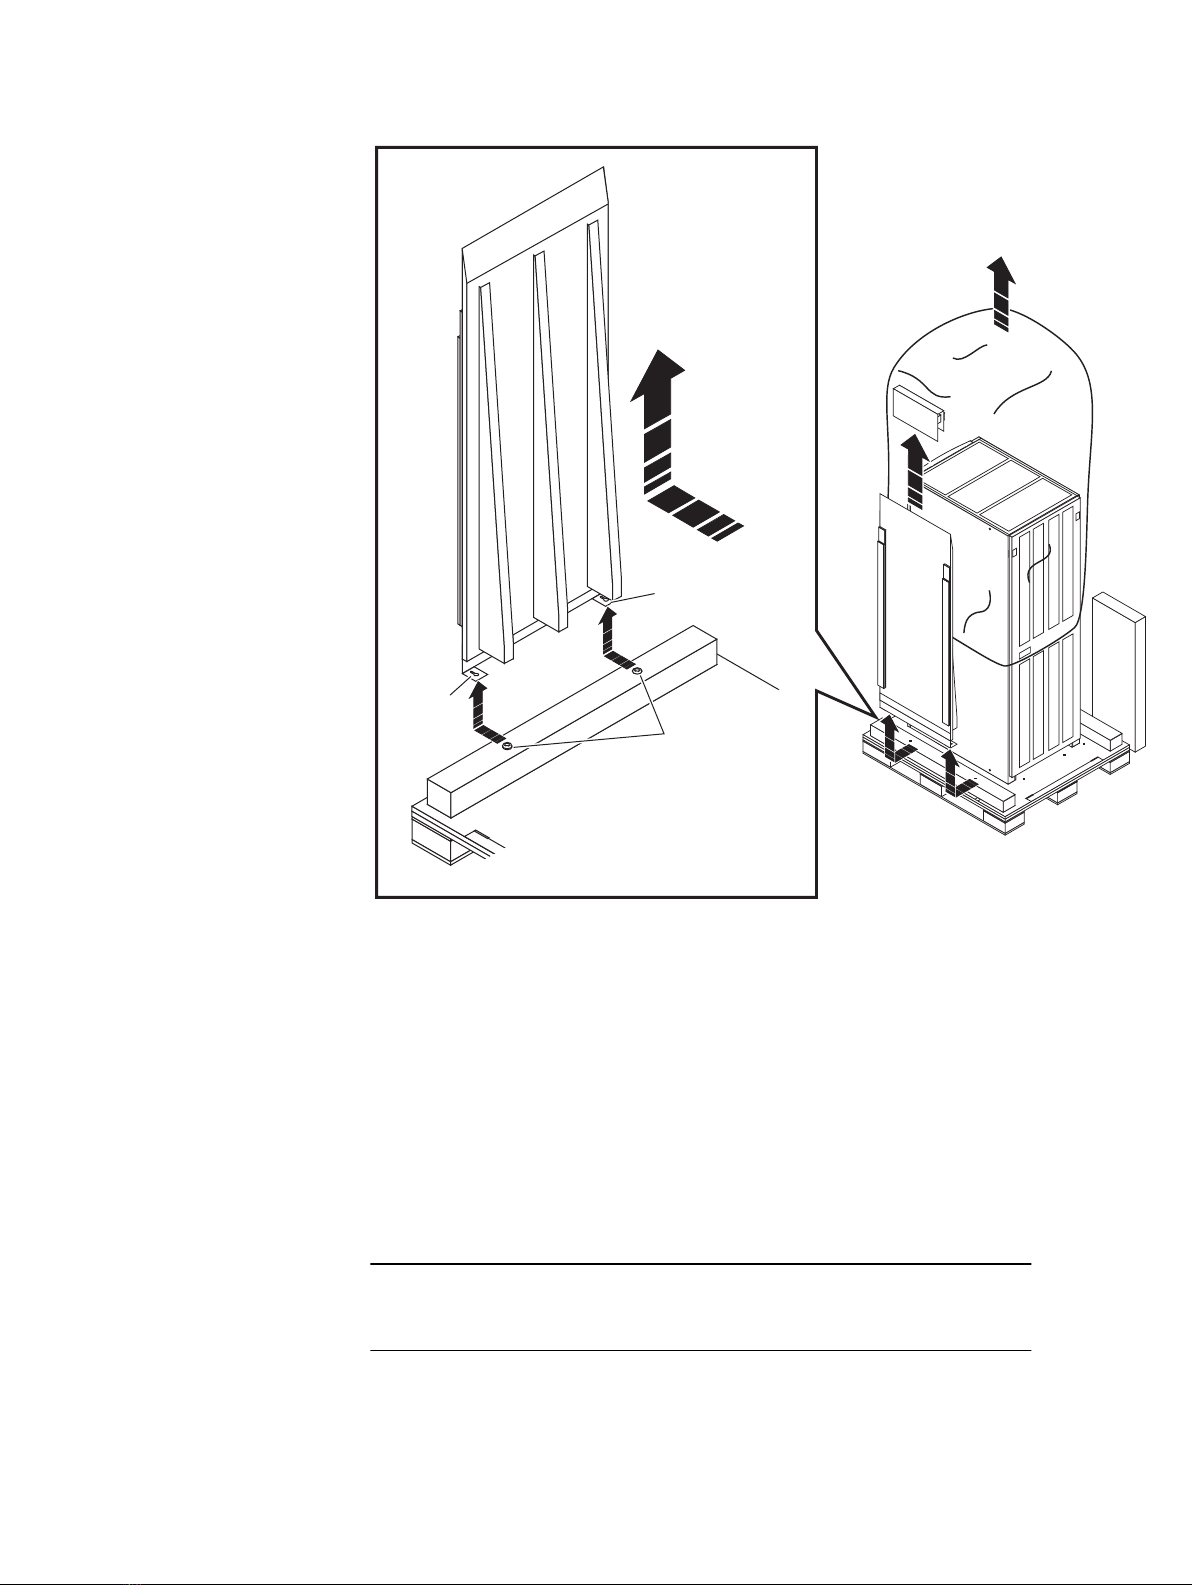
2Remove the cabinet shipping brackets on page 5
3Attach the unloading ramp on page 6
4Roll the cabinet down the ramp on page 7
5Position and level the cabinet on page 9
6GUID-FB1B6860-CF07-4A2E-972A-ABADF4CAA716
7Install the lower rack bezel on page 11
8GUID-0C0E218E-7BB2-4FC4-8338-D0153C8AF3DD
Unpacking and Setup Guide
Hardware acclimation 3