- 9 -
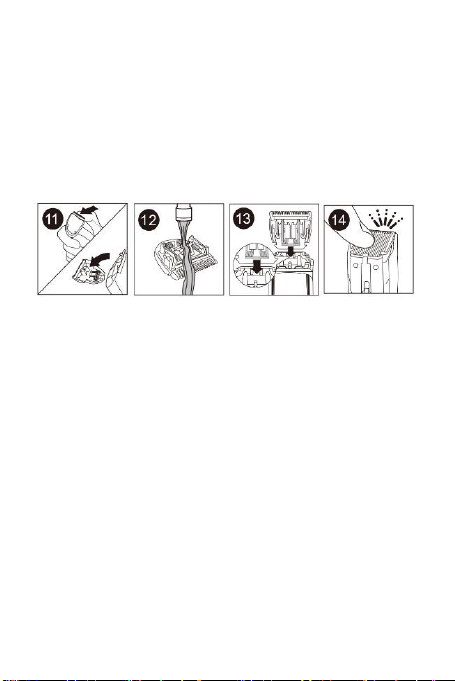
4. Place the cutting unit back by inserting the notch of the
cutting unit into the guiding slot (fig. 13).
5. Push the cutting unit back into place on the Trimmer until
you hear a click (fig. 14).
6. Use a soft, dry cloth to clean the Trimmer handle.
7. Never immerse the Trimmer in water or rinse under the tap.
8. Do not use abrasive cleaning agents, scourers or aggressive
liquids such as alcohol, gasoline, or acetone to clean the
Trimmer and attachments.
9. Do not touch cutters with hard objects as this may damage
them.
STORAGE
Be sure trimmer is turned off and unplugged.
Store the appliance and its charger in a safe, dry location
where they will not be crushed, banged, or subject to
damage.
Do not wrap cord around the appliance when storing.
TECHNICAL DATA
Operating voltage: 220-240V ~ 50/60Hz
Power: 3 W
GUARANTEE AND CUSTOMER SERVICE
Before delivery our devices are subjected to rigorous quality
control. If, despite all care, damage has occurred during
production or transportation, please return the device to your
dealer. In addition to statutory legal rights, the purchaser has an
option to claim under the terms of the following guarantee:
For the purchased device we provide 2 years guarantee,
commencing from the day of sale. If you have a defective
product, you can directly go back to the point of purchase.
Defects which arise due to improper handling of the device and
malfunctions due to interventions and repairs by third parties or
the fitting of non-original parts are not covered by this