emerio BGR-115696 User manual

BGR-115696
DT-300
Beard trimmer (EN)
Habemetrimmer (ET)
Bārdas trimmeris (LV)
Barzdaskutė (LT)

- 2 -
Instruction manual –English
SAFETY INSTRUCTIONS
Before use make sure to read all of
the below instructions in order to
avoid injury or damage, and to get
the best results from the appliance.
Make sure to keep this manual in a
safe place. If you give or transfer
this appliance to someone else
make sure to also include this
manual.
In case of damage caused by user
failing to follow the instructions in
this manual the warranty will be
void. The manufacturer/importer
accepts no liability for damages
caused by failure to follow the
manual, a negligent use or use not
in accordance with the
requirements of this manual.
1. There is a potential risk of injuries
from misuse.

- 3 -
2. This appliance can be used by
children aged from 8 years and
above and persons with reduced
physical, sensory or mental
capabilities or lack of experience
and knowledge if they have been
given supervision or instruction
concerning use of the appliance
in a safe way and understand the
hazards involved.
3. Children shall not play with the
appliance.
4. Cleaning and user maintenance
shall not be made by children
without supervision.
5. The appliance is only to be used
with the power supply unit
provided with the appliance.
6. Care shall be taken when
handling the sharp cutting blade.
7. WARNING: Do not use
this appliance near bathtubs,

- 4 -
showers, basins or other vessels
containing water.
8. Close supervision is necessary
when this appliance is used by, on,
or near children or invalids.
9. Use this Trimmer for its intended
household use as described in
this manual. Do not use
attachments not recommended.
10. Never operate this Trimmer if it
has a damaged charger, if it is not
working properly, if it has been
dropped, damaged, or dropped
into water.
11. Keep the Trimmer, charger and
any attachments away from
heated surfaces.
12. Never drop or insert any object
into any opening.
13. Do not operate, charge, clean or
plug in Trimmer outdoors or
where aerosol (spray) products
are being used or where oxygen
is being administered.
14. Always check cutters, cutting unit

- 5 -
and comb before using the
Trimmer. Do not use the Trimmer
if cutters, cutting unit and comb
are damaged, as injury may occur.
15. To prevent possible damage to
the cord, do not wrap cord
around the Trimmer.
16. Never put Trimmer in direct
sunlight or store at a temperature
above 60℃.
17. Never immerse the Trimmer in
water or rinse under the tap.
18. This Trimmer is for use on human
hair only. Do not use this Trimmer
for any other purpose.
19. Always store your Trimmer,
attachments and charger in a
moisture-free area. Make sure
the cord is disconnected from the
Trimmer.
20. Only use the charger and other
accessories supplied with the
appliance.
21. The appliance is intended for
trimming purposes only.
22. Keep the appliance dry.

- 6 -
BGR-115696 (DT-300) EN
PARTS DESCRIPTION
1. Trimming comb
2. Cutting unit
3. Adjustment ring
4. On/off switch
5. Charge lamp
6. Charge port
7. Charger
8. Cleaning brush
9. Support standing
TO CHARGE/ RECHARGE
1. Turn off the appliance (fig. 2).
2. Connect the cord (A) of the charger directly into the charge
port and the plug (B) into the power supply (fig. 3).

- 7 -
3. The charge lamp lights up to indicate the appliance is charging.
After fully charging, the charge lamp will remain lighting.
4. Unplug and remove the cord (A) from the appliance.
Note:
1. Fully charge the Trimmer before using for the first time.
2. Charging or using the Trimmer at temperatures below 4℃
or higher than 35℃ adversely affects lifespan of the battery.
3. It will take approximately 8-10 hours to fully charge the
Timmer for a cordless trimming time of up to 30-35minutes.
4. If Trimmer is subjected to a major change in temperature,
pressure or humidity, let the trimmer acclimatize for 30
minutes before using.
5. Do not use the appliance when it is charging.
Optimize the working life of the battery
1. After the Trimmer has been charged for the first time, do not
recharge the Trimmer between trimming sessions. Continue
using it until the battery is completely empty.
2. Do not charge for more than 24 hours.
3. Do not keep the charger permanently plugged in.
4. Discharge/run down the battery completely twice a year by
letting the motor run until it stops.
5. If the Trimmer hasn’t been used for a long period of time, it
must be recharged for a full 8-10 hours.
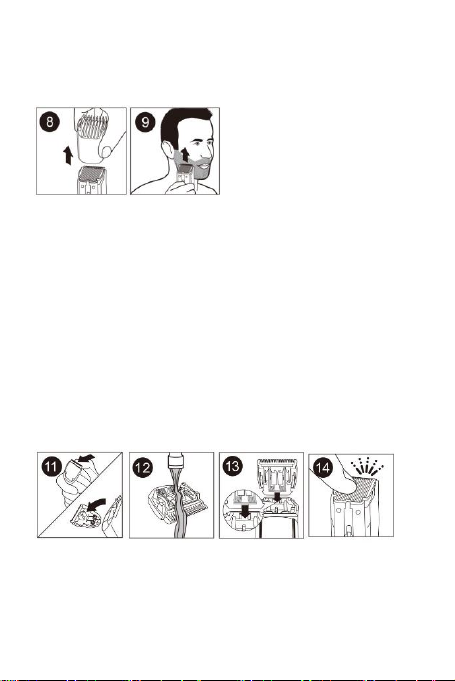
CORDLESS TRIMMING
1. Slide ON/OFF switch to position “0” to turn on the appliance.
2. When finished, slide to position “I” to turn off the appliance.
Note:
⚫Always comb the beard and/or moustache with a fine comb
before you start trimming.
⚫If you are trimming for the first time, be careful. Do not move
the Trimmer too fast. Make smooth and gentle movements.
1. Trimming with the trimming comb
1) Turn the adjustment ring to the desired trimming length

- 8 -
setting (see table). The setting is indicated in the center of
the adjustment ring (fig. 4).
Note: If you are trimming for the first time, start by using the
comb at the maximum trimming length setting (#10) to prevent
accidentally trimming hairs too short.
Setting
Hair length after
trimming
1
1mm
2
2mm
3
3mm
4
4mm
5
5mm
6
6mm
7
7mm
8
8mm
9
9mm
10
10mm
2) Switch the Trimmer on.
3) To trim in the most effective way, move the Trimmer against
the direction of hair growth. Make sure the surface of the
comb always stays in contact with the skin (fig. 5).
Note: If cut hairs have accumulated in the comb, turn Trimmer
off, remove the comb and blow and/or shake the hair out of the
comb (fig. 6). The selected trimming length setting will not
change when you do this.
For example:
Trimming for 'Stubble' look
Make sure trimming comb is on the Trimmer and use setting 1
(3/64in/1mm) to result in a 'stubble' look (fig. 7).
2. Trimming without the trimming comb
1) Be sure the Trimmer is in the position off.
2) Remove the trimming comb by pulling it off the Trimmer (fig.
8).

- 9 -
3) Switch the trimmer on.
4) Make well-controlled movements. Touch the hair/skin
lightly with the Trimmer (fig. 9).
Be careful when you are trimming without the comb as when
the trimmer is turned on it will trim every hair it touches.
CLEANING
1. Clean the Trimmer after each use. Make sure the Trimmer is
switched OFF and disconnected from the electrical outlet.
2. Remove the Trimming Comb and clean with the brush.
3. Remove the cutting unit by pushing against the teeth of the
cutting unit (fig. 11) and rinse under warm tap water (fig. 12)
or use the brush supplied. Allow to air dry thoroughly.
4. Place the cutting unit back by inserting the notch of the
cutting unit into the guiding slot (fig. 13).
5. Push the cutting unit back into place on the Trimmer until
you hear a click (fig. 14).
6. Use a soft, dry cloth to clean the Trimmer handle.
7. Never immerse the Trimmer in water or rinse under the tap.
8. Do not use abrasive cleaning agents, scourers or aggressive
liquids such as alcohol, gasoline, or acetone to clean the
Trimmer and attachments.
9. Do not touch cutters with hard objects as this may damage
them.
STORAGE
⚫Be sure trimmer is turned off and unplugged.
⚫Store the appliance and its charger in a safe, dry location
where they will not be crushed, banged, or subject to
damage.
⚫Do not wrap cord around the appliance when storing.

- 10 -
TECHNICAL DATA
Operating voltage: 220-240V ~ 50/60Hz
Power: 3 W
GUARANTEE AND CUSTOMER SERVICE
Before delivery our devices are subjected to rigorous quality
control. If, despite all care, damage has occurred during
production or transportation, please return the device to your
dealer. In addition to statutory legal rights, the purchaser has an
option to claim under the terms of the following guarantee:
For the purchased device we provide 2 years guarantee,
commencing from the day of sale. If you have a defective
product, you can directly go back to the point of purchase.
Defects which arise due to improper handling of the device and
malfunctions due to interventions and repairs by third parties or
the fitting of non-original parts are not covered by this
guarantee. Always keep your receipt, without the receipt you
can’t claim any form of warranty. Damage caused by not
following the instruction manual, will lead to a void of warranty,
if this results in consequential damages then we will not be
liable. Neither can we hold responsible for material damage or
personal injury caused by improper use or if the instruction
manual are not properly executed. Damage to accessories does
not mean free replacement of the whole appliance. In such case
please contact our service department. Broken glass or
breakage of plastic parts is always subject to a charge. Defects
to consumables or parts subjected to wearing, as well as
cleaning, maintenance or the replacement of said parts are not
covered by the warranty and are to be paid.
ENVIRONMENT FRIENDLY DISPOSAL
Recycling – European Directive 2012/19/EU
This marking indicates that this product should
not be disposed with other household wastes.
To prevent possible harm to the environment or
human health from uncontrolled waste
disposal, recycle it responsibly to promote the
sustainable reuse of material resources. To
return your used device, please use the return
and collection systems or contact the retailer
where the product was purchased. They can take this product
for environmental safe recycling.

- 11 -
Kasutusjuhend –Estonian
OHUTUSJUHISED
Vigastuste ja seadme kahjustamise
vältimiseks ning parimate
tulemuste saavutamiseks lugege
enne seadme kasutamist kindlasti
läbi kõik järgnevad juhised.
Säilitage seda kasutusjuhendit
ohutus kohas. Kui annate selle
seadme edasi kellelegi teisele, siis
andke kindlasti kaasa ka see
kasutusjuhend.
Käesolevas kasutusjuhendis
esitatud juhiste eiramise tagajärjel
tekkinud kahjustused muudavad
garantii kehtetuks.
Tootja/maaletooja ei vastuta
kahjustuste eest, mis on tekkinud
kasutusjuhendi eiramise, toote
hooletu kasutamise või käesolevas
kasutusjuhendis esitatud nõuetele
mittevastavuse tagajärjel.
1. Väärkasutus võib tekitada
vigastuste ohu.

- 12 -
2. Konditsioneeri tohib kasutada
alates 8. eluaastast; need, kellel
on piiratud füüsilised, sensoorsed
või vaimsed võimed ja kellel
puuduvad kasutuskogemused
ning väljaõpe, tohivad seda
kasutada siis, kui nad on
kasutamise ajal ohutuse eest
vastutava isiku järelvalve või
juhendamise all ja saavad aru
konditsioneeri kasutamisega
seotud ohtudest.
3. Lapsed ei tohi selle seadmega
mängida.
4. Lastel ei ole lubatud
konditsioneeri ilma järelvalveta
puhastada.
5. Seadet tohib kasutada ainult
seadmega komplektis oleva
toiteadapteriga.
6. Olge terava lõiketera käsitsemisel
ettevaatlik.

- 13 -
7. HOIATUS! Ärge
kasutage seadet vanni, duši,
kraanikausi või muude
veeanumate läheduses.
8. Kui seadet kasutavad lapsed või
invaliidid, seda kasutatakse
nende peal või nende läheduses,
tuleb olukorda hoolega jälgida.
9. Kasutage trimmerit vaid
sihtotstarbeliselt,
kodumajapidamises ja
kasutusjuhendis esitatu kohaselt.
Ärge kasutage mittesoovitatud
tarvikuid.
10. Ärge kunagi kasutage trimmerit,
kui selle laadija on kahjustatud,
see ei tööta korrektselt, see on
maha kukkunud, kahjustunud või
vette kukkunud.

- 14 -
11. Hoidke trimmerit, laadijat ja
mistahes tarvikuid kuumadest
pindadest eemale.
12. Ärge kunagi kukutage ega pange
esemeid seadme mistahes
avadesse.
13. Ärge kasutage, laadige,
puhastage ega ühendage
trimmerit välistingimustes või
kohas, kus kasutatakse
aerosooltooteid või
manustatakse hapnikku.
14. Enne trimmeri kasutamist
kontrollige alati lõiketerade,
lõiketarviku ja kammi seisukorda.
Ärge kasutage trimmerit, kui
lõiketarvik ja kamm on
kahjustunud, sest see võib
lõppeda vigastustega.
15. Juhtme võimaliku kahjustumise
vältimiseks ärge keerake juhet
trimmeri ümber.

- 15 -
16. Ärge kunagi jätke trimmerit
otsese päikesevalguse kätte ega
hoiustage seda kohas, kus
temperatuurid ületavad 60°C.
17. Ärge kunagi pange trimmerit
vette ega loputage seda jooksva
vee all.
18. Trimmer on mõeldud
kasutamiseks vaid inimeste
karvade jaoks. Ärge kasutage
trimmerit muudel eesmärkidel.
19. Hoiustage trimmerit, tarvikuid ja
laadijat alati kuivas kohas.
Veenduge, et juhe on trimmerist
lahti ühendatud.
20. Kasutage ainult koos seadmega
tarnitud laadijat ja teisi tarvikuid.
21. Seade on mõeldud ainult karvade
piiramiseks.
22. Hoidke seade kuiv.

- 16 -
BGR-115696 (DT-300) ET
OSADE KIRJELDUS
1. Piiramiskamm
2. Lõiketarvik
3. Reguleerimisketas
4. Toitelüliti (ON/OFF)
5. Laadimistuli
6. Laadimisport
7. Laadija
8. Puhastushari
9. Seisutugi
LAADIMISEKS /TAASLAADIMISEKS
1. Lülitage seade välja (joon. 2).
2. Ühendage laadija juhe (A) otse laadimisporti ja pistik (B)
toiteallikasse (joon. 3).

- 17 -
3. Laadimistuli süttib. See näitab, et seade laeb. Kui seadme
aku on täis laetud, jääb laadimistuli põlema.
4. Eemaldage pistik ja juhe (A) seadme küljest.
Märkus!
1. Enne esmakordset kasutamist laadige trimmeri aku täiesti
täis.
2. Trimmeri laadimine või kasutamine temperatuuridel alla 4°C
või üle 35°C põhjustab aku eluea lühenemist.
3. Trimmeri täislaadimine võtab aega umbes 8-10 tundi ja see
tagab 30-35 minutit juhtmevaba kasutust.
4. Kui trimmerile avalduvad märkimisväärsed temperatuuri,
rõhu või niiskustaseme kõikumised, siis laske trimmeril enne
kasutamist umbes 30 minutit keskkonnaga kohaneda.
5. Ärge kasutage seadet laadimise ajal.
Aku eluea optimiseerimine
1. Pärast trimmeri esmakordset laadimist ärge taaslaadige
seda piiramissessioonide vahel. Kasutage seadet, kuni aku
on täiesti tühi.
2. Ärge laadige seadet üle 24 tunni.
3. Ärge hoidke laadijat pidevalt vooluvõrgus.
4. Laadige aku kaks korda aastas maha, lastes mootoril kuni
seiskumiseni töötada.
5. Kui trimmerit ei ole pikka aega kasutatud, tuleb seda enne
kasutamist 8-10 tundi taaslaadida.
JUHTMEVABA PIIRAMINE
1. Seadme sisselülitamiseks libistage toitelüliti (ON/OFF)
asendisse „0“.
2. Kasutamise lõpetamisel seadme väljalülitamiseks libistage
lüliti asendisse „I“.
Märkus!
⚫Enne piiramise alustamist kammige habet ja/või vuntse alati
peene kammiga.
⚫Olge esmakordsel piiramisel ettevaatlik. Ärge liigutage
trimmerit liiga kiiresti. Liigutused olgu sujuvad ja õrnad.

- 18 -
1. Piiramine piiramiskammiga
1) Keerake reguleerimisketas soovitud piiramispikkuse
seadistusele (vt. tabelit). Seadistust on näha
reguleerimisketta keskel (joon. 4).
Märkus! Esmakordsel piiramisel alustage kammi kasutamist
maksimaalsel piiramispikkuse seadistusel (#10), et vältida
karvade kogemata liiga lühikeseks piiramist.
Seadistus
Karva pikkus
pärast piiramist
1
1mm
2
2mm
3
3mm
4
4mm
5
5mm
6
6mm
7
7mm
8
8mm
9
9mm
10
10mm
2) Lülitage seade sisse.
3) Piiramine õnnestub kõige tõhusamalt, kui liigutate
trimmerit karvakasvule vastupidises suunas. Veenduge, et
kammi pind on alati nahakontaktis (joon. 5).
Märkus! Kui kammile on kogunenud lõigatud karvad, siis lülitage
trimmer välja, eemaldage kamm ning puhuge ja/või raputage
karvad kammi seest välja (joon. 6). Valitud piiramispikkuse
seadistus sellega ei muutu.
Näiteks:
Habemetüüka efektiga piiramine
Habemetüüka efekti saavutamiseks kontrollige, et trimmerile
on kinnitatud piiramiskamm ja kasutage seadistust 1 (3/64 tolli
/ 1 mm) (joon. 7).

- 19 -
2. Piiramine ilma piiramiskammita
1) Veenduge, et trimmer on välja lülitatud.
2) Piiramiskammi eemaldamiseks tõmmake see trimmeri
küljest ära (joon. 8).
3) Lülitage trimmer sisse.
4) Liigutused olgu hästi kontrollitud. Puudutage karvu/nahka
trimmeriga vaid õrnalt (joon. 9).
Ilma kammita piiramisel olge ettevaatlik, sest trimmeri
sisselülitamisel lõikab see kõiki karvu, mida puudutab.
PUHASTAMINE
1. Puhastage trimmerit pärast iga kasutuskorda. Veenduge, et
trimmer on välja lülitatud ja vooluvõrgust lahti ühendatud.
2. Eemaldage piiramiskamm ja puhastage seda harjaga.
3. Lõiketarviku eemaldamiseks vajutage lõiketarviku hambaid
(joon. 11) ja loputage seda sooja kraanivee all (joon. 12) või
kasutage komplektis olevat harja. Laske õhu käes korralikult
kuivada.
4. Lõiketarviku tagasi panemiseks sisestage lõiketarviku sälk
juhtpilusse (joon. 13).
5. Lükake lõiketarvikut trimmerisse, kuni kuulete klõpsatust
(joon. 14).
6. Trimmeri käepideme puhastamiseks kasutage pehmet kuiva
lappi.
7. Ärge kunagi pange trimmerit vette ega loputage seda
jooksva vee all.
8. Ärge kasutage trimmeri ja tarvikute puhastamiseks
abrasiivseid puhastusvahendeid, nuustikuid ega atsetooni.
Other manuals for BGR-115696
1
This manual suits for next models
1
Table of contents
Languages:
Other emerio Electric Shaver manuals