Instruction Manual
D104551X012
easy-Drive RPU-100
May 2021
6
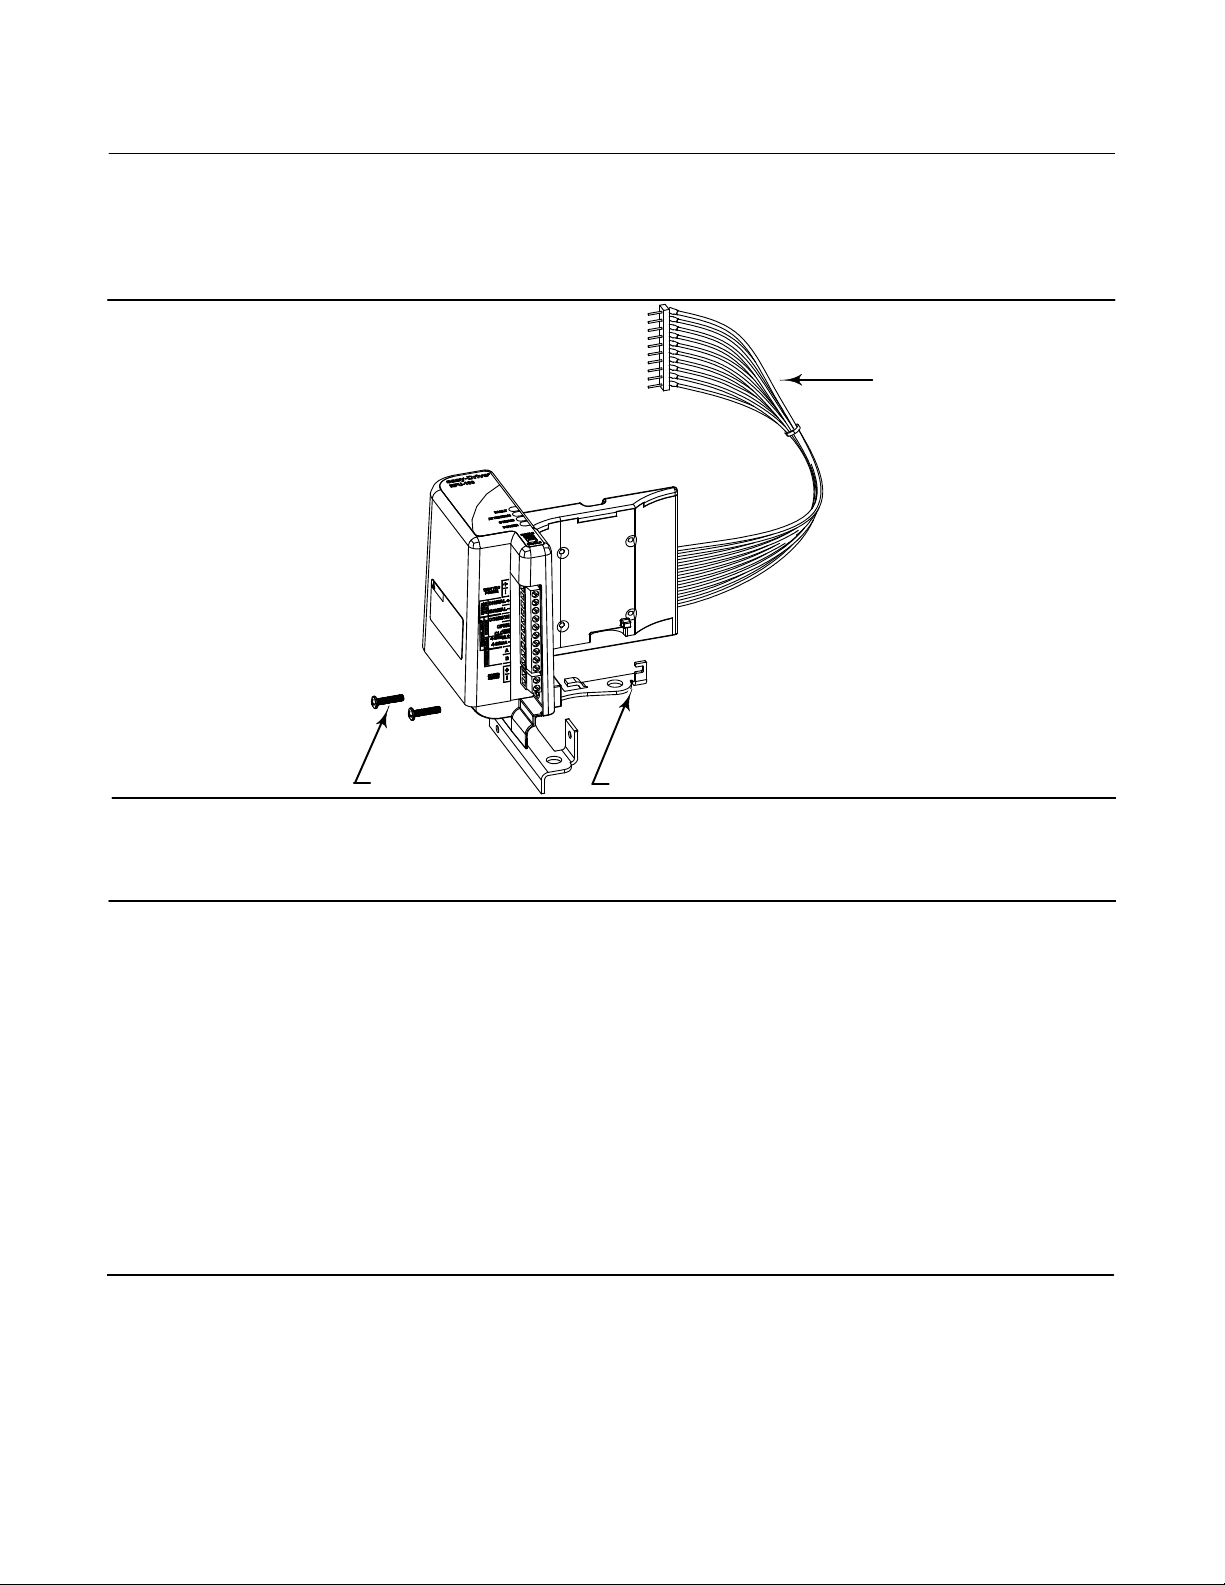
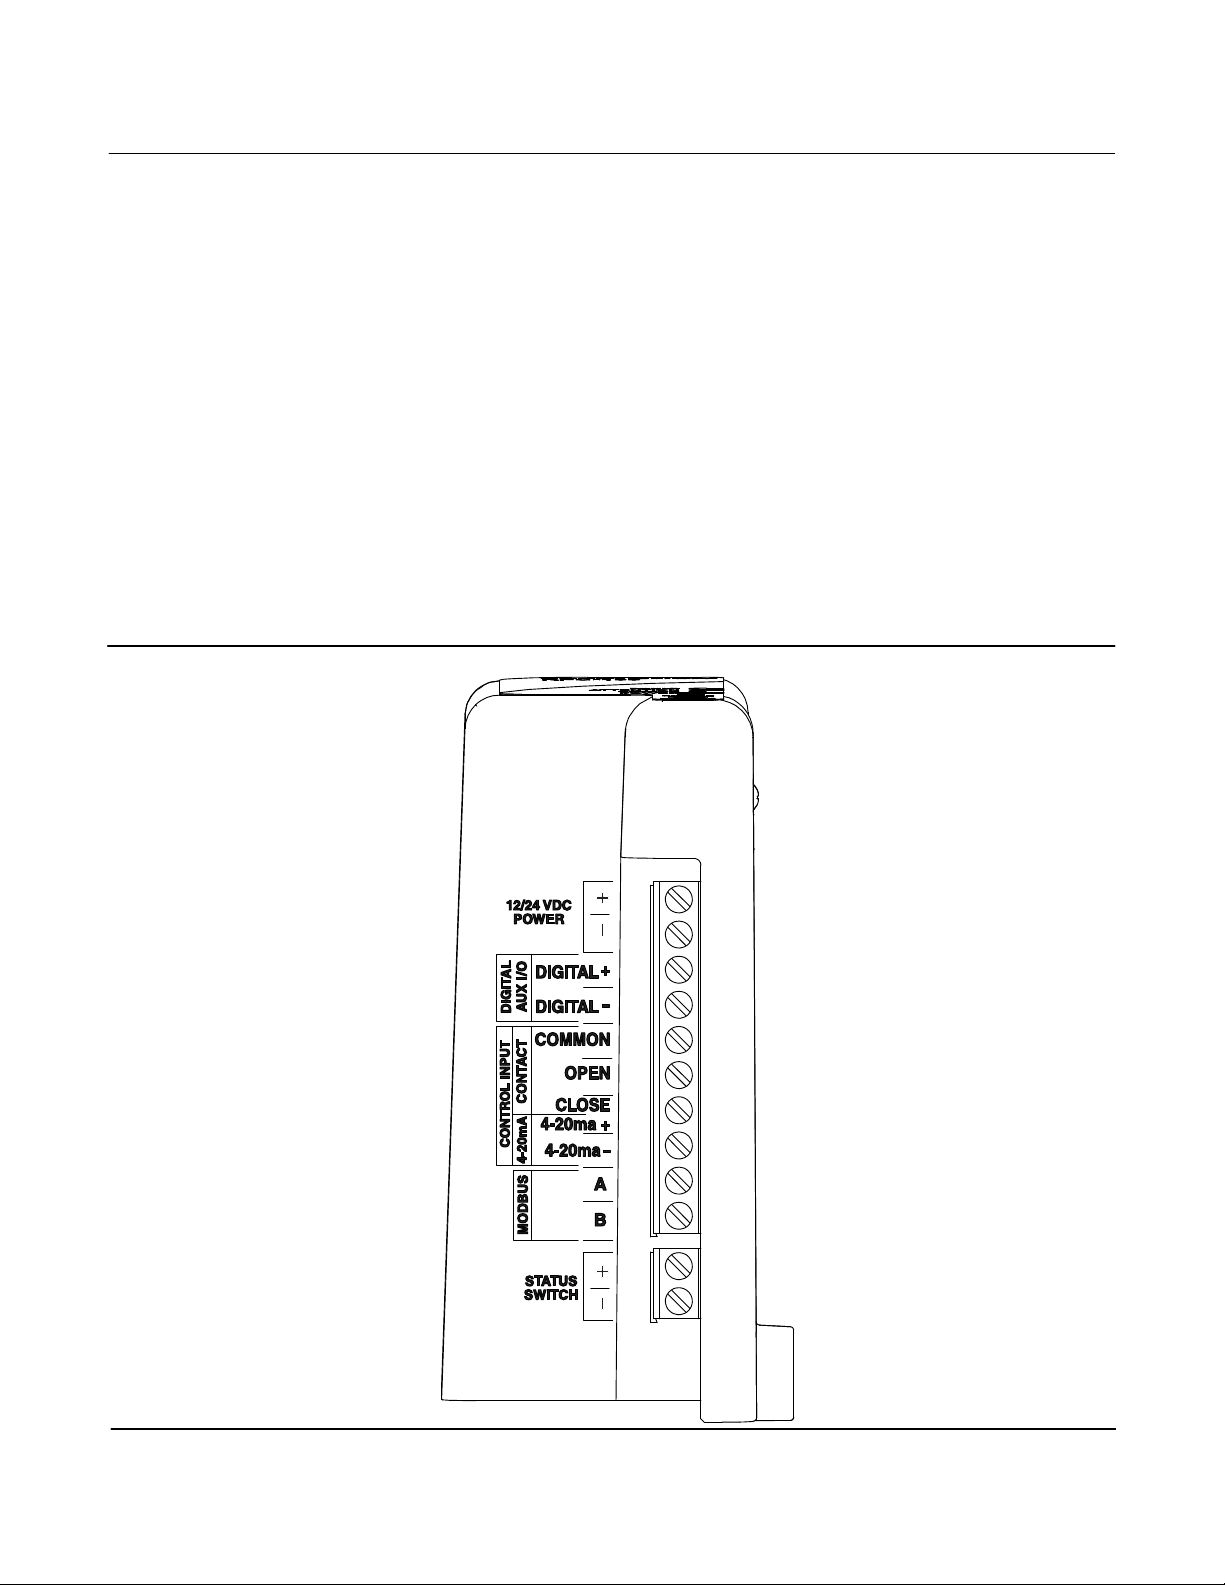
Installation
WARNING
Avoid personal injury from sudden release of process pressure or bursting of parts. Before performing any maintenance
operations:
D Do not remove the actuator from the valve while the valve is still pressurized.
D Always wear protective gloves, clothing, and eyewear when performing any maintenance operations to avoid personal
injury.
D Back plug away from seat to relieve spring compression.
D Disconnect any operating lines providing air pressure, electric power, or a control signal to the actuator. Be sure the
actuator cannot suddenly open or close the valve. If an RPU-100 is already installed, move the switch to the disable
position to prevent movement of the valve by the RPU-100.
D Use bypass valves or completely shut off the process to isolate the valve from process pressure. Relieve process pressure
on both sides of the valve. Drain the process media from both sides of the valve.
D Use lock‐out procedures to be sure that the above measures stay in effect while you work on the equipment.
D Check with your process or safety engineer for any additional measures that must be taken to protect against process
media.
WARNING
D For explosionproof applications, ensure the actuator cover is properly bolted before applying power to the actuator.
Personal injury or property damage may result from fire or explosion if power is applied to the actuator with the cover
removed in a hazardous area.
D For explosion‐proof applications, install rigid metal conduit and a conduit seal no more than 457 mm (18 in) from the
actuator. Personal injury or property damage may result from explosion if the seal is not installed.
D Select wiring and/or cable glands that are rated for the environment of use (such as hazardous area, ingress protection,
and temperature). Failure to use properly rated wiring and/or cable glands can result in personal injury or property
damage from fire or explosion.
D Wiring connections must be in accordance with local, regional, and national codes for any given hazardous area
approval. Failure to follow the local, regional, and national codes could result in personal injury or property damage
from fire or explosion.
D To avoid exposure hazard or release of toxic gases, DO NOT disassemble, subject to heat above 1005C (2125F), or
incinerate the RPU-100.
Note
End user must ensure a power supply voltage of 11-30VDC after retrofitting an easy-Drive electric actuator with the RPU-100 to
maintain the actuator's CSA hazardous area approval.
Product Security
It is the end-user's responsibility to provide a secure facility with limits to operating equipment.
Facility cyber security practices should include keeping the Fisher easy-Drive Configurator up to date.