manuals.online logo
Brands
  1. Home
  2. •
  3. Brands
  4. •
  5. EMI
  6. •
  7. Heat Pump
  8. •
  9. EMI Volts/HZ/pH User manual

EMI Volts/HZ/pH User manual

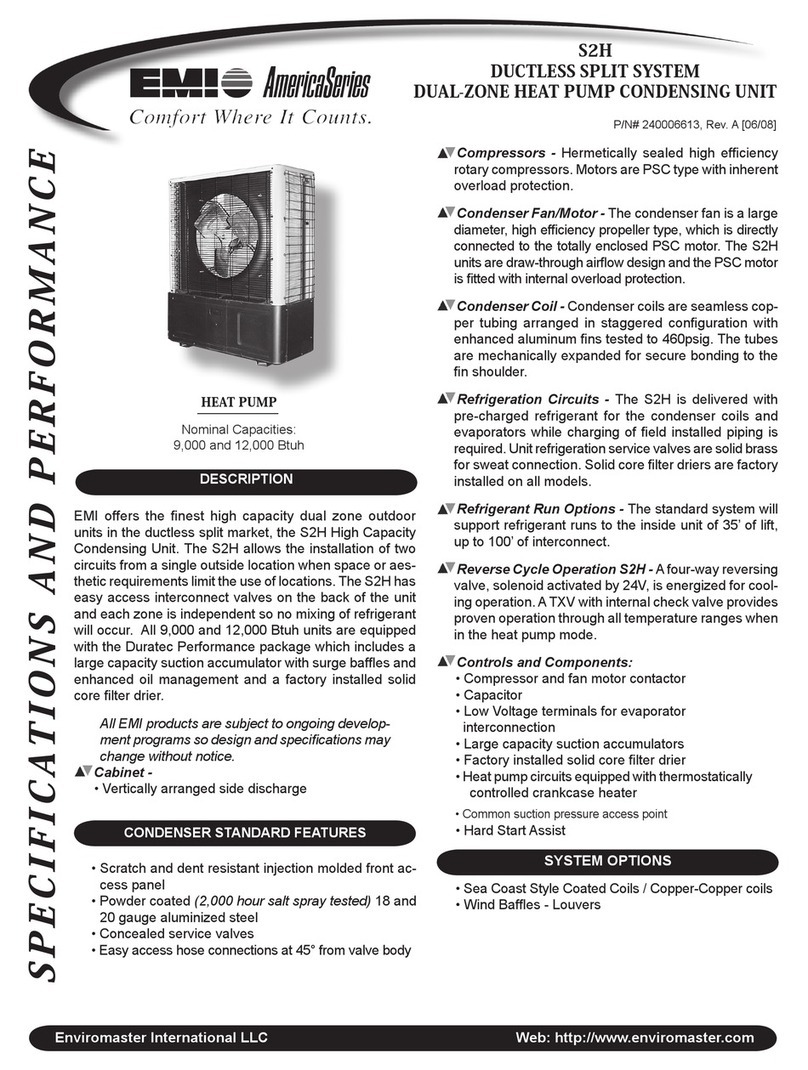
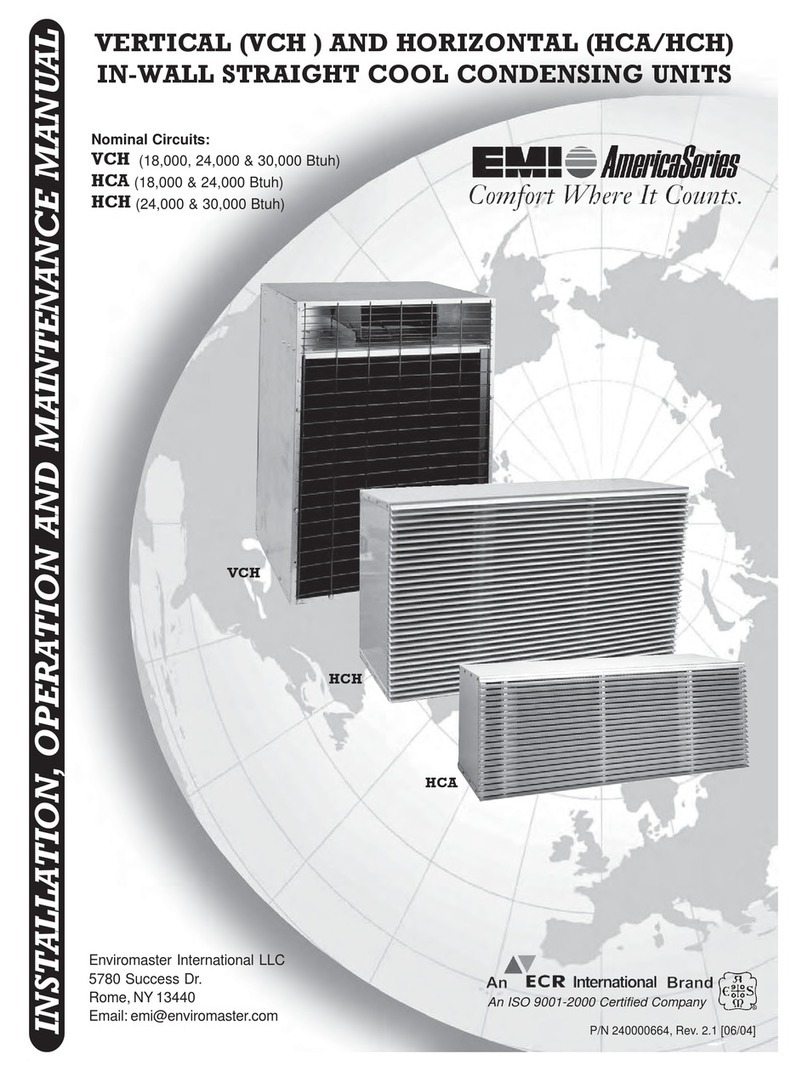
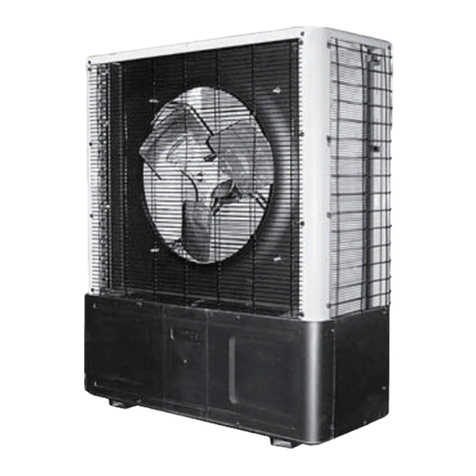
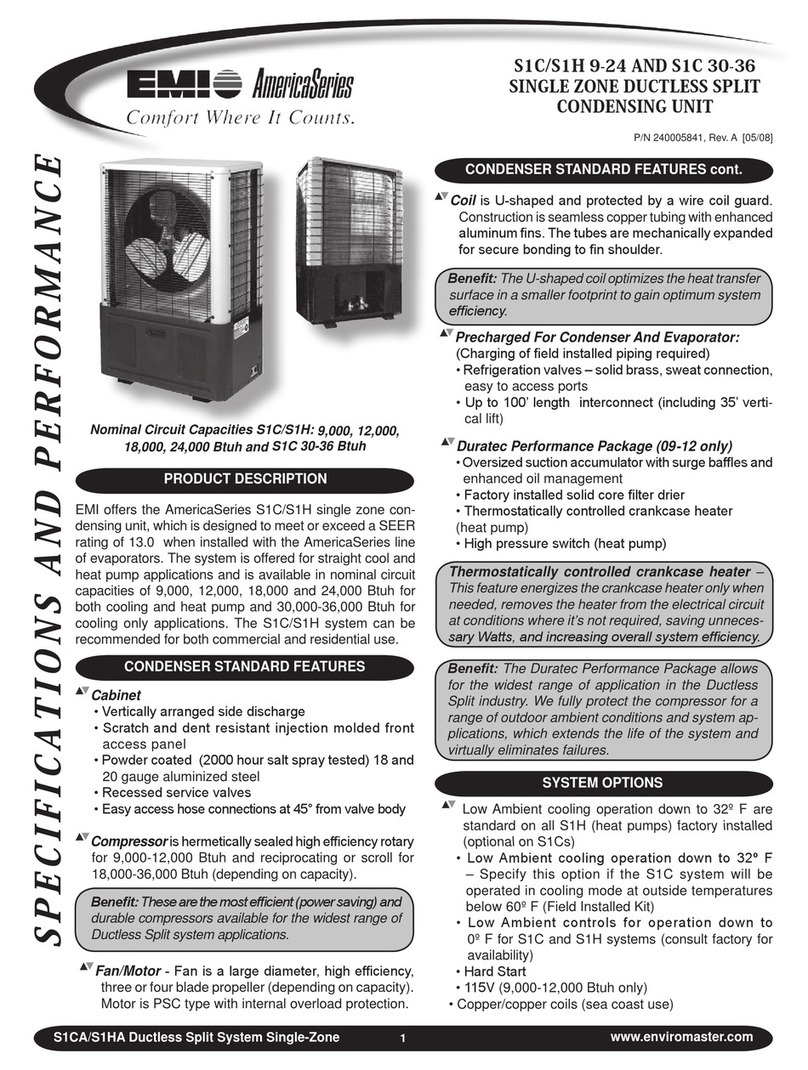
S1C/S1H Single-Zone & S2C Dual-Zone
SiDe DiSCHarge DuCtleSS Split SyStem
ConDenSing unitS
P/N# 240005897 Rev. B [05/08]
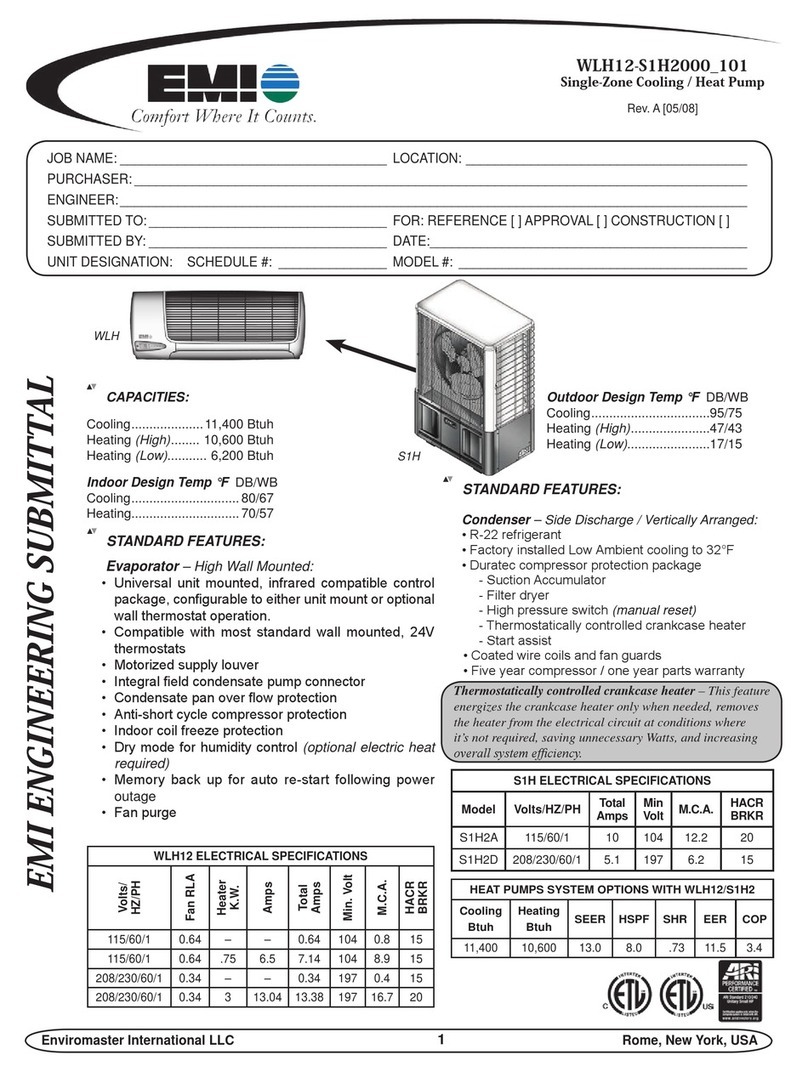
Straight Cool/heat pump S1C/S1h
Nominal Circuit Capacities S1C/S1H:
9,000, 12,000, 18,000, 24,000 Btuh and
S1C 30-36 Btuh
Cooling only S2C
Nominal Circuit Capacities:
9,000-12,000 Btuh
Enviromaster International LLC
5780 Success Dr.
Rome, NY 13440
www.enviromaster.com
inStallation, operation anD maintenanCe manual
An ISO 9001-2000 Certied Company
S1C/S1h
S2C
www.enviromaster.comSide Discharge Condensers 2
INSTALLATION, OPERATION AND MAINTENANCE MANUAL
S1C/S1H SINGLE-ZONE & S2C DUAL-ZONE
CONDENSING UNITS
Shipping Damage MUST be Reported to the Carrier IMMEDIATELY!!!
Examine the exterior. Remove cover and examine compressor and piping
for signs of damage.
This manual is intended as an aid to a qualied service personnel for proper installation,
operation, and maintenance of EMI AmericaSeries high efciency condensing units.
Carefully read these instructions before attempting installation or operation. Failure
to follow these instructions may result in improper installation, operation, service, or
maintenance, possibly resulting in re, electrical shock, property damage, personal
injury, or death.
SAFETY INSTRUCTIONS
Read all instructions before using
the EMI AmericaSeries high ef-
ciency condensing unit. Install or
locate this unit only in accordance
with these instructions. Use this
unit only for its intended use as
described in this manual.
Check the rating plate on the EMI
AmericaSeries condensing unit
before installation to make certain
the voltage shown is the same as
the electric supply to the unit.
The EMI AmericaSeries condens-
ing unit must be connected only to
a properly grounded electrical sup-
ply. Do not fail to properly ground
this unit.
Turn off the electrical supply before
servicing the EMI AmericaSeries
condensing unit.
Do not use the EMI AmericaSeries
condensing unit if it has damaged
wiring, is not working properly, or
has been damaged or dropped.
[Save these instructions]
TO THE INSTALLER
(1) Retain this manual and warranty for future
reference.
(2) Before leaving the premises, review this
manual to be sure the unit has been
installed correctly and run the unit for
one complete cycle to make sure it
functions properly.
To obtain technical service or warranty
assistance during or after the installation
of this unit, check our website @ www.
enviromaster.com or call your installing
contractor or distributor. Our technical
service department may be contacted at
1-800-228-9364.
When calling for assistance, please have
the following information ready:
• Model Number___________________
• Serial Number___________________
• Date of installation________________
Tampering with the EMI America-
Series condensing unit is danger-
ousandmayresultinseriousinjury
or death. Tampering voids all war-
ranties. Donotattempttomodifyor
change this unit in any way.
!
DANGER
!
www.enviromaster.com
Side Discharge Condensers 3
PRODUCT DESCRIPTION
The AmericaSeries S1C/H and S2C
condensing units are, air-cooled, vertically
arranged side discharge, high efciency
units designed specically to meet or ex-
ceed a 13 SEER rating.
The S1C 9,000-36,000 Btuh and S1H
9,000-24,000 Btuh capacity condensing unit
will provide cooling for a single evaporator,
as identied in the "S1C Specications and
Dimensions" section on pages 23-24.
The S2C 18,000 (99) - 21,000 (92) and
23,000 (22) Btuh capacity condensing units
will provide cooling for two evaporators, as
identied on page 25 in the "S2C Specica-
tions and Dimensions" section. The S1C/H
and S2C are quiet units that can be recom-
mended for both commercial and residential
applications.
Installation of the S1C/H and S2C
condensing units is simplied by a 24V
control interconnection from the evaporator
and multiple units can be lined up in close
proximity to an exterior wall. Service valves
are recessed to reduce tampering and
all 9,000-12,000 Btuh units are equipped
with a Duratec Performance Package that
includes an oversized suction accumula-
tor with surge bafes and enhanced oil
management, a factory installed solid core
lter drier and loss of charge switch. A eld
installed crankcase heater is standard on
S1H 09 &12 (Thermostatically controlled)
models, and is available as optional equip-
ment on other models.
• Compressor and fan motor contactor
• Run capacitor
• Loss of charge switch (09 - 12 only)
• Low voltage terminal connections
• Large capacity suction accumulator
(09 - 12 only)
• Solid core lter drier (09 - 12 only)
• Thermostatically controlled crankcase
heater (09 - 12 S1H’s)
• H.P.S. (High pressure switch)
- Standard on S1H’s (heat pumps)
- Standard on S1C’s 18K and above.
• Low Ambient controls
for operation
down to 32º F
standard,
factory in-
stalled
on all S1H’s (heat pumps)
• Field installed crankcase heater
for straight cool units (standard on
9,000-12,000 Btuh S1H’s Thermostati-
cally controlled)
• Straight cool hard start (standard on
all S1H’s)
• 115V (9,000-12,000 Btuh only)
• Copper/copper coils (sea coast use)
• Low Ambient controls
for operation down
to 32º F
, specify this option for S1C or
S2C systems (standard on S1H’s) that
will be operated in cooling mode at
outside temperatures below 60º F
(eld
installed kit)
•
Low Ambient
for operation down to 0º F
for S1C, S1H or S2C systems (consult
factory for availability)
INSTALLER SUPPLIED ITEMS
• Power wiring
• Low Volt wiring (18 awg minimum)
• Secure mounting pad or foundation
• Refrigerant piping (if not purchased
from EMI)
• High Volt Disconnect
• Refrigerant for charging interconnect
piping (see charge table on page 10)
ITEMS FOR CONSIDERATION
LowAmbient controls are required when
the system is asked to cool at outdoor tem-
peratures below 60º F, this may cause dam-
age to the compressor and coil, and may
Thermostatically controlled crankcase
heater – This feature energizes the crank-
case heater only when needed, removes
the heater from the electrical circuit at
conditions where it’s not required, saving
unnecessary Watts, and increasing overall
system efciency.
CONTROLS AND COMPONENTS
(Factory Installed or Supplied)
SYSTEM OPTIONS
www.enviromaster.comSide Discharge Condensers 4
ITEMS FOR CONSIDERATION
• Locate the unit as close to the indoor
section as possible. (See Tubing
Specications chart on pape 7.)
• If the unit is used for low ambient cool-
ing down to 32°F, this option must be
specied to prevent system damage.
• Avoid high trafc areas and prevailing
wind locations.
• Surface must be at and level.
• Mount unit above typical snow fall
levels.
Ensure free ow of air through the unit.
Air must not recirculate from discharge to
intake. Air is drawn through the coil and
side discharged through the fan grille. A
minimum48"clearance isnecessaryfor
the condenser discharge. Rear intake
(coil side) clearance is 12" minimum.
Consider how power will be run to the unit
from the power source. Refrigerant piping
should be a direct line to the indoor unit.
SITE PREPARATION
1. Place the unit on a at concrete surface
or pad if on the ground. Roof mounting
should use a build up platform to avoid
intake of hot air from the roof.
2.In areas of heavy snowfall, condens-
ers should be set above the level of
maximum anticipated snowfall (12"
is usually adequate).
1. Loosen the screws on left and right sides
of the front panel. (Do not remove these
screws.)
2. Remove the screws on the front of the
panel.
3. To remove front panel:
4.Slide front panel forward to clear side
screws and remove.
INSTALLATION INSTRUCTIONS
S1C is shown
UNIT MOUNTING INSTRUCTIONS
Side discharge unit allows for per-
manent mounting through the feet. This is
highly recommendeddue to the vertical
design of the unit.
SYSTEM OPTIONS (cont.)
void the warranty. A Field Installed Low-
Ambient Kit is good for operation down to
32º F.
This is accomplished by cycling the
condenser fan on and off, which will in turn
maintain a constant low side pressure pro-
viding a steady cooling effect and keeping
the air handler from frosting-up.
www.enviromaster.com
Side Discharge Condensers 5
INSTALLATION INSTRUCTIONS
UNIT MOUNTING INSTRUCTIONS
Continued
5. Insert lag bolts through the holes in
the bottom of the unit and tighten to
secure.
6. Insert lag bolts through the holes in the
feet on the back of the unit and tighten
to secure.
7. Replace the front panel, do not tighten
the side screws at this time.
Lag Bolts
Compressor
Accumulator
Capacitor
Filter Drier
3. Use only HACR type breakers or time
delay fuses. Select the wire size accord-
ing to the ampacity rating.
4. To access electrical connections and
wiring diagram:
a) Remove the screws on the side panel
adjacent to the back panel.
Rating
Plate
ELECTRICAL WIRING
1. All electrical wiring must be run accord-
ing to NEC and local codes.
2. Refer to the unit rating plate for voltage,
minimum circuit ampacity and over cur-
rent protection requirements.
b) The screws adjacent to the front
panel should already be loose (don't
remove them).
S1C
Shown
S1C
Shown

This manual suits for next models

15

Other EMI Heat Pump manuals

EMI S2HA User manual

EMI

EMI S2HA User manual

EMI S2H User manual

EMI

EMI S2H User manual

EMI AmericaSeries WLH09 User manual

EMI

EMI AmericaSeries WLH09 User manual

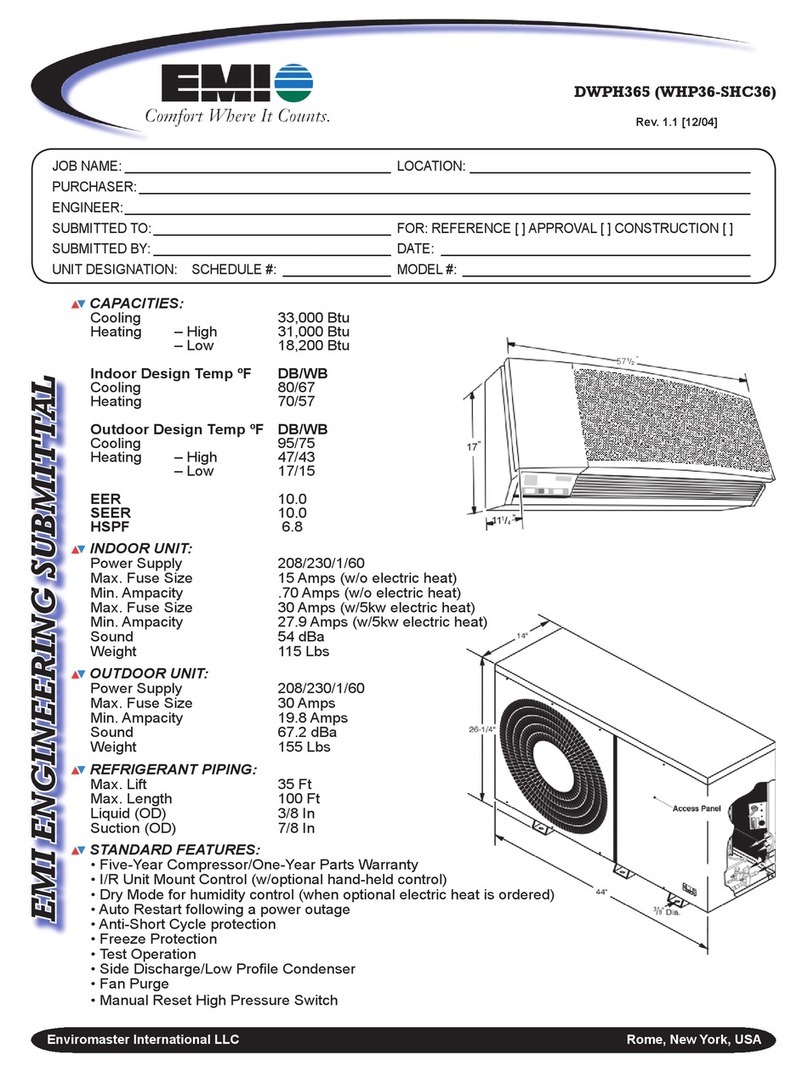
EMI DWPH365 (WHP36-SHC36) User manual

EMI

EMI DWPH365 (WHP36-SHC36) User manual

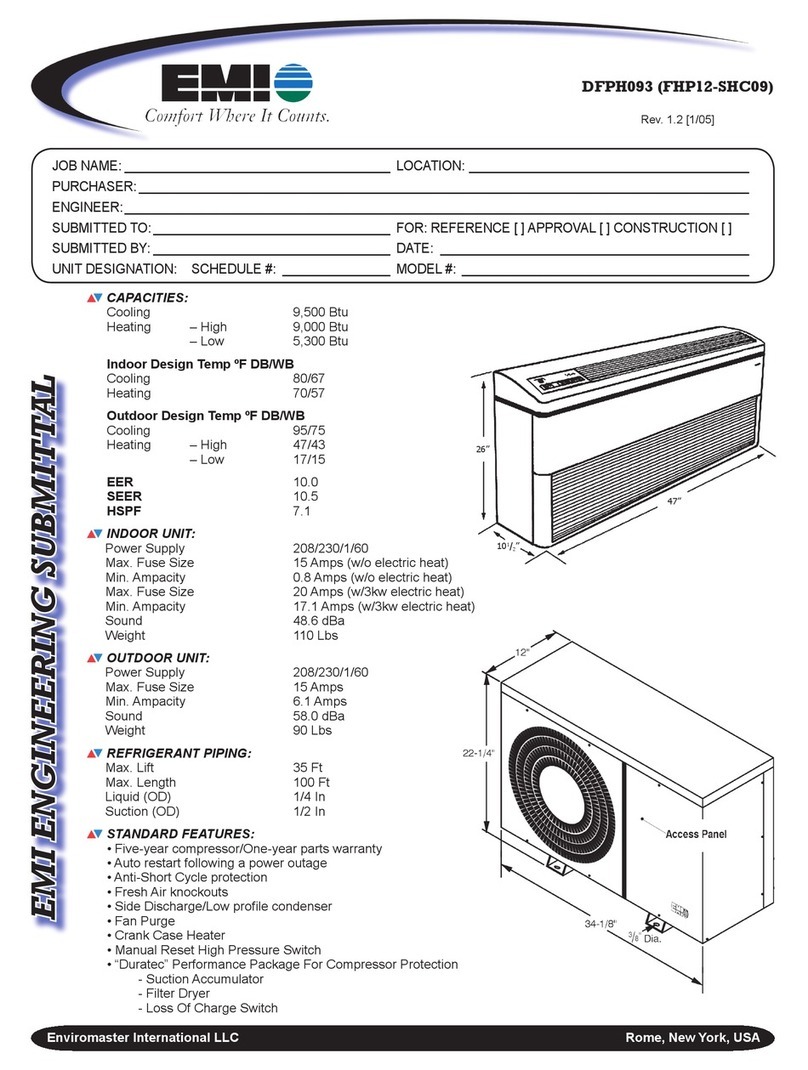
EMI DFPH093 (FHP12-SHC09) User manual

EMI

EMI DFPH093 (FHP12-SHC09) User manual

EMI Corp User manual

EMI

EMI Corp User manual

EMI S2HB User manual

EMI

EMI S2HB User manual

EMI AmericaSeries S1H9A User manual

EMI

EMI AmericaSeries S1H9A User manual

EMI AmericaSeries S1H2A User manual

EMI

EMI AmericaSeries S1H2A User manual

EMI SCC User manual

EMI

EMI SCC User manual

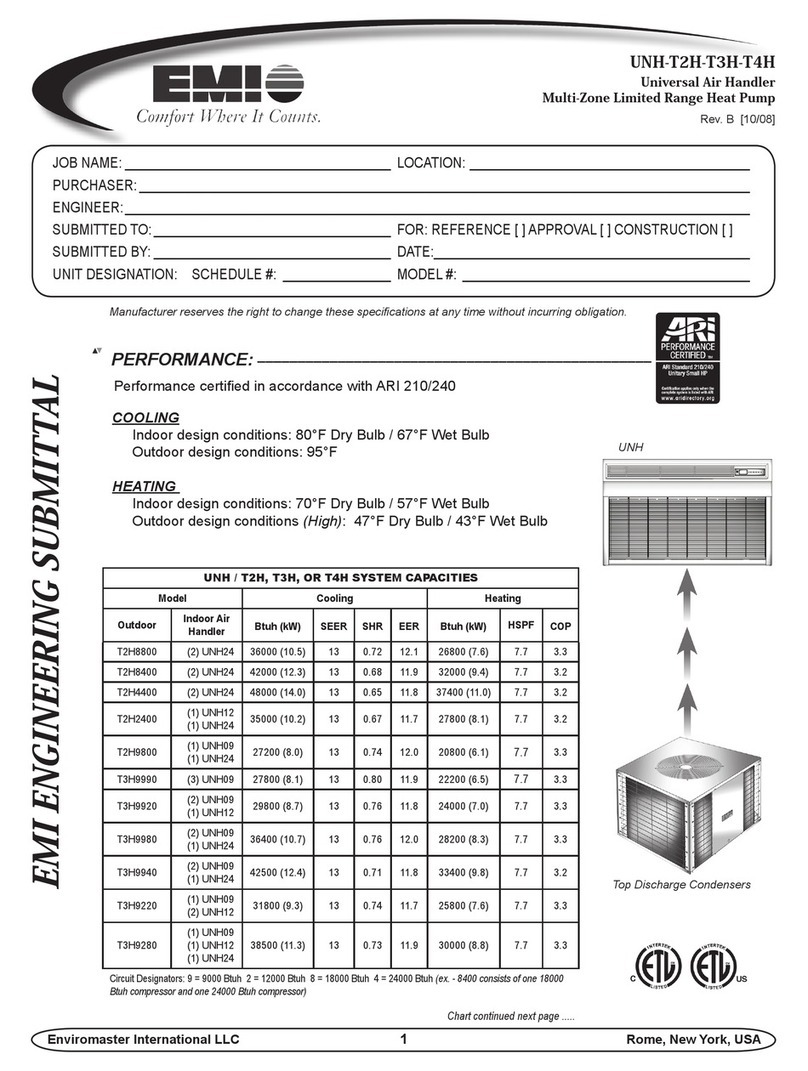
EMI UNH-T2H-T3H-T4H User manual

EMI

EMI UNH-T2H-T3H-T4H User manual

EMI WLHA User manual

EMI

EMI WLHA User manual

EMI VCH Series User manual

EMI

EMI VCH Series User manual

Popular Heat Pump manuals by other brands

Daikin RXL12QMVJU Service manual

Daikin

Daikin RXL12QMVJU Service manual

AIREDALE BluCube CUR092V16-1CO-0 Installation and maintenance manual

AIREDALE

AIREDALE BluCube CUR092V16-1CO-0 Installation and maintenance manual

Calyenty RBH 125 Customer's manual

Calyenty

Calyenty RBH 125 Customer's manual

GRE HPGI50 owner's manual

GRE

GRE HPGI50 owner's manual

Carrier 30XW Installation, operation and maintenance instructions

Carrier

Carrier 30XW Installation, operation and maintenance instructions

Hayward SUMHEAT HP5131DT3 Installation instructions manual

Hayward

Hayward SUMHEAT HP5131DT3 Installation instructions manual

REMKO SQW 400 Electrical wiring

REMKO

REMKO SQW 400 Electrical wiring

Sanyo SAP120FCH Service manual

Sanyo

Sanyo SAP120FCH Service manual

Daikin EHYHBH05AA Operation manual

Daikin

Daikin EHYHBH05AA Operation manual

Panasonic WH-SDF03E3E5 Design handbook

Panasonic

Panasonic WH-SDF03E3E5 Design handbook

Airxcel 45000 Series Installation, operation and maintenance instructions

Airxcel

Airxcel 45000 Series Installation, operation and maintenance instructions

Mitsubishi Electric PUZ-SWM60VAA Service manual

Mitsubishi Electric

Mitsubishi Electric PUZ-SWM60VAA Service manual

Dimplex LI 16I-TUR Installation and operating instruction

Dimplex

Dimplex LI 16I-TUR Installation and operating instruction

Carrier WSHP Open v3 Integration guide

Carrier

Carrier WSHP Open v3 Integration guide

Mitsubishi Electric EHSE-YM9EC Service manual

Mitsubishi Electric

Mitsubishi Electric EHSE-YM9EC Service manual

TGM CTV14CN018A Technical manual

TGM

TGM CTV14CN018A Technical manual

Carrier 38MGQ Series installation instructions

Carrier

Carrier 38MGQ Series installation instructions

Kokido K2O K880BX/EU Owner's manual & installation guide

Kokido

Kokido K2O K880BX/EU Owner's manual & installation guide

manuals.online logo
manuals.online logoBrands
  • About & Mission
  • Contact us
  • Privacy Policy
  • Terms and Conditions

Copyright 2025 Manuals.Online. All Rights Reserved.