Emprex EC-M120 User manual

EC-M120 Quick Start Guide
Important Note for Encrypted Models Only:
You will be required to partition and format the hard drive disk (HDD) after
installing it in the encrypted enclosure. Always perform partition and format
functions with the Secure Key plugged in. If you are adding a new disk, then
no backup is required. Otherwise, you are advised to back up the disk. WE
ARE NOT RESPONSIBLE FOR ANY LOST DATA.
There is no “back door” into the security system of the enclosure. Without the
Secure Key, you will not be able to access the data or operating system on the
protected disk. This means you must keep the backup key in a safe place at
all times. WE ARE NOT ABLE TO CREATE A SECURE KEY WITH THE
SAME “SECRET KEY” WITHOUT YOUR BACKUP KEY. Please contact
your supplier immediately if you lose one of your Secure Keys. If you lose all
Secure Keys, you will NOT be able to decrypt your HDD
Assembling the 3.5” HDD Enclosure Kit
Install a hard disk drive in the Enclosure Kit by completing the following steps.
1. Using a Phillips screwdriver, remove the screw from the rear panel of the
Enclosure.
2. Carefully remove the rear panel.

3. Slide the bottom panel out of the housing ensuring that adequate pressure
is applied.
4. When disassembled, the enclosure will appear as shown below.

5. Locate the plastic bag containing (4) auto-limiting screws included in the
package.
Auto-limiting Screw
6. Ensure that the shock absorbers are installed in the mounting brackets
with the “thin” side facing out.
7. Insert the IDE cable into the hard drive.

8. Insert the control board power cable into the receptacle on the hard drive.
9. Place the hard drive in the housing positioning it between the shock
absorbers.
10. Align the opening on the hard drive with the opening in the shock absorber
and insert the first screw. Tighten the first screw ensuring that proper
alignment is maintained. Repeat for the remaining three screws.

11. Align the edges of the hard drive platform with the integral rails and
carefully slide the assembled platform into the enclosure housing.
12. Ensure that the LED indicator is properly aligned with the opening on the
front panel of the enclosure.
13. Fasten the rear panel to the enclosure housing by replacing the screws
included in the package.

2
1
14. Fasten the last (1) screw to reattach the bottom panel.
15. The Enclosure Kit is now assembled and ready for connection to a
computer.
OK!!
Connecting the Enclosure Kit to a Computer
For Standard models:
1. Connect the AC/DC power adapter, then turn on the power switch; ensure
that the green LED indicator is active. The orange LED indicator will blink
during data transfer.

ON!!
2. Insert the USB or IEEE 1394(b) connector into the corresponding port.
3. Insert the USB or IEEE 1394(b) connector into an available port on the
computer.
For Encrypted models:
1. Insert the Secure Key into the security key port indicated by the secure
key icon “ “on the rear panel of the Enclosure Kit. As the shape of
the security key port is similar to the shape of the IEEE 1394 port, ensure
that the Secure Key is inserted only into the security key port. Incorrect
insertion into a port other than the designated security key port may result
in damage to the Secure Key and/or other ports/equipment.

2. Connect the AC/DC power adapter; turn on the power switch, ensure that
the green LED indicator is active. The orange LED indicator will blink
during data transfer.
ON!!
3. Insert one end of the USB or IEEE 1394(b) connector into a
corresponding port on the enclosure.
4. Insert the USB or IEEE 1394(b) connector into an available port on the
computer.

Note: If the LED indicator is red, security is not enabled. Ensure that the
Secure Key is inserted before power on, and USB/FireWire cables are properly
connected

Kurzanleitung
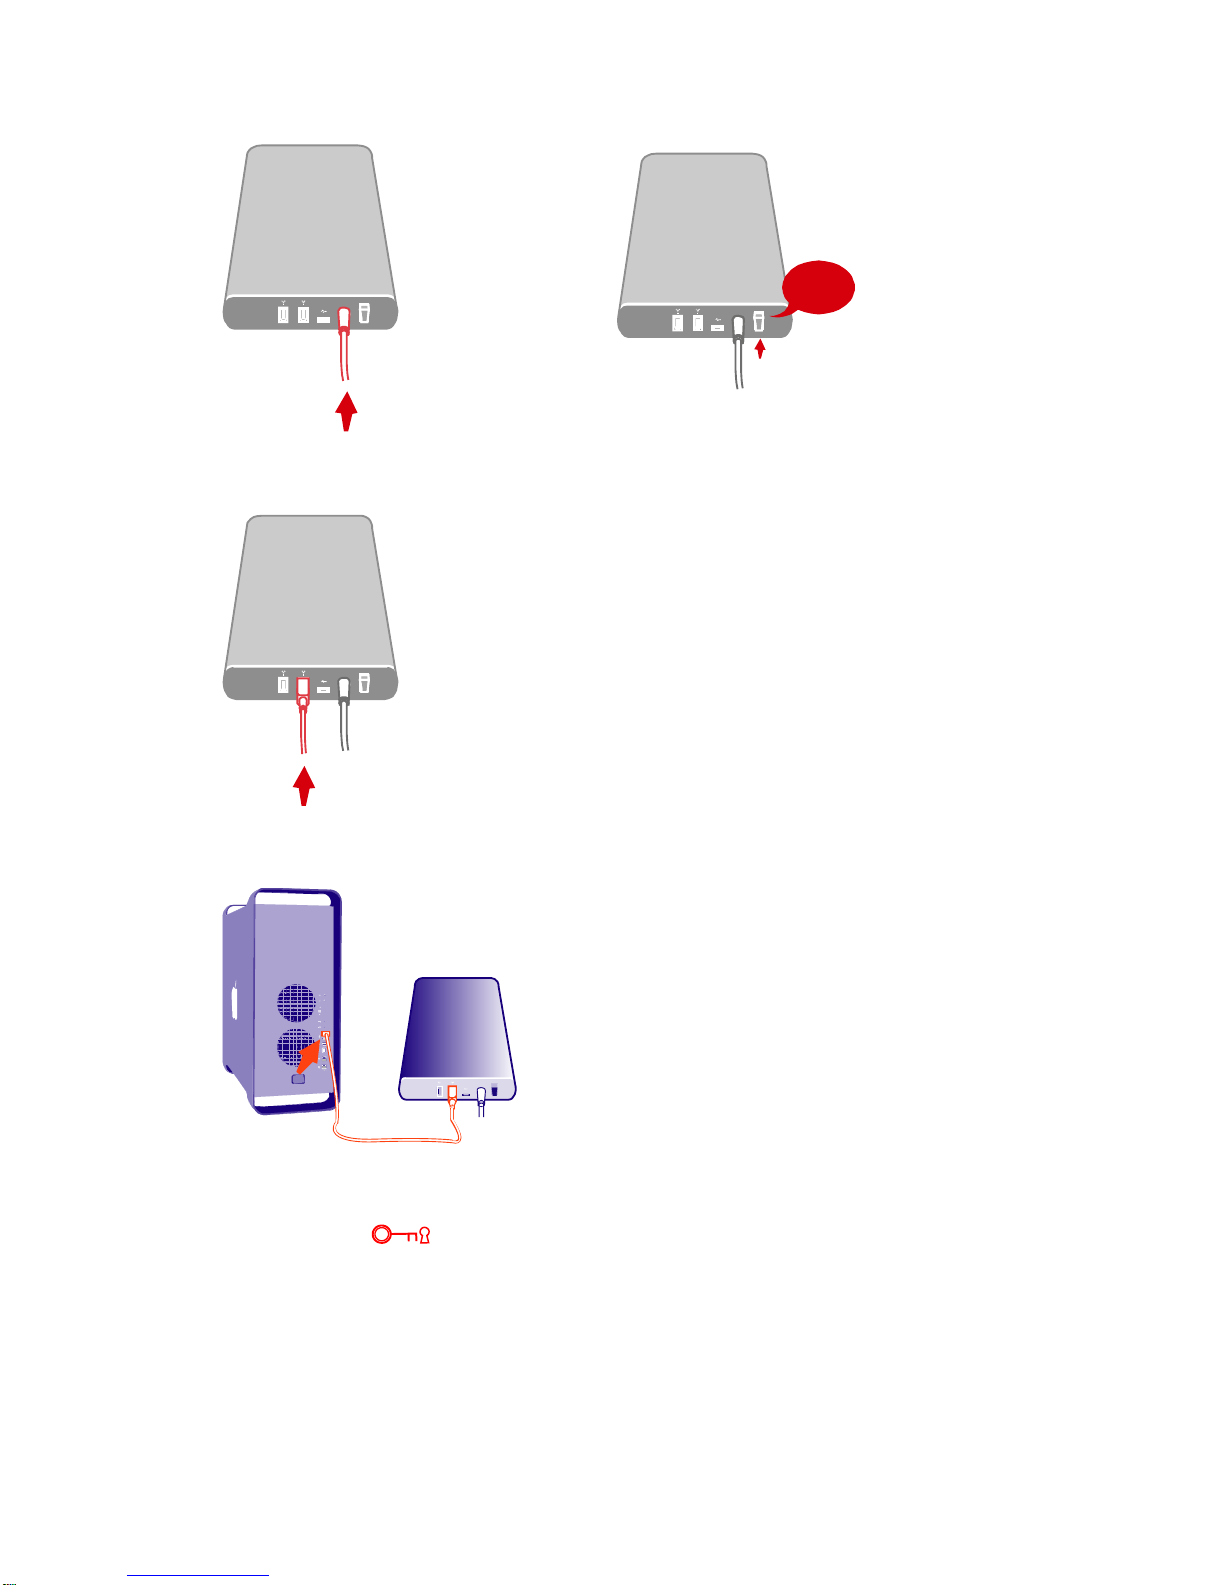
Wichtiger Hinweis für Verschlüsselte Modelle
Die Festplatte (HDD) muss formatiert und partitioniert werden, nachdem sie im
Verschlüsselungs-Festplattengehäuse installiert worden ist. Führen Sie
Partitionierung und Formatierung immer mit eingestecktem Secure Key
(Hardwareschlüssel) durch. Wenn Sie eine fabrikneue Platte einbauen, ist
keine Datensicherung erforderlich. Andernfalls raten wir dringend, eine
Sicherung (Backup) der Platte zu erstellen. WIR SIND NICHT
VERANTWORTLICH FÜR VERLORENE DATEN.
Es gibt keine "Hintertür" in das Sicherheitssystem Ihres Festplattengehäuses.
Ohne den Secure Key werden Sie nicht in der Lage sein, auf die Daten oder
ein Betriebssystem auf der geschützten Platte zuzugreifen. Das bedeutet,
dass Sie einen Zweitschlüssel immer an einem sicheren Ort aufbewahren
müssen. WIR SIND NICHT IN DER LAGE, OHNE IHREN ZWEITSCHLÜSSEL
EINEN SECURE KEY MIT DEM SELBEN "GEHEIMSCHLÜSSEL" ZU
ERZEUGEN. Bitte kontaktieren Sie Ihren Händler bzw. Administrator sofort,
wenn Sie einen Ihrer Secure Keys verlieren. Wenn Sie alle Secure Keys
verlieren, werden Sie Ihre Festplatte NICHT entschlüsseln können.
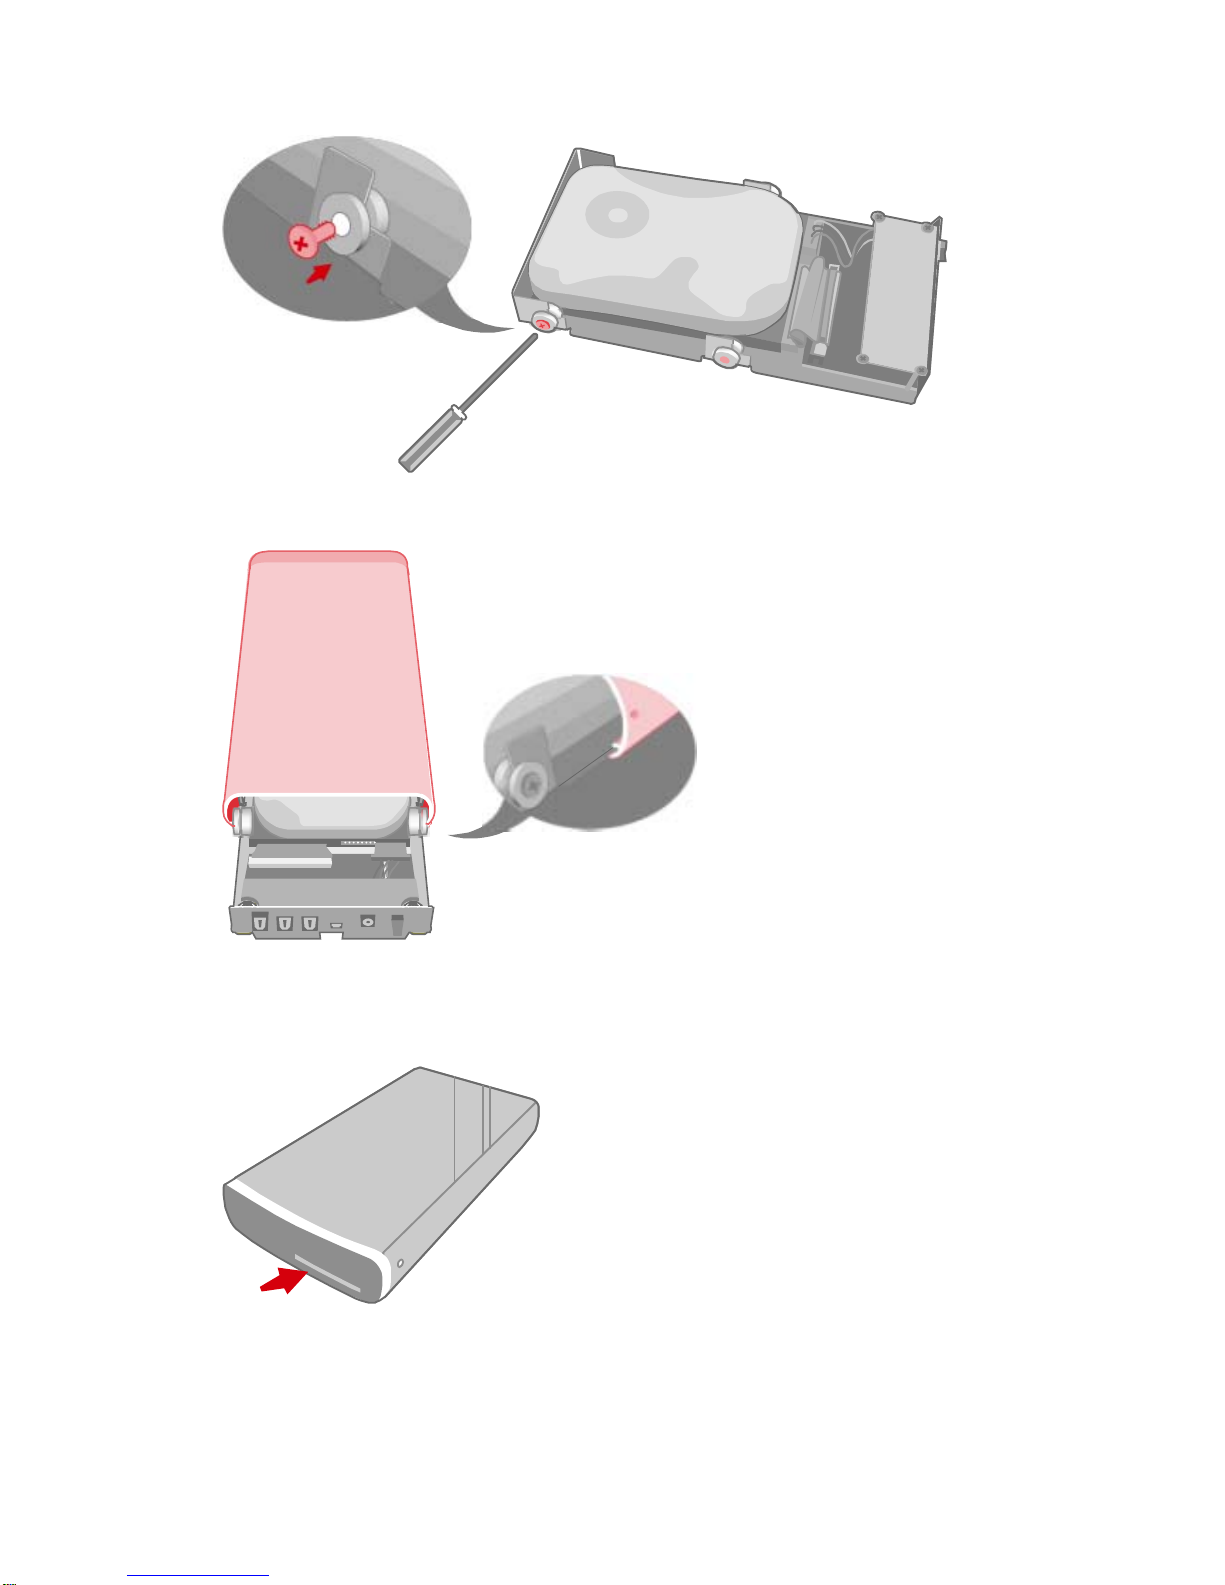
Zusammenbau des 3.5” Festplattengehäuses
Um vom 3.5“ Festplattengehäuse Gebrauch zu machen, setzen Sie einfach
Ihre 3,5“ IDE Festplatte in das Festplattengehäuse ein und installieren.
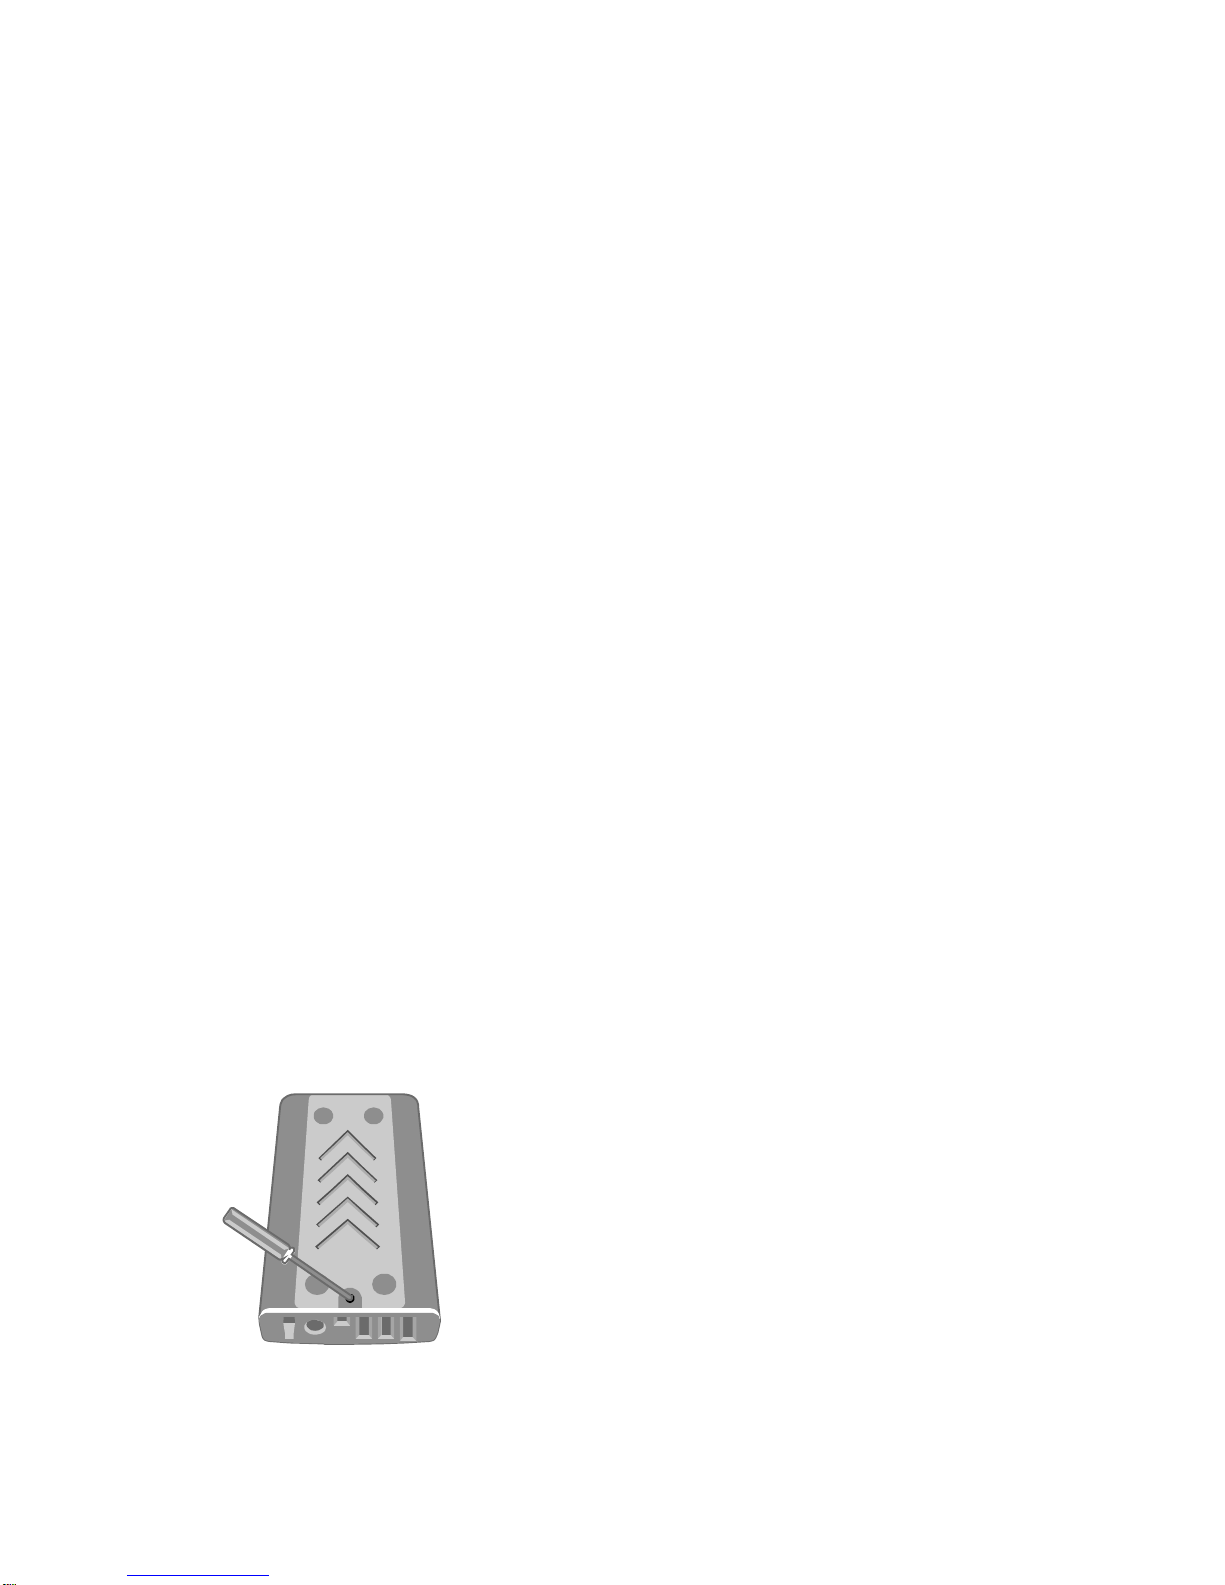
1. Entfernen Sie die Rückentafel von dem Festplattengehäuse, indem Sie
die Schraube von dem Gehäuse mit einem Kreuzschlitz-Schraubenzieher
lösen.
2. Entfernen Sie vorsichtig die Rückentafel vom Gehäuse.

3. Drehen Sie das Gehäuse, so dass der Boden nach oben zeigt und
schieben Sie den Boden aus dem Gehäuse. Zum Herausschieben des
Bodenblechs muss ausreichend Druck angewendet werden.
4. Auseinandergenommen wird das Gehäuse wie oben gezeigt aussehen.

5. Nehmen Sie den Plastikbeutel mit den (4) automatisch-stoppenden
Schrauben aus der Packung.
Automatisch-stoppende Schraube
6. Stellen Sie sicher, dass die Stossdämpfer mit der „dünnen“ Seite nach
Außen in den Befestigungsmulden montiert sind.
7. Setzen Sie das IDE-Kabel in das Festplattenlaufwerk ein.

8. Setzen Sie das Platinen-Stromkabel in die Buchse an der Festplatte ein.
9. Platzieren Sie die Festplatte im Gehäuse zwischen den Stoßdämpfern.
10. Richten Sie die Öffnung an der Festplatte auf die Öffnung im Stoßdämpfer
aus uns führen Sie die erste Schraube ein. Ziehen Sie die erste Schraube
fest und stellen Sie sicher, dass die richtige Ausrichtung während des
Festziehens beibehalten wird. Dies für die restlichen drei Schrauben
wiederholen.

11. Richten Sie die Aussenkanten der Laufwerksplattform auf die integrierten
Schienen aus und schieben Sie die zusammengesetzte Plattform
vorsichtig in das Festplattengehäuse.
12. Stellen Sie sicher, dass die LED-Anzeige richtig auf die Öffnung in der
Frontplatte des Festplattengehäuses ausgerichtet ist.

13. Befestigen Sie die Rückentafel am Gehäuse, indem Sie die (2)
beigefügten Schrauben einsetzen.
2
1
14. Setzen Sie die letzte (1) Schraube ein, um die Bodenplatte wieder zu
befestigen
15. Der Festplattengehäuse-Bausatz ist jetzt zusammengebaut und bereit, an
einen Computer angeschlossen zu werden.
OK!!
Anschluss des Festplattengehäuses an einen Computer
Standardmodelle

1. Schließen Sie das Netzteil an, dann schalten Sie den Hauptschalter ein;
stellen Sie sicher, dass die grüne LED-Anzeige aktiv ist. Die orange
LED-Anzeige wird während des Datentransfers blinken.
ON!!
2. Stecken Sie den USB oder IEEE 1394(b) Stecker in die zugehörige
Buchse.
3. Stecken Sie den USB oder IEEE 1394(b) Stecker in eine freie Buchse am
Computer.
Verschlüsselte Modelle

1. Fügen Sie den Secure Key in sein „Schlüsselloch“ (bezeichnet durch das
Symbol “ “) auf der Rückentafel des Festplattengehäuses ein. Da
die Form des Secure Key Schlüssellochs sehr ähnlich der Form der IEEE
1394-Buchse ist, stellen Sie sicher, dass der Secure Key nur in das
Secure Key Schlüsselloch eingeführt wird. Inkorrekte Einführung in eine
andere Buchse als das vorgesehene Secure Key Schlüsselloch kann zu
Beschädigungen des Secure Key oder anderer Buchsen/Apparaturen
führen.
2. Schließen Sie das Netzteil an und vergewissern sich, dass die grüne
LED-Anzeige aktiviert ist. Die orange LED-Anzeige wird während der
Datenübertragung blinken.
ON!!
3. Schließen Sie ein Ende des USB oder IEEE 1394(b) Kabels an eine
entsprechende Buchse am Festplattengehäuse an.

4. Schließen Sie das USB oder IEEE 1394(b) Kabel an einer freien Buchse
am Computer an.
Hinweis: Wenn die LED-Anzeige rot ist, ist die Sicherheitsfunktionalität nicht
aktiviert. Stellen Sie sicher, dass der Secure Key (Hardwareschlüssel) richtig
vor dem Einschalten eingesetzt wurde und USB/FireWire-Kabel richtig
angeschlossen wurden.

Guide Rapide
Note importante pour Modèles cryptés
Vous devez partitionner et formater le disque dur après son installation dans la
baie cryptée. Partitionnez et formatez toujours avec la clé de cryptage
branchée. Si vous ajoutez un nouveau disque, aucune procédure de
sauvegarde n’est requise. Autrement, il est conseillé de sauvegarder les
données sur le disque. NOUS NE SOMMES PAS RESPONSABLES EN CAS
DE PERTES DE DONNEES.
Le système de sécurité de la baie n'offre pas une procédure de récupération
de données. Vous ne pourrez pas accéder aux données ou au système
d'exploitation sur le disque protégé sans la clé de cryptage. Ceci signifie que
vous devez garder la clé de sauvegarde dans un endroit sûr. NOUS NE
POUVONS PAS RECREER UNE CLE DE CRYPTAGE AVEC LE MEME
CODE DE SECURITE SANS VOTRE CLE DE SAUVEGARDE. Veuillez
contacter votre revendeur immédiatement si vous avez égaré l'une de vos clés
de cryptage. Si vous perdez toutes les clés de cryptage, vous ne pourrez pas
décrypter votre disque dur.
Assembler la baie externe
Placez simplement votre disque dur IDE 3,5 pouces dans la baie et installez le
logiciel (si nécessaire).
1. Retirez la vis du dessous de la baie externe.
2. Retirez soigneusement le panneau postérieur de la baie.

3. Retournez la baie et retirez le panneau inférieur du logement. Utilisez un
peu de force pour faire glisser le panneau.
4. Une fois démontée, la baie apparaît comme indiqué au dessous.
5. Un sachet en plastique avec quatre vis à segmentation automatique est
inclus dans l’emballage.
Table of contents
Languages:
Other Emprex Enclosure manuals
Popular Enclosure manuals by other brands

StarTech.com
StarTech.com RK1219WALHM instruction manual

Siko
Siko TG01 Translation of the original installation instructions

Western Digital
Western Digital WDBABV0010ABK - Elements SE Portable Specifications

Phanteks
Phanteks ENTHOO ELITE user manual

Kicker
Kicker Q-CLASS L7 Series owner's manual

SilverStone
SilverStone TJ07 manual