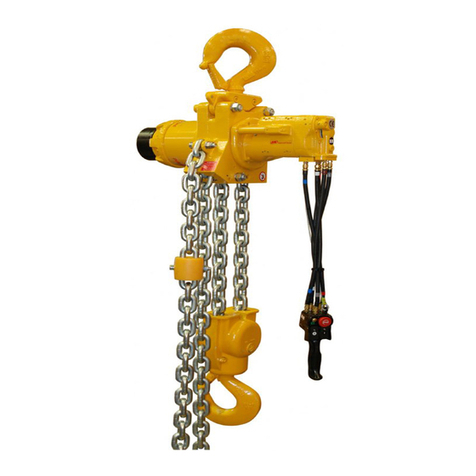
Endo EHL-05TS, EHL-1TW User manual

I
INSTRUCTION
MANUAL
I
AIR HOIST
EHL-05TS
EHL-1TW
AWARNING
.Never usethe hoist for lifting or lowering people.
• Supply this manual to the user.
.Read this manual before installation, operation, or maintenance.
• Keepthis manual available.
~===============
~E ND0
==========Is=sue=d =on~Ju~1.
=201~6
ENDO KOGYO CO., LTD.
HM-10133

SAFETY ALERT SYMBOL AND ALERT SIGNS
Please read this manual carefully and follow its instructions.
The SAFETY ALERT SYMBOL (
A ),
WARNING, CAUTION, and NOTE carry
special messages.
This SAFETYALERT SYMBOL is used to call your attention to items or
operations that could be dangerous to you or other persons using this
equipment.
Please read these messages and follow these instructions carefully.
IC'
A
A
WARNING: WARNING indicates a hazardous situation which, if
not avoided, could result in death or serious injury.
A
CAUTION: CAUTION indicates a hazardous situation which, if not avoided,
could result in minor or moderate injury, damage or destruction
of the equipment and others.
NOTE: NOTE indicates a special instruction in operation or
maintenance.

Scope of warranty and liabilities for the equipment
1. We will repair or replace the product free' of charge if a failure due to manufacturing
defects occurs under proper usage during the warranty period.
For details, contact us or your dealer.
2. The warranty will be void in the following cases:
1) Change in ownership.
2) Repair, adjustment, or modification performed by a party other than the
manufacturer, agents, or dealers.
3. The warranty period is one (1) year from the date of purchase except for
consumables.
4. Repairs applicable to any of the following shall be charged even during the warranty
period:
1) Failure/damage caused by incorrect use.
2) Failure/damage caused by use of non-genuine parts.
3) Failure/damage caused by fire, earthquake, natural disaster, or other unexpected
incident.
4) Incident caused by fall, shock, negligence, or by inadequate storage.
5) Failure/damage caused by use of parts or other equipment that are not included in
this product.
6) Replacement of consumables.
7) Usage in violation of dangers or cautions stipulated in this Instruction Manual or
the warning labels.
8) Failure/damage caused by any reason that is not attributable to the manufacturer.
5. Warranty exclusions such as mechanical loss.
Either during or after the warranty period, mechanical loss, damage to anything other
than our product(s), or other duties incurred on you/your customer as a result of the
failure of our product(s) are outside the scope of the warranty.
I

CONTENTS
I.
WARNING - READ THESE INSTRUCTIONS ---------------1
II. Specifications ---------------------.:---------------------------------------------------------------- 3
III. Checks and cauti
0
ns before Insta
II
ation ---------------------------------------------------- 3
1. Checks of the Product
3
2. Instructions on Working Conditions 3
IV':"'Insta
II
ation ----------------.,------------------------------------------------------------------------- 4
1.Accessories
2. Installation
3. BeforeAir Connection
4
4
6
V. Checks after Installation and Test Run------------------------------------------------------- 7
1. Load chain
2. Hoisting operation
3. Ho.istingand Lowering Limit Switches
4. Loadtest
7
7
8
8-
VI. OPERATION - Proper Operation and Caution -------.:.----------------------------------- 9
VII.Check before Operation - At the beginning of each shift ------------------------------ 12
VIII.Periodic Inspections ----------------------------------------------------------------------------- 13
IX. Maintenance and Inspection ------------------------------------------------------------------- 13
1. Lubrication
2. Inspection
3. Storing the Hoist
4. Troubleshooting
13
15
21
22
X. Adjustment of Speed and Operating Limit of Control Lever --------------------------- 23
X
I.
Replacement of Load Chain ---------------------------------------------------------------- 24
X II. Disassembly and Reassembly ------------------------------------------------------------- 30
1. Procedures of Disassembly 30
2. Reassembly 33 .
X III. Parts List ----------------------:------------------------------,------------------------------------- 39

Important
• Before installingor operating the air hoist, carefully read and understand all of the instructions in
this manual in order to avoid accidents as a consequence of incorrect handling.
• All ofthe people who will install, operate or maintain the hoist, should read this manual.
• After reading, keep this manual available for maintenance and inspections.
• Be sure to abide by trade associations', local and national rules and regulations relating to safety.
• Strictly obey the contents described in this manual.
I. WARNIG - READ THESE INSTRUCTIONS
I
If
the hoist is not used correctly, a serious accident may occur, such as dropping the load or
the hoist itself.
Observe the following instructions for safe operation.
• The following safety precautions should be posted in a conspicuous location.
1. General Handling
• Anyone who operates the hoist must know and observe the safety rules and regulations.
• Do not operate the hoist unless the contents of this manual and warnings on the caution
plate are completely known.
• Only allow qualified people to operate the hoist.
Do not operate the hoist without being qualified and familiar with the safety rules, etc.
• Installthe hoist properly and carefully.
• Be sureto check the hoist before each shift, and inspect it periodically.
2. Operation and Handling
• Never lift a load greater than the rated capacity of the hoist.
• Never use the hoist for lifting or lowering people, and never stand on a suspended load. ,
• Never operate the hoist if it is damaged or has a malfunction.
.• Never operate the hoist with the load chain in any of the following conditions:
CD
Twisted, kinked or deformed.
®When elongation or the reduction of diameter exceeds the service limits.
/
@
Cracked, damaged or corroded.
@)
Improperlyengaged on the chain wheel.
• Never carry loads over people.
• Be certain there are no objects in the way of the load or hook when moving the hoist.
• Always stand clear of the load.
Neverwalk under a suspended load, and keep out of its area of projection.
Never place hands, feet, etc., under or between suspended loads.
• Never leave a load suspended for any extended period.
• Never use the load chain as a sling.
• Never use a load chain as a ground for welding.
Do not attach a welding electrode to the hoist or sling chain.
• Never use the upper and lower limit switches as a means of stopping the hoist -
these are emergency devices only.
_ 1._

o
Beforeeach shift, check the hoist for wear or damage.
Check brakes, load chain, limit switches, etc.
o
Stretched, worn or damaged hooks should be discarded.
Do not attempt to repair it,just replace it with the new hook.
Do not use the hook with a damaged or malfunctioning hook latch.
o
Be sure that all slings are correctly positioned on, or attached to the load hook.
o
Never splice the hoist chain by inserting a bolt between links or by any other means.
o
Donot force a load chain or hook into place by hammering,and never insertthe pointof the hook
into a chain link.
o
Always operate the hoist carefully during lifting and lowering operations.
Do not start suddenly, do not stop suddenly, and do not reverse the hoist suddenly.
r:
0
Never lock the pull rope or the push button switches.
The hoist must be operated by the operator himself/herself at all times.
o
Neveroperate the hoist when the load block is not centered underthe hoist.
Do not pull the load at an angle. Move the hoist over the loads' center of gravity before lifting
the load.
o
Easethe slack out of the load chain when starting to lift.
Do notjerk the hoist. Carefully take up the slackened load chain.
oAlways keep the load chain clean and well lubricated.
Do not drag the load chain or hook on the floor.
o
Be careful the suspended load does not touch the nearby structure or power lines, etc.
o
Becareful the hoist or trolley does not collide with the I-beam stopper or the structure.
o
Do not swing the load or load blockwhen moving the hoist.
• When moving a loadwith the trolley, do not pushthe load chain but push the load itself.
Do not pull the load.
o
Payattention to the load at all times when operating the hoist.
o
Keepthe load block overhead when not in use.
o
Do not operate the hoist if you are not physically fit to do so.
The operator must have good hearing, vision and depth perception.
o
Do not lift any single load with 2or more hoists.
o
Properly secure an outdoor hoist before leaving it unattended.
o
Be sure to protect the hoist from rain and water.
3. Maintenance and Alterations
o
Neveralter the hoist or its accessories.
o
Besure to shut off the air supply before performing any maintenance work on the hoist.
o
Periodically, inspect the hoist thoroughly and replaceworn or damaged parts.
o
Always employ qualified or well trained personnel for inspection and maintenance.
o
Only use genuine parts.
o
Followthe lubrication instructions.
o
Never operate the hoist without lubricator and filter.
o
The air pressure must never exceed 0.6 MPa {6 kgf/cm2}
o
Do not do anything if you have any questions about the hoist, please do not hesitate to contact
the dealer from whom you purchasedthe hoist, or the nearest dealer shop.
- 2 -

n.
Specifications
Rated Standard Air Lifting Air Chain Mass Air Hose Mass
load lift pressure speed consumption size of inlet size (with standard
Model MPa m3/min xmm lift, rope control)
chain
t m fkaf/cm2} m/min {normal} falls
kg/m
Rp (in} ka
0.4{4) 7.5 0.95
EHL-05TS
1/2
30.5{5) 9.0 1.3 6.3x1 0.87
1/2
12.5 20
0.6{6) 10.5 1.65
{1/2}
0.4{4) 3.7 0.95
EHL-1TW 1 3 0.5{5) 4.5 1.3 6.3x2 0.87
1/2
12.5 26
0.6{61 5.2 1.65
{1/2}
,
Working conditions
Application area: Indoor and normal atmospheric conditions
Temperature range:
-1oDe
to +50
De
m.
Checks and Cautions before Installation
1. Checks of the Product
· Check the delivered hoist is what you ordered (check the name plate).
· Check there was no damage to the hoist during transportation.
· Check the pressure of the available air supply corresponds to the working air pressure of the hoist.
2.lnstructions on Working Conditions
A
WARNING
· Never use the hoist at a temperature below -1O'C or +above 50°C.
A
CAUTION
· Do not install and leave the hoist outdoors.
If it is necessary to use the hoist outdoors, be sure to make a shelter with a roof for housing the hoist.
• Under hostile environments such as high temperatures, high humidity, acidic, corrosive and/or extremely
dusty atmospheric conditions, the mechanical parts of the hoist may be seriously damaged (for example,
corroded).
Therefore, frequently check the hoist is maintained in normal conditions at all times.
- 3 -

N. Installation
~ Green
1. Accessories Control lever
ShoOk
• In case of using Control handle (Pull rope):
Referring to Fig. 1, attach Control
handle to Control lever by using
Control chain and Shook.
Clamp S hook to prevent it disengaging
from Control chain.
Control chain
• In case of using special accessories:
- Before installing the hoist, special
accessories, such as Pendant control
switch or Overload protector, should
be attached to the hoist according to
the Instruction Manual.
I.~
v
Red
Fig.1
2. Installation
A
WARNING
. Make certain the hoist is properly installed. Otherwise, it could result in dropping the
hoist and personal injury or death .
. Always make certain the supporting member from which the hoist is suspended is
strong enough to support the weight of the hoist plus the weight of the maximum rated
load, etc.
• Check Hook is correctly rigged onto the supporting member and Hook latch is correctly closed.
• Never suspend the hoist as an I-beam flanges.
• Do not use a supporting member that suspends the hoist at an angle. Otherwise,
it could result in dropping the hoist and personal injury or death.
• Do not install hook to edged supporting member The hook is easily worn and degraded.
-4-

.Supporting hunger is possible to support Air hoists with supporting wire rope or supporting chain.
Installation for using supporting hanger
CD
The support member installed supporting chain or supporting wire rope must be different member
from the support member installed top hook.
@ The safety factor of the support member installed supporting chain or supporting wire rope must be
plenty for supporting Air hoists and for the rated load of Air hoists.
®Adjust supporting wire rope to keep the falling distance of Air hoists within 100mm in case Air
hoists fall down.
@ Case1: Using supporting wire rope
(EHL-1TW cannot be applied supporting wire rope. It can be applied only supporting chain. )
• Let supporting wire rope through Cap screw (132) attached to Casing(1) and the connecting part.
• Use more than 2 wire clips for connecting wire rope ~LLL
• Use forging wire clips for connecting wire rope.
===:-
..::=:=:
• Refer to Fig.2 shows the mounting distance of wire clip.
(r- "\\
• Process the end of supporting wire rope to prevent it from untwist. ~
!J
· Bend up the tip of Split pin (134) completely. Split pin (134) is not
Dimension of Lis 6-7 times bent completely at the time of dispatching from the manufacturer.
the diameter of wire rope.
@ Case2: Using supporting chain Fig.2
• Remove Cap screw(132), let supporting chain through supporting hanger and assemble Cap
,
.
screw(132) again.
• After fix Hex. slotted nut(133) temporally by hand, place Hex. slotted nut (133) back to fit the slot
of Hex. slotted nut (133) to the hole of Cap screw(132).
• Insert Split pin (134) into the hole of Cap screw(132), and bend up the tip of Split pin (134)
Note: Never use bended split pin again. Replace itwith new one when remove bended split pin.
@
Refer to Table.1 for choosing supporting wire rope, chain, and connecting parts.
suPPorting hunger suPPorting hunger
couPling
caP screw(132l
suPPorting cnaln
couPling
suPPorting wire roPe
. Hex. slotted nut(133l
YHM000764
Fig.3 example of using supporting wire rope FigA example of using supporting chain
- 5 -

Wire rope Wire rope Chain sling Working load of
Model
(j>
9.0 mm (6x24)
(j>
10.0 mm (6x24) Diameter 10.0 mm connecting part
Breaking load Breaking load Breaking load
37.1kN or more 45.8kN or more 125kN or more t
EHL-05TS
00 0
1.0
EHL-1JW x x
0
2.0
Table 1 Specification of supporting wire rope and supporting chain sling.
Incasesupportinghangeris not used,bend Splitpin(134)bothsidecompletelyordismountCap screw(132).
3. Before Air Connection
• Check sufficient air can be supplied to the operating area of the hoist.
Compare the air supply from the compressor to the air consumption of the hoist
(See Chapter IT "Specifications").
For a pipe of excessively small diameter or of great length, the pressure drop can become large
enough to prevent the specified performance.
• Use an air hose whose inside diameter is at least 12.5 mm
(1/2
in.).
• Before connecting the air hose or pipe to the hoist, be sure to flush out or blowout with air to prevent
the invasion of foreign matter (dust, etc.) into Air motor.
• Compressed air supplied to the hoist should be free from moisture or foreign matter.
Install an air filter to eliminate them from air supply.
• The hoist is designed to operate within a working pressure range of 0.4 - 0.6 MPa { 4 - 6
kgf/cm2}.
Keep the working pressure no greater than 0.6 MPa.
If necessary, use an air regulator for reducing air pressure.
• Install a lubricator to feed lubricant to Air motor. See Chapter IX "1. Lubrication".
(Do not operate the hoist without lubricant.)
• Connect the air filter, regulator and lubricator as close to the hoist as possible .
• When the air hose is connected to the hoist, pour about 10 drops of lubricant into the connecting port
of the hoist. (See Chapter IX "1.(6) Recommended Lubricants".)
• Install a dump valve (drain valve) at the lowest point in the piping.
'--6 -

V.
Checks after Installation and Test Run
1. Load Chain
• In case of more than one chain fall, Bottom hook may sometimes be rotated between two chain falls.
This causes Load chain to be twisted (See Fig. 5)..
Before operation, check for and correct any twisting of Load chain.
A
WARNING
Using the hoist when the Load chain is twisted could result in damage to the hoist or failure of the
Load chain, causing personal injury or death. Besure the Load chain is in the correct position.
WeldS on IInks
e n o u
I d
be r o o a
t
e o
on the same side.
APPearance of Load chain
that has been twisted. APPearance Of Load c~aln
that has not been twisted.
Fig.5
• Check the welds on Load chain are faced
away from the center of Chain wheel
(See Fig. 6).
Chain wheel
Weld ~hould face awaY
from Chain wheel.
Fig.6
2. HOisting Operation
At the initial operation, repeat up/down operations several times at low speed, then go
to the full-speed operation. Adjust the speed by controlling the pulling force on Pull rope
(for Pendant control switch, adjust the pushing force on buttons).
At this point, check the lubricator is feeding lubricant to Air motor.
(See Chapter IX "1. Lubrication".)
• Pull Rope Type
Pull down Red grip (marked
i)
of Control handle. If Hook goes down, Control chain is incorrectly
attached to Control lever, hence Control chain must be attached to the other side of Control lever,
and checked for correct operation again.
• Pendant Control Type
Push the button
i
on the push button switch panel.
If Hook goes down, the hose is incorrectly connected to the cylinder.
Reverse the connection to the cylinder, and check for correct operation.
- 7 -

3. HOisting and Lowering Limit Switches
After checking Control handle or Pendant control for correct operation, slowly lift Load hook (Bottom
hook) to the upper limit.
At this point, Control lever is pushed up by Load hook so that the hoist is stopped automatically.
Next, slowly lower Load hook to the lower limit.
Control lever is lifted up by Load chain so that the hoist is stopped automatically.
Ensure these operations are carefully carried out (See Fig. 7).
Load hook
c=\o
Contro I Iever
P I
ate
SPring Control lever Is lifted
uP bY
Load chain and the holst stoPs.
Fig.?
4. Load Test
• Lift the rated load a few inches off the floor and check ability of braking system to stop and hold the
load without excessive drift.
• In case of using the hoist with the trolley, traverse the trolley over the entire length of I-beam with the
rated load suspended a few inches off the floor.
Check the condition of I-beam and the length of the air hose.
• Lift 125
%
of the rated load and check the operation.
This test should be performed for the safety check concerning the hoist, I-beam, etc.
- 8 -

VI. OPERAION - Proper Operation and Caution
A
CAUTION: Only allow qualified people to operate the hoist.
1. Never exceed the rated load of the hoist.
• Never lift a load greater than the rated load.
*
Otherwise, the hoist may be damaged or the suspended load may drop, causing serious danger.
2. Before operating the hoist, check the condition of Load chain.
SeeChapter V "1. Load Chain" and
Chapter IX "2.(2) Inspection of Load Chain and Service Limit".
• Never operate the hoist if Load chain
is twisted, kinked, damaged or worn.
*
Otherwise, the hoist may be damaged or the suspended load may
drop, causing serious danger.
• Do not operate the hoist if Load chain is stained or unlubricated.
*
Otherwise, Load chain will wear out,
making the hoist operation dangerous. Never twist
3. Properly hang the slings (suspension fastenings).
Position the slings at the center of the Load hook sadc
• Incorrect positioning of the slings can cause the load tl
Always hang the sling securely to avoid slipping.
• Never use Load chain as a sling.
*
Otherwise, Hook and Load chain
may be damaged or the suspended
load may drop, causing serious danger.
• Discard Hook if stretched or damaged.
Do not attempt to repair it,
just replace it with a new Hook.
When Hook latch is damaged or
malfunctioning, do not use.
*
Otherwise, the sling may slip from
Hook or the suspended load may drop.
• Use the appropriate sling according to
the weight and shape of the load.
~M~mu~
Correct use
Incorrect use
Never use Load
chain as a sling
I
- 9 -

4. Move the hoist over the loads' center of gravity before lifting.
o
Do not pull a load at an angle.
*
Otherwise, the load may slip on the floor or swing when lifted, causing serious danger.
In addition, the hoist may possibly be damaged.
5. When starting to lift, stop hoist once as Load chain becomes tensioned.
Carefully take up the slackened Load chain,
Thereby, lift-off shock can be reduced, while preventing the hoist from damage.
o
Stop once and check the condition of the sling.
o
Check the balance of the load by slightly moving or lifting the load.
6. Carefully lift and lower the load without swinging.
o
Do not lift or lower with the load swinging.
Even if there is no load, do not swing Load hook.
*
Otherwise, Load chain may be damaged due to the irregular winding or the suspended load may drop.
o
Be careful Load hook or the suspended load does not touch the structure, etc.
*
Otherwise, the hoist may be damaged or the suspended load may drop due to abnormal shock.
7. Stop lifting or lowering before Upper or Lower limit switches are activated.
o
Never use Upper and Lower limit switches as a means of stopping hoist.
*
Otherwise, Control lever may become worn or deformed, causing failure in an emergency.
8. Employ 1 hoist for hoisting and lowering.
o
Do not lift any single load with 2 or more hoists.
*
The air hoist is different from the electric hoist, hoisting speed varies depending on the weight
of the load, pressure or flow rate of supplied air, etc.
Therefore, 2 hoists can not be operated at the same speed.
When this is done, a dangerous situation will occur, as the load is applied to only one hoist,
creating overloading.
9. Carefully traverse the trolley to prevent the load from swinging.
o
When moving the load with the trolley, do not push Load chain but push the load itself.
Do not pull the load.
o
Do not pull the trolley by pulling Control chain (Pull rope type) or Control tube (Pendant control type).
*
Otherwise, an operating mistake may occur and the chain or the tube may be damaged.
o
When traversing the trolley, be careful that the trolley does not collide with the I-beam stopper.
*
Otherwise, excessive shock may cause the suspended load to drop or the hoist to be damaged.
- 10 -

10. Correctly operate the hoist.
• Do not reverse the hoist suddenly.
When reversing, stop lifting or lowering once.
Do not start suddenly, do not stop suddenly.
*
Otherwise, shock may occur and the hoist may be damaged,
• Smooth operation for lifting and lowering is very important.
• Never lock Pull rope or the push button switches.
*
Otherwise, the hoist can not be operated in an
emergency, causing serious danger.
• After operation, do not let go of Pull rope or
the push button switch panel until it has been
centered below the hoist.
*
Otherwise, the Pull rope or panel may swing and hit
something, causing an operating mistake or damage.
Never
lock
I
11. Be sure to unload all loads on the floor.
• Never leave a load suspended.
*
This is a serious hazard for any person near the suspended load.
12. Carefully choose a safe position for operation and check the surroundings.
• Never walk under a suspended load or in the traveling area of the load.
*
Serious danger if the load drops.
• Never stand on a suspended load.
*
The suspended load is very unstable, causing a person or the load to drop.
• Never carry a load over people.
*
Serious danger if the load drops.
• Before operating the hoist, be sure to check that no one is in the travelling area of the load.
- 11 -

VH. Checks before Operation (At the beginning of each shift)
Besureto executethe following checksatthe beginningof eachshift.
Ifthere is anything unusual noticed,do not usethe hoist until the problem hasbeencorrected.
Neveroperatethe hoist if damagedor malfunctioning.
At leastthe following itemsshould bechecked:
1.Check before Start up
(1) Check Load chain is not twisted, kinked, damaged, or worn.
Wear or damage on the chain can not be detected by casual or formal observation.
SeeChapterV
"1.
LoadChain"andChapterIX "2.(2)Inspectionof LoadChainandServiceLimit".
(2) Keep Load chain clean and well lubricated.
(3) Check Load hook is not stretched or damaged
and Hook latch is in the normal position.
(4) Check Chain wheel in Hook blo,ckrotates smoothly (See Fig. 8).
(5) Check the support bearing of Load hook is not
damaged, and swivels easily and smoothly.
(6) Check the trolley wheels track the rails properly
and the wheels and rails are not worn.
(7) Check the lifting sling (suspension fastening)
is not damaged or worn.
2. Check by Idling Operation
(1) Check Pull rope or the push button switches can be easily operated and
the up/down operations are correct as indicated .
• Check hoisting speed can be changed from low to high speed by controlling the pulling
Fig.S
force on Pull rope or the pushing force on the push button switches.
(2) Check Load chain flows freely and smoothly into and out of the Chain wheel and there is no
noise indicative of binding or other malfunctions.
(3) Check Upper and Lower limit switches function correctly.
SeeChapter V "3. Hoisting andLowering Limit Switches" .
(4) Check the hoist is not abnormally noisy or vibrating.
3. Check by Load Operation
(1) Lift the rated or near the rated load a few inches off the floor and check ability of braking system to stop
and hold the load without excessive drift.
(2) Check Load chain flows freely and smoothly into and out of the Chain wheel and there is no audible
clicking or other evidence of binding or malfunction.
(3) Check the hoist is not abnormally noisy or vibrating.
- 12 -

VI. Periodic Inspections
Be sure to periodically inspect the hoist for safe operation.
• Before inspection, shut off the air supply completely.
• Preparing a special table for inspection is recommended.
• Monthly Inspection
Inspect the hoist at least once a month.
Correct and repair any problems which are detected.
• Required interval for inspection depends on the operating environment, operating frequency,
and loading conditions of the hoist.
Therefore, make the inspection interval shorter according to your operating condition.
• For inspection items and methods, see Chapter IX "2. Inspection" .
• Annual Inspection - Disassembly is required
Completely disassemble the hoist at least once a year for inspection and maintenance.
Correct and repair any problems which are detected.
• Inspect the hoist yearly or every 1000 hours of operation, whicheyer is shorter.
If daily operation time exceeds 5 hours, inspect the hoist every 6 months.
However, the required interval for inspection also depends on the operating environment and loading
conditions of the hoist.
Therefore, make the inspection interval shorter according to your operating condition.
• For inspection items and methods, see Chapter IX "2. Inspection".
• Service Limit of Parts
If any part is found to be worn beyond its service limit in the monthly, annual,
or other inspections, never reuse it.
IX.
Maintenance and Inspection
1. Lubrication
(1) Air motor
• To prevent Air m~tor from dry operation, continuously lubricate using a lubricator.
• Adjust the frequency and volume of lubrication at the lubricator so that one drop of lubricant might fall
off from the nozzle when the hoist works with no load at one meter lift 3 times.
• Periodically check the oil level in the lubricator, and replenish if necessary.
Do not allow the oil level to go below the indicated line.
• Periodically remove drain water deposited in the air filter bowl.
(2) Reduction Gear
• The reduction gear has been greased before shipment.
• Replace grease in the reduction gear when the hoist is disassembled for maintenance or inspection.
Daily lubrication is not required.
• Required quantity of grease is 150 cm
3
(150 mL).
Lubricate 50 cm
3
(50 mL) respectively in each of the two gear stages, and 50 cm
3
(50 mL)
in the space between Internal gear and Casing.
- 13

(3) Load Chain
• Always keep Load chain and the chain anchor pin clean and well lubricated.
• Before installation, load test or initial operation, be sure to lubricate Load chain.
Even if operating with no load, lubricate Load chain.
• Periodically coat Load chain with lubricant to minimize wear on Load chain or Chain wheel.
Poorly lubricated Load chains will wear out quickly, making the hoist operation dangerous.
• Determine the lubrication interval according to the operating frequency and the loading conditions.
• Before reapplying lubricant, completely clean Load chain.
Lubricate in the no-load condition.
• Use heavy gear oil, for example, "Shell Omala Oil S2 G 320", etc.
(4) Hook Block, Load Hook
• Each time the hoist is disassembled for inspection, maintenance, or replacement of Load chain,
lubricate the support bearing (Steel ball) of Load hook.
(5) Brake Part
• Each time the hoist is disassembled for inspection, maintenance or repair, completely clean the inner
mechanism and reapply lubricant.
For lubricating position, see Chapter lX "2.(3) Inspection of Brake and Service Limit".
• For lubricant, use lithium saponified silicon grease corresponding to the
No.2 class of NLGI (National Lubrication Grease Institute).
For example, "Molykote (R) 33M", etc.
(6) Recommended Lubricants
The following table shows the recommended lubricants.
Always use the same type or equivalents recommended by the oil manufacturer.
Air motor Reduction gear
Manufacturer Other bearing
(Lubricator) (I ncl. bearing of reductiongear)
Exxon Mobil Mobil DTE Light Mobilux EPO Mobilux EP2
COSMO NEW COSMO GREASE DYNAMAX EP COSMO GREASE
COSMO OIL MIGHTY SUPER 32 No.O DYNAMAX EP No.2
JX Nippon Oil
&
EPNOC GREASE EPNOC GREASE
FBK OIL R032
Energy AP (N)O AP (N)2
Shell Tellus S2 M32 Alvania EP Grease RO Alvania EP Grease 2
- 14 -

2. Inspection
A
CAUTION:
• Be sure to shut off the air supply before inspection.
• Always disassemble the hoist on the floor.
• Always use genuine parts for replacement.
• Always employ qualified or well trained personnel for inspection and maintenance.
(1)
Inspection of Hook and Service Limit
• If any of the following conditions apply to the inspected Hook, never reuse, always replace with
a new Hook.
Never repair Hook.
• Hook opening is visibly stretched, or opening dimension is different from that specified.
• Hook is deformed or cracked.
Carefully check for any bends or cracks on the hook shank, and wear or indents on the raceway
surface of Steel ball.
• Wear on the hook saddle, where the lifting sling (suspension fastening) rests, exceeds,
the service limit.
• Hook latch is damaged or malfunctioning .
• Major Dimensions of Hook and Wear Limit
For hook opening dimensions A and B, measure Hook before use as a reference for later inspections .
. (rnrn)
Standard C
dimension
Standard
A B Service limit
Model dimension
Top hook 25.5 23 22 20.7
EHL-05TS Bottom hook 25.5 23 22 20.7
Top hook 28.0 25 26 24.0
EHL-HW Bottom hook 28.0 25 26 24.0
- 15 -

(2) Inspection of Load Chain and Service Limit
Clean Load chain using solvent so any damage can be located.
The inspection should be carried out on each link of Load chain.
Never use acidic solvents.
• Never use Load chain having anyone of the following defects.
Replace it with a new Load chain.
Never repair Load chain.
• Flaws or cracks.
In particular, carefully check the weld on the links and end links which are connected to
the main body or Load hook (Hook holder).
• Deformed or corroded.
• Stretch exceeding the service limit.
• Reduction of diameter exceeding the service limit.
• Limit of Stretch and Wear
For dimensions P and d, measure the entire working length of Load chain.
Pay special attention to the links which engage Chain wheel when the load is at the upper or
lower limit.
If the hoist is always used for the same lifting distance, wear on these links will be about two to
four times that of other links.
For dimension P, measure the length of 5 links while tensing Load chain as shown in the
figure below.
PC511nkS)
(mm)
Standard Service
dimension Limit
d 6.3 5.9
P95.5 97.4
• When any number of links in the working length reaches or exceeds the service limit,
replace the entire chain.
• Replacement Parts and Maintenance after Inspection
• Never use a new Load chain with a worn Chain wheel.
Replace Load chain and Chain wheel at the same time.
• See Chapter X
I
"Replacement of Load Chain".
• Always use a manufacturer's genuine replacement chain.
Never use any other chain.
• Always coat Load chain with lubricant after inspection or upon replacement.
See Chapter IX "1. Lubrication".
- 16 -
Table of contents
Popular Chain Hoist manuals by other brands

R&M
R&M LOADMATE LM 01 Operator's manual

KITO
KITO HARRINGTON MR2Q Series owner's manual

SmartMetals
SmartMetals 062.7300 Series product manual

Far Tools
Far Tools EP500 Original manual translation

Tractel
Tractel Minifor TR 10 Operating and maintenance instruction

KITO
KITO ER2 Series Disassembly and reassembly guide

EXE RISE
EXE RISE D8 User and service manual

OZ Lifting Products
OZ Lifting Products OZ500EC Operator's manual

Eller
Eller PH3 Series operating instructions

Sievert Crane & Hoist
Sievert Crane & Hoist CM BANDIT Operating, Maintenance & Parts Manual

REMA
REMA Hoistman manual

Harrington
Harrington CF4 owner's manual