Enel X Waybox Pro User manual

Waybox Pro
Waybox Plus
User Manual
ENGLISH

In this document
1. Notes 3
2. Geing to know your Waybox 4
3. Waybox Modes 5
3.1 Connect & Charge Mode
3.2 Unlock To Charge Mode
4. Geing Online 6
4.1 Geing Waybox online using cellular connectivity
4.2 Association with a second account using Cellular connectivity
4.3 Geing Waybox online using Wi-Fi connectivity
4.4 Add a Waybox already connected to Wi-Fi
5. Charging your vehicle 33
5.1 Connect & Charge Mode
5.2 Unlock To Charge Mode
6. Charging history 37
7. Seings 38
8. LED Indicator 40
9. The colour of sustainability 41

3
REV. 1 11/22
1. Notes
Before using this product make sure to read and understand fully the user manual and the
relevant technical documentation inside the packaging.
You can contact your distributor or the manufacturer for any question regarding the use
and safety of this product.
The user will be directly and exclusively responsible for any use of the product that does
not comply with the methods of use and safety requirements indicated in the manual or
the proper relevant documentation.
The information contained in the manual and all related rights are owned by Enel X Way.
Any use not strictly necessary for operating the product, or not otherwise authorized, is
prohibited.
Make sure that this is the latest revision of the manual by checking the Suppo Hub link
that can be found either on the Welcome leer inside the packaging or at this address:
hps://suppo-emobility.enelx.com/

4
REV. 1 11/22
2. Geing to know your Waybox
Waybox is the innovative home charger that makes your charging experience sma, reliable,
and cost-eective.
This manual will guide you through the main features of your Waybox, so you can get the
most out of your charging experience.
WAYBOX PRO/PLUS CABLE VERSION:
1Cable
2RFID Reader
3LED Indicator
4Connector
1RFID Reader
2LED Indicator
3Socket
WAYBOX PRO/PLUS SOCKET VERSION:
1
2
4
3
1
3
2

5
REV. 1 11/22
3. Waybox Modes
WARNING: Before using your Waybx, we encourae you to follow all the steps to connect
it to your Enel X Way account (as outlined in the Geing Online section). This will allow you
to remotely schedule and sta charging sessions, congure the power level, receive live
notications, get remote technical suppo, keep track of charging sessions and more.
Waybox allows you to charge in two modes: Connect & Charge or Unlock To Charge.
3.1 Connect & Charge Mode
NOTE: This mode is suggested when the Waybox is installed in areas with reserved access
for the user.
This mode does not require any authentication before staing and ending a charging
session. However, this mode does not allow for sma charging features (e.g. delayed and
scheduled charging).
>To sta charging, simply plug in your vehicle.
>To stop charging, send a stop command (from the Enel X Way App or from the vehicle)
and then unplug your vehicle.
Waybox uses the Connect & Charge Mode by default.
NOTE: Connect & Charge mode is the only mode available to charge your vehicle if you do
not sync your Waybox with your Enel X Way account.
3.2 Unlock To Charge Mode
NOTE: This mode is recommended when the charger is installed in areas with public access
and when using the sma charging features. With scheduled charging, you can set up a
recurring charging schedule, choosing the duration and days of the week. This feature is
accessible through the Enel X Way App, and from the main screen of your Waybox. For
more information on the feature and what you can do with the Enel X Way App, please refer
to the app’s User Instructions and FAQs, available on our Suppo Hub.
In Unlock To Charge Mode, the Waybox only charges when it recognizes an authorized user.
This means that charging sessions are staed and stopped using either an authorized Enel
X Way App account or a RFID card.
Note: This mode is suggested when the Waybox is installed in areas with reserved
access for the user.
Note: This mode is suggested when the Waybox is installed in areas with reserved
access for the user.
Note: This mode is recommended when the charger is installed in areas with public
access and when using the sma charging features. With scheduled charging, you can
set up a recurring charging schedule, choosing the duration and days of the week. This
feature is accessible through the Enel X Way App, and from the main screen of your
Waybox. For more information on the feature and what you can do with the Enel X Way
App, please refer to the app’s Use Instructions and FAQs, available on our Suppo Hub.
Warning: Before using your Waybox, we encourage you to follow all the steps to
connect it to your Enel X Way account (as outlined in the Geing Online section). This
will allow you to remotely schedule and sta charging sessions, congure the power
level, receive live notications, get remote technical suppo, keep track of charging
sessions and more.
6
REV. 1 11/22
4. Geing Online
Your Waybox can be connected to Enel X Way sma charging platform through either a
Wi-Fi or cellular internet connection. This allows you to control your Waybox anytime, from
anywhere, using the Enel X Way App.
The Enel X Way App is available on the iOS App Store and Google Play Store.
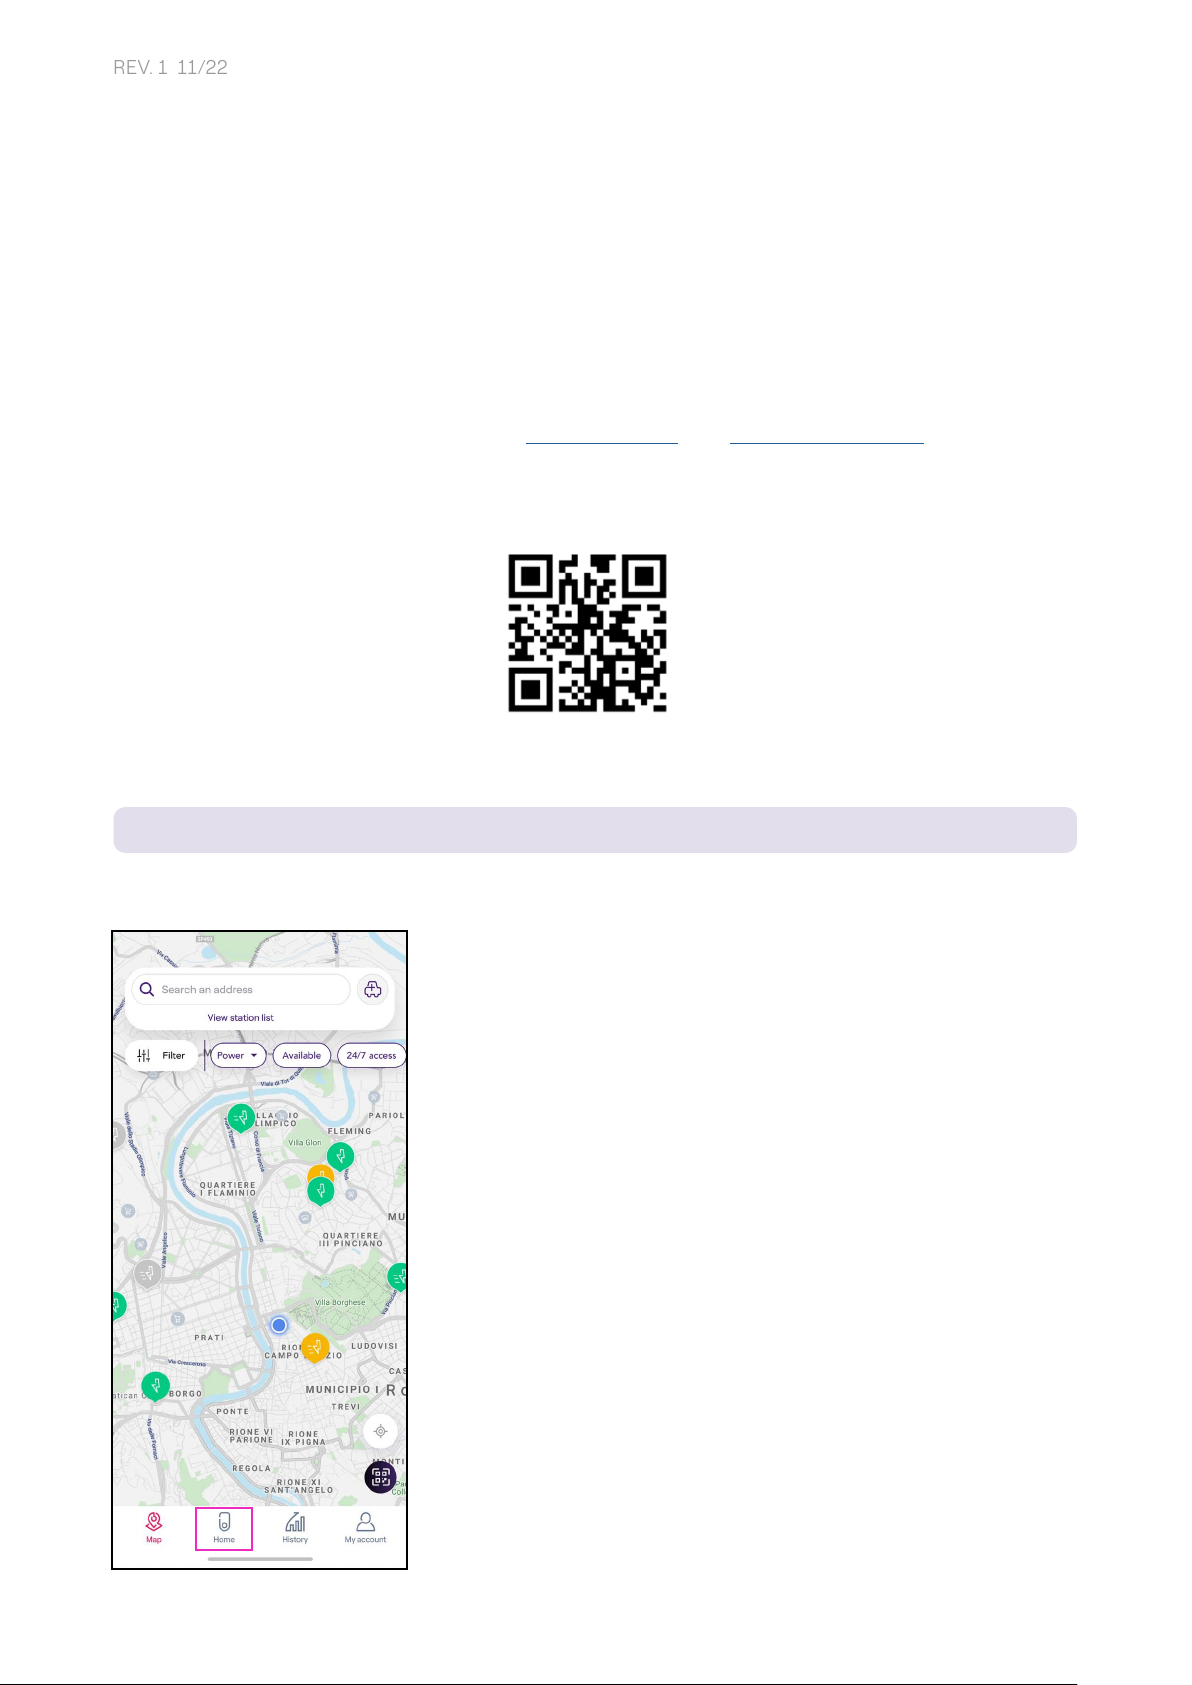
Scan the QR code below to download the app on your smaphone.
4.1 Geing Waybox online using cellular connectivity
NOTE: this conguration only applies to “Cellular” products.
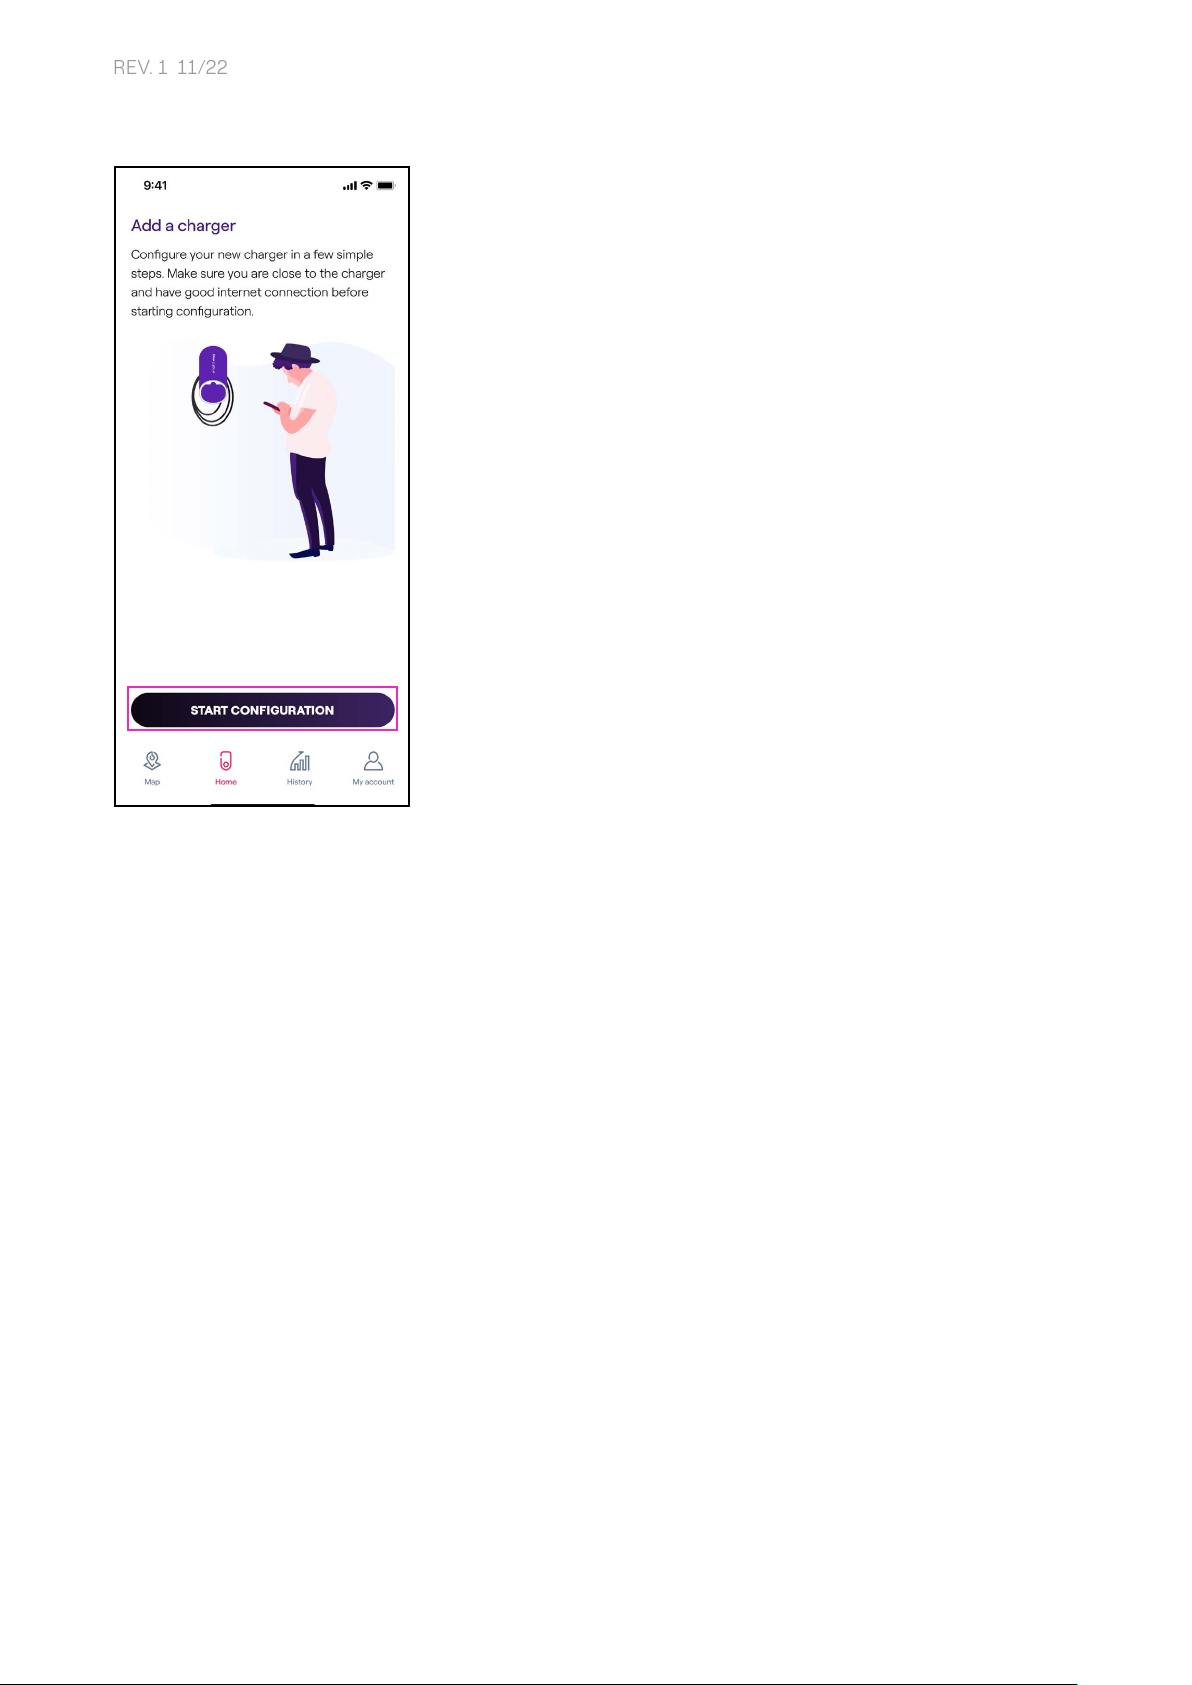
1. After launching the app, on the boom of the of the main page, select Home
Note: This conguration only applies to “Cellular” products

7
REV. 1 11/22
2. Select START CONFIGURATION.

8
REV. 1 11/22
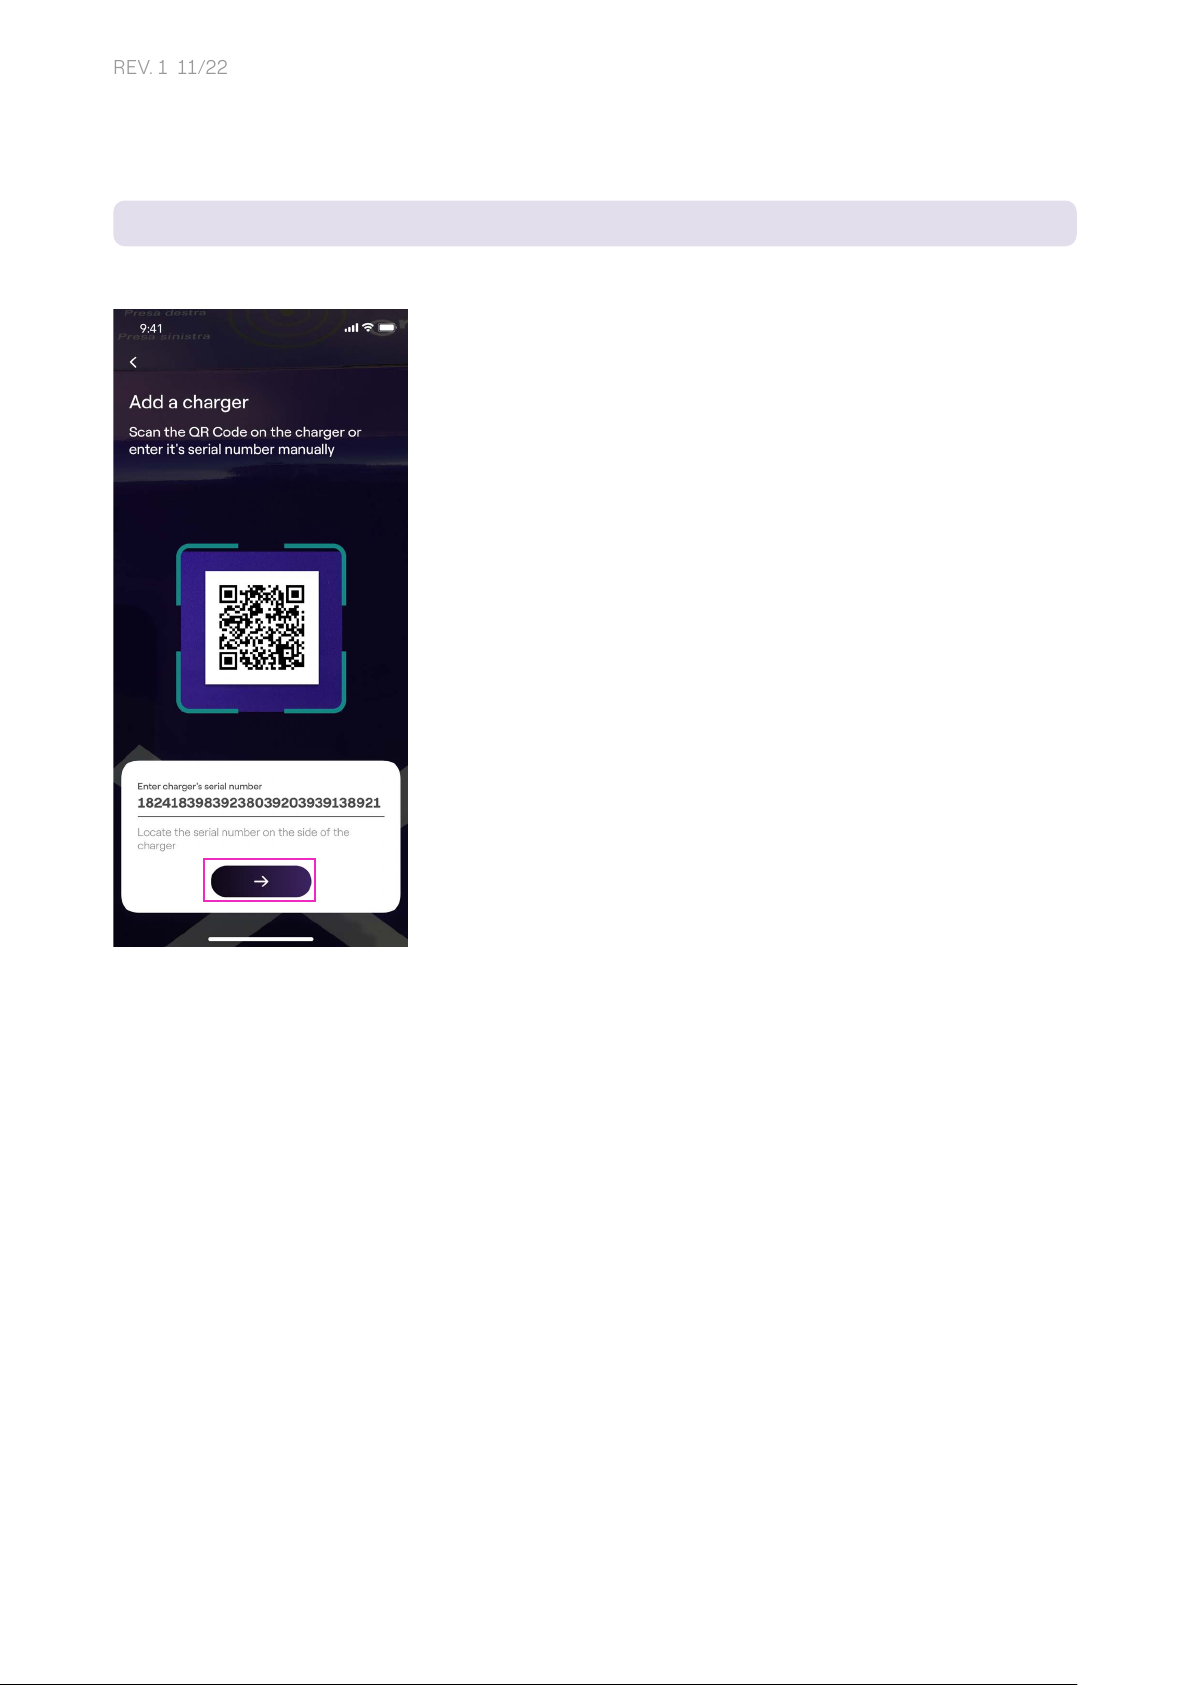
3. Scan or inse the serial number of your Enel X Way Waybox™. Once done, click on the
arrow to proceed.
NOTE: The serial number is on the label on the right side of your Waybox.
Note: The serial number is on the label on the right side of your Enel X Way Waybox™.
9
REV. 1 11/22
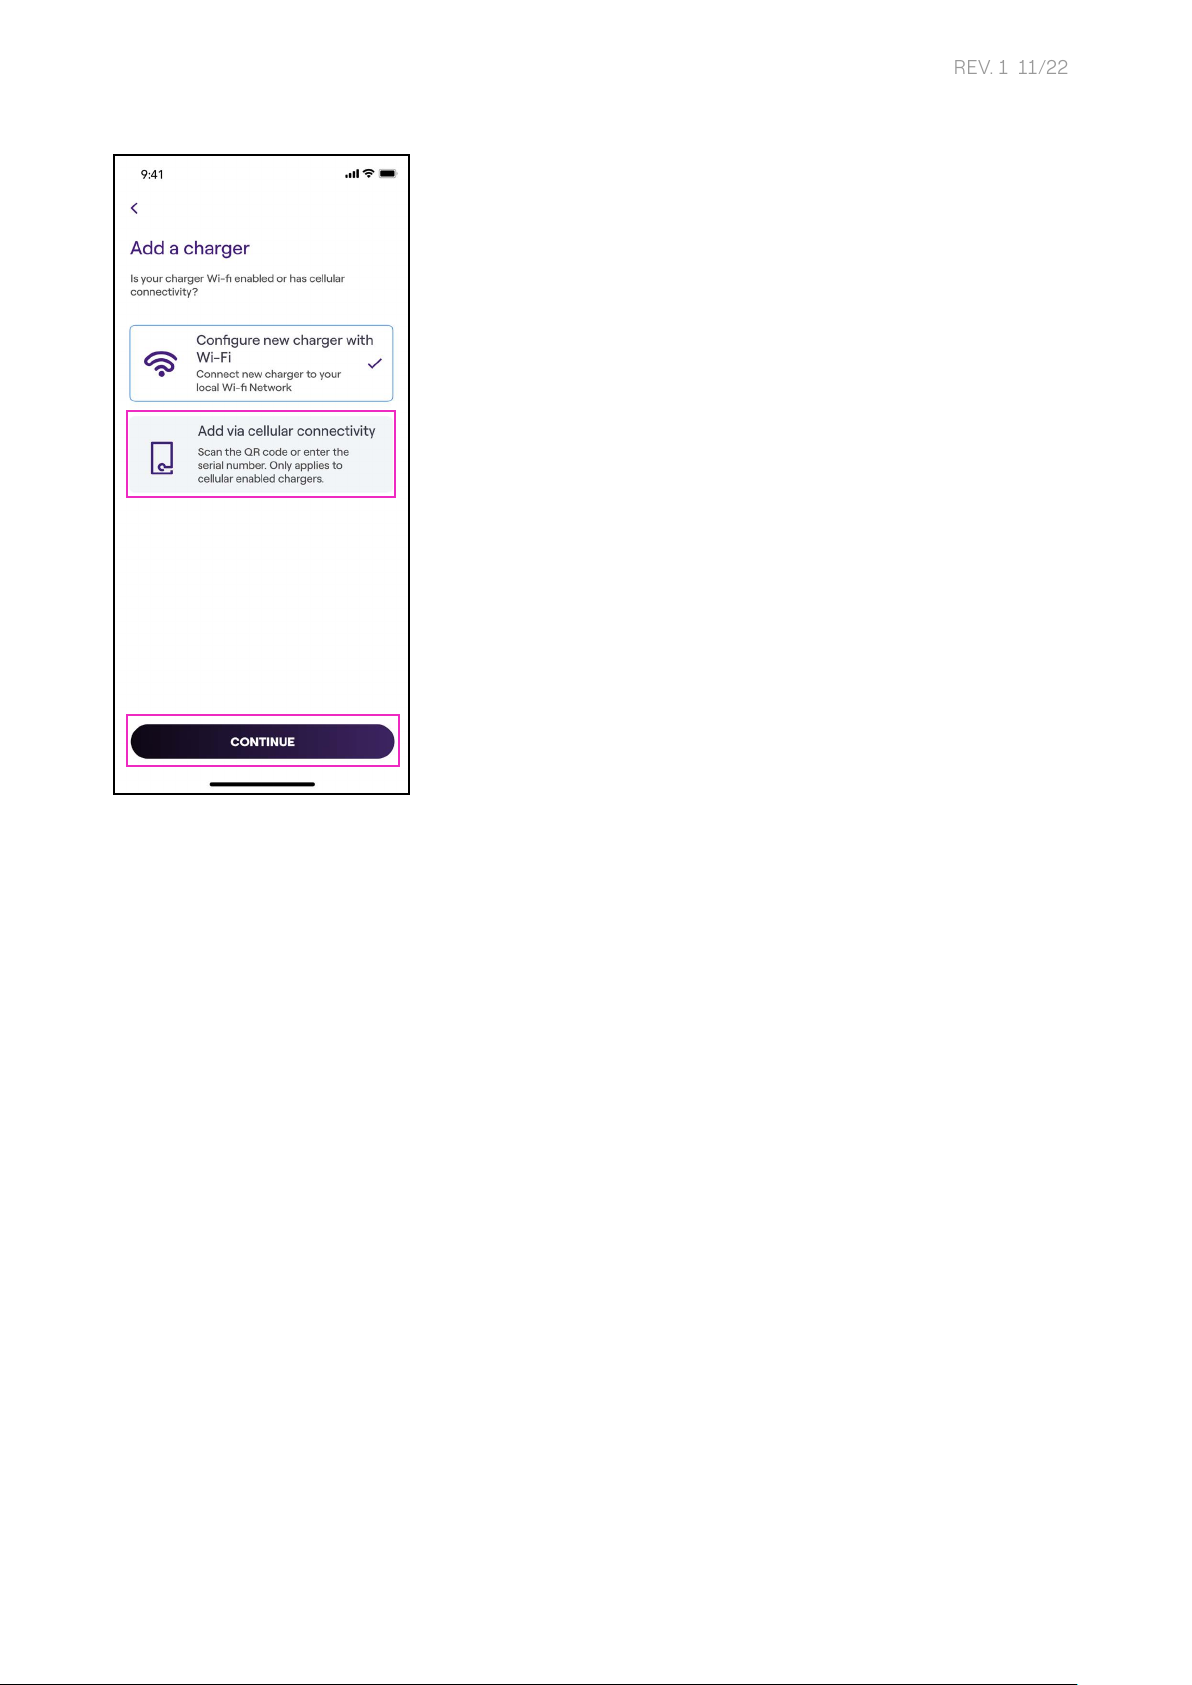
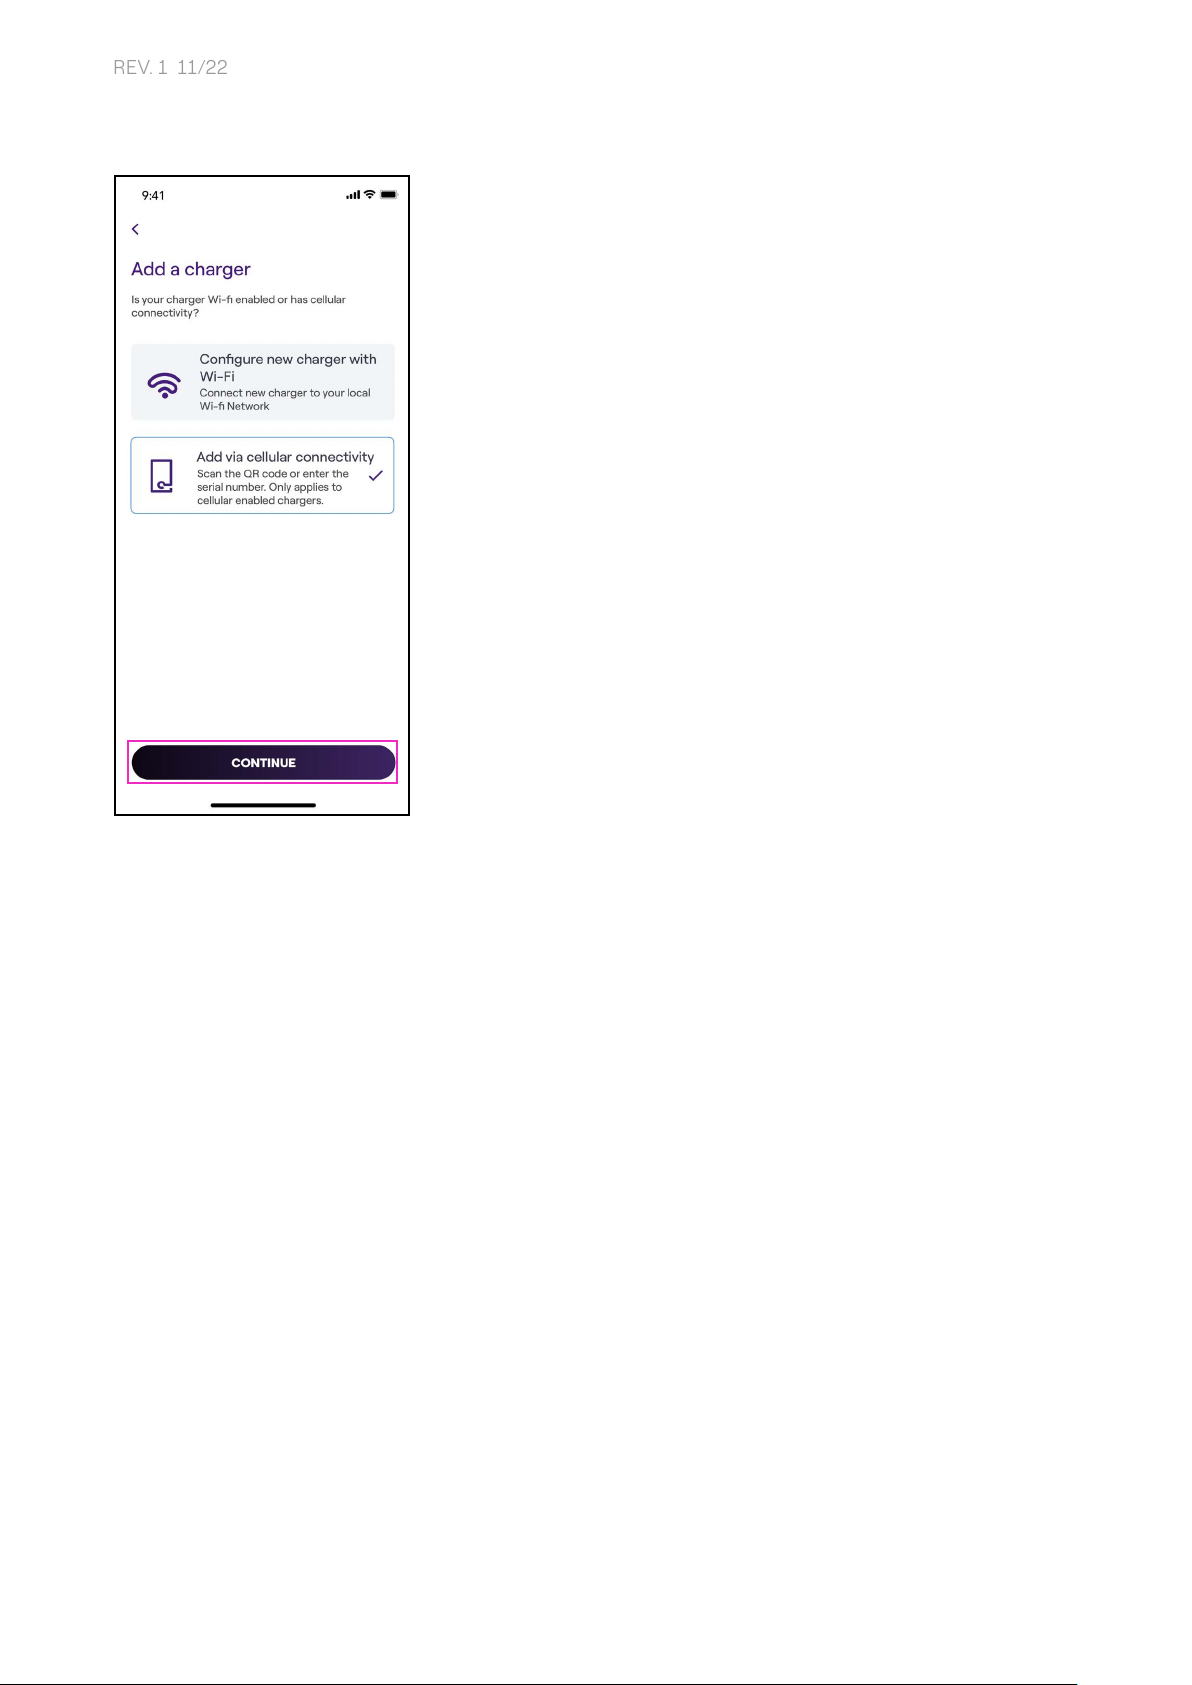
4. Select Add via cellular connectivity and click CONTINUE to proceed.

10
REV. 1 11/22
5. In the conguration screen, follow the steps below, then click on the arrow to proceed.
>Enter a unique name for your Waybox.
>Check the physical address of your Waybox (modify the address if it is not correct).
>Select the default power level of your Waybox.
Note: The model and maximum power information are populated automatically and
cannot be changed.
Note: The default power (in kW) denes the maximum power that the charger tries to
supply to the car. Always remember that your car is able to limit or reduce the charging
power.
Note valid for Waybox Pro, Pro Cellular: If a Waymeter enables Load Optimization Pro
functionality (available only for Waybox Pro, Pro Cellular), the maximum power delivered
by the Waybox will be the lower number between the cap set during the Waymeter’s
installation and the power level selected through Enel X Way App.

11
REV. 1 11/22
6. Select the mode of use of your Waybox, choosing between Connect & Charge or Unlock
To Charge. Then click on the arrow to proceed.
NOTE: For more information on the modes of use, refer to the section Charging your
vehicle.
Note: For more information on the modes of use, refer to the section Charging your
vehicle.
12
REV. 1 11/22
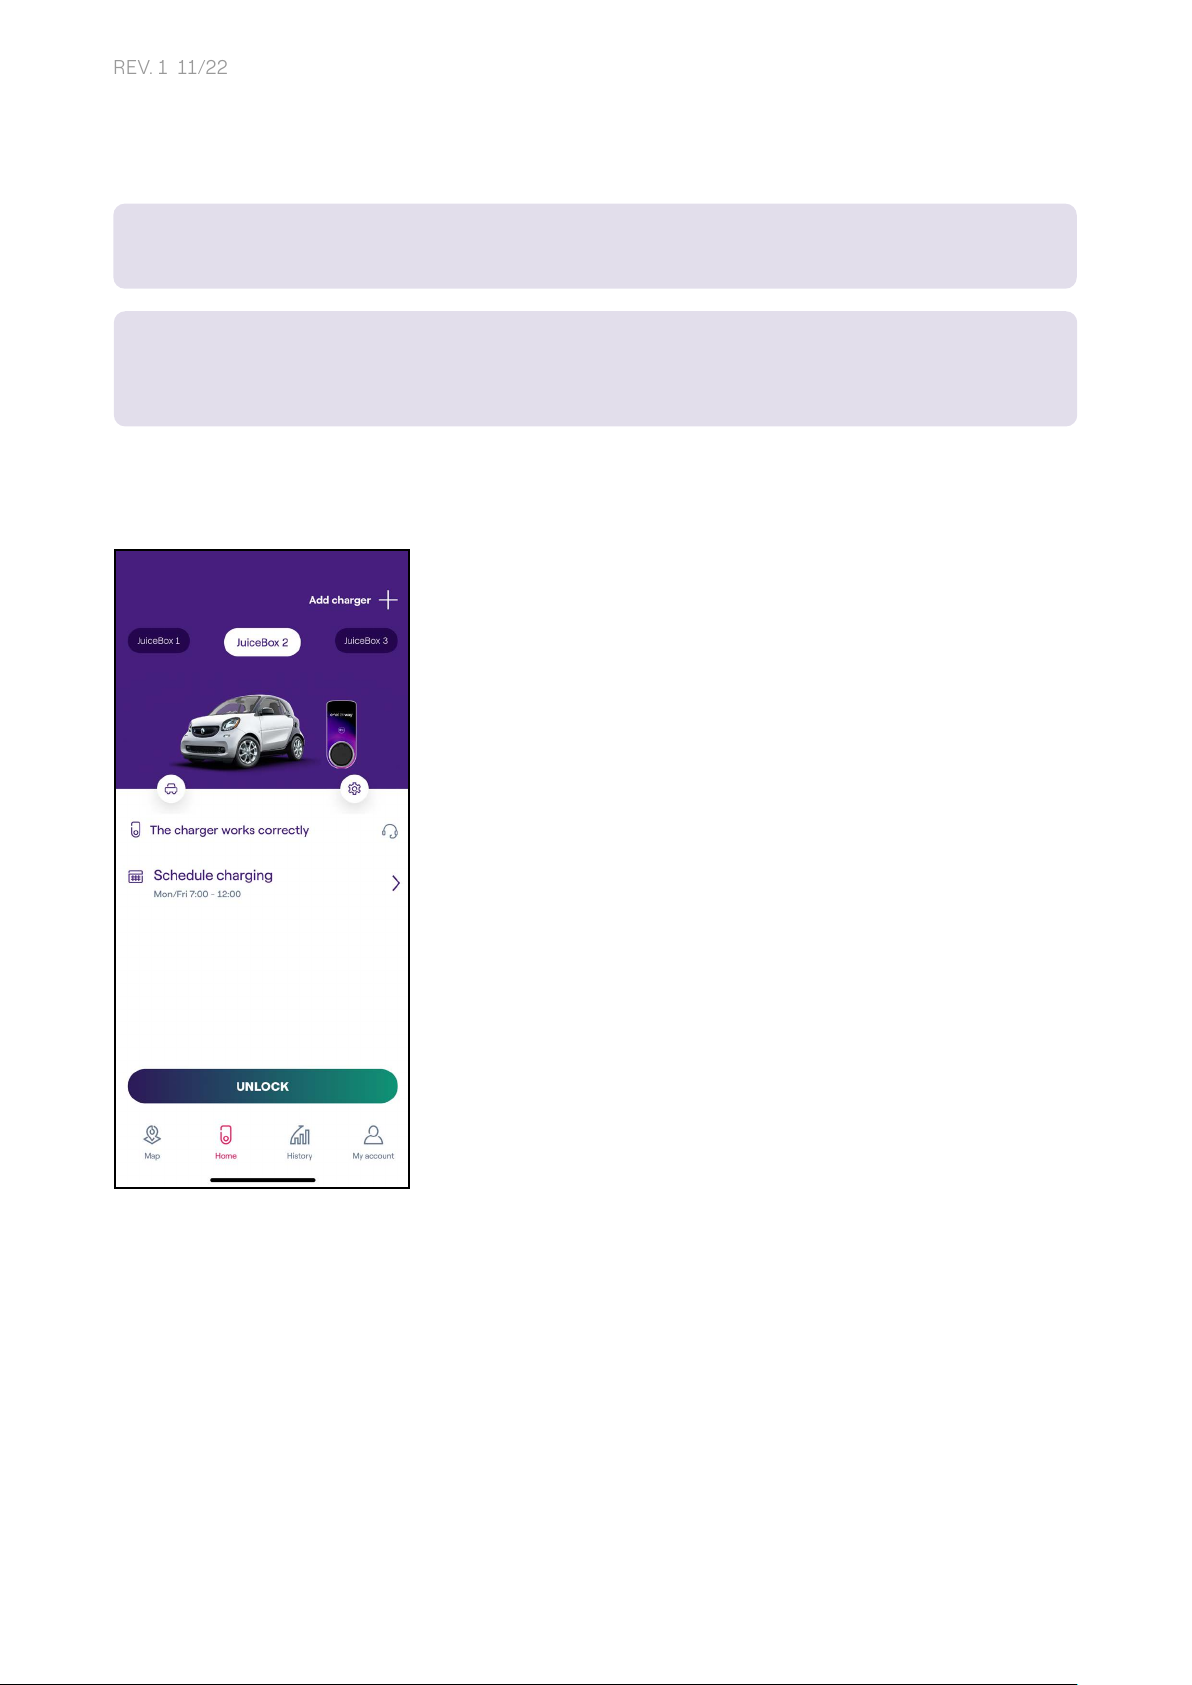
7. If you selected Unlock to Charge, you can also sta your charging session with an RFID
card.
NOTE: You can set up an RFID card with your account at any time. Go to My Account > Enel
X Way Card section and follow the steps on screen.
NOTE: If the Waybox is set in Unlock To Charge and no RFID card is registered, it is still
possible to sta a charging session with a sta command from the Enel X Way App (refer
to the section Charging your vehicle).
8. You did it! The Enel X Way Waybox™ is now online and ready to charge.
Note: You can set up an RFID card with your account at any time. Go to My Account >
Enel X Way Card section and follow the steps on screen.
Note: If the Enel X Way Waybox™ is set in Unlock To Charge and no RFID card is
registered, it is still possible to sta a charging session with a sta command from the
Enel X Way App (refer to the section Charging your vehicle).
13
REV. 1 11/22
4.2 Association with a second account using Cellular
connectivity
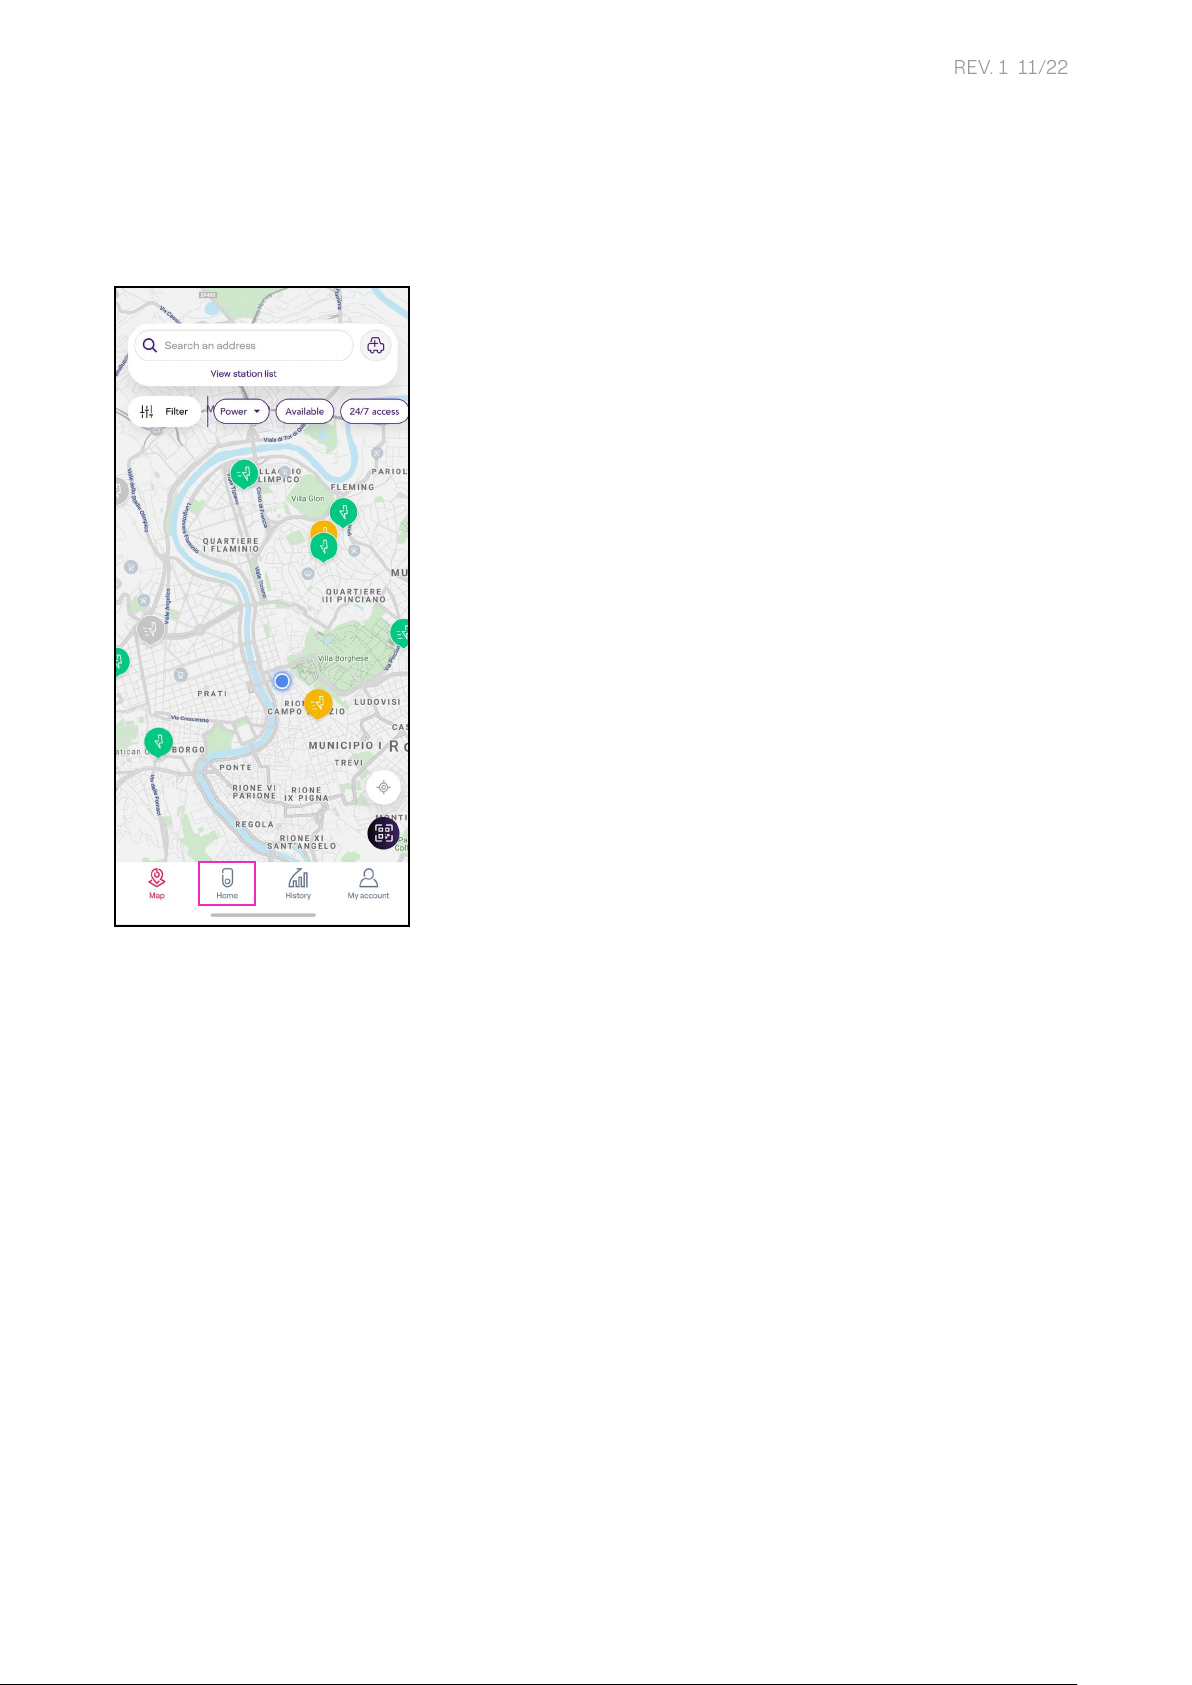
1. After launching the app, on the boom of the main page, select Home.
14
REV. 1 11/22
2. Select START CONFIGURATION.

15
REV. 1 11/22
3. Scan or inse the serial number of your Waybox. Once done, click on the arrow to
proceed.
NOTE: The serial number is on the label on the side of your Waybox.
Note: The serial number is on the label on the side of your Waybox.
16
REV. 1 11/22
4. Select Add via cellular connectivity and click CONTINUE to proceed.

17
REV. 1 11/22
5. Enter the PIN code needed to complete the process. The PIN code should be shared by
the user who rst associated the Waybox to his/her account.
NOTE: The PIN code can be retrieved at any time by a user already associated in the seings
menu of the Waybox, in the section Sharing.
Note: The PIN code can be retrieved at any time by a user already associated in the
seings menu of the Waybox, in the section Sharing.

18
REV. 1 11/22
6. You did it! Your Waybox is now connected to your account.

19
REV. 1 11/22
4.3 Geing Waybox online using Wi-Fi connectivity
1. After launching the app, on the boom of the main page, select Home.
2. Select START CONFIGURATION.
20
REV. 1 11/22
3. Scan or inse the serial number of your Waybox. Once done, click on the arrow to proceed.
NOTE: The serial number is on the label on the side of your Waybox.
Note: The serial number is on the label on the side of your Waybox.
Other manuals for Waybox Pro
1
This manual suits for next models
1
Table of contents
Other Enel X Automobile Accessories manuals


Popular Automobile Accessories manuals by other brands

Chapman Machinery
Chapman Machinery MGF350 Original instructions

Prorack
Prorack K189 Fitting instructions

Cruz
Cruz 933-07 Series Assembly instructions

Metra Electronics
Metra Electronics 95-7504 installation instructions

STO N SHO
STO N SHO SNS 152 Installation procedures

Livoo
Livoo TEA164 instruction manual


Lippert
Lippert RV ENTRY DOOR OEM INSTALLATION MANUAL

Prorack
Prorack PR3206 instructions

Camcar
Camcar 40125 AL Mounting instructions

Omron Automotive Electronics
Omron Automotive Electronics OKA-325R user manual

Mercedes-Benz
Mercedes-Benz Wallbox Home operating manual

Kenwood
Kenwood KCA-RC700A instruction manual