Englefield EVORA 29795A-0 User manual

BATHS | EVORA®
SHOWER OVER BATH
englefield.co.nz
1539391-A02-B May 2023 Page 1
29794A-0
29795A-0
RIGHT HAND
29795A-0
LEFT HAND-
29794A-0
WARNING: The Freestanding bath is very heavy. Please ensure that the floor is
structurally sound and provides adequate support for the bath, water and the user.
A mechanical lifting device is advised when manoeuvring the bath.
NOTE: Check the rough-in and room dimensions to provide adequate available space for
the bath unit. Arrange the location of the drain in advance and ensure that the flooring is
prepared to allow space for the drain. Ensure that the floor is level.
EVORA SHOWER OVER BATH INSTALLATION INSTRUCTIONS
englefield.co.nz
1539391-A02-B
May 2023
Page 2
BEFORE YOU BEGIN:
IMPORTANT: Carefully unpack the bath and check for transit damage and general acceptability
and report any faults immediately to your supplier.
Installers are responsible for damage that occurs during installation and no claims for damages will
be accepted once the bath has been installed.
Before installing the bath, please read these instructions carefully to familiarize yourself with the
required tools, materials, and installation sequences.
After completing the installation, please leave these instructions for the consumer for further
reference and change of ownership.
1. Follow all warnings, cautions and instructions contained in this guide.
2. Warning! Two-person lift.
3. Wear protective footwear when lifting and shifting the bath.
4. Wear safety glasses when drilling.
SAFETY:
ATTENTION:
Timber Support blocks
TOOLS AND MATERIALS REQUIRED:
1. Flow rate into the bath must not exceed 25 litre per minute. Excessive flow rates may lead
to overflowing and leaking.
2. We recommend a drainage test is carried out to ensure the waste pipe work is adequate for
the flow delivered.
3. The waste should be located to allow good access for maintenance or replacement with
minimum disruption. Kohler NZ will not be liable for any cost associated with access
restrictions and subsequent works.
4. Building requirements can vary, local regulations must be checked prior installation.
NOTE:
It is the responsibility of the installer to ensure that the installation complies with council
and local authority by laws.
EVORA SHOWER OVER BATH INSTALLATION INSTRUCTIONS
englefield.co.nz
1539391-A02-B
May 2023
Page 3
BATH INSTALLATION:
Option 1:
Installation with acrylic wall:
Install bath wall as per instructions supplied with the bath wall.
Install bath screen as per instructions supplied with the bath screen.
The floor area must be flat, level, clean, and free of any bumps and protrusions.
Additional protective coverings such as dust sheet should be used to protect the bath from
falling objects during installation and cover the waste opening to prevent loss of small parts
during installation.
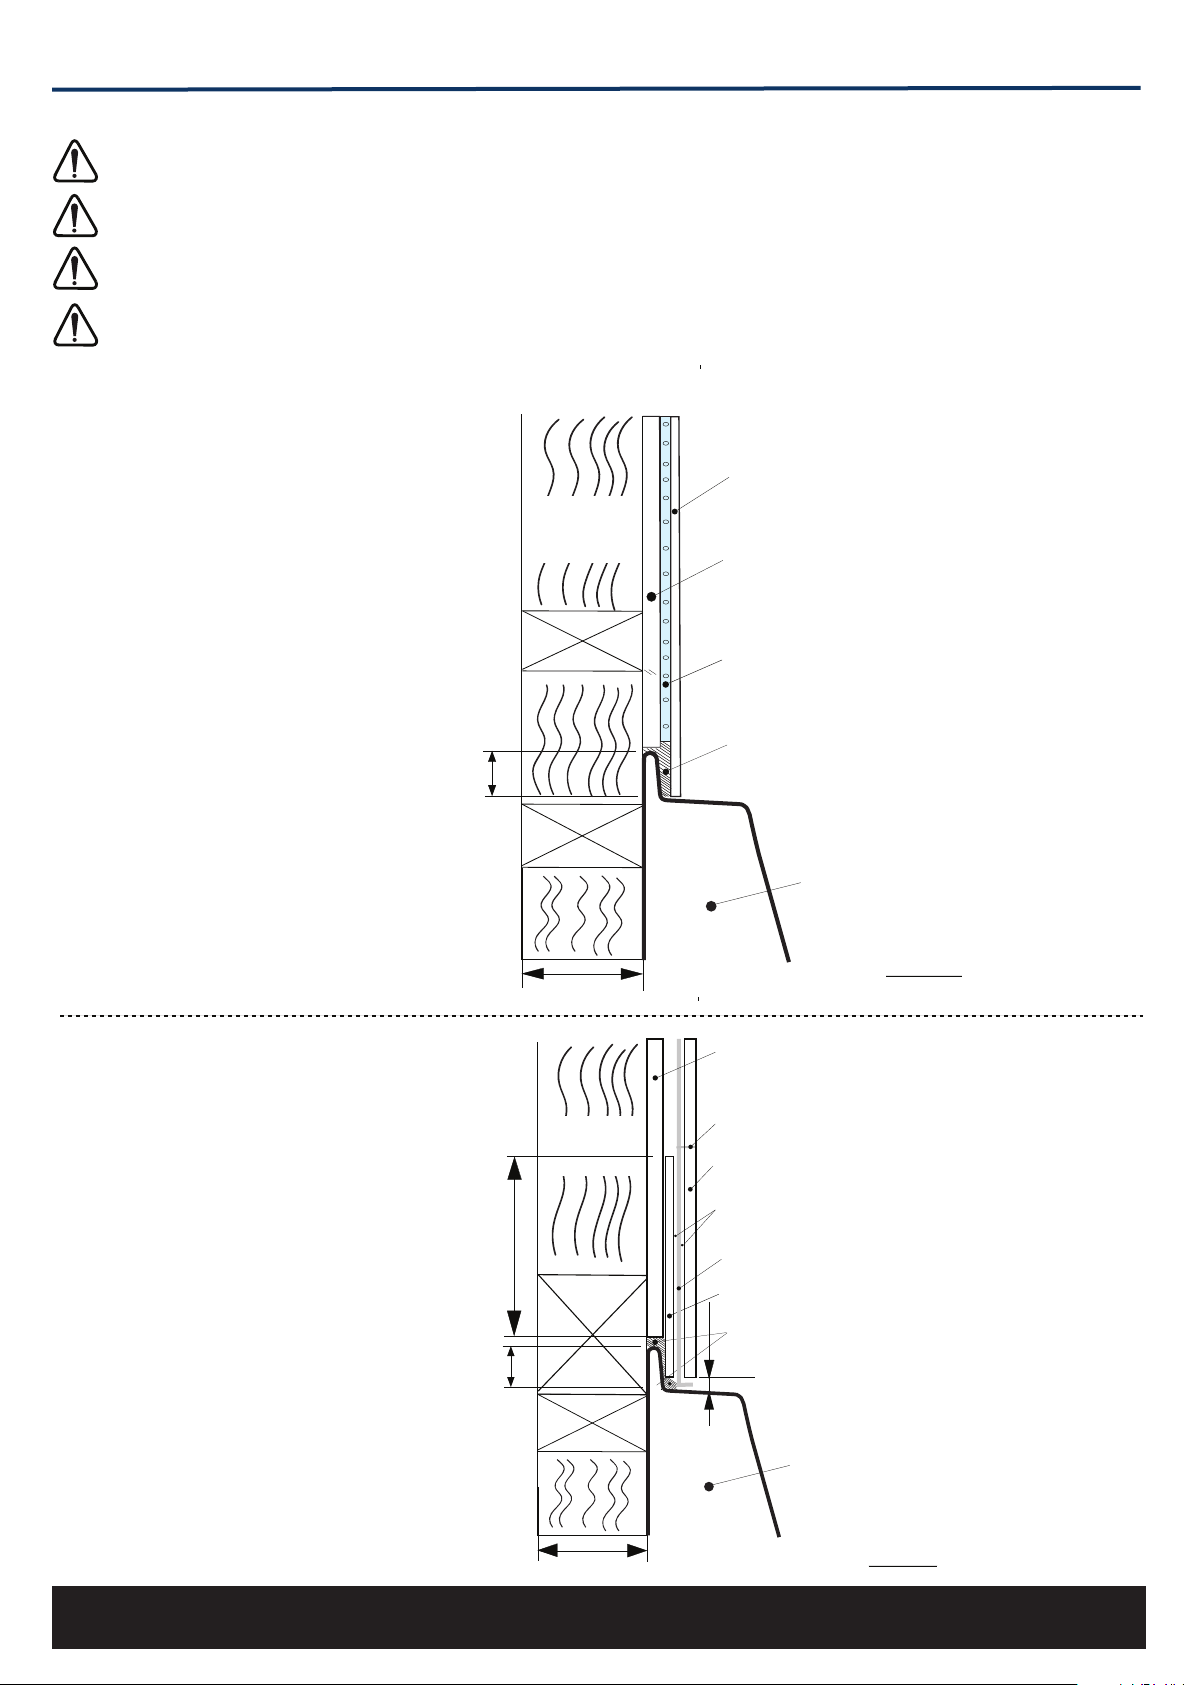
BATH
WALL BOARD (9-10 mm)
(e.g.GIB board)
SIKASIL NG SILICONE SEALANT
SIKA SHOWERBOND ADHESIVE
(2 mm)
DURACRYL WALL (2 mm)
(e.g.Acrylic)
Nog
Nog
25 mm
Upstand
Figure 1
90 mm
WALL
FRAME
BATH
SILICONE SEALANT
COMPATIBLE BANDAGE/LAP SEAL
(5 mm GAP)
GROUT
Nog
Nog
25 mm
Upstand
Figure 2
WET AREA WALL BOARD
(9-10 mm)
TILES (UP TO 10 mm THICK)
TILE ADHESIVE
WATERPROOFING MEMBRANE
90 mm
MINIMUM 90 mm
BANDAGE/LAP SEAL
Option 2:
Wet area wallboard and tiles:
EVORA SHOWER OVER BATH INSTALLATION INSTRUCTIONS
englefield.co.nz
1539391-A02-B
May 2023 Page 4
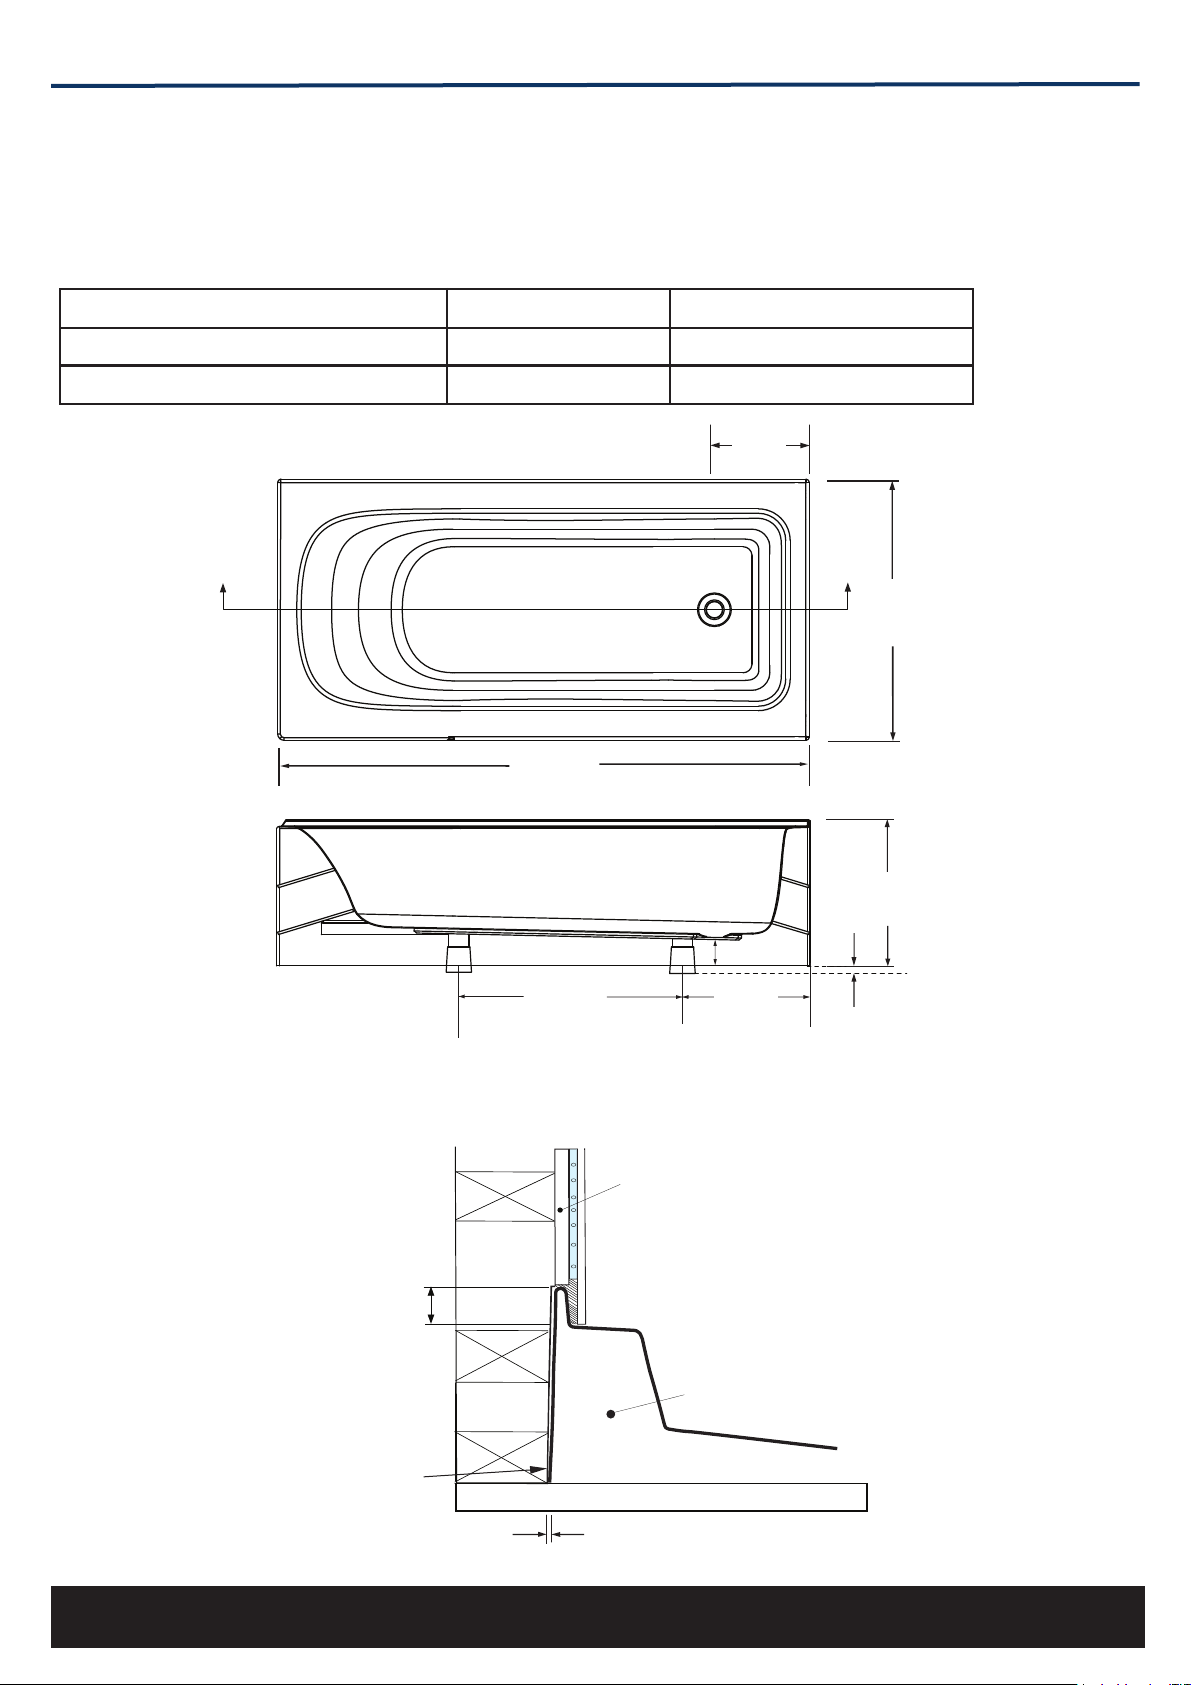
1670
820
A
A
298
SECTION A-A
545
400700
(108)
3-5mm
1) Determine location of the bath. Ensure the floor is level, clean and free of bumps
and protrusions.
BATH INSTALLATION:
2) Check how the upstand is fitting in relation to the backing wall and rebate into the stud
frame as required.
99329A-CP N/A
No under floor access
40mm Pop-up bath waste
Self-sealing trap with flexible waste
Product Part Number Floor Type
80144A-NA
Recommended waste fitting products:
BATH
FLOOR
Nog
Nog
Nog
25mm
Upstand
WALL
FRAME
Rebate into the
stud frame
(2-4 mm)
WET AREA WALL BOARD
(9-10 mm)

EVORA SHOWER OVER BATH INSTALLATION INSTRUCTIONS
englefield.co.nz
1539391-A02-B
May 2023 Page 5
CONCRETE SLAB FLOOR PREPARATION - IF APPLICABLE
Minimum
120mm
SECTION A-A
Minimum
100mm
Maximum
520mm
5) Mark out the position of the bath and bath drain. Determine if there is under floor access
to the drain and make floor and plumbing preparation as necessary to make space for the
drain.
4) Return the bath to its feet to check that the bath sits level and adjust legs to compensate
for any variations in floor level if required.
+0 mm
BATH
DOWN
UP
DOWN
UP
BATH FEET HEIGHT ADJUSTMENT
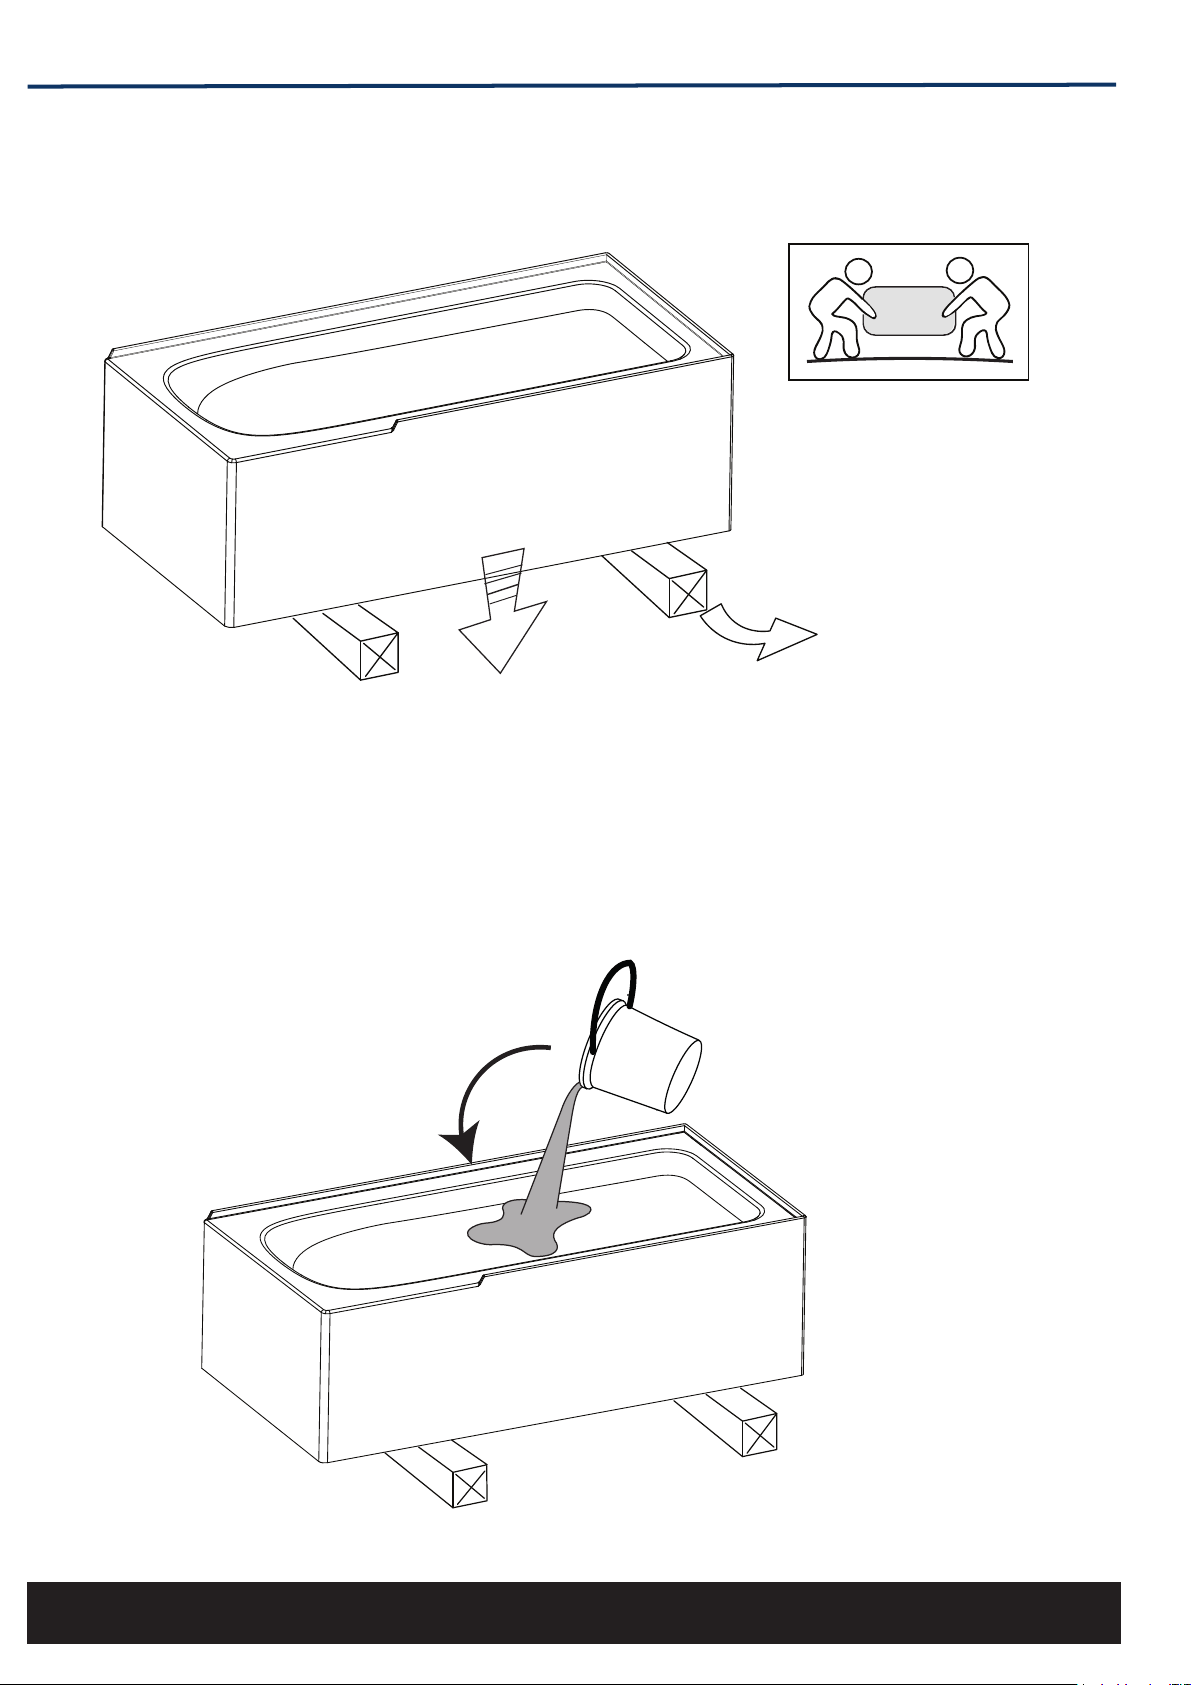
3) Assemble your new bath on a mat to protect it from any damage. Turn the bath upside
down and check that all four legs are level and 3 to 5 mm above the bath skirt.
3-5mm
545
(108)
400
700
+0 mm

EVORA SHOWER OVER BATH INSTALLATION INSTRUCTIONS
englefield.co.nz
1539391-A02-B
May 2023 Page 6
7) Position the lifting blocks supplied, on the floor in the right location as shown the image
below (fig 1) to place the bath onto
6) Turn the bath upside-down on the protective mat and apply a suitable construction adhe-
sive on the bottom surface of the bath feet.
240
400700
Figure 1
Bath feet
Honeycomb
lifting Block
Bath waste
Bath
Outline
Front of Bath
Front of
Bath
Honeycomb lifting block
EVORA SHOWER OVER BATH INSTALLATION INSTRUCTIONS
englefield.co.nz
1539391-A02-B
May 2023
Page 7
10) Close-off the waste and fill the bath with water and allow the water to stand for at least
30 minutes. Check for leaks and attend to waste and pipe connections as necessary.
8) Lift the bath and place it onto the timber supoort blocks. Make sure it is in the correct loca-
tion and the waste outlet can be connected to the plumbing. Install the waste system in accord-
ance with the manufacturer instructions.
2 Person Lifting
9) Complete waste fitting installation. Please adhere to relevant sections of AS/NZS3500.

EVORA SHOWER OVER BATH INSTALLATION INSTRUCTIONS
englefield.co.nz
1539391-A02-B
May 2023
Page 8
11) Remove the timber support blocks from underneath the bath.
10) Carefully tilt over the bath, attention requires two person.
EVORA SHOWER OVER BATH INSTALLATION INSTRUCTIONS
englefield.co.nz
1539391-A02-B
May 2023 Page 9
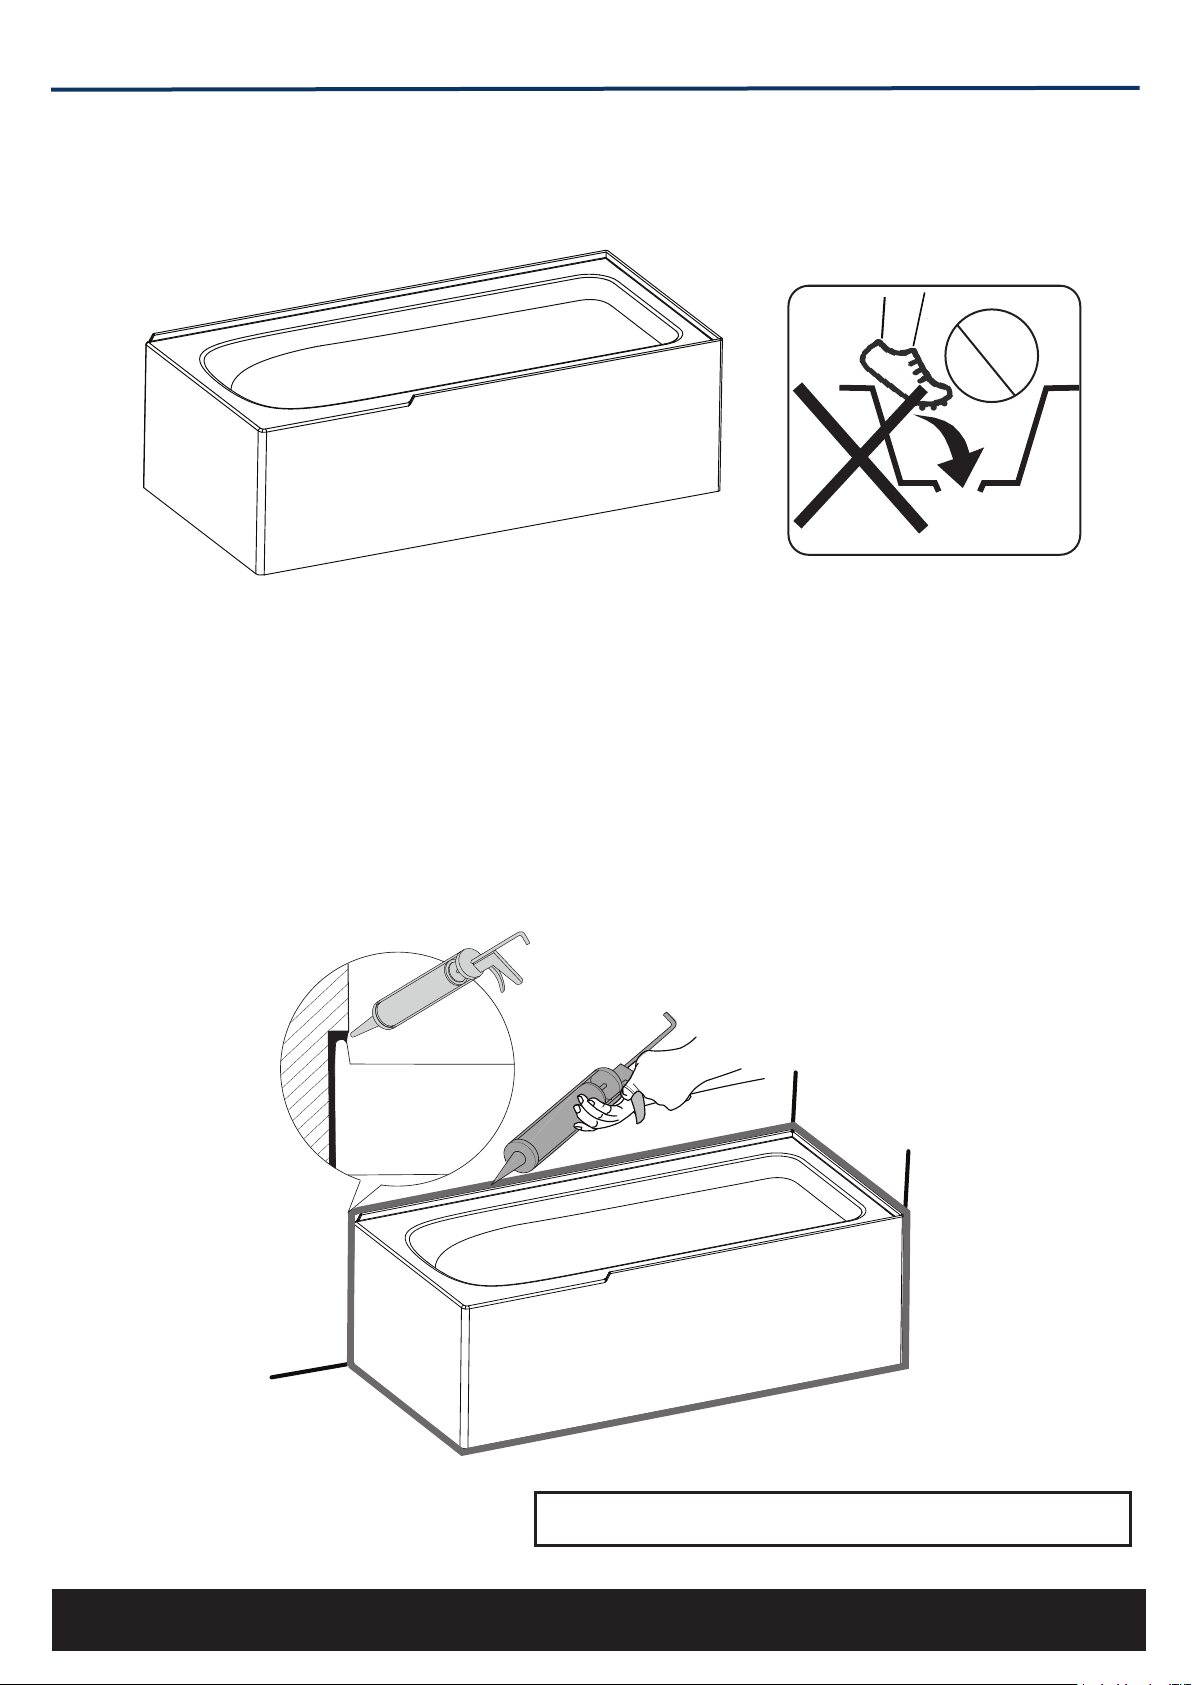
12) Lower the bath back into position. DO NOT stand in the bath for 24 hours to allow the
glue to cure.
13) Apply silicone sealant between the edges and adjacent surfaces as showing below ensuring
that a watertight seal is formed.
*Ensure that the silicone sealant is applied along the back edge of the bath as shown.
Complete wall and bath screen installation
24H
Bath

EVORA SHOWER OVER BATH INSTALLATION INSTRUCTIONS
englefield.co.nz
1539391-A02-B
May 2023 Page 10
CONTACT AND WARRANTY INFORMATION
NEW ZEALAND
Kohler New Zealand Limited
0800 100 382
AUSTRALIA
englefield.com
info@englefield.co.nz
englefield.co.nz
This manual suits for next models
1
Table of contents
Other Englefield Bathtub manuals

Popular Bathtub manuals by other brands


Jason International
Jason International MicroSilk Assembly

glass 1989
glass 1989 DEK 175/80 manual

American Standard
American Standard Scala Corner 5' 2664.118 parts manual

Laufen
Laufen MEDA 2.2011.2.000.000.1 manual

Royal Home
Royal Home Massage bathtub Series Installation and operation manual

DURAVIT
DURAVIT Blue Moon 700143 Mounting instruction