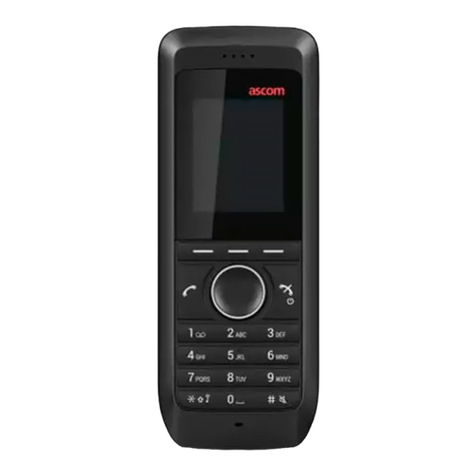
Enreach SwyxDECT 500 Operating and maintenance instructions

SwyxDECT 500
Installation and Configuration
As of: September 2023

Legal information
© 2023 Enreach GmbH. All rights reserved.
Trademarks: Swyx, SwyxIt! and SwyxON are registered trademarks of Enreach GmbH.
All other trademarks, product names, company names, trademarks and service marks are the property of
their respective owners.
The contents of this documentation are protected by copyright. Publication in the World Wide Web or in
other services of the Internet does not constitute a declaration of consent for other use by third parties. Any
use not permitted under German copyright law requires the prior written consent of Enreach GmbH.
The information in this documentation has been carefully checked for correctness, but may contain errors
due to constant updating and changes.
Enreach GmbH assumes no responsibility for printing and writing errors.
Despite careful control of the content, Enreach GmbH accepts no liability for the content of external links
and does not adopt it as its own. The operators of the linked sites are solely responsible for the content of
their sites.
Enreach GmbH
Emil-Figge-Str. 86
D-44227 Dortmund
www.enreach.de/en

Contents 3
Contents
SwyxDECT 500 System............................................................................... 4
1.1 Scope of supply ................................................................................. 4
1.2 Installation ....................................................................................... 4
1.3 General Information on SwyxDECT 500 ................................................ 5
1.4 Starting the SwyxDECT 500 base station ............................................... 5
1.5 Configuration of a SwyxDECT 500 base station ...................................... 6
1.5.1 Configuration as a single-cell system.............................................. 6
1.5.2 Configuration of a multi-cell system............................................... 7
1.5.3 Settings at the webinterface......................................................... 8
1.5.3.1 User .................................................................................. 9
1.5.3.2 Network ........................................................................... 12
1.5.3.3 Management..................................................................... 13
1.5.3.4 Security............................................................................ 16
1.5.3.5 Global Phonebook .............................................................. 16
1.5.3.6 Multicell........................................................................... 17
1.5.3.7 Log out ............................................................................ 17
1.5.4 Reset to factory settings ............................................................ 17
1.6 SwyxPhone D510/SwyxPhone D565 on the SwyxDECT 500................... 18
1.6.1 Register SwyxPhone................................................................. 18
1.6.2 Reset SwyxPhone D510/ D565.................................................... 18

SwyxDECT 500 System Scope of supply 4
1 SwyxDECT 500 System
Operation of a SwyxDECT 500 with SwyxWare
This documentation describes the SwyxDECT 500 base station.
SwyxDECT 500 supports the following functions:
LAN connection to the Server
Up to eight (G.711 - eight, G.729 - eight, G.722 - five) simultaneous
phone calls per base station.
Up to 1000 users per multi-cell system, and up to 30 users per single-
cell
Up to 3 repeaters are possible on one base station
Configuration via web interface
DECT GAP/CAP radio interface
Air synchronization between several base stations
Power over Ethernet (PoE 802.3af)
External LED status display
For the maximum scope of installation the following configuration
options are available:
1.1 Scope of supply
One base station
One stand
Two screws with wall plugs
Base stations Repeaters per base
station Handsets
254 - 1000
127 1 1000
50 3 1000
1.2 Installation
The SwyxDECT 500 can be operated as a stand-mounted or wall-
mounted system. Before mounting the station to a wall, the stand has to
be disassembled.
How to mount the SwyxDECT 500 base station to a wall
1Mark two bore holes horizontally at a distance of 60mm.
2Drill the holes and insert the dowels.
3Turn in two screws until the screw head is at a distance of 4mm to the
wall.
4Attach the base station to the screws and push it downwards.

SwyxDECT 500 System General Information on SwyxDECT 500 5
1.3 General Information on SwyxDECT 500
A SwyxDECT 500 has two internal antennas.
Power Supply
A PoE (Power-Over Ethernet) supply, class 2 (3.84 to 6,49 watt at 48 volt
DC) is required.
Network
RJ45 jack for LAN/PoE
Status LED
Reset switch
State signaling by LEDs
The SwyxDECT 500 has an LED, which indicates the states of the system.
1.4 Starting the SwyxDECT 500 base station
The SwyxDECT 500 is preset for the use of a DHCP server. When first
switched on, it automatically obtains an IP address of a DHCP server.
SwyxDECT 500 in a network with DHCP
Make a note of the MAC address, which is given on the back of the
base station.
In the DHCP server, check the IP address of SwyxDECT 500 by using
the MAC address.
As of v. 5.11, the LEDs also display the RSSI values of the Air Sync func-
tion. The RSSI (Received Signal Strength Indicator) is a ratio value that
shows the received field strength of the base station.
LED Signal State
solid green • The base station is active, the network registra-
tion has been successful
• Operation with good RSSI, better than -75 dBm
solid orange • Operation with RSSI between -75 dBm and -90
dBm
unlid/ solid red • Impermissible RSSI below -90 dBm
• Warning of factory reset or long press of reset
button
• Error/ Critical error
blinking green • Initialization
• Scanning for base stations
blinking orange • Initialization
• Search by IP
blinking red • Factory reset is carried out
• Firmware upgrade/ downgrade is carried out
• No Internet connection available or SIP handset
registration failed
unlid • Base station is inactive.

SwyxDECT 500 System Configuration of a SwyxDECT 500 base station 6
Enter http://xxx.xxx.xxx.xxx (whereas xxx.xxx.xxx.xxx is the identified IP
address) in the address field of the web browser.
The home page of the SwyxDECT 500 web interface appears. Here you
can configure the base station.
Alternatively, you can identify an existing IP address via the DECT hand-
set, even when the handset is not registered on the base station.
How to identify the IP address of the base station via the DECT hand-
set
1Press the menu button of the DECT handset.
2Enter "*47".
3The IP search starts. Wait up to 30 seconds.
4The MAC and the IP address of the base station are displayed. By
comparing the displayed MAC address with the MAC address on the
SwyxDECT 500 type label, you can verify that the handset has found
the desired base station.
5If several base stations exist, their MAC and IP addresses are also
displayed. Use the navigation key to scroll through the base station
information.
1.5 Configuration of a SwyxDECT 500 base
station
A SwyxDECT 500 must be configured so that it can be reached by Swyx-
Server. Then, you can connect the DECT handsets with the SwyxDECT
500 base station and make calls via SwyxServer.
SwyxDECT 500 can be operated in a multi-cell system as well as a single-
cell system.
1.5.1 Configuration as a single-cell system
How to configure a SwyxDECT 500 base station as a single cell
1Define the IP address of the SwyxDECT 500 and gain access to
SwyxDECT 500 via the web interface (Starting the SwyxDECT 500 base
station, page 5).
2Enter the IP address of the base station in the address bar of a
browser.
A login window will open.
3Enter the user name and password. By default the user name and
password is "admin" and "admin".
The home page of the web interface to configure the SwyxDECT 500
base station opens.
4Go to the menu bar and click on "Management | Country setting" and
select the country and the desired language. Confirm your selection
by clicking on "Save and Reboot".
The system restarts.
5Select the "Management | Time settings" option, and enter the IP
address of your Windows server or a public time server (e.g.
ptbtime1.ptb.de) in the field "Time Server". This synchronizes the time
being displayed on the DECT handsets.
6Click on "Save and Reboot".
The system restarts.

SwyxDECT 500 System Configuration of a SwyxDECT 500 base station 7
7Select the "Management" option.
8Give the base station a name.
9Confirm the entry by clicking on "save".
10 Select the "User | Server" option.
11 Click on "Add server".
12 Deactivate the NAT adaption.
13 Enter the SwyxServer's IP address in the "Registrar" field.
14 Please enter in the field "Secondary Registrar-Address:" the IP-addres
of the Standby Server.
15 Activate "SIP Session Timers."
16 Enter the value "90" in the "SessionTimer Value" field.
17 In the field "DTMF signaling", select "SIP-INFO".
18 Click on "Save."
19 Add a new user. See How to add a new user, page 10.
1.5.2 Configuration of a multi-cell system
A multi-cell system is an aligned and synchronized system of base sta-
tions, covering larger radio ranges. Up to 254 base stations can be used.
They can be set up in chains (up to 24 base stations per chain).
Before installing a multi-cell system, all requirements regarding radio
coverage, number of DECT users, their movements, as well as the instal-
lation site (building information) have to be met. Verify if any interference
factors are present that may have a negative impact on the DECT installa-
tion.
In order to support Codec G.729, an optional module for the base sta-
tion is required (one module per base station). The codec G.729
should be placed after codec G.711U in the priority list.
In general: You can save configuration changes by clicking on "save." If
there is no "Save" button available on the respective site, changes have
to be confirmed by restarting the base station.
Please adhere to the following sequence of steps to configure a multi-cell
system.
Setup first base station (step (1) to (9))
Add server (Step (10) to (18))
Add at least one user (step (19))
Set first base station to "multi-cell" (step (20))
Add second base station (repeat step (1) to (9) followed by (20) to
(22))
How to configure a multi-cell system
1Enter the IP address of the base station in the address bar of a
browser.
A login window will open.
2Enter the user name and password. By default the user name and
password is "admin" and "admin".
3The home page of the web interface to configure the SwyxDECT 500
base station opens.
4Go to the menu bar and click on "Management | Country setting" and
select the country and the desired language. Confirm your selection
by clicking on "Save and Reboot".
The system restarts.
5Select the "Management | Time settings" option, and enter the IP
address of your Windows server or a public time server (e.g.
ptbtime1.ptb.de) in the field "Time Server". This synchronizes the time
being displayed on the DECT handsets.
6Click on "Save and Reboot".
The system restarts.
7Select the "Management" option.
8Give the base station a name.
9Confirm the entry by clicking on "save".
10 Select the "Extensions | Server" option.
11 Click on "Add server".
12 Deactivate the NAT adaption.
13 Enter the SwyxServer's IP address in the "Registrar" field.

SwyxDECT 500 System Configuration of a SwyxDECT 500 base station 8
14 Please enter in the field "Secondary Registrar-Address:" the IP-addres
of the Standby Server.
15 Activate "SIP Session Timers."
16 Enter the value "90" into the "Session Timer Value" field.
17 In the field "DTMF signaling", select "SIP-INFO".
18 Click on "Save."
19 Add a new user. See How to add a new user, page 10.
20 Select the "Multi-cell" option.
21 Select "Activated" in the field "Multi-cell system".
Within the "Home/Status" menu item, the base station will be marked
as primary cell in the "System information" field.
22 Click on "Save and Reboot".
The system restarts.
23 Configure further base stations by repeating step (1) to (9), followed
by step (20) to (22).
24 After a few minutes, the configured base stations will be displayed in
the "Base station group" table. The base station added first will
automatically be defined as the primary base station.
25 The synchronization will be defined automatically. For a manual
synchronization, the field "Configure synchronization of DECT tree
automatically" must be set to "Deactivated". Afterwards, you can set
the order manually in the "DECT synchronization source" column.
26 Click on "Save" to activate the settings.
In order to support Codec G.729, an optional module for the base sta-
tion is required (one module per base station). The codec G.729
should be placed after codec G.711U in the priority list.
Please note that the multi-cell ID for several base stations must be
identical.
1.5.3 Settings at the webinterface
Function Description
Home/Status General overview of the current operating status
and settings on the base station and the handsets.
Statistics
Overview of the functionality of the base station(s).
The logs can help the administrator in cases of
error analysis and system optimization.
Users Managing all users. See User, page 9.
Servers
Setting the server to which the base station
connects. See Servers, page 11.
Repeaters
Option to configure repeaters. See
Repeaters, page 12.
Network IP Settings
Here, select whether you would like to configure a
DHCP-assigned IP address or a static address.
When selecting a static IP address, you can save
the respective parameters.
NAT settings
Option to configure the function for NAT resolu-
tion. These functions facilitate interoperability with
most types of routers.
SIR/RTP Settings
Facilitates configuration of SIP parameters.
DHCP Options
Facilitates activating/deactivating plug-n-play.
See Network, page 12.

SwyxDECT 500 System Configuration of a SwyxDECT 500 base station 9
1.5.3.1 User
Under the menu item "Extensions", the following settings are possible:
Add and edit users.
Display all of the system's registered users
Set the base station to log-on mode to log on handsets. See To con-
nect the SwyxPhone D510/ D565 to SwyxDECT 500, page 18.
Management Option to configure the base station for special
functions, such as web interface language, log
management, etc.) See Management, page 13.
Firmware update
Option to configure how base stations and
handsets are updated. See Firmware
update, page 14.
Time
Option to configure a time server. See
Time, page 15.
Country
Option to configure location. See
Country, page 15.
Configuration
Display of detailed and complete SME network
settings for base stations, HTTP/DNS/DHCP/TFTP
servers, SIP servers, etc. See Log out, page 17.
Syslog
Display of events and logs respective to the whole
network (live feed only). See Syslog, page 16.
SIP Log
Display of SIP-related logs
Security Option to assign a user name and password on the
base station. See Security, page 16.
Global Phonebook Option to load a global telephone book saved on
the server. See Global Phonebook, page 16.
Multicell Option to enter the parameters for configuring a
multi-cell system. See Multicell, page 17.
Log off Log-off
Function Description Select registered users to delete or deregister handsets
Parameter Description
IPEI (International Portable Equipment Identifier) Serial
number of the DECT handset.
The IPEI number is set for every handset by the
manufacturer and can be seen in the menu of the
SwyxPhone D510 under "Settings | Status".
Authorization
Code
a number with 4 digits, which you assign to the
user´s handset for the registration at a base station.

SwyxDECT 500 System Configuration of a SwyxDECT 500 base station 10
Add user
Before registration of the new user please keep at hand the serial number
(IPEI) of the concerning handset ready. The serial number can be dis-
played in the menu of SwyxPhone D510 under "Settings | Status".
How to add a new user
1Select the "Extensions" option in the menu bar.
SIP User: SIP user ID you entered into the user's properties
on the SwyxWare Administration.
SIP User name SIP user name you entered in the user's properties
on the SwyxWare Administration.
Password Password you entered in the user's properties on
the SwyxWare Administration.
Display Name Additional designation appearing on the handset's
display.
Mail box Name Numbers of User
Mail box number Here you can e.g. enter the function code for
remote query (##10).
P-preferred-iden-
tity (Sender
number):
Here you can enter further numbers additionally to
the own number of the user (e.g. "234;220;478" for
an internal number, a group number and an alter-
native number). Subsequently the user can decide
for every external call with the selection of the
desired line, which number he wants to signal.
Servers SwyxServer IP address; various servers can be
selected.
BroadWorks
Feature Event
Package
If activated (recommended), call forwarding is
performed via the telephone system. Calls can then
be handled by SwyxWare and, for example,
correctly rejected as "busy" with DND (do not
disturb).
Default setting: Deactivated.
Parameter Description 2Click on "Add user".
3Enter in the field "IPEI" the serial number of the handset.
4Enter in the field "AC" the 4 digits number, which is used to identify
the user (handset) for the registration at the base station.
5Enter the phone number in the "SIP user" field and the SIP user name
in the "SIP user name" field, which you also assigned in SwyxServer
within the SIP registration. See also the SwyxWare documentation for
administrators, chapter SIP Registration" tab.
6Under "Authentication Password" enter the SIP password that you also
assigned in SwyxServer during SIP registration.
7In the "display information" field, enter the name that should appear
on the user's SwyxPhone D510 display.
8Enter the phone number in the field "Mailbox Name".
9You can use the "Mailbox Number" field, e.g. to enter the function
code for remote query (##10).
10 In the "Server" field, select the SwyxServer on which the user is
configured.
11 Select "Enabled" for "BroadWorks Feature Event Package".
12 Click on "Save."
13 Select the desired user.
14 Click on "Log-on handsets".
The log-on mode for the base station is enabled.
15 Log the SwyxPhone D510 of the user just added onto the base station
while the base station is still in log-on mode. See SwyxPhone D510/
SwyxPhone D565 on the SwyxDECT 500, page 18.

SwyxDECT 500 System Configuration of a SwyxDECT 500 base station 11
Servers
Function Description
Server Alias You can enter a name for the server which
consists of 10 characters max.
NAT Adaption When this option is activated, all SIP messages
are forwarded directly to the NAT gateway on
the SIP aware router. The standard setting for
this option is activated.
Registrar SwyxServer IP-adress
Secondary Registrar
Address
IP address of the standby server
SIP Server Retry
Check Time
The interval (in seconds) for identifying the
active server on a standby system.
Registration time (s) The time frame (in seconds) for renewed SIP
registration of the base station on SwyxServer.
RTP from own bases-
tation
If activated, only the base station, on which the
User is logged on, will be used for data transfer
to the outside. (This options will only make
sense in case of an not optimal use to capacity
of the network).
Keep Alive This option defines the time frame for opening
ports on relevant NAT aware routers.
Display extension on
handset (in idle state)
Show own extension on the headset.
Use Own Codec Prior-
ity
If activated, the codec priority of the base
station will be preferred to the code priority of
the servers.
DTMF Signalling Method for signaling keys being pressed
during a conversation.
Codec priority Selection of the codec priority that the base
station should use for audio compression and
transmission. You set the order using the
buttons "up" and "down."

SwyxDECT 500 System Configuration of a SwyxDECT 500 base station 12
How to add a new server
1In the menu bar, click on "Extensions | Servers".
2Choose "add server."
3Enter the SwyxServer's IP address in the "Registrar" field.
4If you are using a standby server, enter the standby server's IP address
in the "secondary registrar address:" field.
5Activate "SIP Session Timers."
6Enter the value "90" in the "SessionTimer Value" field.
7Select "SIP INFO" in the "DTMF signalization" field.
8Confirm the entry by clicking on "save".
Repeaters
The "repeater" area can be used to extend the range of your base sta-
tions by installing additional repeaters (up to 100 repeaters per system).
Up to three repeaters per base station and up to three repeaters on one
chain can be used. Up to five (with G.711 five, with G.729 five, with G.722
two) simultaneous calls per repeater possible.
How to add a repeater
1Select the "Extensions | Repeaters" option.
2Select "Add Repeater".
3In the field "DECT snyc mode", select "Manually".
4Establish the DECT synchronization source.
5Click on "Save."
6The repeater is listed.
RTP Packet Size The setting schoud be changed only after
consulting the support service.
Function Description
In order to support Codec G.729, an optional module for the base sta-
tion is required (one module per base station). The codec G.729
should be placed after codec G.711U in the priority list.
7Select the repeater being registered by setting a check mark.
8Click on "register repeater."
9Connect the repeater to a power socket.
10 Press the button located on the repeater.
11 After a few seconds, the repeater's light will be light up in green.
12 Update the base station's web page, and the repeater will be
displayed in the list.
1.5.3.2 Network
The network settings consist of the following parts: "IP settings", "SIP/RTP
settings", "DHCP options" and "NAT settings".
Avoid registering repeaters and headsets simultaneously, for this may
result in interference effects.

SwyxDECT 500 System Configuration of a SwyxDECT 500 base station 13
IP Settings
DHCP Options
The value "plug-n-play" should be set to "activated."
NAT settings
The "NAT settings" area is used to make various settings regarding the
use of a STUN server. A STUN server makes it possible for NAT clients to
communicate behind a firewall with a VoIP provider outside of the local
network.
SIP/RTP settings
Function Description
Static IP address If the DHCP server is active, then the base
station will procure the TCP/IP parameters
automatically.
IP-adress Base station IP address
Subnet mask Base station subnet mask.
Default gateway IP address of the standard network
gateway
DNS (Primary) Main server to which a base station directs
DNS queries.
DNS (Secondary) Alternative DNS server.
Function Description
Local SIP port Standard port number value: 5060
SIP ToS/QoS Priority of call trigger signal transmission
based on the ToS byte's two IP layers.
RTP port The port used for RTP audio streaming.
Standard port number value: 50004.
RTP port range Number of ports that can be used for RTP
audio streaming. Default value: 40
1.5.3.3 Management
The management settings are subdivided into the following areas: "Set-
tings", "Configuration" and "Syslog/SIP Log".
RTP-ToS/QoS RTP transmission priority based on ToS byte
IP layer.
Function Description

SwyxDECT 500 System Configuration of a SwyxDECT 500 base station 14
Firmware update
In this area, you can configure updates on base stations.
Function Description
Base Station Option to enter a name for the base
station.
Management Transfer
Protocol
The protocol that should be used for
uploading/downloading the configuration
file / firmware file.
HTTP management upload
script
The server folder or the path where the
configuration file is located.
HTTP management user-
name
Username for accessing the configuration
server
HTTP management pass-
word
Password for accessing the configuration
server.
Configuration Server
Address
Option to enter the configuration server's
IP address.
SIP Log Server Address Option to enter the IP address of the server
on which the SIP log file should be saved.
Upload of SIP log Select "activate" if SIP debug notifications
should be saved to the configuration
server.
Syslog server IP Address IP address of the server on which the DECT
IP system's log file should be saved.
Syslog Server Port Entry of released server port.
Syslog Level Selection of various logging levels.
Function Description
Firmware update server
address
IP address of the server on which firmware
update files have been saved.
Firmware path Memory location for the firmware update
files .
How to update software of base stations and/or headsets
1In the field "Firmware Update Server Address", enter the IP address of
the TFTP server, on which the update files for base stations and
handsets are stored.
2In the "firmware path" field, enter the root path for the sub-paths in
which update files are located. Paths have to be created with the
following designations for the update files of the base stations and the
handsets:
Required Version The "Required Version" field is used to
indicate the firmware version that should be
loaded onto the device (handsets) indicated
under "type".
Function Description
You can find a TFTP server for free download here:
TFTP-Server
solarwinds.com/products/freetools/free_tftp_server.aspx

SwyxDECT 500 System Configuration of a SwyxDECT 500 base station 15
Path „8660“ („\rtx\fw\8660\“): this is where the update files are
stored for the base stations.
Path „DECT4024“ („\rtx\fw\4024\“): this is where the update files are
stored for the repeater.
Path „8630“(„\rtx\fw\8630\“): this is where the update files are
stored for SwyxPhone D510.
Path „8830“(„\rtx\fw\8830\“): this is where the update files are
stored for SwyxPhone D565.
3Enter the version number of the software that should be used to
update the handset software. All types of handsets are listed.
4Save the data for updating handsets by clicking on "Save".
5For base station update, select whether you would like to update only
this base station or all of them.
6In the field "Required version," enter the firmware version that should
be used to update the base station(s).
7To launch the update with the settings that have been made, click on
"start update."
Base stations and handsets will be updated.
Time
Save any time server settings under "Time Settings". The time server is
used to synchronize a multi-cell system. It also stipulates the time dis-
played in logs and on SIP trace information pages, as well as on handset
displays.
During the update, all handsets must be placed in the charging sta-
tion!
Function Description
Time server IP address of the NTP server.
Refresh time (h) Time frame in hours for updating
the time server.
Time zone Local time in GMT format.
To apply settings, click on "Save and Reboot."
Should you not reach a time server on the network, you can click on "PC
time" to apply the time on your PC for one time. When restarting the base
station, however, that time information will be deleted.
Country
Here, you can select the system's location and the language of the web
interface in order to configure standard values specific to the region. Per
default the time zone and the summertime settings of your country will be
used.
After selecting the country and the language, click on "Save and Reboot".
Configuration
In the "configuration" area, you'll find a view of the configuration made in
text form. Here, settings can be saved in a file (*.cfg) for later use. Addi-
tionally, a configuration file that has already been created can be loaded.
How to save configuration settings in a file (*.cfg)
1Select the option "Management | Configuration".
Current settings will be displayed in text form.
2Click on "Save."
The "save as..." dialog will open, and you can determine a location for
saving.
3The file "settings.cfg" is loaded for further use in your download path.
How to load a configuration file
1Select the option "Management | Configuration".
2Click on "Browse..." and select the desired configuration file (*.cfg).
3Click on „Load."
4The settings will be applied.
Passwords are not stored in configuration data when saving. They will
have to be set again!

SwyxDECT 500 System Configuration of a SwyxDECT 500 base station 16
Syslog
In the "Syslog" area, system log files can viewed.
SIP Log
In the "SIP log" area, SIP log files can be viewed.
1.5.3.4 Security
Under "Security", enter username and password of the web interface for
the configuration of the base station and/or the system.
1.5.3.5 Global Phonebook
Here, you can set the storage location for telephone book files being
imported. Clicking on "load" imports telephone book files.
Import files are allowed in the formats .csv, .tvt, and .xml.
Import Requirements for .csv and .tvt
The import file may contain a maximum of 3000 entries.
.txt .csv
Names must not be longer than 23 characters, phone numbers must
not be longer than 21 characters (all other characters are truncated or
the entry is not saved).
Names must have the following
format:
First name Last name
Example: John Jones
Names must have the following
format:
First name Last name
Example: “Jones, John”
Phone numbers must be in canonical format and must not contain
spaces (SIP-URI are not permitted).
Example with area code: +49023134567
Example extension: 567
How to import contacts from an HTTP or TFTP server via a telephone
book file
1Click on "Management."
2In the field "Management Transfer Protocol," select "HTTP" or "TFTP"
as needed.
3Click on "Save."
4Click on „Global phonebook".
5Enter the HTTP or TFTP server's IP address in the "server" field.
6Add a path on the HTTP or TFTP server with the name "Directory" and
save the CSV file to be imported there.
7Go back to the option "Global phonebook" and enter the file name in
the "file name" field.
8Click on "Save."
9Restart the base station.
Name and phone number must
have the following format: Name,
phone number
Example with area code: John
Jones,+49023134567
Example extension: John
Jones,567
Name and phone number must
have the following format:
"Name",Home number,Mobile
number,Office number (all three
commas must be present for each
entry, even if not all phone numbers
are present)
Example with all phone numbers:
"John
Jones",+49023134567,+01520123
4567,123
Example with missing numbers:
"John Jones",,+015201234567,123
.txt .csv
When importing telephone numbers, the entire telephone book is re-
written. It is not possible to attach contacts. The imported contacts are
not displayed on the base station's configuration interface.

SwyxDECT 500 System Configuration of a SwyxDECT 500 base station 17
How to import contacts from an LDAP server via a telephone book
file
1Click on „Global phonebook".
2Select "LDAP server" in the "location:" field.
3Enter the LDAP server's IP address in the "server" field.
4Enter the LDAP server's port in the "port" field.
5Enter the desired data base (e.g. dc=meta) in the "Sbase" field.
6In the "bind" field, enter the user name for authentication on the LDAP
server.
7Enter password, as applicable.
8Click on "Save."
How to import contacts by selecting a phonebook file
1Click on „Global phonebook".
2In the "file name:" field, select the CSV file with the contact information
by clicking on "Browse..."
3Click on "load" to load the file.
4Restart the base station.
1.5.3.6 Multicell
In the "multi-cell settings" area, you can make the multi-cell configuration
for using specific base stations.
Multicell status
The CSV file's name is limited to 31 characters.
Function Description
System Information Status of the multi-cell system.
Last package received
from IP
IP address of the last base station synchro-
nized or of the repeater + time of synchro-
nization.
Settings for this base
1.5.3.7 Log out
Clicking on "logout" will log you out of the web interface.
1.5.4 Reset to factory settings
You can perform the factory reset on the base station or in the web inter-
face.
Function Description
Multi-cell system This option has to be activated in order to
activate the SwyxDECT 500's multi-cell modus.
System chain ID ID that is unique for a specific multi-cell
Synchronization time
(s)
The duration in seconds after which links from
base stations are synchronized with each other.
Data Synch DECT base stations are synchronized among
each other over the network. There are two
types of synchronization that can be chosen:
Multi-cast:
Simultaneous distribution of synchronization
data to all connected base stations. This
function must be supported by network
hardware (switches). If this is not the case, then
use "peer-to-peer."
Peer-to-peer:
In "peer-to-peer," another base station is
indicated as a synchronization target for each
base station. All base stations are synchronized
on the system.
Note that the configuration of the base station is lost when resetting.

SwyxDECT 500 System SwyxPhone D510/SwyxPhone D565 on the SwyxDECT 500 18
To reset the SwyxDECT 500 via the base station
1Press and hold the reset button on the base station with a pointed
object for at least 10 seconds until the LED lights up solid red.
The base station is reset to the default setting.
To reset the SwyxDECT 500 via the web interface
1In the web interface, select "Management | Default Base Station".
2Confirm this with “OK”.
The base station is reset to the default setting.
1.6 SwyxPhone D510/SwyxPhone D565 on
the SwyxDECT 500
1.6.1 Register SwyxPhone
You can log the SwyxPhone D510 onto the base station while the base
station is in log-on mode. Have ready the 4-digit number (access code)
entered in the menu under "Extensions | Add (or edit) extension" in the
"AC" field.
To connect the SwyxPhone D510/ D565 to SwyxDECT 500
If the base station is already in log-on mode, then proceed to step (4);
otherwise, start with step (1).
1Select the "Extensions" option within the web interface.
2Select an extension by setting a check mark.
3Then click on "Register handset(s)".
The log-on mode is enabled.
4Press the SwyxPhone D510's menu key.
5Select "Connections" with the navigation key and confirm with
"Selection".
6Select "registration" and confirm with "selection."
7Enter the 4-digits number (AC) and confirm with "OK".
The telephone is logged-on to the base station.
1.6.2 Reset SwyxPhone D510/ D565
How to reset the SwyxPhone D510/ D565 to factory settings (Factory
Reset)
1Press the menu key (3 horizontal lines).
2Enter the following combination: [star key], 7, 3, 7, 8, 4, 2, 3, [star key].
The service menu opens.
3Select the "Master reset" menu item and confirm the reset with "OK"
or the Select key.
The log-on mode will not be deactivated automatically.
To avoid unauthorized access, deactivate the mode. In the web inter-
face, click on the link "Extensions | Stop log-on".
Note that the handsets must be recommissioned after a factory reset
and local files are deleted.
As an indication, you can remember that the letters of the key
combination make the word "service".
Table of contents

