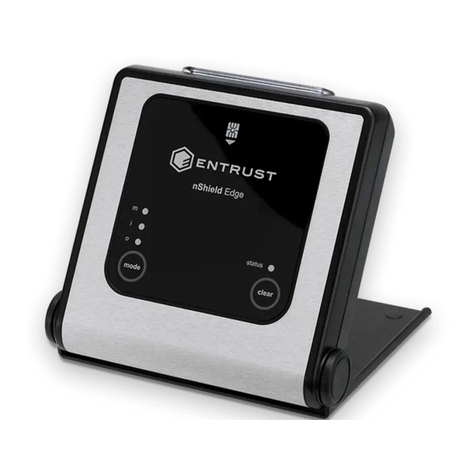
Entrust nShield Edge User manual

nShield® Edge
Installation Guide
12.80
17 Nov 2021

Contents
1. Introduction. . . . . . . . . . . . . . . . . . . . . . . . . . . . . . . . . . . . . . . . . . . . . . . . . . . . . . . . . . . . . . . . . . . Ê4
1.1. About this guide . . . . . . . . . . . . . . . . . . . . . . . . . . . . . . . . . . . . . . . . . . . . . . . . . . . . . . . . . . Ê4
1.2. Additional documentation . . . . . . . . . . . . . . . . . . . . . . . . . . . . . . . . . . . . . . . . . . . . . . . . . Ê4
2. Safety and security . . . . . . . . . . . . . . . . . . . . . . . . . . . . . . . . . . . . . . . . . . . . . . . . . . . . . . . . . . . . Ê6
2.1. FIPS . . . . . . . . . . . . . . . . . . . . . . . . . . . . . . . . . . . . . . . . . . . . . . . . . . . . . . . . . . . . . . . . . . . . . Ê6
3. Regulatory notices . . . . . . . . . . . . . . . . . . . . . . . . . . . . . . . . . . . . . . . . . . . . . . . . . . . . . . . . . . . . Ê7
3.1. FCCÊclass AÊnotice . . . . . . . . . . . . . . . . . . . . . . . . . . . . . . . . . . . . . . . . . . . . . . . . . . . . . . . . Ê7
3.2. Canadian certification - CAN ICES-3 (A)/NMB-3(A) . . . . . . . . . . . . . . . . . . . . . . . . . . Ê7
3.3. Recycling and disposal information. . . . . . . . . . . . . . . . . . . . . . . . . . . . . . . . . . . . . . . . . Ê7
4. Before you install the software. . . . . . . . . . . . . . . . . . . . . . . . . . . . . . . . . . . . . . . . . . . . . . . . . . Ê8
4.1. Preparatory tasks before installing software . . . . . . . . . . . . . . . . . . . . . . . . . . . . . . . . . Ê8
4.2. Firewall settings . . . . . . . . . . . . . . . . . . . . . . . . . . . . . . . . . . . . . . . . . . . . . . . . . . . . . . . . . Ê10
5. Installing the software . . . . . . . . . . . . . . . . . . . . . . . . . . . . . . . . . . . . . . . . . . . . . . . . . . . . . . . . . Ê11
5.1. Installing the Security World Software on Windows. . . . . . . . . . . . . . . . . . . . . . . . . . . Ê11
5.2. Installing the Security World Software on Linux . . . . . . . . . . . . . . . . . . . . . . . . . . . . . Ê12
6. Setting up the nShield Edge . . . . . . . . . . . . . . . . . . . . . . . . . . . . . . . . . . . . . . . . . . . . . . . . . . . Ê14
6.1. Power saving options. . . . . . . . . . . . . . . . . . . . . . . . . . . . . . . . . . . . . . . . . . . . . . . . . . . . . Ê14
6.2. Connecting an nShield Edge . . . . . . . . . . . . . . . . . . . . . . . . . . . . . . . . . . . . . . . . . . . . . . Ê14
6.3. Enabling optional features . . . . . . . . . . . . . . . . . . . . . . . . . . . . . . . . . . . . . . . . . . . . . . . . Ê15
6.4. Disconnecting and reconnecting the nShield Edge . . . . . . . . . . . . . . . . . . . . . . . . . . Ê15
6.5. Checking the installation . . . . . . . . . . . . . . . . . . . . . . . . . . . . . . . . . . . . . . . . . . . . . . . . . Ê16
6.6. Using a Security World . . . . . . . . . . . . . . . . . . . . . . . . . . . . . . . . . . . . . . . . . . . . . . . . . . . Ê16
7. Using the nShield Edge . . . . . . . . . . . . . . . . . . . . . . . . . . . . . . . . . . . . . . . . . . . . . . . . . . . . . . . . Ê17
7.1. Mode LEDs . . . . . . . . . . . . . . . . . . . . . . . . . . . . . . . . . . . . . . . . . . . . . . . . . . . . . . . . . . . . . . Ê17
7.2. Changing the mode . . . . . . . . . . . . . . . . . . . . . . . . . . . . . . . . . . . . . . . . . . . . . . . . . . . . . . Ê18
7.3. Status LED . . . . . . . . . . . . . . . . . . . . . . . . . . . . . . . . . . . . . . . . . . . . . . . . . . . . . . . . . . . . . . Ê18
8. Troubleshooting . . . . . . . . . . . . . . . . . . . . . . . . . . . . . . . . . . . . . . . . . . . . . . . . . . . . . . . . . . . . . . Ê19
8.1. None of the LEDs are lit. . . . . . . . . . . . . . . . . . . . . . . . . . . . . . . . . . . . . . . . . . . . . . . . . . . Ê19
8.2. The Mode LED is amber or red . . . . . . . . . . . . . . . . . . . . . . . . . . . . . . . . . . . . . . . . . . . . Ê19
8.3. The Status LED is flashing irregularly and the nShield Edge is unresponsive
for more than a few minutes . . . . . . . . . . . . . . . . . . . . . . . . . . . . . . . . . . . . . . . . . . . . . . . . . . Ê19
8.4. The Security World Software does not detect the connected nShield Edge . . . . Ê19
8.5. Upgrading the firmware . . . . . . . . . . . . . . . . . . . . . . . . . . . . . . . . . . . . . . . . . . . . . . . . . . Ê19
9. nShield Edge Windows compatibility issues and considerations . . . . . . . . . . . . . . . . . . . Ê20
9.1. nShield Edge very slow in VMware virtual machine . . . . . . . . . . . . . . . . . . . . . . . . . . Ê20
10. Dimensions and operating conditions . . . . . . . . . . . . . . . . . . . . . . . . . . . . . . . . . . . . . . . . . . Ê21
10.1. Physical location considerations. . . . . . . . . . . . . . . . . . . . . . . . . . . . . . . . . . . . . . . . . . . Ê21
Appendix A: Uninstalling existing software . . . . . . . . . . . . . . . . . . . . . . . . . . . . . . . . . . . . . . . . Ê22
nShield® Edge Installation Guide 2 of 29

A.1. Uninstalling the Security World Software on Windows . . . . . . . . . . . . . . . . . . . . . . . Ê23
A.2. Uninstalling the Security World Software on Linux . . . . . . . . . . . . . . . . . . . . . . . . . . Ê23
Appendix B: Software packages . . . . . . . . . . . . . . . . . . . . . . . . . . . . . . . . . . . . . . . . . . . . . . . . . Ê25
B.1. Security World installation media. . . . . . . . . . . . . . . . . . . . . . . . . . . . . . . . . . . . . . . . . . Ê25
B.2. Components required for particular functionality . . . . . . . . . . . . . . . . . . . . . . . . . . . Ê26
B.3. nCipherKM JCA/JCE cryptographic service provider . . . . . . . . . . . . . . . . . . . . . . . . Ê27
B.4. SNMP monitoring agent . . . . . . . . . . . . . . . . . . . . . . . . . . . . . . . . . . . . . . . . . . . . . . . . . Ê27
nShield® Edge Installation Guide 3 of 29

1. Introduction
The Entrust nShield Edge is a portable Hardware Security Module (HSM) for use in root
Certification Authorities (CAs) and Registration Authorities (RAs), code signing, and
remote HSM operations. The nShield Edge combines a full-featured HSM with a smart
card reader, which you can use to securely store and access your organization’s
highvalue occasional-use keys, such as certificate signing keys.
The nShield Edge has been designed and tested for deployments where one HSM is used
with one computer or Windows Virtual Machine (VM). Multiple-unit deployments, where
multiple nShield Edge HSMs are connected to the same computer or VM, are not
supported.
We do not recommend using the nShield Edge alongside other Entrust nShield HSMs on
the same computer or VM.
1.1. About this guide
This guide includes:
•Installing the Security World Software. See Installing the software.
•Steps to set up an nShield Edge. See Setting up the nShield Edge.
•How to use an nShield Edge. See Using the nShield Edge.
•Troubleshooting information. See Troubleshooting.
•nShield Edge compatibility considerations. See nShield Edge Windows compatibility
issues and considerations.
•Instructions to uninstall existing software. See Uninstalling existing software.
•Software components and bundles. See Software packages.
The Security World Software is supplied on the accompanying Security World for nShield
installation media.
1.2. Additional documentation
You can find additional documentation in the documentation directory of the installation
media, including the nShield Edge and nShield Solo User Guide, which describes how to
use the Security World Software. We strongly recommend that you read the release
notes in the release directory of your installation disc before you use the nShield Edge.
These notes contain the latest information about your product.
nShield® Edge Installation Guide 4 of 29

1.2.1. Terminology
The nShield Edge is referred to as the nShield Edge, the hardware security module, or the
HSM.
nShield® Edge Installation Guide 5 of 29

2. Safety and security
There are no user-serviceable parts inside the nShield Edge. Any
attempt to dismantle the nShield Edge results in any remaining
warranty cover, the maintenance and support agreement, or both being
rendered void.
To help maintain security:
•Always inspect the USB cable and the nShield Edge before use, specifically the
Entrust logo hologram in the tamper window shown below. (The nShield Edge
Developer Edition does not have a hologram and tamper window.) If there are any
signs of tampering, do not use the cable and the nShield Edge.
•Where possible, use the lock slot of the nShield Edge to secure it to a desk with a
compatible lock (not supplied).
•Never store or carry smart cards with the nShield Edge.
•Protect your pass phrase in line with your organization’s security policy.
2.1. FIPS
There are a number of nShield Edge variants, some certified to different FIPS 140-2
levels. The FIPS rating is indicated on the label on the nShield Edge.
nShield® Edge Installation Guide 6 of 29

3. Regulatory notices
3.1. FCCÊclass AÊnotice
The nShield Solo and nShield Solo XC HSMs comply with Part 15 of the FCC rules.
Operation is subject to the following two conditions:
1. The device may not cause harmful interference, and
2. The device must accept any interference received, including interference that may
cause undesired operation.
This equipment has been tested and found to comply with the limits for a Class A digital
device, pursuant to Part 15 of the FCC Rules. These limits are designed to provide
reasonable protection against harmful interference when the equipment is operated in a
commercial environment. This equipment generates, uses, and can radiate radio
frequency energy and, if not installed and used in accordance with the instruction
manual, may cause harmful interference to radio communications. Operation of this
equipment in a residential area is likely to cause harmful interference in which case the
user will be required to correct the interference at his own expense.
3.2. Canadian certification - CAN ICES-3 (A)/NMB-3(A)
3.3. Recycling and disposal information
For recycling and disposal guidance, see the nShield product’s Warnings and Cautions
documentation.
nShield® Edge Installation Guide 7 of 29

4. Before you install the software
Do not connect the nShield Edge to your computer before installing the Security World
Software.
Uninstall any older versions of Security World Software. See Uninstalling existing
software.
4.1. Preparatory tasks before installing software
Perform any of the necessary preparatory tasks described in this section before installing
the Security World Software.
4.1.1. Windows
Adjust your computers power saving setting to prevent sleep mode.
4.1.1.1. Install Microsoft security updates
Make sure that you have installed the latest Microsoft security updates. Information
about Microsoft security updates is available from http://www.microsoft.com/security/.
4.1.2. Linux
4.1.2.1. Install operating environment patches
Make sure that you have installed the latest recommended patches. See the
documentation supplied with your operating environment for information.
4.1.2.2. Users and Groups
The installer automatically creates the following group and users if they do not exist. If
you wish to create them manually, you should do so before running the installer.
Create the following, as required:
•The nfast user in the nfast group, using /opt/nfast as the home directory.
•If you are installing snmp, the ncsnmpd user in the ncsnmpd group, using /opt/nfast as
the home directory.
•If you are installing the Remote Administration Service, the raserv user in the raserv
group, using /opt/nfast as the home directory.
nShield® Edge Installation Guide 8 of 29

4.1.3. All environments
4.1.3.1. Install Java with any necessary patches
The following versions of Java have been tested to work with, and are supported by, your
nShield Security World Software:
•Java7 (or Java 1.7x)
•Java8 (or Java 1.8x).
•Java11
We recommend that you ensure Java is installed before you install the Security World
Software. The Java executable must be on your system path.
If you can do so, please use the latest Java version currently supported by _brand} that
is compatible with your requirements. Java versions before those shown are no longer
supported. If you are maintaining older Java versions for legacy reasons, and need
compatibility with current nShield software, please contact Entrust nShield Support,
https://nshieldsupport.entrust.com.
To install Java you may need installation packages specific to your operating system,
which may depend on other pre-installed packages to be able to work.
Suggested links from which you may download Java software as appropriate for your
operating system:
•http://www.oracle.com/technetwork/java/index.html
•http://www.oracle.com/technetwork/java/all-142825.html
You must have Java installed to use KeySafe.
4.1.3.2. Identify software components to be installed
Entrust supply standard component bundles that contain many of the necessary
components for your installation and, in addition, individual components for use with
supported applications. To be sure that all component dependencies are satisfied, you
can install either:
•All the software components supplied
•Only the software components you require
During the installation process, you are asked to choose which bundles and components
to install. Your choice depends on a number of considerations, including:
•The types of application that are to use the module
nShield® Edge Installation Guide 9 of 29

•The amount of disc space available for the installation
•Your company’s policy on installing software. For example, although it may be
simpler to choose all software components, your company may have a policy of not
installing any software that is not required.
You must install the Hardware Support bundle. If the Hardware Support bundle is not
installed, your module cannot function.
The Core Tools bundle contains all the Security World Software command-line utilities,
including generatekey, low-level utilities, and test programs. The Core Tools bundle
includes the Tcl run time component that installs a run-time Tcl installation within the
nCipher directories. This is used by the tools for creating the Security World and by
KeySafe. This does not affect any other installation of Tcl on your computer.
4.2. Firewall settings
When setting up your firewall, you should ensure that the port settings are compatible
with the HSMs and allow access to the system components you are using.
The following table identifies the ports used by the nShield system components. All listed
ports are the default setting. Other ports may be defined during system configuration,
according to the requirements of your organization.
Component Default Port Use
Hardserver 9000 Internal non-privileged connections from Java
applications including KeySafe
Hardserver 9001 Internal privileged connections from Java applications
including KeySafe
Hardserver 9004 Incoming impath connections from other hardservers, for
example from a non-attended host machine to an
attended host machine when using Remote Operator
If you are using an nShield Edge as a Remote Operator slot for an HSM located
elsewhere, you need to open port 9004. You may restrict the IP addresses to those you
expect to use this port. You can also restrict the IP addresses accepted by the hardserver
in the configuration file. See the User Guide for your module and operating system for
more about configuration files.
nShield® Edge Installation Guide 10 of 29

5. Installing the software
This chapter describes how to install the Security World Software on the computer to
which your nShield Edge will be connected.
After you have installed the software and connected an nShield Edge to your computer,
you must complete further Security World creation, configuration and setup tasks before
you can use your nShield environment to protect and manage your keys. See the User
Guide for more about creating a Security World and the appropriate card sets, and
further configuration or setup tasks.
If you are planning to use an nToken with a client, this should be physically installed in
the client before installing the Security World software, see nToken Installation Guide
5.1. Installing the Security World Software on Windows
Do the following:
1. Log in as Administrator or as a user with local administrator rights.
2. Place the Security World Software installation media in the optical disc drive.
Launch setup.msi manually when prompted.
3. Follow the onscreen instructions. Accept the license terms. Click Next to continue.
4. Specify the installation directory. Click Next to continue.
5. Select all the components required for installation, and then click Install. All
components will be selected by default. Unselect via dropdown menu for individual
component that you do not wish to install. nShield Hardware Support and Core
Tools are necessary to install the Security World Software. See Software packages
for more about the component bundles and the additional software supplied on your
installation media.
The selected components are installed in the installation directory chosen above. The
installer creates links to the following nShield Cryptographic Service Provider (CSP)
setup wizards as well as remote management tools under Start > All Programs >
nCipher:
◦If nShield CSPs (CAPI, CNG) was selected: 32bit CSP install wizard, which sets
up CSPs for 32-bit applications
◦If nShield CSPs (CAPI, CNG) was selected: 64bit CSP install wizard, which sets
up CSPs for 64-bit applications
◦If nShield CSPs (CAPI, CNG) was selected: CNG configuration wizard, which
sets up the CNG providers
nShield® Edge Installation Guide 11 of 29

◦If the nShield Java package was selected: KeySafe, which runs the key
management application
◦If nShield Remote Administration Client Tools was selected: Remote
Administration Client, which runs the remote administration client
If selected, the SNMP agent will be installed, but will not be added to the Services
area in Control Panel →Administrative Tools of the target Windows machine. If you
wish to install the SNMP agent as a service, please consult the SNMP monitoring
agent section in the User Guide.
6. Click Finish to complete the installation.
7. The following global variables are set upon install:
◦%NFAST_CERTDIR%
◦%NFAST_HOME%
◦%NFAST_KMDATA%
◦%NFAST_LOGDIR%
5.2. Installing the Security World Software on Linux
1. Log in as a user with root privileges.
2. Place the installation media in the optical disc drive, and mount the drive.
3. Open a terminal window, and change to the root directory.
4. Extract the required .tar files to install all the software bundles by running
commands of the form:
tar xf disc-name/linux/ver/<file>.tar.gz
In this command, ver is the architecture of the operating system (for example, i386
or amd64), and <file>.tar is the name of a .tar.gz file for that component.
5. Run the install script by using the following command:
/opt/nfast/sbin/install
6. Log in to your normal account.
7. Add /opt/nfast/bin to your PATH system variable:
◦If you use the Bourne shell, add these lines to your system or personal profile:
PATH=/opt/nfast/bin:$PATH
export PATH
nShield® Edge Installation Guide 12 of 29

◦If you use the C shell, add this line to your system or personal profile:
setenv PATH /opt/nfast/bin:$PATH
nShield® Edge Installation Guide 13 of 29

6. Setting up the nShield Edge
6.1. Power saving options
Do not use the power-saving features of your computer when the
nShield Edge is connected. If your computer goes into standby or sleep
mode, the hardserver restarts automatically.
If your computer has power saving features enabled, do the following:
Windows
1. From the Power Options section of the Control Panel, select Power Option >
Change plan settings.
2. For Put the computer to sleep, select Never .
Linux
Set power options to never put computer to sleep.
6.2. Connecting an nShield Edge
Do the following:
6.2.1. Windows
Connect the nShield Edge to your computer, using the supplied USB cable.
If your operating system detects the nShield Edge automatically, allow it to finish.
A message appears, reporting that Windows is stopping and restarting the hardserver.
This takes approximately 30 seconds. Do not click Close.
nShield® Edge Installation Guide 14 of 29

6.2.2. Linux
1. Connect the nShield Edge to your computer, using the supplied USB cable.
2. Open a terminal window and enter the following command:
>tail -f /opt/nfast/log/edgeHandler.log
A message appears in the log file, reporting that Linux is stopping and restarting the
hardserver. This takes approximately 30 seconds.
For example:
2020-01-09 10:33:35 INFO: Waiting for the Edge to be ready: ETA 30 seconds
2020-01-09 10:34:05 WARN: Restarting hardserver
waiting for nCipher server to become operational ...
nCipher server now running
2020-01-09 10:34:09 INFO: The hardserver has finished restarting
When the hardserver has restarted, you are ready to use the nShield Edge with the
Security World Software. See the nShield Edge and nShield Solo User Guide for more
about creating a Security World and using the Security World Software. Creating a
Security World involves putting the nShield Edge into Initialization (I) mode. See
Changing the mode for more information.
6.3. Enabling optional features
The nShield Edge supports a range of optional features, which can be enabled with a
certificate or Activator card that you order from Entrust. The features that are suitable
for the nShield Edge are listed in the Release Notes.
To enable optional features, follow the instructions in the nShield Edge and nShield Solo
User Guide, or follow the instructions supplied with the certificate or Activator card.
6.4. Disconnecting and reconnecting the nShield Edge
After use, you can disconnect the nShield Edge from the computer’s USB port, and then
reconnect it when you next need to use it. The hardserver stops and restarts
automatically each time you disconnect or connect the nShield Edge.
Do not use the Windows Safely Remove Hardware system tray icon
when disconnecting the nShield Edge. If you use this method, an error
displays. Simply disconnect the nShield Edge from the computer’s USB
port.
nShield® Edge Installation Guide 15 of 29

Do not disconnect the nShield Edge or remove the smart card when data is being written
to the inserted smart card.
6.5. Checking the installation
To check that the software and nShield Edge have been installed correctly:
1. Log in as a user and open a command window.
2. Run the command:
enquiry
The following is an example of the output following a successful enquiry command:
Module ##: enquiry reply flags none enquiry reply level Six serial number ####-####-####-#### mode operational version
#.#.# speed index ### rec.
queue ##..## ... rec.
LongJobs queue ## SEE machine type ARMtype2 supported KML types DSAp1024s160 DSAp3072s256
If the mode is operational the HSM has been installed correctly.
If the output from the enquiry command says that the module is not found, first restart
your computer, then re-run the enquiry command.
Ensure that the Windows power saving features are disabled. See
Power saving options for more information.
6.6. Using a Security World
See the User Guide for more about creating a Security World or loading an existing one.
nShield® Edge Installation Guide 16 of 29

7. Using the nShield Edge
The nShield Edge controls, card slot, and LEDs
Key:
A Mode button Selects a mode—the mode changes only when
you press the Clear button.
B Mode LEDs Shows the current mode or selected mode.
C B type USB port For connecting the nShield Edge to the computer.
D Card slot For inserting the required smart card.
E Card slot LED Lights green when a smart card is inserted.
F Status LED Shows the status of the nShield Edge.
G Clear button Clears the memory of the nShield Edge and
changes the selected mode. When using this
button, press and hold it for a couple of seconds.
7.1. Mode LEDs
Red In Maintenance mode
Red flashing Maintenance mode selected
Amber In Initialization mode
Amber flashing Initialization mode selected
nShield® Edge Installation Guide 17 of 29

Green In Operational mode
Green flashing Operational mode selected
You generally use the nShield Edge in Operational (O) mode, but you must put it into
Initialization (I) mode when creating the Security World.
7.2. Changing the mode
To change the mode:
1. Use the Mode button to highlight the required mode.
2. Within a few seconds, press and hold the Clear button for a couple of seconds.
If the mode changes, the new mode’s LED stops flashing and remains lit. The Status LED
might flash irregularly for a few seconds and then flashes regularly when the nShield
Edge is ready.
Otherwise, the nShield Edge remains in the current mode, with the appropriate mode
LED lit.
7.3. Status LED
Long blue flash In Operational mode
Short blue flash In Maintenance or Initialization mode
Irregular flash Changing mode or processing data
Off No power
If the Status LED flashes irregularly and the nShield Edge is unresponsive for more than a
few minutes, see Troubleshooting.
Ê
nShield® Edge Installation Guide 18 of 29

8. Troubleshooting
If the nShield Edge does not function as expected, check the symptoms against the
following conditions and try the suggested action. If these actions do not solve your
problem, contact https://nshieldsupport.entrust.com.
8.1. None of the LEDs are lit
The nShield Edge is not receiving power. Check that the USB cable is undamaged and
connected to the nShield Edge and computer. Try another USB port on the computer.
8.2. The Mode LED is amber or red
The nShield Edge is not in the Operational (O) mode. Press the Mode button to select
the Operational mode, and then press and hold the Clear button for a couple of seconds.
Wait a few seconds before using the nShield Edge.
8.3. The Status LED is flashing irregularly and the nShield
Edge is unresponsive for more than a few minutes
The nShield Edge has encountered an error. Disconnect the nShield Edge, wait a few
seconds, and then reconnect it.
8.4. The Security World Software does not detect the
connected nShield Edge
Disconnect the nShield Edge, wait a few seconds, and then reconnect it.
Run the enquiry command. If the command output says that the module is not found,
restart the hardserver by following the instructions in the nShield Edge and nShield Solo
User Guide.
8.5. Upgrading the firmware
If you are instructed to upgrade firmware of the nShield Edge, see the nShield Edge and
nShield Solo User Guide for instructions.
nShield® Edge Installation Guide 19 of 29

9. nShield Edge Windows compatibility
issues and considerations
9.1. nShield Edge very slow in VMware virtual machine
In Windows installations nShield Edge can be very slow when used with a virtual machine
under VMware (Workstation or Player) leading to the COM port timing out and errors in
the Event log.
The problem does not happen in all installations and is not consistent on specific
hardware platforms.
The work-around for the problem involves using the USB Serial driver on the Host rather
than on the Guest, and mapping a serial port on the Guest to it (details below)
To apply the work-around to use the USB to serial driver on the Host rather than on the
Guest, do the following:
1. With the Guest running, use the VMware Workstation/Player menu to disconnect the
nShield Edge from the Guest and reconnect it to the Host. Now shut down the Guest.
2. Verify that the USB Serial Port now shows under Ports (COM & LPT) in Device
Manager on the Host. On recent versions of Windows, the driver will be installed
automatically or can be found via Window Update. If you are unable to find the
drivers, you may need to install the Security World Software on the Host. If you do
so, make sure to stop and disable the nFast Server and nFast Edge services on the
Host, so they do not prevent the Guest from using of the unit. Make a note of the
COM port number of the port.
3. Edit the settings of the Virtual machine in Workstation/Player. Disable the setting to
automatically connect to new USB devices to make sure the Guest will not connect
to the nShield Edge directly again. Add a serial port to the VM, specifying to use a
physical serial port, on the host, and selecting the USB serial port from the previous
step. Save the settings.
4. Start the Guest. Open the config file in a text editor - it is a plain text file named
config (no extension), located in %NFAST_KMDATA%\config. In the section
[server_startup] add a line: serial_dtpp_devices=COM2 specifying the COM port
number of the new serial port in the VM. Make sure this is the only line with
serial_dtpp_devices in the section. Save the file, and restart the nFast Server service
to make the new configuration active.
You can now use the nShield Edge in the Guest without excessive time out errors.
nShield® Edge Installation Guide 20 of 29
Table of contents
Other Entrust Control Unit manuals
Popular Control Unit manuals by other brands

Groth
Groth 1201B Installation, operation and maintenance manual

Telit Communications
Telit Communications GM862-QUAD Hardware user's guide

TAMURA
TAMURA EPM Series Application notes
Digilent
Digilent PmodUSBUART 410-212 Reference manual
Honeywell Home
Honeywell Home 4219 Installation and setup guide

bee
bee KSN77 PN 16 Operating and assembly instruction

Martin
Martin XHV Air Cannon Operator's manual

AEMC
AEMC Simple Logger L620 user manual
Watts
Watts bar-positrol Mounting and operating instructions

VIA Technologies
VIA Technologies VNT6656GUV00 user manual

Tyco Electronics
Tyco Electronics AMP NETCONNECT 1933668 Series instruction sheet

M-system
M-system R7ML-EC8B instruction manual
