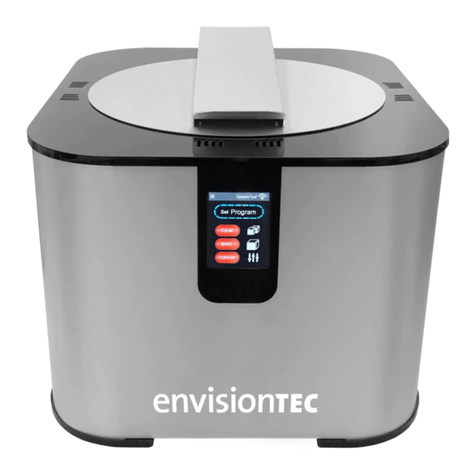
Envisiontec PWA 2000 Quick start guide

Primary Supplies
☐ 99% isopropyl alcohol (IPA) or ☐ Nitrile gloves
☐ Diluted PC1 cleaning agent ☐ Absorbent paper towels
Order from Envisiontec or ☐ Air compressor
authorized distributor: ☐ Makeup or paint brush
SAP part # ACC-99-1000
Dilute - 2 parts water / 1 part PC1
Environmental Conditions
Situate the PWA 2000 in a ventilated area away from sources that
can generate re or heat - see Safety Instructions. Keep the PWA
2000 at least 8 in / 20 cm from the wall. Keep the PWA 2000 in an
environment with temperatures within 65° to 82° F / 18° to 28° C.
Technical Specs
External dimensions: 12.6 x 13 x 9.68 in / 320 x 330 x 246 mm
Washing tank dimensions: 5.7 x 5.7 x 4.13 in / 145 x 145 x 105 mm
Washing system: Contactless agitator
Washing Mode: Basket or platform
Liquid capacity: 118.35 oz / 3.5 lt
Compatibility: Universal adapter (optional)
Programs: Strong - Medium - Delicate
Management: 16 bit IDM processor
Interface: 3.2 in TFT touch screen
Controls: Auto o
Connectivity: 2.4 Ghz WIFI
Power supply: External
Power supply voltage: 100 - 230V 0.3A
Recommended Washing Times
Below is a list of recommended washing times for EnvisionTEC
materials in the PWA 2000 washing apparatus. Washing times are
subject to change.
(H:MM:SS) (H:MM:SS)
Material Program Time: IPA - or - Time: PC1
ABS Tough High 00:03:00 00:06:00
EC-3000 High 00:01:00 00:06:00
E-Dent MFH High 00:05:00 00:06:00
E-Denture High 00:05:00 00:12:00
E-Guard High 00:05:00 00:06:00
E-Guide Tint High 00:03:00 00:06:00
E-Gum High 00:05:00 00:06:00
E-IDB High 00:05:00 00:06:00
E-Model High 00:03:00 00:06:00
(Light, Beige, HS)
E-OrthoShape High 00:03:00 00:06:00
E-Partial High 00:03:00 00:06:00
Epic High 00:00:30 00:06:00
E-Rigid Form High 00:05:00 00:06:00
(Amber, Charcoal)
E-SepFree High 00:01:00 00:06:00
HTM140 High 00:02:00 00:06:00
(V2, V3)
PIC-100 High 00:00:30 00:06:00
Press-E-Cast High 00:03:00 00:06:00
WIC-402 High 00:03:00 00:06:00
Do not expose models to alcohol for an extended period of time.
For more specic post processing information on the material used,
see the Cookbook for that material. Cookbooks are available for
download in the E-Team, or by contacting technical support.
The Parts Washing Apparatus (PWA 2000) is a convenient tool
to assist in removing uncured material from 3D printed models.
The removable washing compartment allows for ease of use
when adding or removing models from the PWA 2000. The PWA
2000 oers a selection between three washing programs, so
that the user can accurately clean the most delicate models
and larger, more complex models eectively and eciently.
These selections can be made directly on the easy-to-use touch
screen.
Applicable Printers: All cDLM and DLP printer series
© EnvisionTEC Page 1 of 3
Technical Guide
PWA 2000
TS-OPI-PWA-2000-V20200219-FN-EN.pdf
Handle
PULL
PULL
LEVEL
LOW
MED
HIGH
PWA 2000 FRONT VIEW
Washing
compartment lid
Touch screen
Fig. 1
Lock for washing
compartment lid
Removeable
washing
compartment Drainage
spout
LEVEL
PULL
PULL
LOW
MED
HIGH
PWA 2000 REMOVEABLE WASHING COMPARTMENT
Fig. 2
Handle
Drainage spout
Interior
grate

© EnvisionTEC Page 2 of 3
TS-OPI-PWA-2000-V20200219-FN-EN.pdf
When ready to begin a cleaning cycle add the cleaning agent in the
following manner -
1 Open the washing compartment lid, Fig. 1
2 Lift the handle to raise the interior grate to the highest position,
Fig. 2
3 Pour the 99% IPA or the dilluted PC1 into the washing
compartment to just below the grate while it is in the lifted position.
This ensures you will not have to reach into the cleaning agent
when retrieving models after washing
4 Close the washing compartment lid and lock in place
Programs and Features
The PWA 2000 has a microprocessor-controlled touch screen interface
and intuitive software that allows you to control every aspect of the
washing process of your 3D printed models.
Set program
Once the PWA 2000 is powered on, it
automatically switches to the Set Program
menu. The three washing options are
accessible from this screen -
High, Medium, and Low
High Program
The High program is a strong washing
program designed for sturdy models and
materials
Medium Program
The Medium program is a standard washing program designed for
standard models and materials
Low Program
The Low program is a slow washing program designed for very
delicate models and materials
Setting a Program
1 Once the High, Medium, or Low program
is selected, the Set Timer menu is displayed
2 Using the Plus and Minus symbols
towards the bottom of the Set Timer menu,
adjust the time to the desired setting. Each
digit will need to be selected and adjusted
individually
3 Open the washing compartment lid. Lift
the handle to raise the interior grate to the
highest position, Fig. 2. Place the model(s)
on the grate and gently lower the handle to
submerge the model(s) in the cleaning agent. Close the washing
compartment lid and lock in place
4 When ready, select the Start button. The PWA 2000 will
immediately beginning the set washing cycle
5Open the washing compartment lid and lift the handle to raise the
model(s) out of the cleaning agent. Inspect the model(s) and use
a brush to gently clean cavities as needed. Remove the model(s)
from the washing compartment
6 If using PC1 - rinse models thoroughly in water for 30
seconds. A tub of water or a sink can be used for this step. After
rinsing, use compressed air to quickly dry the models
7 If using IPA - use compressed air to remove all IPA from the
surface of the model as soon as possible
Do not expose models to IPA or PC1 for an extended period of
time. For more specic post processing information on the material
used, see the Cookbook for that material. Cookbooks are available for
download in the E-Team, or by contacting technical support.
Product Setup
Complete the following steps in order to correctly unpack and assemble
the PWA 2000 -
Unpacking the PWA 2000
1 Carefully open the packaging: Do not use blades that could
damage the contents
2 The PWA 2000’s power cable is packed on the top foam panel,
Fig. 3. Remove the power cable from the box and set aside
3 Extract the PWA 2000 from the box by lifting upwards
4 Remove the foam panels from the top and bottom
5 Do not throw away the box and foam panels. Keep the packaging
6 Situate the PWA 2000 on a secure surface. Place the PWA 2000
at a distance of at least 8 inches (20 cm) from any other object,
including the back wall
7 Connect the power cable to the PWA 2000 and into a power
socket US - 110V / EU - 220V with a grounding socket. A controlled
switch socket is prefered as this would allow the operator to easily
disconnect the power to the apparatus when not in use
8 Once power is connected, the PWA 2000 will display a brief start-
up screen and will then go to stand-by mode. In this mode the PWA
2000 is ready to start the required program
Adding the cleaning agent
There are two recommended cleaning agents for the PWA 2000 -
1 99% isopropyl alcohol (IPA) - See the manufacturer for use and
safety instructions
2PC1 - A non-carcinogenic, non-hazardous, non-ammable, eco-
friendly alternative to IPA. PC1 must be diluted with water before
using in the PWA 2000. Use a ratio of 2 parts water to 1 part PC1
Do not store the cleaning agent in the PWA 2000 after use. Use the
drainage spout, Fig. 2, to pour the cleaning agent into a separate
storage container between uses.
LOW
MED
HIGH
00:00 Connected
Set Program
HIGH
MED
LOW
PWA
2000
Foam
panel
Foam
panel
Box
Power
cable
PWA 2000 UNPACKINGFig. 3
LOW
MED
HIGH
START
Set Timer
00:31:00

© EnvisionTEC Page 3 of 3
TS-OPI-PWA-2000-V20200219-FN-EN.pdf
Safety Instructions
Warning: The PWA 2000 removes uncured resin from
the surface of 3D printed models using chemicals such
as 99% isopropyl alcohol and PC1. The PWA 2000 is
a professional product and must be used by qualied
personnel, following safety instructions.
Warning: The PWA 2000 is powered at US - 110V
/ EU - 220V mains voltage. Avoid tampering with
the equipment and all of its parts to avoid risk of
electrocution. In case of malfunction of the device
contact EnvisionTEC technical support or an authorized
distributor.
Warning: It is recommended that the user carefully
read the instructions for the cleaning product used for
cleaning the 3D printed models before operating the
PWA 2000 in conjunction with this product.
Warning: Always operate the PWA 2000 in well
ventilated areas. Many cleaning products are ammable
and highly volatile. After use place the cleaning products
in their appropriate storage containers. Do not use the
PWA 2000 near sources of heat or sparking.
Warning: After use, always empty the cleaning product
from the washing compartment. Be careful when
emptying the washing compartment.
Copyright
This instruction manual must be treated condentially. It should
only be used by authorized personnel. It may only be entrusted or
made available to third parties with the prior written consent of
EnvisionTEC GmbH, EnvisionTEC Inc. or authorized distributors.
All documents are protected within the sense of copyright law.
No part of this documentation may be reproduced, utilized or
transmitted without specic prior consent. Infringements are
an oence resulting in obligatory compensatory damages.
All industrial rights reserved.
Trademark
EnvisionTEC® and Perfactory® are related product names that are
registered Trademarks of EnvisionTEC GmbH, Germany.
Manufacturer Warranty
This instruction manual must be read carefully before installing the
product and putting it into operation. We assume no liability for damage
and malfunctions resulting from failure to comply with the instruction
manual. Furthermore, no warranty can be provided for faults that are
due to subjecting the goods to improper use or application above
average strain, nor can any warranty be provided for wearing parts.
In case any material defects or errors occur despite correct usage,
EnvisionTEC oers a warranty period limited to one year starting from
the moment the customer is supplied with the goods for the 3D printing
system and respective accessories. The obligation of EnvisionTEC
is limited to repairing or replacing defective machine parts.
Under no circumstances will EnvisionTEC assume liability for
the consequences or side eects of a violation of warranty
conditions, even if this has been agreed to or expected, and
even in case of fault or negligence on the part of the company.
EnvisionTEC expressly refrains from granting any other warranty
claims in this respect. Neither representatives/dealers nor employees
of the company are authorized to increase or alter the warranty
claims. Contact EnvisionTEC for more information regarding Warranty
Programs and for details about extended warranty options.
Other Envisiontec Industrial Equipment manuals
