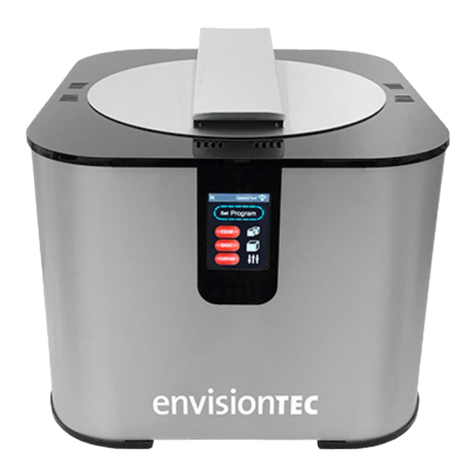
Envisiontec PCA 4000 Quick start guide

Technical Specs
External dimensions: 14.33 x 15.9 x 12.55 in (364 x 404 x 319 mm)
Curing chamber dimensions: 7.87 x 7.87 x 7.48in (200 x 200x190mm)
Emitter type and quantity: 60 Hi-power LED 5 W
Irradiance system: OmniRay 360° Irradiance
Wavelengths: 365 nm - 405 nm
Emission opening: +/- 20 nm
Total emitter power: 150 W
System: Eco-passive
Heating control: 6x PID controller
Management: 16 bit IDM processor
Interface: 3.2 in TFT touch screen
Programs: 2 standard - customer set n°7 memory
Command: Auto o
Connectivity: 2.4 Ghz WIFI
Power supply: Internal
Power supply voltage: 110-230V 6-4A 50-60Hz
Environmental Conditions
Situate the PCA 4000 in a ventilated area away from sources of heat
and away from ammable materials and liquids that may cause a
safety risk - see Safety Instructions p. 4.
Keep the PCA 4000 at least 8 inches / 20 cm from the wall. To avoid
damaging the apparatus, do not obstruct in any way the cooling
ducts, their openings to the outside, the fans on the rear panel,
and fan on the base of the PCA 4000. Keep the PCA 4000 in an
environment with temperatures within 65° to 82° F / 18° to 28° C.
Recommended Custom Curing Times
Below is a list of recommended curing times for EnvisionTEC materials
in the PCA 4000 curing apparatus. Curing times are subject to change.
Material Time (H:MM:SS) Temp. Power
Easy Cast 2.0 0:30:00 60˚ C 100%
EC-3000 0:10:00 60˚ C 100%
EC-500 0:30:00 60˚ C 100%
E-3172 First cycle: 0:06:00 60˚ C 100%
Second cycle: 0:30:00 60˚ C 100%
E-3172 0:01:00 60˚ C 39%
E-3843 First cycle: 0:06:00 60˚ C 100%
Second cycle: 0:30:00 60˚ C 100%
E-3860 First cycle: 0:06:00 60˚ C 68%
Second cycle: 0:30:00 160˚ C 100%
E-5015 0:20:00 60˚ C 100%
E-AquaModel 0:02:00 20˚ C 100%
E-Guard 2.0 0:01:00 20˚ C 35%
E-Guide 2.0 0:01:00 20˚ C 35%
E-IND147 First cycle: 1:30:00 60˚ C 68%
Second cycle: 3:00:00 170˚ C 100%
E-IND402 1:30:00 60˚ C 100%
(Black, Gray)
E-IND406 First cycle: 1:00:00 60˚ C 100%
Second cycle: 2:00:00 140˚ C 100%
E-Model 0:01:00 20˚ C 100%
(Light, Beige, HS)
E-Orthoshape 0:01:00 20˚ C 100%
E-Partial 0:04:00 20˚ C 100%
E-Rigid Form 0:04:00 20˚ C 100%
(Charcoal, Amber)
E-Rigid PU 0:05:00 60˚ C 100%
NextDent Gingiva Mask 0:02:00 20˚ C 100%
The PCA 4000 Parts Curing Apparatus is the ideal solution for
post-curing parts that have been 3D printed using cDLM or DLP
technologies. The PCA 4000 utilizes a unique system of UV LED
light sources that use both 365 nm to deep cure and 405 nm for the
perfect surface cure of each part. It has a microprocessor-controlled
touchscreen interface and intuitive software that allows you to control
every aspect of the post-processing 3D printed models. With 360°
irradiation and controlled heating, the PCA 4000 can optimize your
productivity.
Applicable Printers: All cDLM and DLP printer series
© EnvisionTEC Page 1 of 4
Technical Guide
PCA 4000
TS-OPI-PCA-4000-V20210311-FN-EN.pdf
00:00 Connected
Set Program
CLEAR
BASIC
CUSTOM
CUSTOM
BASIC
CLEAR
START
Set Timer
00:02:00
START
Set Temp
20
°C
START
Set Power
100%
Program 0
Power
Temp
Time
START
100%
20
°
C
00:02:00
Set PRG
Prog: 0
Prog: 0
Prog: 1
Prog: 2
Prog: 3
Prog: 4
Prog: 5
Prog: 5
100%
100%
100%
100%
100%
100%
100%
30°C
30°C
30°C
30°C
30°C
30°C
30°C
00:10:00
00:10:00
00:10:00
00:10:00
00:10:00
00:10:00
00:10:00
Set PRG
Curing
chamber lid
Touch
screen
Cooling
ducts
Fan output
(not pictured)
PCA 4000 FRONT VIEWFig. 1
PCA 4000 CURING CHAMBER
Fig. 2
Curing chamber lid
Curing chamber
LED light source
Touch
screen
Cooling
ducts
Cooling
ducts

© EnvisionTEC Page 2 of 4
TS-OPI-PCA-4000-V20210311-FN-EN.pdf
10 Once all four tray supports are in place, the post curing tray
can be lowered into the curing chamber, Fig. 5. Close the curing
compartment lid
11 Connect the power cable to the PCA 4000 and into a power
socket US - 110V / EU - 220V with a grounding socket. A controlled
switch socket is prefered as this would allow the operator to easily
disconnect the power to the apparatus when not in use - see Safety
Instructions
Powering on the PCA 4000
12 Once power cable is connected, the PCA 4000 can be powered
on via the power switch at the back of the unit.
The PCA 4000 will display a brief start-up screen and will then go
to stand-by mode. In this mode the PCA 4000 is ready to start the
required program. It is connected to power, but does not emit UV
rays while in stand-by mode - see Safety Instructions p. 4
Programs and Features
Main menu
Once the PCA 4000 is powered on, it automatically switches to the
Main menu. While in the Main menu, the curing oven is powered on
and ready to start the program selected by the user, but the LED lights
are not ignited.
Product Assembly
Unpacking the PCA 4000
1 Carefully open the packaging: Do not use blades that could
damage the contents
2Accessories for the PCA 4000 are packed on the top foam panel
- power cable, post curing tray, and tray supports to hold the post
curing tray in place, Fig. 3. Remove these from the box and set
aside
3Extract the PCA 4000 from the box by lifting upwards
4Remove the foam panels from the top and bottom
5Do not throw away the box and foam panels. Keep the packaging
6Situate the PCA 4000 on a secure surface. Place the PCA
4000 at a distance of at least 8 inches (20 cm) from any other
object, including the back wall. This is essential in order to avoid
obstructing the ducts of the PCA 4000’s cooling system - see
Safety Instructions p. 4
Installing the accessories
7The post curing tray, Fig. 3, has a protective lm that will need to
be removed from both sides before installation. Always handle the
tray with gloved hands to avoid leaving nger prints
8 Locate the bag with the four small plastic tray supports, Fig. 3.
Remove these from their bag
9In each corner inside the curing chamber there is a top hole,
middle hole, and bottom hole, Fig. 4. It is recommended to place
the tray supports in the top holes to ensure the models are an even
distance from all lights during the curing process. Open the curing
compartment lid, Fig. 1, and install the four tray supports in the four
top holes
00:00 Connected
Set Program
CLEAR
BASIC
CUSTOM
CUSTOM
BASIC
CLEAR
START
Set Timer
00:02:00
START
Set Temp
20
°C
START
Set Power
100%
Program 0
Power
Temp
Time
START
100%
20
°
C
00:02:00
Set PRG
Prog: 0
Prog: 0
Prog: 1
Prog: 2
Prog: 3
Prog: 4
Prog: 5
Prog: 5
100%
100%
100%
100%
100%
100%
100%
30°C
30°C
30°C
30°C
30°C
30°C
30°C
00:10:00
00:10:00
00:10:00
00:10:00
00:10:00
00:10:00
00:10:00
Set PRG
PCA
4000
Foam
panel
Foam
panel
Box
Post
curing
tray
Power
cable
Tray
supports
PCA 4000 UNPACKINGFig. 3
PCA 4000 TRAY SUPPORTS POSITIONFig. 4
00:00 Connected
Set Program
CLEAR
BASIC
CUSTOM
CUSTOM
BASIC
CLEAR
START
Set Timer
00:02:00
START
Set Temp
20
°C
START
Set Power
100%
Program 0
Power
Temp
Time
START
100%
20
°
C
00:02:00
Set PRG
Prog: 0
Prog: 0
Prog: 1
Prog: 2
Prog: 3
Prog: 4
Prog: 5
Prog: 5
100%
100%
100%
100%
100%
100%
100%
30°C
30°C
30°C
30°C
30°C
30°C
30°C
00:10:00
00:10:00
00:10:00
00:10:00
00:10:00
00:10:00
00:10:00
Set PRG
LED bulb
Tray
support
Base of curing
chamber
Top hole
Middle hole
Bottom hole
PCA 4000 INSTALLING POST CURING TRAYFig. 5
Time
00:01:00
Temp
20
°C
Time
START
00:01:00
Program
1
Temp
Power 60%
20
°
C
Power
35%
Time
START
00:01:00
E-Orthoshape
Main menu
Program
1
Program
2
Program
3
Program
4
Program
5
Program
6
Program
7
Program
8
Main menu
E-Orthoshape E-Model HS E-SepFree
E-Tray Easy Cast E-Shell
200 Series
PCA4000
30
°
C 35
°
C 40
°
C 45
°
C
STANDARDCUSTOM
Post
curing
tray
Cooling
ducts
Tray
supports
Curing
chamber lid
LED bulbs
Curing
chamber

© EnvisionTEC Page 3 of 4
TS-OPI-PCA-4000-V20210311-FN-EN.pdf
The Custom program allows the user to adjust -
1 The UV power from 1% up to 100%.
2 The exposure time from 1 second to 100 hours
3The temperature from 20° C to 60° C / 68° F to 140° F
Storing a Custom program
To store a new Custom program -
1 Select Custom from the Main menu
2From the Custom Program list, choose the number of the program
to edit from Prg 1 - Prg 8
3 The custom program screen will open, ex. Program 1 Fig. 10.
For each custom program, the Power, Temperature, and Time can
be adjusted individually -
4 From the Custom program menu,
select Power
5 Adjust the power from 1 - 100% using
the plus and minus symbols
6 Select the Back button at the center
left of the menu to return to the Custom
program menu
7Select Temp
8Adjust the temperature from 20° to 60°
C / 68° to 140° F
9Select Back
10 Select Time
11 Adjust the time from 1 second to 100
hours
12 Select Back. Verify your Power,
Temp, and Time are correct
13 Place the clean model(s) on the post
curing tray in the curing chamber and
close the lid
14 When ready to begin the curing cycle, select Start
The PCA 4000 system has two post curing program options - Custom
and Standard. The placement of the UV emitters allows for 360°
curing of the models without having to rotate the curing platform.
Using a Standard program
The Standard programs are pre-programmed post-curing settings for
specic EnvisionTEC materials. Each material listed in the Standard
program menu has specic time, temperature, and power settings.
1 Select the STANDARD icon from the Main menu, Fig. 6, to
access the Standard program menu, Fig. 7.
2 Select the desired material from the Standard program menu, ex.
E-Orthoshape Fig. 8
3 Place the clean model(s) on the post curing tray in the curing
chamber and close the lid
4 When ready to begin the curing cycle, select the Start button at
the bottom right of the menu
Custom programs
The PCA 4000 can store eight personalized programs. Select the
CUSTOM icon from the Main menu, Fig. 6, to access the Custom
program menu, Fig. 9.
Main menu
Program
1
Program
2
Program
3
Program
4
Program
5
Program
6
Program
7
Program
8
CUSTOM PROGRAM MENUFig. 9
Main
menu
Custom
program 1
Main menu
E-Orthoshape E-Model HS E-SepFree
E-Tray Easy Cast E-Shell
200 Series
STANDARD PROGRAM MENUFig. 7
Main
menu
E-Orthoshape
program
Time
START
00:01:00
E-Orthoshape
E-ORTHOSHAPE STANDARD PROGRAMFig. 8
Return to Standard
program menu
Standard
program time
Start
button
Time
START
00:01:00
Program
1
Temp
Power 60%
20
°
C
CUSTOM PROGRAM 1Fig. 10
Return to Custom
program menu
Custom
program 1
Start curing
cycle
Power settings
Temp settings
Time settings
Power
35%
Temp
20
°C
Time
00:01:00
MAIN MENUFig. 6
Standard
program
Custom
program
PCA4000
30
°
C 35
°
C 40
°
C 45
°
C
STANDARDCUSTOM

© EnvisionTEC Page 4 of 4
TS-OPI-PCA-4000-V20210311-FN-EN.pdf
Safety Instructions
Warning: This post curing apparatus uses UV LED light
sources of high energy UV rays that can cause serious
harm to eyes and skin. Avoid direct or indirect exposure
to such emissions even for short periods of time.
Warning: Avoid opening the curing compartment lid
during operation. If you need to open the lid during a post
curing cycle, pause or stop the program on the touch
screen before opening. The PCA 4000 is equipped with
an automatic switch o system of the UV LEDs if the
curing compartment lid is opened during operation.
Warning: The safety systems on the PCA 4000 are
intended as emergency aids: do not tamper in any way
with the integrity of the UV oven or any part thereof, and
do not tamper with the closed-lid control system. In the
case of a malfunction of the safety system or in the case
of the LEDs remaining on while the curing compartment
lid is open, immediately remove the power plug from the
outlet and contact EnvisionTEC technical support.
Warning: The PCA 4000 is powered at 220 V. Avoid
tampering with the equiment and all of its parts to avoid
risk of electocution. In case of malfunction of the PCA
4000 contact EnvisionTEC technical support.
Warning: The PCA 4000 has a touchscreen interface
and does not use commands or mechanical buttons.
Even when the apparatus is not currently operating it
remains powered on. Unplug the power cable to the
PCA 4000 if it will not be used for an extended period of
time, especially when left unattended.
Warning: The PCA 4000 utilizes the heat generated by
the LEDs to accelerate the curing process of the resins.
The cured models and the oven itself may be very hot.
Warning: The PCA 4000 uses the heat generated by
the LEDs to accelerate the curing process of the resin.
Do not leave unattended to avoid risk of re.
Warning: During post curing, the models can generate
heat, especially if grouped in large quantities. Never
leave the PCA 4000 unattended to avoid risk of re.
Warning: The resins placed to cure in the PCA 4000
could generate fumes that are harmful to health. Position
and use the PCA 4000 in a well-ventilated place.
Warning: The fan in the PCA 4000 controls the
temperature of the device through numerous air vents
placed at dierent points on the device. To avoid
damaging the unit, do not obstruct in any way the
cooling ducts, the openings to the outside, and the fan
itself.
Warning: The PCA 4000 is a device for professional
use. Keep the post curing apparatus in a safe place
and accessible only to qualied operators. Do not allow
children to use it.
Warning: Place the PCA 4000 away from heat sources,
ammable materials, and liquids that may cause safety
risk. Clean the unit only with a clean, dry cloth. Do not
expose to water.
00:00 Connected
Set Program
CLEAR
BASIC
CUSTOM
CUSTOM
BASIC
CLEAR
START
Set Timer
00:02:00
START
Set Temp
20
°C
START
Set Power
100%
Program 0
Power
Temp
Time
START
100%
20
°
C
00:02:00
Set PRG
Prog: 0
Prog: 0
Prog: 1
Prog: 2
Prog: 3
Prog: 4
Prog: 5
Prog: 5
100%
100%
100%
100%
100%
100%
100%
30°C
30°C
30°C
30°C
30°C
30°C
30°C
00:10:00
00:10:00
00:10:00
00:10:00
00:10:00
00:10:00
00:10:00
Set PRG
Copyright
This instruction manual must be treated condentially. It should
only be used by authorized personnel. It may only be entrusted or
made available to third parties with the prior written consent of
EnvisionTEC GmbH, EnvisionTEC Inc. or authorized distributors.
All documents are protected within the sense of copyright law.
No part of this documentation may be reproduced, utilized or
transmitted without specic prior consent. Infringements are
an oence resulting in obligatory compensatory damages.
All industrial rights reserved.
Trademark
EnvisionTEC® and Perfactory® are related product names that are
registered Trademarks of EnvisionTEC GmbH, Germany.
Manufacturer Warranty
This instruction manual must be read carefully before installing the
product and putting it into operation. We assume no liability for damage
and malfunctions resulting from failure to comply with the instruction
manual. Furthermore, no warranty can be provided for faults that are
due to subjecting the goods to improper use or application above
average strain, nor can any warranty be provided for wearing parts.
In case any material defects or errors occur despite correct usage,
EnvisionTEC oers a warranty period limited to one year starting from
the moment the customer is supplied with the goods for the 3D printing
system and respective accessories. The obligation of EnvisionTEC
is limited to repairing or replacing defective machine parts.
Under no circumstances will EnvisionTEC assume liability for
the consequences or side eects of a violation of warranty
conditions, even if this has been agreed to or expected, and
even in case of fault or negligence on the part of the company.
EnvisionTEC expressly refrains from granting any other warranty
claims in this respect. Neither representatives/dealers nor employees
of the company are authorized to increase or alter the warranty
claims. Contact EnvisionTEC for more information regarding Warranty
Programs and for details about extended warranty options.
Other Envisiontec Industrial Equipment manuals
Popular Industrial Equipment manuals by other brands
Bühler technologies
Bühler technologies GAS 222.21 E 2 Series Installation and operation instruction
Endress+Hauser
Endress+Hauser Prothermo NMT 539 Operating instruction
ABB
ABB HT612833 Operation manual
Pilous
Pilous ARG 260 CF-NC automat instruction manual

SCHUNK
SCHUNK TRIBOS SVP-2D Assembly and operating manual
KTR-Group
KTR-Group BoWex FLE-PA Operating & assembly instructions

