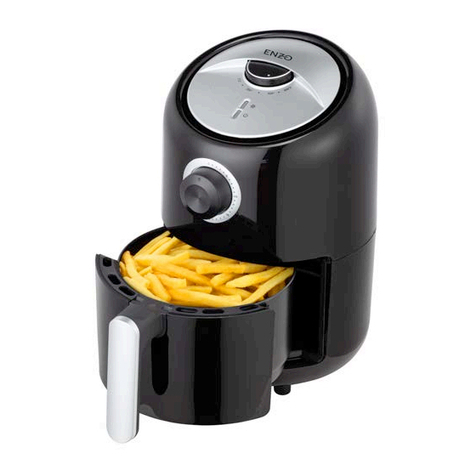
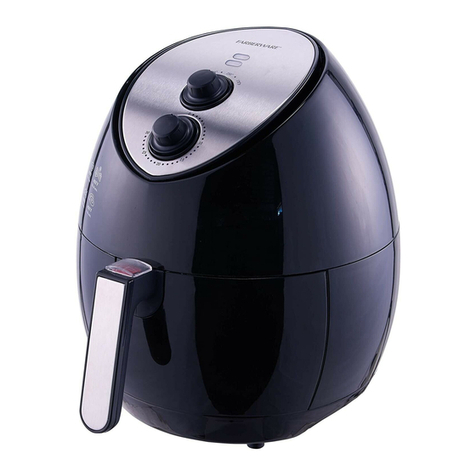
Enzo EMAF3219KE User manual

3.2 Quart Air Fryer
MODEL: EMAF3219KE
USER MANUAL
For technical assistance or troubleshooting
please call 1-888-770-3696 or visit www.sibrands.com

~"2"~"
A"
Small Silicone Caps (Pre-installed)
G"
Timer Control Knob (0-30 min.)
B"
Grill Rack
H"
Power Indicator Light
C"
Handle
I"
Heat Indicator Light
D"
Pan
J"
Air Outlet Openings
E"
Air Inlet Openings
K"
Base
F"
Temperature Control Knob (176-392°F)
L"
Power Cord
GENERAL DESCRIPTION

~"3"~"
The Grill Rack (B) should always be secured inside the Pan (D) before using the Air Fryer.
To install the Grill Rack (B) simply follow these steps:
1. Make sure the 4 Small Silicone Caps (A) are placed on the 4 tabs on the edge of the Grill
Rack (B) as shown in the image below.
2. Hold the grill Rack (B) by the small bar in the center and insert the Grill Rack (B) into the
Pan (D) so the small bar in the center is facing up. NOTE: inside the Pan (D) there are small
raised areas or “Lips” that are designed to help hold the Grill Rack (B) inside the Pan (D).
You may need to rotate the Grill Rack (B) slightly so the 4 Small Silicone Caps (A) can clear
these “Lips”.
3. Once the Grill Rack (B) is touching the bottom of the Pan (D), rotate the Grill Rack (B)
clockwise until each of the 4 Small Silicone Caps (A) are locked below one the “Lips”. This
will insure the Grill Rack (B) is properly secured inside the Pan (D).
INSTALLING THE GRILL RACK

~"4"~"
Read this user manual carefully before you use the appliance and save it for future reference.
DANGER
- Never immerse the housing, which contains electrical components and the heating
elements, in water nor rinse it under the tap.
- Do not let any water or other liquid enter the appliance to prevent electric shock.
- Always put the ingredients to be fried on the grill rack in the pan, to prevent it from
coming into contact with the heating elements.
- Do not cover the Air Inlet (E) and Air Outlet (J) Openings while the appliance is
operating.
- Do not fill the pan with oil as this may cause a fire hazard.
- Never touch the inside of the appliance while it is operating.
- Always allow the appliance to cool down for at least 30 minutes before attempting to
clean any of the parts.
WARNING
- Check if the voltage indicated on the appliance corresponds to the local power
voltage before you connect the appliance.
- Do not use the appliance if the plug, the power cord or the appliance itself is
damaged.
- If the power cord is damaged, you must have it replaced by Professionals, a service
center authorized by the seller or similarly qualified persons in order to avoid a
hazard.
- This appliance should not be used by children under the age of 15, or by persons
with reduced physical, sensory or mental capabilities, or lack of experience and
knowledge.
- Children should be supervised to ensure that they do not play with the appliance.
- Keep the appliance and its power cord out of the reach of children younger than 15
when the appliance is switched on or is cooling down.
- Keep the power cord away from hot surfaces.
- Do not plug in the appliance or operate the control panel with wet hands.
- Always make sure that the plug is inserted into the wall socket properly.
IMPORTANT

~"5"~"
- This appliance should not be operated by means of an external timer or a separate
remote control system.
- Do not place the appliance on or near combustible materials such as a tablecloth or
curtain.
- Do not place the appliance against a wall or against other appliances. Leave at least
4 inches of free space on the back and sides and 4 inches of free space above the
appliance.
- Do not place anything on top of the appliance.
- Do not use the appliance for any other purpose than described in this manual.
- Do not let the appliance operate unattended.
- During hot air frying, hot steam is released through the air outlet openings. Keep
your hands and face at a safe distance from the steam and from the air outlet
openings. Also be careful of hot steam and air when you remove the pan from the
appliance.
- The accessible surfaces may become hot during use.
- Immediately unplug the appliance if you see dark smoke coming out of the
appliance. Wait for the smoke emission to stop before you remove the pan from the
appliance.
CAUTION
- Place the appliance on a horizontal, even and stable surface.
- This appliance is intended for normal household use only. It is not intended for use
in environments such as staff kitchens of shops, offices, farms or other work
environments. Nor is it intended to be used by clients in hotels, motels, bed and
breakfasts and other commercial environments.
- If the appliance is used improperly or for professional or semi-professional purposes
or if it is not used according to the instructions in the user manual, the warranty
becomes invalid and the manufacturer and seller refuse any liability for damage
caused.
- Always return the appliance to a service center authorized by sellers for
examination or repair. Do not attempt to repair the appliance yourself, otherwise the
warranty becomes invalid.
- Always unplug the appliance after each use.
- Let the appliance cool down for approx. 30 minutes before you handle or clean it.

~"6"~"
- Make sure the ingredients prepared in this appliance come out golden-yellow
instead of dark or brown. Remove burnt remnants. Do not fry fresh potatoes at a
temperature above 356°F (to minimize the production of acrylamide).
AUTOMATIC SHUT-OFF
This appliance is equipped with a timer. When the timer has counted down to 0, the
appliance switches off automatically. To turn the appliance off manually, turn the Timer
Control Knob (G) counterclockwise to 0.
ELECTROMAGNETIC FIELDS (EMF)
This appliance complies with all standards regarding electromagnetic fields (EMF). If
handled properly and according to the instructions in this user manual, the appliance is safe
to use based on scientific evidence available today.
1. Remove all packaging material.
2. Remove any stickers or labels from the appliance.
3. Thoroughly clean the Grill Rack (B) and the Pan (D) with hot water, some mild soap
and a non-abrasive sponge or cloth.
4. Wipe the inside and outside of the appliance with a moist cloth.
This is an air fryer that cooks using hot air. Do not fill the pan with oil or frying fat.
1. Place the air fryer on a stable, horizontal and level surface.
Do not place the appliance on non-heat-resistant surfaces.
2. Insert the Grill Rack (B) in the Pan (D) according to the instructions on page 3.
BEFORE FIRST USE
PREPARING FOR USE

~"7"~"
HOT AIR FRYING
1. Plug the power cord into a working power outlet.
2. Gently pull on the Handle (C) to pull the Pan (D) out of the air fryer.
3. Make sure the Grill Rack (B) is secure inside the Pan (D) according to the
instructions on page 3.
4. OPTIONAL: You can preheat the Air Fryer with no food inside the Pan. To preheat
begin by turning the Temperature Control Knob (F) to your desired temperature and
then turn the Timer Control Knob (G) to 3 minutes. The Air Fryer will turn ON and
heat until the timer stops. At this point the air fryer should be preheated.
If you do not wish to preheat, it is recommended to add 3 minutes to the cooking
time specified for your ingredients/recipe.
5. Place the food to be cooked on the Grill Rack (B) inside the Pan (D).
6. Gently slide the Pan (D) back into the air fryer.
Never use the Pan (D) without the Grill Rack (B) secured into position safely.
Caution: Do not touch the pan during use, or within 30 minutes after use, as it gets very hot.
Only hold the pan by the handle.
7. Turn the Temperature Control Knob (F) to the desired temperature. See section
‘Settings’ for help in determining the temperature.
Note: If you want to prepare different ingredients at the same time, make sure
you check the preparation time and the temperature required for each of the
different ingredients before you start to prepare them simultaneously.
Homemade fries and drumsticks, for example, can be prepared simultaneously
because they require the same settings.
8. Determine the required preparation time for the ingredient (see section ‘Settings’).
9. To turn the Air Fryer ON and begin cooking, turn the Timer Control Knob (G) to the
required preparation time for the ingredients you have placed in the Pan (D).
•The Heat Indicator Light (I) will turn ON.
•The timer starts counting down from the set preparation time.
•During the hot air frying process, the Heat Indicator Light (I) will turn ON and
USING THE APPLIANCE

~"8"~"
OFF several times. This indicates that the heating element is turning ON and
OFF to maintain the set temperature.
•During the cooking process some excess oil from the ingredients will be
collected on the bottom of the Pan (D).
10. Some ingredients require shaking halfway through the preparation time to help cook
evenly (see section ‘Settings’). To shake the ingredients, gently pull the Pan (D) out
of the appliance by the Handle (C) and gently shake the Pan (D) from side to side to
reposition the ingredients. After shaking slide the Pan (D) back into the air fryer and
cooking will start again.
Tip: If you set the timer to half the preparation time, you will hear the timer bell
when you have to shake the ingredients. However, this means that you have to
set the timer again for the remaining preparation time after shaking.
11. When the set cooking time has elapsed you will hear the timer bell, and the Air Fryer
will automatically turn OFF. Using the Handle (C), gently pull the Pan (D) out of the
appliance and place the Pan (D) on a heat-resistant surface.
Note: You can also turn the Air Fryer OFF manually. To do this, turn the Timer
Control Knob (G) to 0.
12. Check if the food is cooked to your desired level. If the food is not ready yet, simply
slide the Pan (D) back into the appliance and set the Timer Control Knob (G) to a
few extra minutes.
13. Use a pair of tongs or a spoon to remove the cooked food from the Pan (D).
Note: Do not turn the pan upside down to remove the cooked food, as any
excess oil that has collected on the bottom of the pan will pour out.
After hot air frying, the pan and the ingredients are hot. Depending on the type
of ingredients in the air fryer, steam may escape from the pan.
After the first batch of food has completed cooking, the Air Fryer is instantly ready for
preparing another batch because it is already heated. To cook another batch simply repeat
steps 5-13.

~"9"~"
The table on the next page helps you to select the basic settings for some ingredients you
may want to prepare. It will also indicate foods that cook better when they are shaken half
way through the cooking process.
Note: Keep in mind that these settings are suggestions. As ingredients differ in origin,
size, shape as well as brand, we cannot guarantee the best setting for your ingredients.
TIPS
- Smaller ingredients usually require a slightly shorter preparation time than larger
ingredients.
- A larger amount of ingredients only requires a slightly longer preparation time. A
smaller amount of ingredients only requires a slightly shorter preparation time.
- Shaking smaller ingredients halfway through the preparation time optimizes the end
result and can help prevent unevenly fried ingredients.
- Brush some cooking oil on fresh potatoes for a crispy result. Fry your ingredients in
the air fryer within a few minutes after you have added the oil.
- Do not prepare extremely greasy ingredients such as sausages in the air fryer.
- Snacks that can be prepared in an oven can also be prepared in the air fryer.
- The optimal amount for preparing crispy fries is about 16 ounces.
- Use pre-made dough to prepare filled snacks quickly and easily. Pre-made dough
also requires a shorter preparation time than homemade dough.
- You can also use the air fryer to reheat ingredients. To reheat ingredients, set the
temperature to 320°F for up to 10 minutes.
SETTINGS

~"10"~"
Min-max
Amount
(oz.)
Time
(min)
Temp
(°F)
Shake"
Extra
Information
Potatoes & Fries
Thin frozen fries
10-24
12-16
392
Shake
Thick frozen
fries
10-24
12-20
392
Shake
Homemade fries
10-28
18-25
356
Shake
Add ½tbsp. of
cooking oil
Homemade
potato wedges
10-28
18-22
356
Shake
Add ½tbsp. of
cooking oil
Homemade
potato cubes
10-26
12-18
356
Add ½tbsp. of
cooking oil
Potato gratin
17
18-22
356
Meat & Poultry
Steak
4-16
10-15
356
Pork chops
4-16
10-14
356
Hamburger
4-16
7-14
356
Sausage roll
4-16
13-15
392
Drumsticks
4-16
18-22
356
Chicken breast
4-16
10-15
356
Snacks
Spring rolls
4-14
8-10
392
Shake
Preheat air fryer
Frozen chicken
nuggets
4-16
6-10
392
Shake
Preheat air fryer
Frozen fish
sticks
4-14
6-10
392
Preheat air fryer
Stuffed
vegetables
4-14
10
320
Note: If you do not preheat the air fryer before beginning the cooking process, Add 3
minutes to the preparation time for best results.

~"11"~"
For the best results, we advise to use pre-baked (e.g. frozen) fries. If you want to make
homemade fries, follow the steps below.
1. Peel the potatoes and cut them into sticks.
2. Soak the potato sticks in a bowl for at least 30 minutes, take them out and dry them
with a paper towel.
3. Pour ½tablespoon of olive oil in a bowl, put the sticks on top and mix until the sticks
are coated with oil.
4. Remove the sticks from the bowl with your fingers or a kitchen utensil so that excess
oil stays behind in the bowl. Put the sticks in the Pan (D) using your hands or a
kitchen utensil.
Note: Do not tilt the bowl to put all the sticks in the Pan (D) all at once, to prevent
excess oil from ending up on the bottom of the pan.
5. Fry the potato sticks according to the instructions in the table above.
Clean the Pan (D) and Grill Rack (B) after every use.
The Pan (D) and Grill Rack (B) have a non-stick coating. Do not use metal kitchen
utensils or abrasive cleaning materials to clean them, as this may damage the non-stick
coating. Always clean these parts using hot water, some mild soap, and a non-abrasive
sponge or cloth.
1. Remove the power plug from the wall socket and let the appliance cool down for at
least 30 minutes.
Note: Remove the pan to let the air fryer cool down more quickly.
2. Wipe the outside of the appliance with a moist cloth.
3. Clean the Pan (D) and Grill Rack (B) using hot water, some mild soap and a
non-abrasive sponge or cloth.
Tip: If excess food is stuck to the Grill Rack or the bottom of the Pan, fill the Pan with
hot water with some mild soap. Put the Grill Rack in the Pan and let the Pan and the
Grill Rack soak for approximately 10 minutes.
4. Clean the inside of the appliance with hot water and a non-abrasive sponge.
MAKING HOMEMADE FRIES
CLEANING

~"12"~"
5. Clean the heating element with a cleaning brush to remove any food residues.
1. Unplug the appliance and let it cool down.
2. Make sure all parts are clean and dry.
3. Place the appliance in a clean, dry place for storage until the next use.
This chapter summarizes the most common problems you could encounter with the
appliance.
Problem
Possible cause
Solution
The air fryer does not
work.
The appliance is not
plugged in.
Plug the power cord into a
grounded wall outlet
You have not set the
timer.
Turn the Timer Control Knob
(G) to the required preparation
time.
The ingredients fried with
the air fryer are not done.
The amount of the
ingredients in the pan is
too large.
Put smaller batches of
ingredients in the pan. Smaller
batches are fried more evenly.
The set temperature is too
low.
Turn the Temperature Control
Knob (F) to the required
temperature setting (see
section ‘Settings’).
The preparation time is
too short.
Turn the Timer Control Knob
(G) to the required preparation
time (see section ‘Settings’).
TROUBLESHOOTING
STORAGE

~ 13 ~
The ingredients are fried
unevenly in the air fryer.
Certain types of the
ingredients need to be
shaken halfway through
the preparation time.
Ingredients that lie on top of or
across each other (e.g. fries)
need to be shaken halfway
through the preparation time.
See section ‘Settings’.
Food is not crispy when it
comes out of the air fryer
You used a type of food
meant to be prepared in a
traditional deep fryer.
Use oven-baked foods or lightly
brush some oil onto the food
before cooking for a crispier
result.
I cannot slide the pan into
the appliance properly.
There are too many
ingredients inthe pan.
Remove some of the
ingredients from the pan.
White smoke comes out of
the appliance
You are preparing greasy
ingredients.
When you fry greasy
ingredients inthe air fryer, a
large amount of oil will leakinto
the pan. The oil produces white
smoke and the pan may heat
up more than usual. This does
not affect the appliance or the
end result.
The pan still contains
grease residuesfrom
previous use.
White smoke is caused by
grease heating up in the pan.
Make sure you clean the pan
and grill rack properly after
each use.
Homemade fries are fried
unevenly in the air fryer
You did not soak the
potato sticks properly
before you fried them
Soak the potato sticks in a bowl
for at least 30 minutes, take
them out and dry them with a
papertowel before applying oil
and cooking.
You did not use the right
potato type.
Use fresh potatoes and make
sure they stay firm during frying
Homemade fries are not
crispy when they come
out of the air fryer.
The crispiness of the fries
depends on the amount of
oil and water in the fries.
Make sure you dry the potato
sticks properly before you add
the oil.
Add slightly more oil for a
crispier result.

~ 14 ~
LIMITED ONE-YEAR WARRANTY
We warrant this product to be free from defects in material and workmanship under normal use for a
one-year period from the original date of purchase from an authorized ENZO dealer. We will repair or
replace the unit free of charge should it become defective under this warranty, providing you, the
original purchaser, submit proof of purchase (sales slip) along with the product and all accessories.
Should you be missing any of the included accessories or other components (screws, pieces, etc.),
please contact the Customer Support Center to secure a replacement. It is not necessary to bring the
unit back to the store. When calling, please reference the parts list found in the Instruction Manual to
help us accurately identify the missing parts and promptly provide replacements.
During the one-year period from the original purchase date, we will service or exchange the product, at
no charge. To obtain warranty service or replacement within the duration of the one-year warranty,
please return the product and all accessories tothe original place of purchase.
For technical support, visit our website www.sibrandssupport.com or call the ENZO Technical Support
Center for technical assistance or troubleshooting at 1-888-770-3696, Monday to Saturday, 10:00AM
to 7:00PM EST.
There are no consumer serviceable parts contained in this product and any attempt by the owner to
service or repair the unit will immediately void all warranty coverage.
This warranty does not cover any product which has been subject to damage due to an act of nature,
misuse, neglect, accident, abuse, outdoor use, commercial use, or modification of, or to, any part of
the product. Damage to any external devices such as countertops, cabinets, and/or tables or other
platforms are not covered nor is the cost incurred in shipping the unit for warranty repair. Under no
circumstances shall ENZO be liable for any loss (direct, indirect, incidental, foreseen, unforeseen,
special or consequential) or for any damage arising out of, or in connection with, the use of this
product.
UNDER NO CIRCUMSTANCES WILL ENZO BE LIABLE FOR ANY INCIDENTAL OR
CONSEQUENTIAL DAMAGES.
This warranty does not cover re-manufactured units, or product sold 'As Is'.
This warranty is valid only to the original purchaser of the Product in the United States and Canada
and grants specific legal rights.

~ 15 ~
Freidora de aire de 3.2 cuartos
MODELO: EMAF3219KE
MANUAL DE USARIO
Para asistencia técnica o solución de problemas
por favor llame 1-888-770-3696 o visite www.sibrands.com

~"16"~"
A"
Tapas de silicona (preinstaladas)
G"
Perilla de control del temporizador
B"
Parrilla de la parrilla
H"
Luz indicadora de poder
C"
Manija
I"
Luz indicadora de calor
D"
Sartén
J"
Aberturas de salida de aire
E"
Aberturas de entrada de aire
K"
Base
F"
Perilla de control de temperatura
L"
Cable de alimentación
DESCRIPCIÓN GENERAL

~"17"~"
La rejilla de la parrilla (B) siempre debe asegurarse dentro de la sartén (D) antes de usar la
freidora de aire.
Para instalar La rejilla de la parrilla (B) simplemente siga estos pasos:
1. Asegúrese de que las 4 pequeñas tapas de silicona (A) estén colocadas en las 4
lengüetas en el borde de la rejilla de la parrilla (B) como se muestra en la imagen a
continuación.
2. Sostenga la rejilla de la parrilla (B) por la barra pequeña en el centro e inserte la rejilla de
la parrilla (B) en la bandeja (D) de modo que la barra pequeña en el centro quede hacia
arriba. NOTA: dentro de la sartén (D) hay pequeñas áreas elevadas o "Barreras" que están
diseñadas para ayudar a sostener el Rejilla de Parrilla (B) dentro de la sartén (D). Es
posible que deba girar la rejilla de la parrilla (B) ligeramente para que las 4 pequeñas tapas
de silicona (A) puedan eliminar estas "barreras".
INSTALANDO LA PARRILLA DE PARRILLA

~"18"~"
3. Después de que la rejilla de la parrilla (B) toque la parte inferior de la sartén (D), gire la
rejilla de la parrilla (B) en el sentido de las agujas del reloj hasta que cada una de las 4
tapas pequeñas de silicona (A) quede bloqueada debajo de uno de las " Barreras ". Esto
asegurará que la rejilla de la parrilla (B) esté asegurada correctamente dentro de la sartén
(D).
Lea este manual del usuario detenidamente antes de utilizar el dispositivo y guárdelo para
futuras consultas
PELIGRO
- Nunca sumerja la carcasa, que contiene componentes eléctricos y elementos de
calefacción, en agua ni la enjuague bajo el grifo.
- No permita que entre agua ni ningún otro líquido en el aparato para evitar
descargas eléctricas.
- Coloque siempre los ingredientes a freír en la rejilla de la parrilla en la sartén para
evitar que entre en contacto con los elementos calefactores.
- No cubra las aberturas de la entrada de aire (E) y la salida de aire (J) mientras el
aparato está funcionando.
- No llene la sartén con aceite de cocina, ya que podría provocar un incendio.
- Nunca toque el interior del aparato mientras está funcionando.
- Deje que el aparato se enfríe siempre durante al menos 30 minutos antes de
intentar limpiar cualquiera de las piezas.
ADVERTENCIA
- Compruebe si la tensión indicada en el aparato corresponde a la tensión de
alimentación local antes de conectar el aparato.
- No utilice el aparato si el enchufe, el cable de alimentación o el propio aparato
están dañados.
- Si el cable de alimentación está dañado, debe ser reemplazado por Profesionales,
IMPORTANTE

~"19"~"
un centro de servicio autorizado por el vendedor o personas con calificaciones
similares para evitar un peligro.
- Este dispositivo no debe ser usado por niños menores de 15 años o por personas
con capacidades físicas, sensoriales o mentales reducidas, o por falta de
experiencia y conocimiento.
- Los niños deben ser supervisados para asegurarse de que no jueguen con el
aparato.
- Mantenga el aparato y su cable de alimentación fuera del alcance de los niños
menores de 15 años cuando el aparato esté encendido o se esté enfriando.
- Mantenga el cable de alimentación alejado de superficies calientes.
- No enchufe el aparato ni accione el panel de control con las manos mojadas.
- Asegúrese siempre de que el enchufe esté insertado en la toma de pared
correctamente.
- Este aparato no debe ser operado por medio de un temporizador externo o un
sistema de control remoto separado.
- No coloque el aparato sobre o cerca de materiales combustibles, como un mantel o
una cortina.
- No coloque el aparato contra una pared o contra otros aparatos. Deje por lo menos
4 pulgadas de espacio libre en la parte posterior y los lados y 4 pulgadas de
espacio libre sobre el aparato.
- No coloque nada encima del aparato.
- No utilice el aparato para ningún otro propósito que no sea el descrito en este
manual.
- No deje que el aparato funcione sin supervisión.
- Durante la fritura de aire caliente, se libera vapor caliente a través de las aberturas
de salida de aire. Mantenga sus manos y cara a una distancia segura del vapor y
de las aberturas de salida de aire. También tenga cuidado con el vapor caliente y el
aire cuando retire la bandeja del aparato.
- Las superficies accesibles pueden calentarse durante el uso.
- Desenchufe inmediatamente el aparato si ve humo oscuro saliendo del mismo.
Espere a que se detenga la emisión de humo antes de retirar la bandeja del
aparato.

~"20"~"
PRECAUCIÓN
- Coloque el aparato sobre una superficie horizontal, uniforme y estable.
- Este aparato está destinado únicamente para uso doméstico normal. No está
diseñado para su uso en entornos como el personal de cocinas de tiendas, oficinas,
granjas u otros entornos de trabajo. Tampoco está destinado a ser utilizado por
clientes en hoteles, moteles, bed and breakfast y otros entornos comerciales.
- Si el aparato se usa de manera inadecuada o con fines profesionales o
semiprofesionales o si no se usa de acuerdo con las instrucciones del manual del
usuario, la garantía dejará de ser válida y el fabricante y el vendedor rechazarán
cualquier responsabilidad por los daños causados.
- Devuelva siempre el aparato a un centro de servicio autorizado por los vendedores
para su examen o reparación. No intente reparar el aparato usted mismo; de lo
contrario, la garantía quedará invalidada.
- Desenchufe siempre el aparato después de cada uso.
- Dejar enfriar el aparato durante aprox. 30 minutos antes de manipularlo o limpiarlo.
- Asegúrese de que los ingredientes preparados en este aparato tengan un color
amarillo dorado en lugar de oscuro o marrón. Retire los restos quemados. No freír
papas frescas a una temperatura superior a 356 ° F (para minimizar la producción
de acrilamida).
CIERRE AUTOMÁTICO
Este aparato está equipado con un temporizador. Cuando el temporizador ha descendido a
0, el aparato se apaga automáticamente. Para apagar el aparato manualmente, gire la
perilla de control del temporizador (G) hacia la izquierda a 0.
CAMPOS ELECTROMAGNÉTICOS
Este aparato cumple con todas las normas en materia de campos electromagnéticos. Si se
maneja correctamente y de acuerdo con las instrucciones en este manual del usuario, el
dispositivo es seguro de usar, según la evidencia científica disponible en la actualidad.
Table of contents
Languages:
Other Enzo Fryer manuals
Popular Fryer manuals by other brands

GoWISE USA
GoWISE USA GW22971 user manual
cecotec
cecotec CECOFRY FULL INOXBLACK 5500 instruction manual
PowerXL
PowerXL VORTEX quick start guide
Trisa electronics
Trisa electronics 7420.42 Instructions for use
Brandt
Brandt FRI2102E instruction manual
Keating Of Chicago
Keating Of Chicago pre 2000 series manual
