EO Mini Pro 2 User manual

EO Mini Pro 2
User Manual.
© EO Charging 2020
EO Mini Pro 2 User Manual

© EO Charging 2020
EO Mini Pro 2 User Manual
1.0 Introduction (p2)
2.0 Charging a vehicle (p3)
3.0 Main screen (p5)
4.0 Charging Options (p9)
5.0 Session Details (p14)
6.0 Menu Options (p16)
7.0 Troubleshooting Guide (p18)
8.0 Further Technical Support (p20)
1
Contents

Introduction
This document details the user instructions for the EO Mini Pro 2
solution. It details how to use both the charging station as well as
the key features of the associated EO Smart Home app.
NOTE It is assumed that:
+ The user has the EO Smart Home app installed on a
smartphone.
+ The EO Mini Pro 2 has been joined to the user’s Wi-Fi
network as per the EO Mini Pro 2 Installation Manual.
Check this with your installer.
There are four main screens associated with the
EO Smart Home app
1. Main Screen
2. Charging Options
3. Session Details
4. Menu options
© EO Charging 2020
EO Mini Pro 2 User Manual
2

© EO Charging 2020
EO Mini Pro 2 User Manual
2.0 Charging
a vehicle.
3

01
Ensure that the EO Mini Pro 2 is powered and that the
Status LED is pulsing blue.
02
Insert the cable into the vehicle rst.
03
Insert the other end of the cable into the EO Mini Pro 2.
04
The vehicle should start to charge immediately or will
charge at the scheduled time.
2.2
Stopping the Charge.
01
Stop the charging session from the vehicle e.g.
unlock the vehicle.
02
Remove the cable from the vehicle rst.
03
Remove the cable from the EO Mini Pro 2.
EO Mini Pro 2 User Manual
© EO Charging 2020 4
2.1
Starting the Charge.

© EO Charging 2020
EO Mini Pro 2 User Manual
3.0 Main screen.
5
EO Mini Pro 2 User Manual
© EO Charging 2020 6
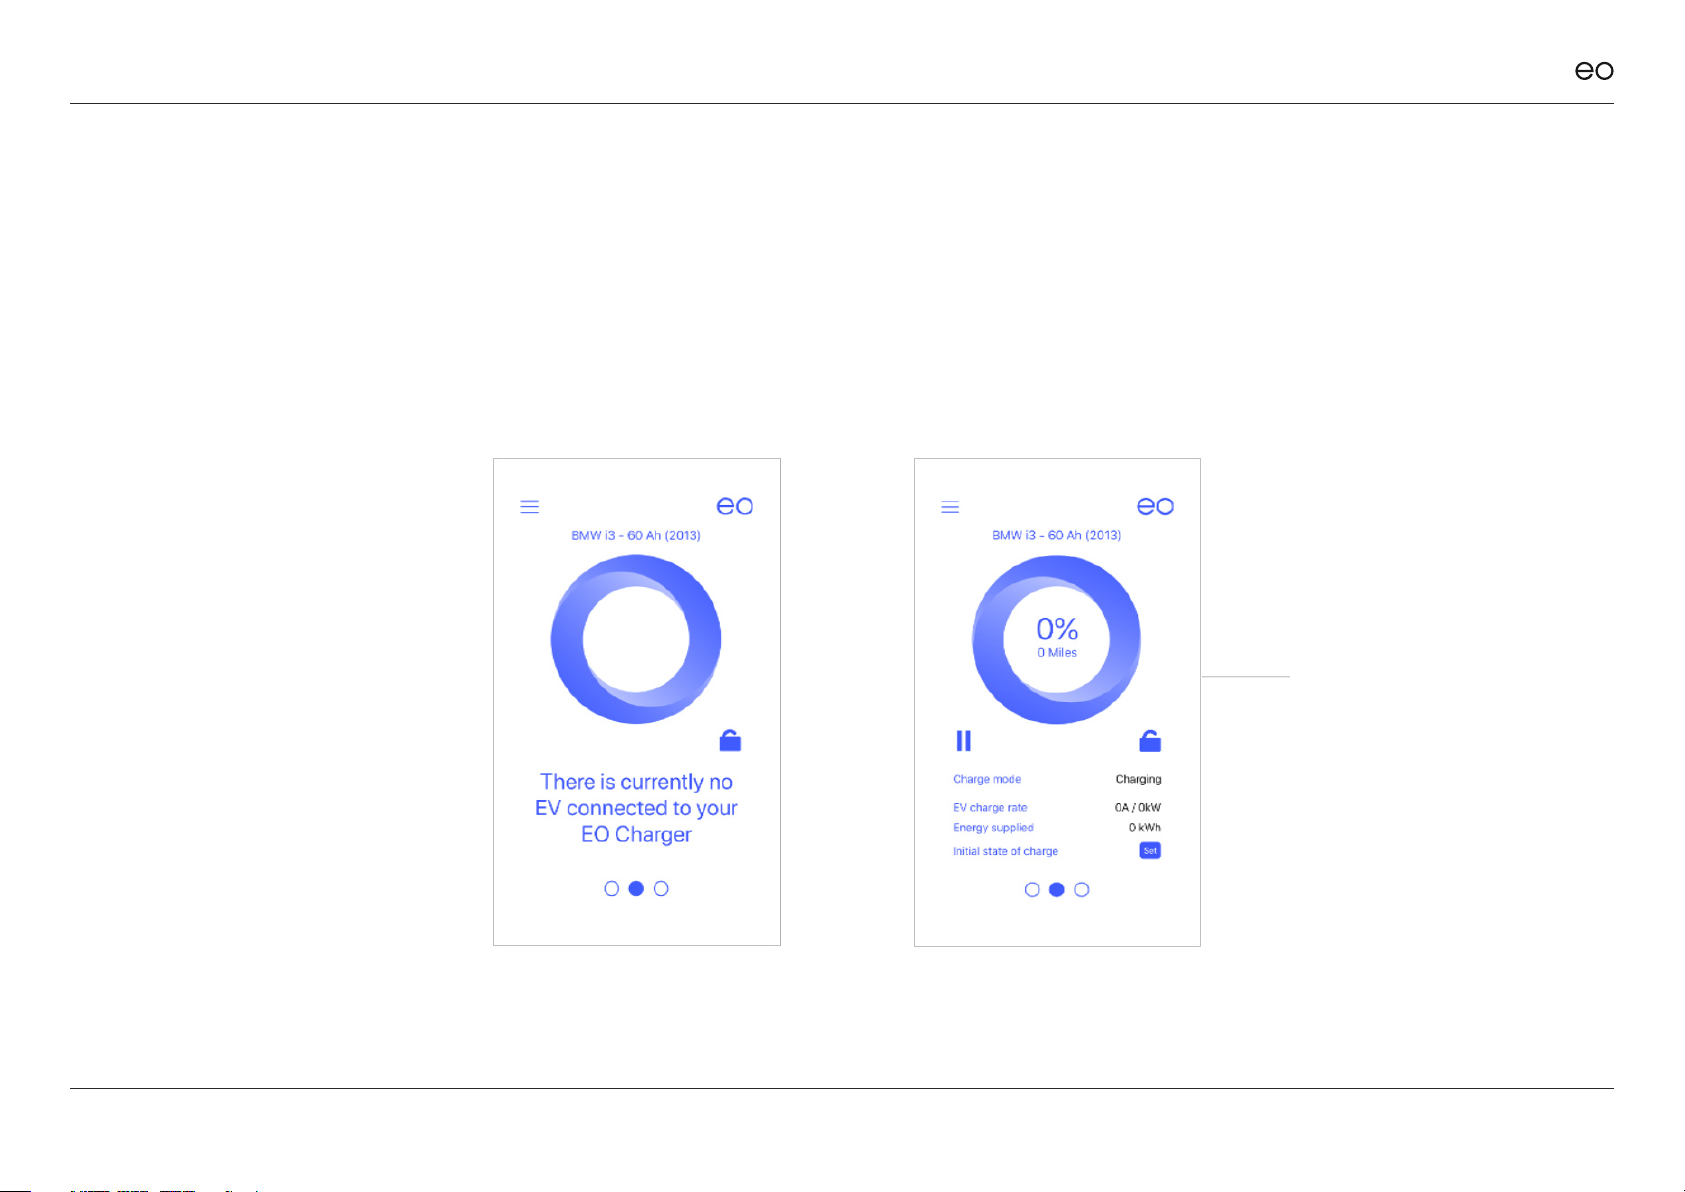
3.0
Main Screen. 3.1
No Vehicle
Connected.
The only option available is to
disable the charging station –
please refer to section 3.3.
When a vehicle is connected
then more information is
presented to the end user:
3.2
Vehicle
Connected.
The information shown is:
+ Vehicle state – is the vehicle
charging or not
+ Charging rate – how
much power is the vehicle
consuming
+ Energy Supplied – how
much energy supplied in the
current session in kWh
+ State of Charge – please
refer to section 3.4
This is the default screen of the
EO Smart Home app. It presents
a variety of information which
changes when the vehicle is
connected or not.
EO Mini Pro 2 User Manual
© EO Charging 2020 7
It is possible to disable the charger so that if a vehicle is connected, then it won’t
charge. This option is useful if the owner is going away on holiday and doesn’t
want a neighbour to charge whilst they are away.
In order to disable the charger, simply press the padlock on the main screen.
When a vehicle is plugged in the it won’t charge.
3.3
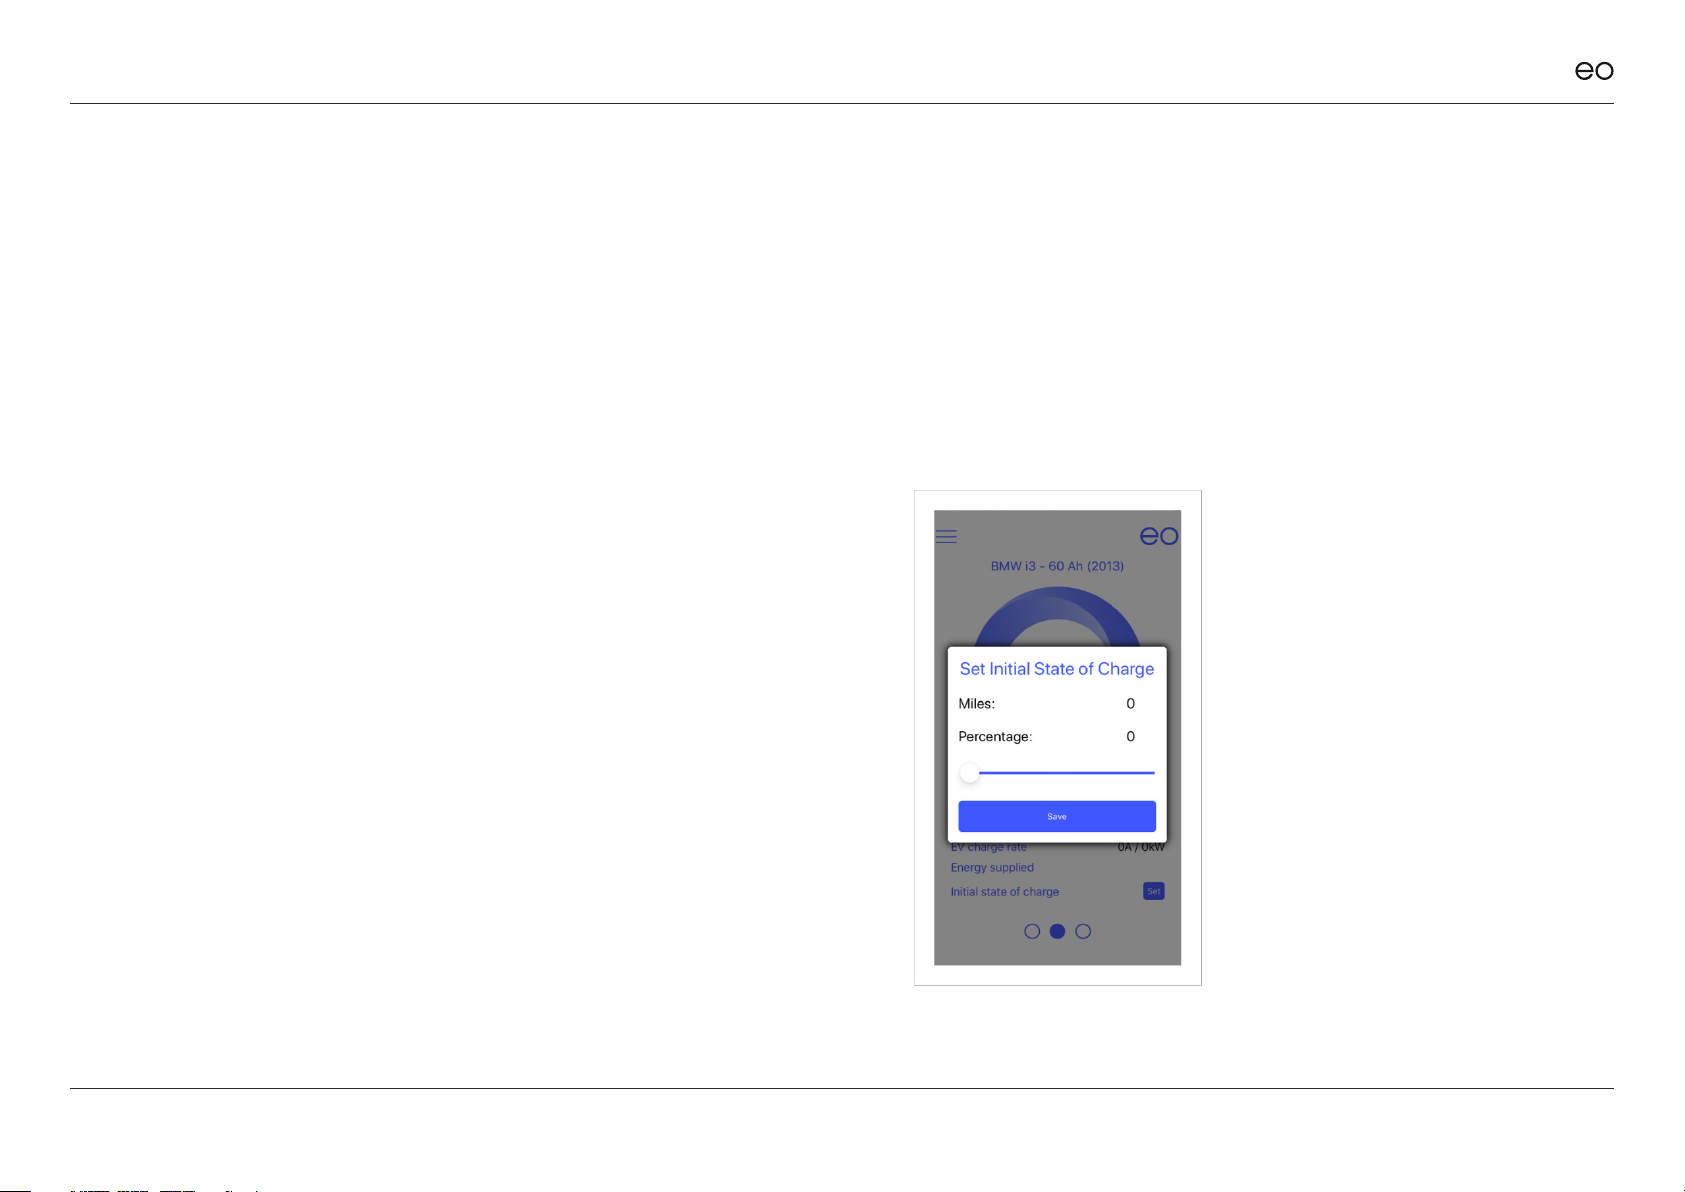
Disable Charger. 3.4
State of Charge.
When a vehicle is charging or plugged in, then it is possible to set the state of
charge of the vehicle at each plugin. If no state of charge is entered, then the
system assumes 0%. The state of charge can be entered by two mechanisms:
1. Tapping the % in the centre of the circle
2. Tapping on the “set” button
NOTE:
The EO Mini Pro 2 cannot
automatically detect the state of
charge for the vehicle. Therefore,
this piece of information must be
manually entered into the app by
the end user. If not, then 0% is used.

EO Mini Pro 2 User Manual
© EO Charging 2020 8
When a vehicle is connected
to the EO Mini Pro 2 then it is
possible to pause and resume
the charging session by pressing
the pause and play buttons. The
pause action or play action shall
operate until the next schedule
boundary. For example if a
scheduled charging window is
set from 16:00 to 17:00 and the
play button is pressed at 15:45
then the vehicle will charge
from 15:45 to 17:00. If the pause/
play button is pressed inside
a charging window, then the
vehicle will stop charging and
then resume charging at the
previous rate (e.g. full rate or at
solar rate).
The pause & play functionality is
detailed opposite.
3.5
Pause/Play.
Solar Charging Window set to 10:00 – 14:00 and TOU from 00:00 to 04:00
1. Vehicle charges during Solar Charging Window (10:00 – 14:00) and TOU window (00:00 to 04:00)
2. Play” and “Pause” pressed before solar window. “Play” pressed before Solar Charging Window – vehicle charges at 32A until solar window,
then drops to solar rate. Stops at end of Solar. Charges during TOU.
3. “Pause” & then “Play” pressed inside the Solar Charging Window –vehicle charges at solar rate until end of solar session. Then charges at TOU.
4. “Play” and “Pause” pressed before solar window. “Pause” pressed inside solar window. Vehicle starts to charge again in TOU window“Play” and
“Pause” pressed before solar window. Car charges during solar window on solar rate. “Pause” and “Play” pressed inside solar window. “Play”
and ”Pause” pressed after solar window. Vehicle charges during TOU.
5. “Play” and “Pause” pressed before solar window. Car charges during solar window on solar rate. “Play” and “Pause” pressed after solar window.
Vehicle charges during TOU.
6. “Play” and “Pause” pressed before solar window. Car charges during solar window on solar rate. “Pause” and “Play” pressed inside solar window.
“Play” and “Pause” pressed after solar window. Vehicle charges during TOU.

© EO Charging 2020
EO Mini Pro 2 User Manual
4.0 Charging
Options.
9

EO Mini Pro 2 User Manual
© EO Charging 2020
By swiping left from the main screen, the charging options are shown. This
screen allows the user to dene the charging windows when they want the
vehicle to charge. There are three options:
1. O Peak
2. Solar
3. Scheduled
These options would allow a user to congure a wide variety of charging
schedules but one such scenario might be as follows:
+ Solar charging between 10:00 and 14:00 – charge using solar.
+ O peak charging from 00:00 to 04:30 – charge at full rate when electricity
is cheap.
+ Scheduled session from 17:00 to 18:00 – put a small amount of charge in
when the EV driver comes back from work – this would ensure that the
vehicle has some charge in case they need to pop to the shops to get
some milk.
10

EO Mini Pro 2 User Manual
© EO Charging 2020 11
It is possible to dene a
charging window where the
electricity is cheap e.g. 00:30 to
04:30. During this window, the
vehicle will charge at full rate
(e.g. 32A).
It is possible to select a user
dened option where the end
user can set an o peak window
according to the details of their
own energy supplier.
4.1
O-Peak. 4.2
Selecting a specic Energy Tari
EO Charging have integrated with two UK Energy suppliers
to oer two EV biased electricity deals:
+ Octopus Go
+ GoElectric by EDF

EO Mini Pro 2 User Manual
© EO Charging 2020 12
It is possible to dene a time window during
which the vehicle will charge according to the
output of the solar array:
1. This will charge your vehicle at the same
rate as the output of the solar array. Any
house consumption shall be taken from the
power grid.
2. If the solar output drops below the specied
minimum rate (e.g. sun goes behind a cloud)
then the vehicle will charge at the minimum
rate. It is not advisable for a vehicle to
repeatably stop and start charging and so
the minimum rate will always guarantee
the charging rate. The extra power shall be
taken from the power grid.
3. The Recommended minimum rate is 6A.
4.3
Solar Charging.

EO Mini Pro 2 User Manual
© EO Charging 2020 13
It is possible to dene a time
window when the vehicle can
charge at full rate. This could
used in a variety of scenarios:
+ Dene a small window
when the EV driver returns
from work at 17:00 to put
a small amount of energy
into the vehicle to cover
potential emergency
+ Extend the o peak
charging window because
the o peak window won’t
charge the vehicle fully.
Therefore the o peak
might be from 00:00
to 04:30 and then the
scheduled window could be
from 04:30 to 08:00.
4.4
Scheduled Charging.

© EO Charging 2020
EO Mini Pro 2 User Manual
5.0 Session
Details.
14

EO Mini Pro 2 User Manual
© EO Charging 2020 15
This screen is designed to present detailed
information about the charging sessions to the
end user. It is designed to help the end user
make informed decisions about when to charge.
For example, the end user could look at this
screen, see that the solar is generating 10A and
then decides to plug in the vehicle to charge on
solar mode. The screen shows:
+At all times
- The reported values from the CT Clamps
for the house, vehicle and solar output
+When a vehicle is plugged in
- The Initial state of charge entered by the
owner
- Amount of energy already added to the
vehicle - % & Mileage
- Remaining – amount of battery left to
charge - % & Mileage
5.0
Session Details.

© EO Charging 2020
EO Mini Pro 2 User Manual
6.0 Menu
Options.
16

EO Mini Pro 2 User Manual
© EO Charging 2020
6.0
Menu Options
17
From the menu (three horizontal
bars on the left of the app) it is
possible to select other options
including the charging session
history and also diagnostic
information to help with support
issues.
6.1
Charging Session History.
It is possible to review the charging session history from the app.
1. Click on the settings options on the top right of the app and the options are displayed as shown below
2. Click on My History
3. In order to display more details then select one of the charging sessions

© EO Charging 2020
EO Mini Pro 2 User Manual
7.0 Troubleshooting
Guide.
18

EO Mini Pro 2 User Manual
© EO Charging 2020
7.0
Troubleshooting Guide.
+What do the colours of the LED on the EO Mini Pro mean?
The LED is an indicator of the state of the EO Mini Pro.
Pulsing Blue – Ready to Charge
Solid Green – Charging
Flashing Red – Fault - If this is seen then contact your installer or EO Support
+I get an error code on the app
If you receive an error code then please note it down and contact EO Support who would be happy to help
+My car didn’t charge
Please check the scheduling options and conrm that the vehicle was supposed to charge in the appropriate time window
If the problem persists then please note down the time of the charging session and contact EO Support for further help
+What do I do if I change my Wi-Fi router?
It is possible to change the Wi-Fi settings of the EO Mini Pro by using the “Update Wi-Fi Network” function on the EO Smart Home app.
19
Other manuals for Mini Pro 2
1
Table of contents
Other EO Batteries Charger manuals


