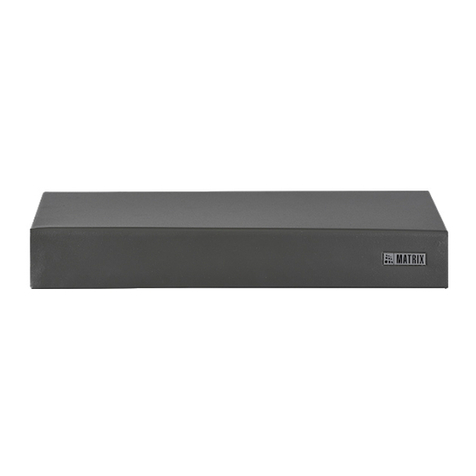
Eonboom AHD-FD series Operating instructions

第
1
页
User's
User's
User's
User's installation
installation
installation
installation and
and
and
and operation
operation
operation
operation Manual
Manual
Manual
Manual
Important
Important
Important
Important Safeguards
Safeguards
Safeguards
Safeguards and
and
and
and Warding
Warding
Warding
Warding
Do not place heavy objects on the DVR.
Do not let any solid or liquid fall into or infiltrate the DVR
Please brush printed circuit boards,connectors,fans,machine box and so on regularly.Before the dust
cleaning please switch off the power and unplug it.
Do not disassemble or repair the DVR by yourself.Do not replace the components by yourself.
Environment
Environment
Environment
Environment
Please place and use the DVR between 0 ℃and 40 ℃.Avoid direct sunlight.Stay away from heat source.
Do not install the DVR in the damp environment.
Do not use the DVR in smoky or dusty environment.
Avoid collision or strong fall.
Please insure the DVR level installation in a stable workplace.
Please install in ventilated place.Keep the vent clean.
Use within the rating input and output scope.
Directory
Directory
Directory
Directory
1 Production Introduction ........................................................................................................................................ 4
1.1 Product overview ....................................................................................................................................... 4
1.2 Main functions ............................................................................................................................................ 4
2 Open-package check and cable connections ................................................................................................... 5
2.1 Open-package check ................................................................................................................................ 5
2.2 Hard disk installation ................................................................................................................................. 7
2.3 Frame installation ...................................................................................................................................... 7
2.4 Front panel ............................................................................................................................................... 1 0
2.5 Rear panel ................................................................................................................................................ 10
2.6 Audion and video inprut and output connections ................................................................................ 1 7
2.6.1 Video input connections .............................................................................................................. 1 7
2.6.2 Video output connctions asn options ........................................................................................ 17
2.6.3 SDI video input ............................................................................................................................. 1 8
2.6.4 Audion signal input ....................................................................................................................... 1 8
2.6.5 Audion signal output .................................................................................................................... 1 8
2.7 Alarm input and output connections ..................................................................................................... 1 8
2.7.1 Alarm input port specification ..................................................................................................... 2 0
2.7.2 Alarm output port specification ................................................................................................... 2 1

第
2
页
2.7.3 Alarm output port relay parameters ........................................................................................... 2 1
2.8 Speed dome connections ....................................................................................................................... 2 1
3 Basic operation ................................................................................................................................................... 22
3.1 Turn on ...................................................................................................................................................... 22
3.2 Turn off ...................................................................................................................................................... 2 3
3.3 System login ............................................................................................................................................. 2 3
3.4 Preview ..................................................................................................................................................... 2 4
3.5 Desktop shortcut menu ........................................................................................................................... 2 4
3.5.1 Main menu ..................................................................................................................................... 2 5
3.5.2 Playback ........................................................................................................................................ 2 6
3.5.3 Record control .............................................................................................................................. 2 7
3.5.4 Alarm output .................................................................................................................................. 2 8
3.5.5 PTZ comtrol ................................................................................................................................... 2 9
3.5.6 Color setting .................................................................................................................................. 3 4
3.5.7 Output adjust ................................................................................................................................. 3 5
3.5.8 Logout ............................................................................................................................................ 3 5
3.5.9 Window switch .............................................................................................................................. 3 6
3.6.0 Spot ................................................................................................................................................ 3 6
4 Main menu ........................................................................................................................................................... 3 8
4.1 Main menu navigation ............................................................................................................................. 3 8
4.2 Record ....................................................................................................................................................... 4 1
4.2.1 Record Config ............................................................................................................................... 4 1
4.2.2 Playback ........................................................................................................................................ 4 2
4.2.3 Backup ........................................................................................................................................... 4 2
4.24 Snapshot............................................................................................................................44
4.3 Alarm ......................................................................................................................................................... 4 5
4.3.1 Motion Detect ................................................................................................................................ 4 5
4.3.2 Video Blind .................................................................................................................................... 4 8
4.3.3 Video Loss ..................................................................................................................................... 5 0
4.3.4 Alarm input .................................................................................................................................... 5 1
4.3.5 Alarm output .................................................................................................................................. 5 3
4.3.6 Abnormal ....................................................................................................................................... 5 3
4.3.7 Intelligent analysis ........................................................................................................................ 5 3
4.4 System ...................................................................................................................................................... 5 6
4.4.1 General .......................................................................................................................................... 5 7
4.4.2 Encode ........................................................................................................................................... 5 9
4.4.3 Network .......................................................................................................................................... 6 1
4.4.4 NetSevice ...................................................................................................................................... 6 2
4.4.5 GUI Display ................................................................................................................................... 7 1
4.4.6 PTZ/RS485 ................................................................................................................................... 7 2
4.4.7 RS232 ............................................................................................................................................ 7 4
4.4.8 Tour ................................................................................................................................................. 7 5
4.4.9 Spot Set ......................................................................................................................................... 7 6
4.5.0 Digital ............................................................................................................................................. 7 6
4.5 Advanced .................................................................................................................................................. 8 2
4.5.1 HDD Manage ................................................................................................................................ 8 2

第
3
页
4.5.2 Account .......................................................................................................................................... 8 2
4.5.3 Online user .................................................................................................................................... 8 5
4.5.4 Output adjust ................................................................................................................................. 8 6
4.5.5 Auto maintain ................................................................................................................................ 8 6
4.5.6 Restore .......................................................................................................................................... 8 6
4.5.7 Upgrade ......................................................................................................................................... 8 7
4.5.8 Device Info .................................................................................................................................... 8 7
4.5.9 Import/Output ................................................................................................................................ 8 7
4.6 Info ............................................................................................................................................................. 8 8
4.6.1 HDD info ........................................................................................................................................ 8 8
4.6.2 BPS ................................................................................................................................................ 8 9
4.6.3 Log .................................................................................................................................................. 8 9
4.6.4 Version ........................................................................................................................................... 9 0
4.7 Shut down system ................................................................................................................................... 9 0
5 XM cloud basic operation .................................................................................................................................. 9 1
6 FAQ and maintenance ....................................................................................................................................... 9 6
6.1 FAQ ............................................................................................................................................................ 9 6
6.2 Maintenance .......................................................................................................................................... 1 02
Appendix 1.Remote controller operation .......................................................................................................... 1 03
Appendix 2.Mouse operation ............................................................................................................................. 1 04
Appendix 3 . Hard Disk capacity calculation ...................................................................................................... 1 05

第
4
页
1
1
1
1 Production
Production
Production
Production Introduction
Introduction
Introduction
Introduction
1.1
1.1
1.1
1.1 Product
Product
Product
Product overview
overview
overview
overview
The series DVR is designed specially for security and defence field which is an outstanding digital
surveillance product. It introduces embedded LINUX operating system which is more stable. It introduces
standard H.264mp video compressed format and G.711A audio compressed format which insures the
high quality image, low error coding ratio and single frame playing. It introduces TCP/IP network
technology which achieves the strong network communication ability and telecommunication ability.
The series DVR can be used individually or online applied as a part of a safety surveillance network.
With the professional network video surveillance software it achieves the strong network communication
ability and telecommunication ability.
The series DVR can be applied in the bank, telecom, electric power system, judicial system,
transportation, intelligent housing, factory, storehouse, water conservancy and so on.
1.2
1.2
1.2
1.2 Main
Main
Main
Main functions
functions
functions
functions
Real-time
Real-time
Real-time
Real-time surveillance
surveillance
surveillance
surveillance
· spot interface 、analog interface 、VGA interface and HDMI interface ,surveillance function through
monitor or display.
Storage
Storage
Storage
Storage
· non-working hard disk dormancy processing which is convenient to radiate heat, reduce power and
extend the life-span
· special storage format which insures the data safety
Compression
Compression
Compression
Compression
· real-time compression by individual hard disk which insures the audio and video signal stable
synchronization
Backup
Backup
Backup
Backup
· through
SATA
interface and USB interface such as USB equipment, removable hard disk and so on
· through net download the files in the hard disk
Playback
Playback
Playback
Playback

第
5
页
· individual real-time video recording as well as searching, playback, network surveillance, recording
check, downloading and so on
· multi-playback mode
· zoom at arbitrary region
Net
Net
Net
Net operating
operating
operating
operating
· through net tele-surveillance in the real time
· tele-PTZ control
· tele-recording check and real-time playback
Alarm
Alarm
Alarm
Alarm linka
linka
linka
linka ge
ge
ge
ge
· Alarm activated video record,tour ,message,buzzer,e-mail,ftp
Communication
Communication
Communication
Communication interface
interface
interface
interface
· RS485 interface which fulfills the alarm input and PTZ control
· RS232 interface which can extend keyboard connection to realize master,as well as with computer
serial port connection for system maintenance and upgrade,and matrix control and so on.
· standard ethernet network interface which fulfills the telecommuting function
Intelligent
Intelligent
Intelligent
Intelligent operating
operating
operating
operating
· mouse action function
· fast copy and paste operating for the same setting
2
2
2
2 Open-package
Open-package
Open-package
Open-package check
check
check
check and
and
and
and cable
cable
cable
cable connections
connections
connections
connections
2.1
2.1
2.1
2.1 Open-package
Open-package
Open-package
Open-package check
check
check
check
When you receive the DVR, please check first
First, please check whether there is any visible damage to the package appearance.he protective
materials used for the package of the DVR can protect most accidental clashes during transportation.
Then, please open the box and get rid off the plastic protective materials. Check whether there is
any visible damage to the DVR appearance.
At last, please open the machine crust and check the data wire in the front panel, power wire, the
connection between the fan power and the main board.
1.
1.
1.
1. Front
Front
Front
Front panel
panel
panel
panel and
and
and
and rear
rear
rear
rear panel
panel
panel
panel

第6页
♦T
he
keyfunctionspecificationinthefrontpanelandtheinterfacespecificationintherealpanel
areinthespecification.
♦Pleasechecktheproducttypeinthefrontpanelwhetherisaccordantwiththeproducttypeyou
order.
The
The
The
Thelabel
label
label
l abelin
in
in
inthe
the
the
thereal
rea l
re al
realpanel
pa nel
panel
p anelis
is
is
isvery
very
ver y
veryimportant
im portant
i mportant
importantfor
for
for
forthe
the
the
theafter
afte r
after
a fterservice.
serv ice.
se rvice.
service.Please
Please
Pleas e
Pleaseprotect
protect
pro tect
protectit
it
it
itcarefully.
careful ly.
c arefully.
carefully.When
When
When
When
yo u
you
you
youcontact
contact
conta ct
contactus
us
us
usfor
for
for
forafter
after
a fter
a fterservice,
serv ice,
se rvice,
service,please
please
plea se
pleaseprovide
provide
pro vide
providethe
the
the
theproduct
produ ct
pro duct
producttype
type
type
typeand
and
a nd
andserial
seri al
seri al
serialnumber
number
numb er
numberin
in
in
inthe
the
the
thelabel.
lab el .
labe l.
label.
2.
2.
2.
2.Check
Check
Check
C heck
Afteropenthecover,youshouldcheckifithasobviousdamagetrace,alsopleasecheckthefront
paneldatacable,powercordandmotherboard'sconnectionarelooseornot.
2.2
2.2
2.2
2.2Hard
Hard
Hard
Harddisk
di sk
disk
diskinstallation
in stallat ion
installation
installation
Forthefirstuse,pleaseinstalltheharddisk,thismachineboxcaninstalltwoharddisk(nolimited
capacity).
①Remove the screws on
both sides of shell
②
extracted from the next
cover up
③
connect hard disk
and mother board
④
fix the screw of hard disk⑤
close cover⑥
install the screws on
both sides of shell
2
2
2
2.
.
.
.3
3
3
3 S
S
S
Sh
h
h
he
e
e
el
l
l
lf
f
f
f i
i
i
in
n
n
ns
s
s
st
t
t
ta
a
a
al
l
l
ll
l
l
la
a
a
at
t
t
ti
i
i
io
o
o
on
n
n
n
This product chassis specification for the standard 1u,so it can be installed in the standard shelf.
Installation steps and attention items:
1、Make sure the temperature in the room lower then 35℃ (95°f).
2、Keep the equipment have 15cm(6 inches)space around in order to air's circulation.
3、From bottom to shelf installation.
4、When multiple components install in the frame,please take preventive measures to avoid power
socket overload..

第7页
T
T
T
Th
h
h
he
e
e
e r
r
r
re
e
e
ea
a
a
ar
r
r
r p
p
p
pa
a
a
an
n
n
ne
e
e
el
l
l
l o
o
o
of
f
f
f T
T
T
T s
s
s
se
e
e
er
r
r
ri
i
i
ie
e
e
es
s
s
s
1VideoInput2Video
Output
3AudioOutput
4AudioInput5VGA6Network
7USB8PowerInput
2.4 Rear panel

第
8页
The
The
The
Therear
rear
rear
rearpanel
panel
panel
panelof
of
of
ofA
A
A
Aseries
series
series
series
1 VideoInput2Video
Output
3VGA
4AudioOutput5AudioInput6Network
7USB8RS4859Power

第9页
The
The
The
Therear
re ar
rear
rearpanel
pa nel
panel
panelof
of
o f
ofC
C
C
Cseries
se ries
series
series
1Vi deoInput2Video
Output
3VGA
4AudioInput5Audio
Output
6Network
7USB8RS4859Power
1Vi deoInput2Video
Output
312VOutput
4AudioInput
*
*
*
*

第10页
T he
The
The
Therear
re ar
rear
rearpanel
pa nel
panel
panelof
of
o f
ofE
E
E
Eseries
se ries
series
series

第11页
5004E-S
1VideoOutput2AudioInput3USB
4Network5VGA6External
Interface
7PowerSupply8Switch9VideoOutput
10AudioOutput1112VInput
*
*
*
*
T he
The
The
Therear
re ar
rear
rearpanel
pa nel
panel
panelof
of
o f
ofF
F
F
Fseries
se ries
series
series

第12页
1VideoInput2AudioInput3USB
4Network5VGA6External
Interface
7PowerSupply8Switch9VideoOutput
10AudioOutput
The
The
The
Therear
r ear
rear
rearpanel
p anel
panel
panelof
o f
of
ofK
K
K
Kseries
s eries
series
series
1PowerSwitch2Power
Supply
3Fan
4VideoInput5VGA6Network
7USB8External
Interface
9External
Interface
10AudioOutput11Video
Output
12HDMI
The
The
The
Therear
r ear
rear
rearpanel
p anel
panel
panelof
o f
of
ofD
D
D
Dseries
s eries
series
series

第13页
1VideoInput2AudioInput3SDI
4HDMI5USB6Network
7VGA8External
Interface
9PowerSupply
10PowerSwitch11Video
Output
12AudioOutput
1VideoInput2Video
Output
3HDMI
4USB5Network6VGA
7External
Interface
8Power
Supply
9PowerSwitch
10AudioInput11Audio
Output
*
*
*
*this
this
this
thisseries
s eries
series
seriesproducts
p roducts
products
productshave
h ave
have
havesame
s ame
same
samerear
r ear
rear
rearpanel
p anel
panel
panel

第17页
2.6
2.6
2.6
2.6Audio
A udio
Audio
Audioand
a nd
and
andvideo
v ideo
video
videoinput
i nput
input
inputand
a nd
and
andoutput
o utput
output
outputconnections
c onnections
connections
connections
2.6.1
2.6.1
2.6.1
2.6.1Video
V ideo
Video
Videoinput
i nput
input
inputconnections
c onnections
connections
connections
ThevideoinputportisBNCconnectorplug.ThedemandofinputsignalisPAL/NTSC
BNC(1.0VP-P,75Ω).
Thevideosignalmustbeaccordedwiththestatestandardwhichhasthehighsignaltonoiseratio,
lowaberrationandlowinterference.Theimagemustbeclearandhasnaturalcolorintheappropriate
brightness.
Insure
Insure
Insure
Insurethe
t he
the
thevidicon
v idicon
vidicon
vidiconsignal
s ignal
signal
signalstable
s table
stable
stableand
a nd
and
andcredible
c redible
credible
credible
Thevidiconshouldbeinstalledintheappropriatelocationwhereisawayfrombacklightingandlow
illuminationoradoptsthebetterbacklightingandlowilluminationcompensation.
ThegroundandpowersupplyofthevidiconandtheDVRshouldbesharedandstable.
Insure
Insure
Insure
Insurethe
t he
the
thetransmission
t ransmission
transmission
transmissionline
l ine
line
linestable
s table
stable
stableand
a nd
and
andcredible
c redible
credible
credible
Thevideotransmissionlineshouldadopthighqualitycoaxialpairwhichischosenbythe
transmissiondistance.Ifthetransmissiondistanceistoofar,itshouldadoptshieldedtwistedpair,video
compensationequipmentandtransmitbyfibertoinsurethesignalquality.
ThevideosignallineshouldbeawayfromtheelectromagneticInterferenceandotherequipmentssignal
lines.Thehighvoltagecurrentshouldbeavoidedespecially.
Insure
Insure
Insure
Insurethe
t he
the
theconnection
c onnection
connection
connectionstable
s table
stable
stableand
a nd
and
andcredible
c redible
credible
credible
Thesignalandshieldlinesshouldbefirmandconnectedcrediblewhichavoidfalseandjoint
weldingandoxidation.
2.6.2
2.6.2
2.6.2
2.6.2Video
V ideo
Video
Videooutput
o utput
output
outputconnections
c onnections
connections
connectionsand
a nd
and
andoptions
o ptions
options
options
ThevideooutputisdividedintoPAL/NTSCBNC(1.0VP-P,75Ω)andVGAoutput(selective

第
18
页
configuration ).
When replace the monitor by the computer display, there are some issues to notice
1、Do not stay in the turn-on state for a long time.
2、Keep the computer display normal working by demagnetizing regularly.
3、Stay away from the electro magnetic Interference.
TV is not a credible replacement as a video output. It demands reducing the use time and control the
power supply and the interference introduced by the nearby equipments strictly. The creepage of low
quality TV can lead to the damage of other equipments.
2.6.3
2.6.3
2.6.3
2.6.3 SDI
SDI
SDI
SDI video
video
video
video input
input
input
input
Only part models of 6000 series support SDI encode for 1080P
2.6.4
2.6.4
2.6.4
2.6.4 Audio
Audio
Audio
Audio signal
signal
signal
signal input
input
input
input
Audio port is BNC connection.
The input impedance is high so the tone arm must be active.
The audio signal line should be firm and away from the electro magnetic Interference and connected
credible which avoid false and joint welding and oxidation. The high voltage current should be avoided
especially.
2.6.5
2.6.5
2.6.5
2.6.5 Audio
Audio
Audio
Audio signal
signal
signal
signal output
output
output
output
Commonly the output parameter of DVR audio signal is greater than 200mv 1K Ω (BNC) which can
connect the low impedance earphone and active sound box or other audio output equipments through
power amplifier. If the sound box and the tone arm can not be isolated, howling phenomena is often
existed. There are some methods to deal with the above phenomena.
1、Adopt better directional tone arm.
2、Adjust the sound box volume to be under the threshold that produces the howling phenomena.
3、Use fitment materials that absorb the sound to reduce reflection of the sound.
4、Adjust the layout of the sound box and the tone arm.
2.7
2.7
2.7
2.7 Alarm
Alarm
Alarm
Alarm input
input
input
input and
and
and
and output
output
output
output connections
connections
connections
connections
Before connecting the device,please pay attention to follow situations:

第
19
页
*
*
*
* note:T
note:T
note:T
note:T series
series
series
series have
have
have
have no
no
no
no alarm
alarm
alarm
alarm input/output
input/output
input/output
input/output functions.
functions.
functions.
functions.
1.
.
.
. Alarm
Alarm
Alarm
Alarm input
input
input
input
A. Alarm input is grounding alarm input.
B. Alarm input demand is the grounding voltage signal.
C. When the alarm is connected with two DVRs or connected with DVR and other equipments, it
should be isolated by relay.
2.
2.
2.
2. Alarm
Alarm
Alarm
Alarm output
output
output
output
Alarm output can not be connected with high-power load(no more than 1A).When forming the output
loop it must prevent the big current from relay damage. Use the contact isolator when there is a
high-power load
3.
3.
3.
3. PTZ
PTZ
PTZ
PTZ decoder
decoder
decoder
decoder connections
connections
connections
connections
A. The grounding of the PTZ decoder and DVR must be shared otherwise the common-mode
voltage will lead to the PTZ control failure. The shielded twisted pair is recommended.
B. Avoid the entrance of high voltage. Make the layout reasonably. Take precaution from the
thunder.
C. In the outlying end connect 120 Ω resistance paralleled to reduce the inflection and insure the
signal quality.
D. The 485 AB lines of DVR can not connected with other 485 output equipments paralleled.
E. The voltage between the AB lines of the decoder must be less than
5V.
4.
4.
4.
4. Front
Front
Front
Front equipment
equipment
equipment
equipment grounding
grounding
grounding
grounding note
note
note
note
Bad grounding can lead to the burnout of the chip.
5
5
5
5 .
.
.
. Alarm
Alarm
Alarm
Alarm input
input
input
input type
type
type
type unlimited
unlimited
unlimited
unlimited
The DVR alarm output port is constant opening type.
eight
eight
eight
eight external
external
external
external alarm
alarm
alarm
alarm interface
interface
interface
interface

第
20
页
(1) alarm input 1,2,3,4 (2) ground (3) RS232 (4) RS485 (5) alarm input 5,6,7,8
(6) ground (7) alarm output
sixteen
sixteen
sixteen
sixteen external
external
external
external alarm
alarm
alarm
alarm interface
interface
interface
interface
①⑥⑧ alarm input ② ⑦ groun d ③alarm output ⑤R S 485 ④R S 232
Parameter
Parameter
Parameter
Parameter meaning
meaning
meaning
meaning
G grounding
R , T RS232 port
A , B 485communciate interface which is connected with the
recording control equipments such as the decoder
2.7.1
2.7.1
2.7.1
2.7.1 Alarm
Alarm
Alarm
Alarm input
input
input
input port
port
port
port specification
specification
specification
specification
8 channels alarm input. Alarm input type unlimited.
The grounding and the com port of the alarm sensor are parallel (The alarm sensor is external power

第
21
页
supply) .
The grounding of the alarm and the DVR should be shared.
The NC port of the alarm sensor must be connected with the DVR alarm input port.
The grounding of the power supply and the alarm sensor must be shared when used in external power
supply.
2.7.2
2.7.2
2.7.2
2.7.2 Alarm
Alarm
Alarm
Alarm output
output
output
output port
port
port
port specification
specification
specification
specification
2 channels alarm output. There is external power supply when using the external alarm equipment.
Please refer to the relay relevant parameters to avoid the overload that damages main machine.
2.7.3
2.7.3
2.7.3
2.7.3 Alarm
Alarm
Alarm
Alarm output
output
output
output port
port
port
port relay
relay
relay
relay parameters
parameters
parameters
parameters
Type :JRC-27F
Interface material silver
rating
(resistance load)
Rating switch capacity 30VDC 2A, 125VAC 1A
maximal switch power 125VA 160W
maximal switch voltage 250VAC, 220VDC
maximal switch current 1A
isolation Homo-polarity interface 1000VAC 1minute
Inhomo-polarity 1000VAC 1 minute
Interface and winding 1000VAC 1 minute
Surge voltage Homo-polarity interface 1500VAC (10 × 160us)
Turn-on time 3ms max
Turn-off time 3ms max
longevity mechanical
50 × 106 MIN (3Hz)
electric 200 × 103 MIN (0.5Hz)
Environment
-40~+70 ℃
2.8
2.8
2.8
2.8 Speed
Speed
Speed
Speed dome
dome
dome
dome connections
connections
connections
connections
1. Connect the 485 lines of the speed dome with the DVR 485 interface.

第
22
页
the 485 interface of eight external alarm
the 485 interface of sixteen external alarm
2 . Connect the video line with the DVR video input.
3 . Electrify the speed dome
3
3
3
3 Basic
Basic
Basic
Basic operation
operation
operation
operation
Note: The button in gray display indicates nonsupport.
3.1
3.1
3.1
3.1 Turn
Turn
Turn
Turn on
on
on
on
Plug the power supply and turn on the power supply switch. Power supply indicator light shining
indicates turning on the video recorder. After the startup you will hear a beep. The default setting of video
output is multiple-window output mode. If the startup time is within the video setting time, the timing video
recording function will start up automatically. Then the video indicator light of corresponding channel is
shining and the DVR is working normally.
Note:
Note:
Note:
Note: 1. Make sure that the input voltage corresponds with the switch of the DVR power supply.
2. Power supply demands: 220V ± 10% /50Hz.

第
23
页
Suggest using the UPS to protect the power supply under allowable conditions.
3.1
3.1
3.1
3.1 Turn
Turn
Turn
Turn off
off
off
off
There are two methods to turn off the DVR. Entering [main menu] and choosing [turn off] in the [turn
off the system] option is called soft switch. Pressing the power supply switch is called hard switch.
Illumination:
1、Auto resume after power failure
If the DVR is shut down abnormally, it can automatically backup video and resume previous
working status after power failure.
2、Replace the hard disk
Before replacing the hard disk, the power supply switch in the real panel must be turned off.
3、Replace the battery
Before replacing the battery, the setting information must be saved and the power supply switch
in the real panel must be turned off. The DVR uses button battery. The system time must be checked
regularly. If the time is not correct you must replace the battery, we recommend replacing the battery
every year and using the same battery type.
Note:
Note:
Note:
Note: The
The
The
The setting
setting
setting
setting information
information
information
information must
must
must
must be
be
be
be saved
saved
saved
saved before
before
before
before replacing
replacing
replacing
replacing the
the
the
the battery
battery
battery
battery otherwise
otherwise
otherwise
otherwise
information
information
information
information will
will
will
will lose.
lose.
lose.
lose.
3.3
3.3
3.3
3.3 System
System
System
System Login
Login
Login
Login
When the DVR boots up, the user must login and the system provides the corresponding functions
with the user purview.There are three user settings. The names are admin
admin
admin
admin ,guest
guest
guest
guest and default
default
default
default and
these names have no password. Admin
Admin
Admin
Admin is the super user purview; guest and default
default
default
default
’
s permissions are
preview and video playback. User admin
admin
admin
admin and guest
guest
guest
guest
’
s password can be revised, while their permissions
can ’ t be revised; user default
default
default
default is the default login user whose permission can be revised but not its
password.
Other manuals for AHD-FD series
1
This manual suits for next models
1
Table of contents
Other Eonboom DVR manuals
