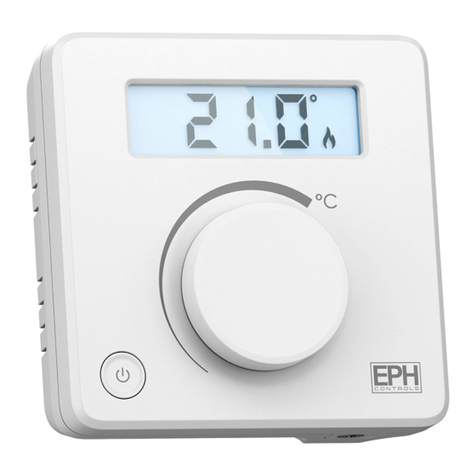
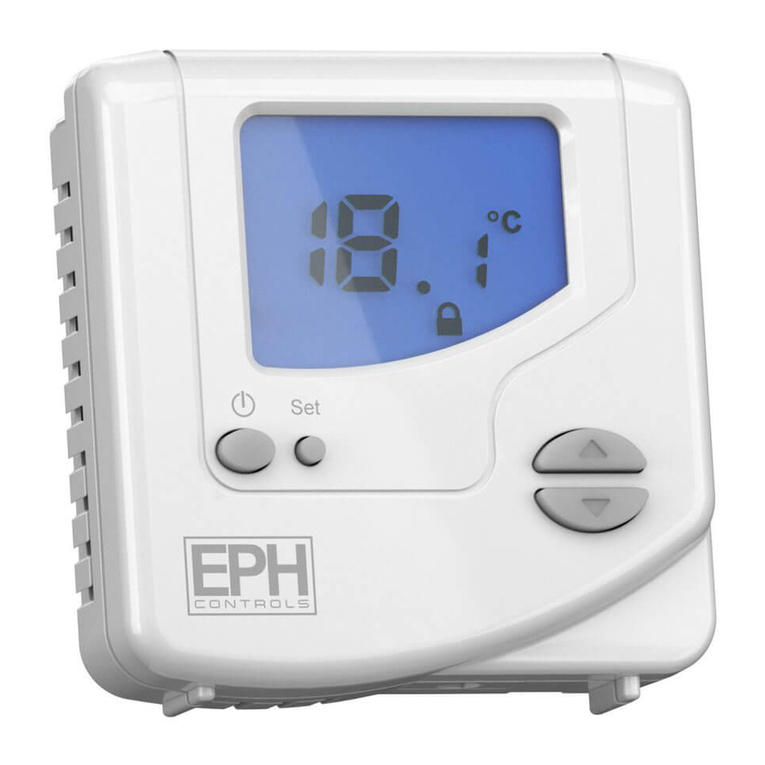
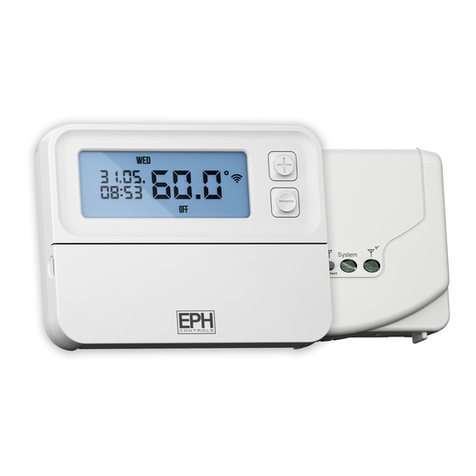
EPH RS1 Operating instructions

Installation and Operation Guide
RS1

2
Factory Default Settings
3
Specications & Wiring
4
How your programmable thermostat works
6
Mounting & Installation
8
LCD Display
10
Buttons
11
Setting the date, time and programming mode
12
Temperature Display
13
Programming Modes
14
Factory program settings
15
To program in 5/2 Day mode (Weekdays / Weekend)
17
To program in 7 Day mode (Monday to Sunday)
16
To program in 24 Hour mode (Monday to Sunday)
19
Temporary Temperature Override
20
Permanent Temperature Override
Locking the thermostat 24
18
Copy Function
22
Boost Function
Table of contents
Recessed Programmable Room Thermostat
23
Holiday Function
25
Backlight Function
21
OFF Function
26
Engineering Settings
27
PO1 Operating mode - Normal / Optimum Start / TPi
31
PO2 Setting High & Low Limits
32
PO3 Hysteresis HOn and HOFF
33
PO4 Calibrate the thermostat
34
PO5 Frost Protection
Frost Protection 35
PO6 Factory Reset

2 3
RS1 EPH Controls Ltd.
Factory default settings
Contacts: Volt Free
Temperature indicator: ˚C
Switching dierential: 0.4˚C
In built frost protection: 5˚C
High and Low temp. limitation: O
Blue backlight activated: for 10 secs after press any button
Keypad lock: O
Daylight saving: On
Specications & wiring
Power supply: 230Vac 50HZ
Power consumption: 1 Watt
Temp. control range: 5 … 35˚C
Ambient temperature: 0 … 50˚C
Contact rating: 3A 230Vac
Dimensions: 95 x 95 x 43mm
Temperature sensor: NTC 100K Ohm @ 25
Switching dierential: Adjustable from 0.2/0.4/0.6/0.8/1.0˚C
Frost protection: Only operational in O mode and
Holiday mode
* If mains voltage output is required, terminals
L & COM must be electrically linked.

4 5
RS1 EPH Controls Ltd.
When the thermostat is in the AUTO mode, it will operate according
to the times and temperatures that have been programmed. The user
can select from 6 dierent programs per day - each with a time and a
temperature.
There is no OFF time, only a higher and a lower temperature.
If the user wants the thermostat to be OFF at a certain time, set the
temperature for this time to be low. The thermostat will turn ON if the
room temperature is lower than the setpoint for the current period.
Example: If P1 is set to be 21˚C at 6am, and if P2 is set to be 10˚C at
8am, the thermostat will look for the temperature to be 21˚C between
6am and 8am.
If the user does not want the heating to switch on during a period,
set the temperature for the period to a lower temperature than the
expected ambient temperature.
Example: If the thermostat is programmed with the following time and
temperatures, at 6am the thermostat will look for 21˚C until 8am. From
8am until 5pm the thermostat will be switched o unless the room
temperature falls below 10˚C.
At 5pm the thermostat will start looking for 21˚C until 9pm.
How your programmable thermostat works
P1 @ 6:00 21˚C
P2 @ 8:00 10˚C
P3 @ 12:00 10˚C
P4 @ 14:00 10˚C
P5 @ 17:00 21˚C
P6 @ 21:00 10˚C

6 7
RS1 EPH Controls Ltd.
1) Remove the thermostat from its packaging.
The thermostat is designed to be ush mounted on a wall once
there is a backbox with a min. depth of 35mm tted to the wall.
2) Choose a mounting location so that the thermostat can measure
the room temperature as accurately as possible.
- Mount the thermostat 1.5 metres above the oor level.
- Prevent direct exposure to sunlight or other heating / cooling
sources.
3) Insert a athead screwdriver in either the top or bottom two slots
to remove the front of the thermostat from the base.
4) The dimension of the backplate is 95 x 95mm.
5) Terminate the cables into the terminal block on the backplate and
screw this backplate onto the recessed back box.
6) Line the front of the thermostat up to the backplate and carefully
snap it into position.
Mounting & Installation

8 9
RS1 EPH Controls Ltd.
Hi Lo LIM
[1] [1]
[2]
[3]
[8]
[10] [11] [12]
[4] [5]
[6]
[9]
[7]
[1] Shows the current day of the week
[2] This thermostat has 6 dierent programs.
[3] The required target temperature is displayed.
[4] The current room temperature is displayed.
[5] When a high and low temperature is set, HI LIM or
LO LIM is displayed.
[6] If the keypad is locked, the lock symbol is displayed.
[7] When the thermostat is calling for heat, the ame
symbol is displayed.
[8] Date – The current day and month are displayed.
[9] Current time is displayed in 24 hour mode.
[10] AUTO mode / OFF mode / MAN mode - The selected
Automatic, O or Manual mode is displayed.
[11] BOOST is displayed if the boost function is selected.
[12] Holiday to and from.
LCD Display

10 11
RS1 EPH Controls Ltd.
Buttons
Menu Down
Clock Up
Boost Ok
Press to enter the screen
to program the date, time and
programming mode.
Press or to set the year.
Press or to set the month.
Press or to set the day.
Press or to set the hour.
Press or to set the minute.
Press or to choose from
5 - 2 day, 7 day or 24 hour mode.
Press .
Press .
Press .
Press .
Press .
Press .
Setting the date, time and programming mode
Press or to set the daylight saving time.
Press to return to the home screen.

12 13
RS1 EPH Controls Ltd.
The room temperature is displayed
as shown along with the time and
date.
When the target room temperature
is selected by using or ,
the word ‘SET’ appears in front of
‘ROOM TEMP’ and ‘OVER’ appears
on the screen as a reference to
overriding the current setting.
Temperature Display
The RS1 thermostat has the following programming modes available:
5/2 Day mode Programing Monday to Friday as one block and
Saturday and Sunday as a 2nd block.
Each block can have 6 dierent times and
temperatures.
7 Day mode Programming all 7 days individually with
dierent times and temperatures.
24 Hour mode Programming all 7 days as one block with the
same time and temperatures.
Programming Modes
* See “Setting the date, time and programming mode”on page 11 to select:
5/2 Day mode, 7 Day mode or 24 Hour mode.

14 15
RS1 EPH Controls Ltd.
5/2 Day
P1 P2 P3 P4 P5 P6
Mon-Fri
06:30 08:00 12:00 14:00 17:30 22:00
21˚C 18˚C 21˚C 18˚C 21˚C 16˚C
Sat-Sun
08:00 10:00 12:00 14:00 17:30 23:00
21˚C 18˚C 21˚C 18˚C 21˚C 16˚C
7 Day
P1 P2 P3 P4 P5 P6
Mon-Fri
06:30 08:00 12:00 14:00 17:30 22:00
21˚C 18˚C 21˚C 18˚C 21˚C 16˚C
Sat-Sun
08:00 10:00 12:00 14:00 17:30 23:00
21˚C 18˚C 21˚C 18˚C 21˚C 16˚C
24 Hour
P1 P2 P3 P4 P5 P6
Everyday
06:30 08:00 12:00 14:00 17:30 22:00
21˚C 18˚C 21˚C 18˚C 21˚C 16˚C
Factory program setting 5/2 Day
There are 6 dierent time
and temperature settings
that can be programmed for
the weekdays and 6 dierent
settings for the weekend.
Press twice.
Program [1] for Monday to Friday is now selected.
Press or to select the required time. Press .
Press or to select the required temperature. Press .
Repeat these steps until program [6] has been entered. Press .
Program [1] for Saturday and Sunday is now selected.
Repeat the programming steps until complete.
Press to conrm the settings and to return to the home screen.
To program in 5/2 Day mode (Weekdays / Weekend)
* To deactivate settings you should adjust the temperature lower.

16 17
RS1 EPH Controls Ltd.
There are 6 dierent time and
temperature settings that can
be programmed, these are the
same for every day of the week.
Press twice.
Program [1] for Monday to Sunday is now selected.
Press or to select the required time. Press .
Press or to select the required temperature. Press .
Repeat these steps until program [6] has been entered.
Press to conrm the settings and to return to the home screen.
To program in 24 H mode (Monday to Sunday)
There are 6 dierent time and
temperature settings that can
be programmed for each day
independently.
Press twice.
Program [1] for Monday is selected.
Press or to select the required time. Press .
Press or to select the required temperature. Press .
Repeat these steps until program [6] has been entered. Press .
Program [1] for Tuesday is now selected.
Repeat the programming steps for each day of the week until complete.
Press to conrm the settings and to return to the home screen.
To program in 7 Day mode (Monday to Sunday)
* - Press to skip through days when programming.
- Copy function is available in 7 day mode - see page 16.
- To deactivate settings you should adjust the temperature lower.
* To deactivate settings you should adjust the temperature lower.

18 19
RS1 EPH Controls Ltd.
Copy Function
Copy function may only be used if the thermostat is in the 7d mode.
Set the times and temperatures for the day that you wish to copy from
in programming mode.
When still on the day, hold for 3 seconds, the day of the week that
you have selected will be shown with‘COPY’next to it.
The next day will begin to ash on the top of the screen.
Press to copy the times and temperatures to that day.
Press to skip a day.
You can copy to multiple days using .
Press when copying has been completed.
Press and the thermostat will operate at this new setpoint, until the
next programmed switching time.
To cancel the temporary override, press and then press .
This function only works when the thermostat is in the AUTO mode
Press until the automatic mode is selected.
Press or to adjust the temperature setpoint.
“OVER” will appear on the screen.
Temporary Temperature Override

20 21
RS1 EPH Controls Ltd.
In Manual mode:
Press until the manual mode is selected. Press .
Press or to adjust the temperature setpoint.
Press and the thermostat will permanently operate at this new
setpoint.
To cancel the permanent override, press to change to the required
mode and then press .
Permanent Temperature Override
Press until the OFF mode is selected. Press .
The thermostat is now permanently OFF.
To cancel the OFF function, press to change to the required mode
and then press .
OFF Function
* Frost protection is active in the OFF mode.

22 23
RS1 EPH Controls Ltd.
The boost function will operate in
Automatic, Manual and O modes.
It will not operate in holiday mode.
The thermostat can be boosted for
up to 3 hours.
The time and temperature for the boost period will be displayed on the
screen.
To cancel the boost function, you can either press or to conrm.
Press once, twice or three times to select the boost time. Press .
Press or to select the required temperature. Press .
Boost Function
The holiday function will switch the thermostat o but will have frost
protection enabled for the time period selected of the holiday.
Press for 5 seconds.
‘HOLIDAY FROM’ will appear on
the screen.
Use , and to set
the date and time for the holiday
period to begin. Press .
‘HOLIDAY TO’ will appear on the
screen.
Use , and to set
the date and time for the holiday
period to end.
Press to cancel the holiday
function.
Holiday Function
* By pressing boost button only, this will activate the boost function to the default 21˚C setting.

24 25
RS1 EPH Controls Ltd.
To lock the thermostat, press and
hold and for 10 seconds.
will appear on the screen.
To unlock the thermostat, press
and hold and for 10
seconds.
Locking the thermostat
There are two settings for selection.
‘bL AUtO’ The backlight is on for 10 seconds when any button is pressed.
‘bL ON’ The backlight is permanently on.
Press to select ‘bL ON’
Press to conrm the setting
and to return to the home
screen.
Backlight AUTO
To adjust the backlight setting,
press for 10 seconds.
‘bL AUtO’ appears on the screen.

26 27
RS1 EPH Controls Ltd.
Press and hold both and
for 5 seconds to access the installer
menu.
Use the , , and
to navigate through the features.
Press to exit to main menu.
Engineering Settings
Setting Description Default Options
P01 Operating Mode Normal Normal, Optimum Start or TPi
P02 Setting High & Low Limits O O or On, Min. 5˚C Max. 35˚C
P03 Hysteresis HOn 0.4°C 0.2°C – 1.0°C
Hysteresis HOFF 0˚ 0°C – 1.0°C
P04 Calibrate the thermostat - + or – 0.1°C increments
P05 Frost Protection On On or O
P06 Factory Reset NO No or Yes
P07 Exit to home screen - Press OK to exit
Nor (Normal Mode)
When the thermostat is in Normal mode, the thermostat will try to
reach the target temperature after the program changes.
Normal Mode is the Default
Setting.
Press to select Normal Mode.
PO1 Operating Mode
Example: Program 1 on the thermostat is 21°C for 06:30am and the room
temperature is 18°C. The thermostat will start the heating at 06:30am and
the room temperature will start to increase then.

28 29
RS1 EPH Controls Ltd.
OS (Optimum Start Mode)
When the thermostat is in Optimum Start mode, the thermostat will try
to reach the target temperature by the start time of the next switching
time. This is done by setting the Ti (time interval) on the thermostat in
this menu to 10, 15, 20, 25 or 30. This will allow the thermostat 10, 15,
20, 25 or 30 minutes to increase the room temperature by 1°C.
Ti can be set when OS is selected in the installer menu. 20˚C
Press to select Optimum
start and then press .
The Ti default setting is 20˚C but
this can be adjusted from 10…30˚C
TPi (Time Proportional & Integral Mode)
When the thermostat is in TPi mode and the temperature is rising in the
zone and falls into the Proportional Bandwidth section, TPi will start to
aect the thermostats operation. The thermostat will turn on and o
as it gains heat so that it doesn’t overshoot the setpoint by too much.
It will also turn on if the temperature is falling so it doesn’t undershoot
the setpoint which will leave the user with a more comfortable level of
heat.
Press to select TPi and then press .
PO1 Operating Mode

30 31
RS1 EPH Controls Ltd.
There are 2 settings that will aect the thermostats operation:
1. CYC - No. of Heating Cycles per
Hour: 6 Cycles
This value will decide how often
the thermostat will cycle the
heating on and o when trying to
achieve the setpoint temperature.
Press or to set 2/3/6 or 12.
Press .
2. Pb - Proportional Bandwidth:
2˚C
This value refers to the
temperature below the setpoint at
which the thermostat will start to
operate in TPi Control.
Press or to set from1.5˚C
to 3.0˚C in 0.1˚C increments.
Press to conrm.
This menu allows the
installer to change
the min. and max.
temperature range
that the thermostat
can be set at. 1) Once in the Hi Lo
screen press .
4) Press or
to set the High limit
temperature.
Press .
5) Press or
to set the Low limit
temperature.
Press to conrm.
2) Press to enable
the Hi Lo limits.
PO2 Setting High & Low Limits
3) Press .
Hi 35˚C and Lo 5˚C
PO1 Operating Mode
TPi (Time Proportional Integral Mode) (Continued)

32 33
RS1 EPH Controls Ltd.
This menu allows the installer to change the switching dierential of
the thermostat when the temperature is rising and falling.
HOn is the fall in temperature – Default – 0.4°C. This will allow a fall of
0.4°C from the setpoint before the thermostat turns on again.
HOFF is the rise in temperature – Default – 0.0°C. This will allow the
temperature to rise 0°C above its setpoint.
Once in the H ON
screen, press .
You can now adjust
Hon from 0.2 to 1.0.
Press .
You can now adjust
HOFF from 0.0 to 1.0.
Press .
PO3 Hysteresis HOn and HOFF
Hi Lo LIM
Once in the CAL
screen, press .
Use or to set
the thermostat to the
new temperature and
press to conrm.
PO4 Calibrate the thermostat
This menu allows the installer to re-calibrate the thermostat. The
current temperature will be displayed on the screen and can be
adjusted by pressing or .

34 35
RS1 EPH Controls Ltd.
Frost protection is built into this thermostat, it is pre xed at 5˚C and is
not adjustable.
It will only be activated when the thermostat is in the o or holiday
mode and if the room temperature drops below 5˚C.
Once in the Fr screen.
Press .
Use or to set frost protection on or o.
Press to conrm.
PO5 Frost Protection 5˚C
It is necessary to reset the thermostat prior to initial programming.
Once in the Fact screen.
Press .
Use or to
select YES for a full
factory reset.
Press to conrm.
PO6 Factory Reset

Table of contents
Other EPH Thermostat manuals
Popular Thermostat manuals by other brands

Venstar
Venstar ColorTouch T5800 Owner's manual and installation instructions
Tekmar
Tekmar tekmarNet 554 user manual
Honeywell
Honeywell PRO TH2000DV Series installation guide
OJ Electronics
OJ Electronics ETR2 manual
KMC Controls
KMC Controls FlexStat Application guide
nVent RAYCHEM
nVent RAYCHEM HWAT-T55 Operation manual
Honeywell
Honeywell DG115EZIAQ - TrueIAQ Digital IAQ Control owner's guide
Aube Technologies
Aube Technologies TH104 user manual
AKO
AKO AKO-D1461 Series installation instructions

Lux Products
Lux Products LUXPRO PSP711CC series Installation and operating instructions
Honeywell
Honeywell t7100f installation instructions
Johnson Controls
Johnson Controls T-3102 Installation and Calibration Manual
