Ephoca HPAC 2.0 User manual
1
THE HEAT PUMP AC – WITH NO OUTDOOR UNIT
®
USER GUIDE
®

2

3
CONGRATULATIONS
Thank you for your purchase of a high-quality Ephoca product. Your new HPAC 2.0 has been carefully engineered
and manufactured to give you many years of dependable, ecient operation while maintaining a comfortable
temperature and humidity level.
Many extra features have been built into your HPAC 2.0 to ensure quiet operation, excellent circulation of cool, dry air,
and the most economical operation.
We are sure you will be thrilled with the HPAC 2.0 as it represents the state-of-the-art technology for home air
conditioning.
By following the suggestions contained in this guide, the HPAC 2.0 will operate smoothly, giving you optimal room
temperature with minimal energy costs.
Inside this user guide you’ll find helpful tips on how to use and maintain the HPAC 2.0 properly. Just a little preventive
care and maintenance on your part can save you a great deal of time and money over the life of your HPAC 2.0.
You’ll find answers to many common problems in the troubleshooting charts. If you review these first, you may not
need to call for service at all.
We want to ensure that you have the best experience possible with your HPAC 2.0. In order to accomplish this, we
send an Ephoca technician to inspect each HPAC 2.0 that is installed and certify the installation before the HPAC 2.0
is activated.
After performing the inspection and certifying that the HPAC 2.0 is installed correctly, the Ephoca technician will sign
and validate your warranty. Please do not use the HPAC 2.0 before certification by an Ephoca technician or it will void
the warranty.
If you have any questions, we are here for you. Please reach out to the center closest to your timezone.
We hope you will enjoy your HPAC 2.0 for many years
- The Ephoca Team.

4
5
This symbol indicates the possibility of electrical shock, death or
serious injury.
All safety messages will inform you of the potential hazard, how to reduce the chance of injury, and what will happen if
the instructions are not followed. Be sure to follow the instructions.
SAFETY
We have provided many important safety messages in this manual for your HPAC 2.0. Always read and adhere to all
safety messages.
For your safety, the information in this manual must be followed to minimize the risk of fire, explosion, electrical shock or
to prevent property damage, personal injury or death.
zRead the manual thoroughly prior to operating the HPAC 2.0.
zSave these instructions.
zIncorrect operation due to ignoring the instructions will cause harm or damage, or even death.
THIS IS A SAFETY ALERT SYMBOL
This symbol alerts you to potential hazards that can kill or hurt you and others. All safety messages
will follow the safety alert symbol with the word “WARNING” or “CAUTION”. These words mean:
This symbol indicates the possibility of minor injury, damage to the
HPAC 2.0 or other property.
This symbol alerts the user to take note of something that may aect
the operation of HPAC 2.0.
This symbol indicates property damage can occur if instructions are
not followed.
ATTENTION
WARNING
NOTICE
CAUTION

6

7
CONTENTS
OPERATIONS
SAFETY WARNINGS 9
SUGGESTIONS FOR SAVING ENERGY 14
TOUCH-SCREEN CONTROL 16
MAINTENANCE 24
TROUBLESHOOTING 38
iOS/ANDROID APP
DOWNLOADING THE APP 40
CONNECTING THE APP TO HPAC 2.0 42
CONNECTING MULTIPLE HPAC 2.0’s 48
RESETING THE Wi-Fi 55
TROUBLESHOOTING 56
USING THE APP 58
SCHEDULING 65
SYSTEM INFO
TECHNICAL SPECIFICATIONS 82
SERVICE & ASSISTANCE 88
WARRANTY 90

8

9
ELECTRICAL SAFETY
IMPORTANT - READ CAREFULLY PRIOR TO INSTALLATION!
FUSE/CIRCUIT
BREAKER
GROUNDING
Use a minimum breaker or fuse as specified by the unit type. Proper
current protection for the HPAC 2.0 is the responsibility of the owner.
The grounded three-prong electrical power outlet must match power
plug on service cord and be within reach of service cord. Do not alter
the service cord or power plug. Do not use an extension cord.
The HPAC 2.0 must be grounded from the breaker or fuse until the
power supply cord.
Be sure that the three-branch circuit or general purpose outlet is
grounded.
POWER OUTLET
ELECTRICAL SHOCK HAZARD
Turn o all electrical power before making any connections. All electrical
connections and wiring MUST be installed by a qualified electrician and
conform to the National Code and all local codes which have jurisdiction.
Improper wiring may result in property damage, injury or death.
WARNING
NEMA5
115V receptacle for 115V
NEMA6
250V receptacle for 208/230V
10
STEP 1
STEP 2
STEP 3
POWER SUPPLY CORD
The HPAC 2.0 is shipped from the factory with a Leakage Current Detection Interrupter (LCDI) equipped power supply
cord. The LCDI device meets the UL and US National Electric Code 440.65 requirements for power supply cord
connected air conditioners.
TEST YOUR POWER SUPPLY CORD PRIOR TO INSTALLATION
Plug power supply cord into a grounded three-prong electrical power outlet.
Press TEST (listen for the click; Reset button trips and pops out). This should cut the
power to the HPAC 2.0. If the plug does not trip and the unit stays on, please contact
technical support.
Press RESET (listen for the click; Reset button latches and remains in). The power
supply cord is ready for operation.
The LCDI device is not intended to be used as a switch. Do not use
the TEST and RESET buttons to turn the HPAC 2.0 on and o. Once
plugged in, HPAC 2.0 will operate normally without the need to
reset the LCDI device.
CAUTION
ELECTRICAL SHOCK HAZARD
If the LCDI device fails to trip when tested or if the power supply
cord is damaged, it must be replaced with a new power supply
cord obtained from Ephoca and must not be repaired.
WARNING
11
ELECTRICAL SHOCK HAZARD
Do not operate or stop the HPAC 2.0 by inserting or pulling out the
power plug. It may cause electric shock and damage the HPAC 2.0.
Failure to follow this warning can result in property damage, injury
and/or death.
ELECTRICAL SHOCK HAZARD
Do not touch the power supply cord or the HPAC 2.0 with wet hands
or use in a damp environment, as it may cause a fire or electrical
shock. To avoid damage or electrical shock, unplug by holding the
end of the power plug. Failure to follow this warning can result in
property damage, injury and/or death.
ELECTRICAL SHOCK HAZARD
Young children should be supervised to ensure that they do not play
with the HPAC 2.0. The HPAC 2.0 is not intended for use by young
children. Failure to follow this warning can result in property damage,
injury and/or death.
WARNING
WARNING
WARNING
ELECTRICAL SHOCK HAZARD
It is the installer’s responsibility to properly apply and install the
equipment. Installation must be in conformance with all applicable
local and national codes. Failure to do so can result in property
damage, personal injury or death. Failure to follow this warning can
result in property damage, injury and/or death.
WARNING
12
ELECTRICAL SHOCK HAZARD
Do not place the power supply cord near a heater. It may cause
fire and electric shock. Failure to follow this warning can result in
property damage, injury and/or death.
EXPLOSION/FIRE HAZARD
Do not operate the HPAC 2.0 where explosive gases develop or where
humidity and temperature levels exceed the maximum allowed in the
specifications. Otherwise, it may cause an explosion and a fire. Make
sure to ventilate the room well when using the HPAC 2.0 together with
a stove or other such appliance. Failure to follow this warning can
result in property damage, injury and/or death.
WARNING
WARNING
ELECTRICAL SHOCK HAZARD
Do not use a power cord, a power plug, or a loose socket that is
damaged. Failure to follow this warning can result in property
damage, injury and/or death.
WARNING
ELECTRICAL SHOCK HAZARD
Do not place objects on the power supply cord. Protect the power
supply cord from being pinched or damaged. There is the danger
of fire or electric shock. Failure to follow this warning can result in
property damage, injury and/or death
WARNING
13
ELECTRICAL SHOCK HAZARD
Do not insert hands or other objects through the air inlet during
operation. Electrical and moving parts could cause shock and injury.
Failure to follow this warning can result in property damage, injury
and/or death.
ELECTRICAL SHOCK HAZARD
Do not alter the service cord or power plug. Do not use an extension
cord. Failure to follow this warning can result in property damage,
injury and/or death.
ELECTRICAL SHOCK HAZARD
When the HPAC 2.0 is in the OFF position, there is still voltage to the
electrical controls. Disconnect the power to the unit before servicing
to avoid electric shock or damage to the HPAC 2.0 by removing the
power supply cord from the wall power outlet or by disconnecting
the circuit breaker or fuses. Failure to follow this warning can result in
property damage, injury and/or death.
WARNING
WARNING
WARNING
ELECTRICAL SHOCK HAZARD
Do not sit/lean or place anything on top of the HPAC 2.0, especially
liquids. It could trigger a short-circuit, damage the HPAC 2.0 and/
or expose the user to the risk of electrocution. Failure to follow this
warning can result in property damage, injury and/or death.
WARNING

14

15
ENERGY-SAVING SUGGESTIONS
The HPAC 2.0 is extremely ecient and features a state-of-the-art inverter compressor. Here are a few energy-saving
tips to keep your HPAC 2.0 running at peak performance and using minimum energy.
zCarefully read and follow the installation instructions.
zAlways keep the filters clean (see Maintenance and Cleaning chapter.)
zHave the HPAC 2.0 professionally inspected and cleaned by an authorized technician every two to three years,
depending on use.
zKeep the doors and windows of the rooms closed while the HPAC 2.0 is operating.
zProper insulation helps your HPAC 2.0 maintain the desired inside temperature.
zDo not let direct sunlight enter the room (use curtains or lower the blinds) while the air conditioner is operating,
using shade wherever possible.
zDo not block the supply and return airflow grilles of the HPAC 2.0; not only will this result in non-optimal
performance of the HPAC 2.0, it may also cause damage and void the warranty.
zKeep window coverings away from the HPAC 2.0 to ensure free air flow.
16

17
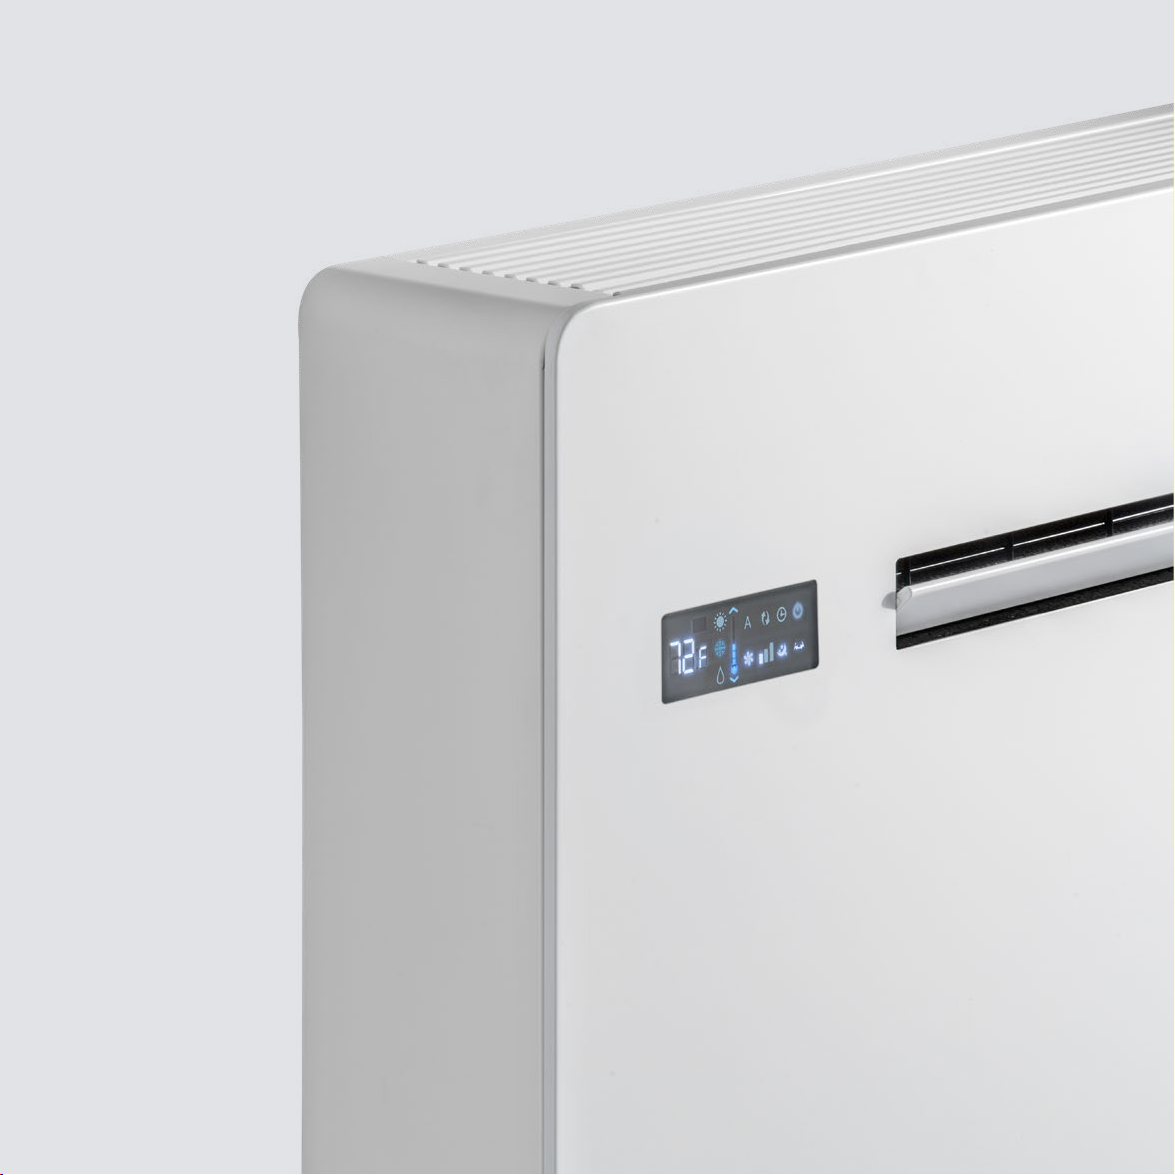
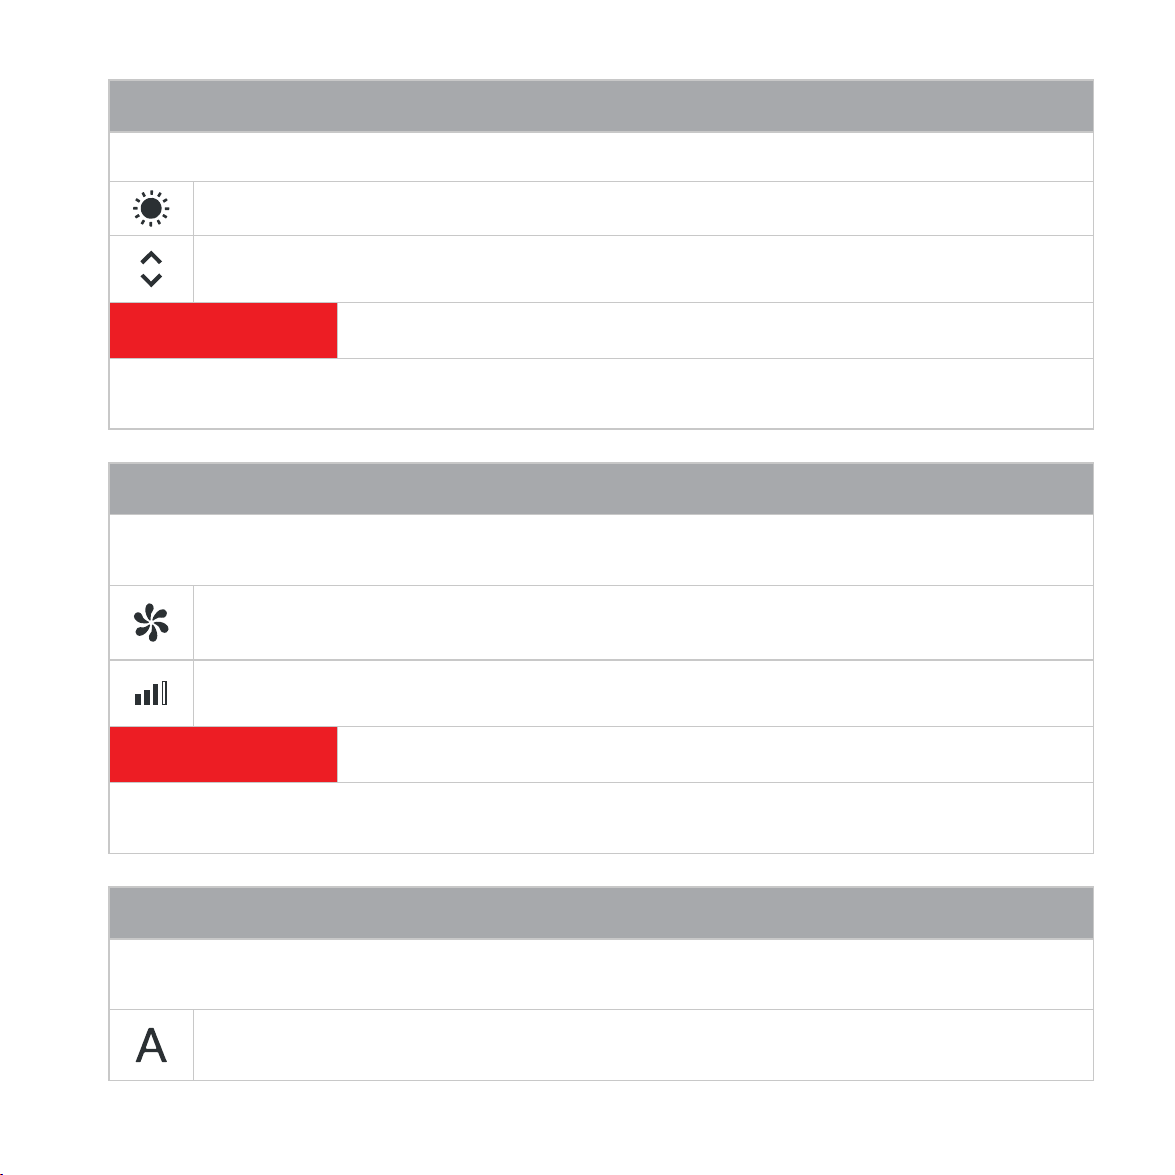
ON BOARD TOUCH-SCREEN CONTROLLER
The display shows the operating status as well as any alarms. Select the various functions by pressing the appropriate
symbols on the touch screen.
Setpoint
Up
Down
Power On/O
Automatic
Cooling
Dehumidification
Ventilation
Heating
Sleep
Air Flow
Fan Speed
Timer
Digital Thermometer
Restricted
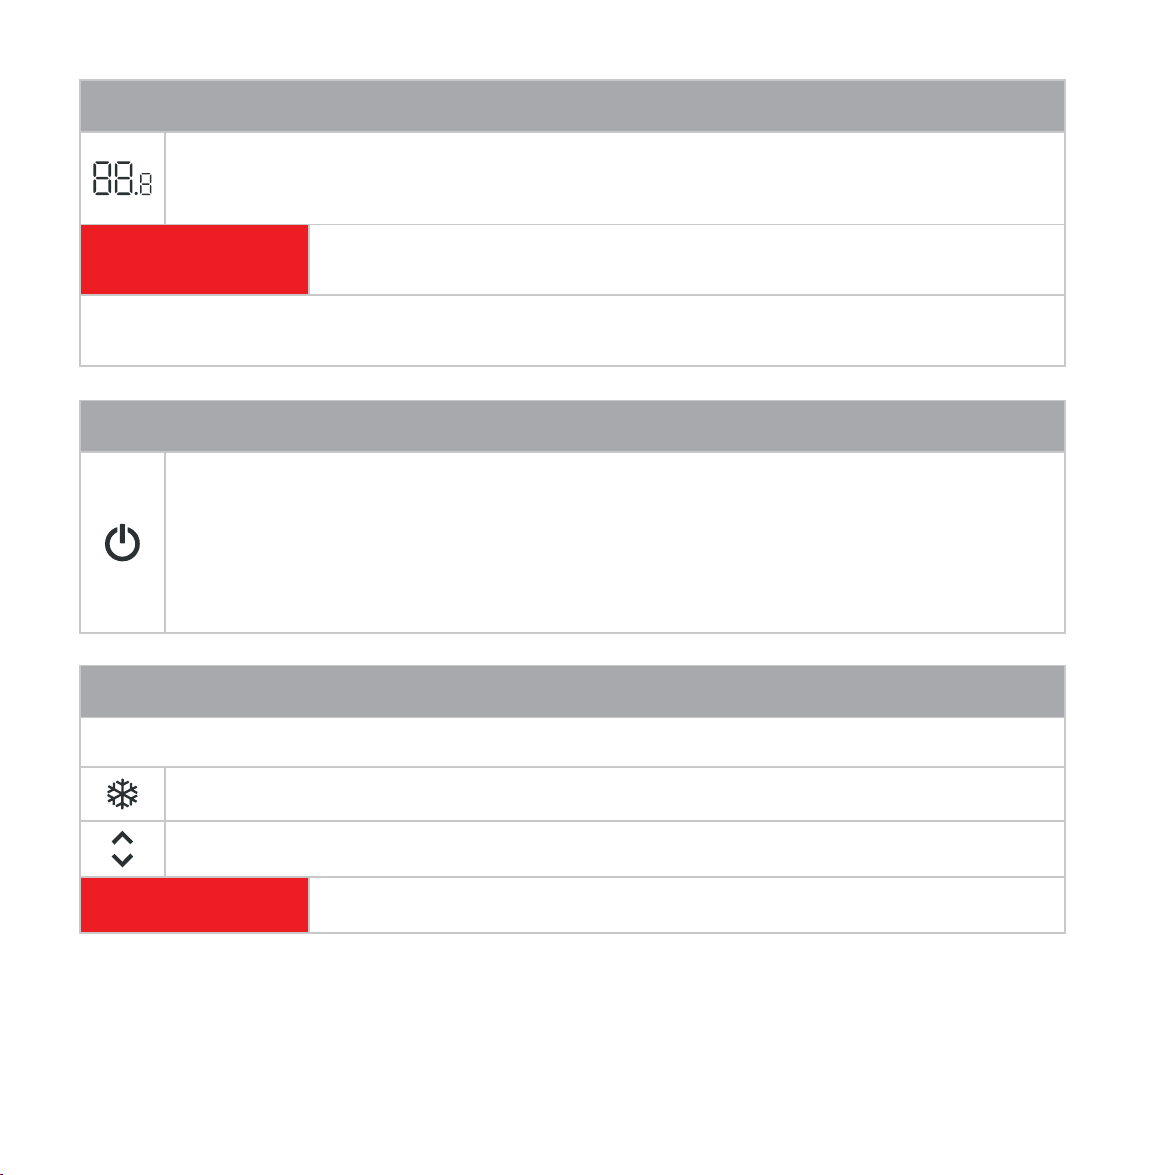
BUTTONS & INDICATORS
18
COOLING MODE
In this cooling mode, the HPAC 2.0 cools and dehumidifies the room. The fan will consistently operate.
To activate cooling mode press and hold the cooling button 5 seconds.
Use the up and down arrows to set the desired temperature between 61°F and 87°F.
ATTENTION At startup, it can take up to three minutes for the HPAC 2.0 to start supplying cool air.
TEMPERATURE SETPOINT DISPLAY
When the HPAC 2.0 is turned on, the three digits on the display will show the desired temperature.
It is possible to set the desired temperature between 61°F and 87°F. The HPAC 2.0 will bring the room to
the desired temperature.
NOTICE If the temperature is set too low or too high, it can be unhealthy and an unnecessary
waste of energy.
The HPAC 2.0 will periodically defrost the evaporator coil, if necessary. During the defrosting phase, the HPAC 2.0
does not supply warm air.
POWER ON/OFF
Power the HPAC 2.0 on or o (standby) by pressing the Power button. The control system of the HPAC
2.0 is equipped with a memory, so settings will not be lost if the HPAC 2.0 is turned o or there is a loss
of power.
The Power button is used to activate or deactivate the HPAC 2.0 for short time periods only. In the case
of long periods of inactivity, the HPAC 2.0 must be unplugged from the power grounded three-prong
electrical power outlet.
19
HEATING MODE
In heating mode, the HPAC 2.0 heats the room.
To activate heating mode, press and hold the heating button for 5 seconds
Use the up and down arrows to set the desired temperature between 61°F and 87°F.
ATTENTION At startup, it can take up to three minutes for the HPAC 2.0 to start supplying warm air.
The HPAC 2.0 will periodically defrost the evaporator coil, if necessary. During the defrosting phase, the HPAC 2.0
does not supply warm air.
VENTILATION MODE
In this ventilation mode the fan circulates the air in the room. The fan speed can be adjusted to Low, Medium and
High.
To activate ventilation mode, press and hold the ventilation button for 5 seconds.
To adjust the fan speed press the fan speed button until the desired speed is reached.
ATTENTION The HPAC 2.0 will not cool, heat or remove humidity in this mode.
The HPAC 2.0 will periodically defrost the evaporator coil, if necessary. During the defrosting phase, the HPAC 2.0
does not supply warm air.
AUTOMATIC MODE
In this mode, the HPAC 2.0 automatically selects the mode (Cooling or Heating) according to the temperature
setting and adjusts the fan speed.
To activate automatic mode, press and hold the A button for 5 seconds. To deactivate, simply select cool
or heat.

20
TEMPERATURE LIMITING (HOTEL MODE)
This mode restricts the temperature setting to 71.5°F to 82.5°F in cooling mode and 61°F to 75°F in heating mode. It
also disables dehumidification mode and automatic mode.
To enable, press and hold the restricted mode button for 10 seconds (“En” displayed).
To disable, press and hold the restricted mode key for 10 seconds.
COOL OR HEAT ONLY MODE
This mode restricts the system to Heating Only or the Cooling Only modes.
To enable Cooling Only press and hold the A button for 12 seconds until HC appears on the Display. Press the
A button again for 5 seconds, Co will display. Wait for three seconds without touching anything for the HPAC
2.0 to memorize the setting and return to normal operations.
To enable Heat Only press and hold the A button for 12 seconds until HC appears on the Display. Press the
A button again for five seconds, Co will display. Press the A button again for five seconds, Ho will display.
Wait for three seconds without touching anything for the HPAC 2.0 to memorize the setting and return to
normal operations.
To disable Heat Only or Cool Only Mode, press and hold the A button on the touch-screen display for 12
seconds until either Ho or Co appear on display. Press the A button again for five seconds,and press until
HC (heating and cooling) appears on the Display. Wait for three seconds without touching anything for
the HPAC 2.0 to memorize the setting and return to normal operations.
DEHUMIDIFICATION MODE
In dehumidification mode, the HPAC 2.0 dehumidifies the room.
To activate dehumidification mode, press and hold the dehumidification button for 5 seconds.
This mode is useful during the spring and fall when the temperature is pleasant, but excess humidity may cause
discomfort. This mode ignores both room temperature and fan speed settings. The fan operates only on low
speed. It is normal for the HPAC 2.0 to work intermittently.
Other manuals for HPAC 2.0
2
Table of contents
Other Ephoca Heat Pump manuals

Popular Heat Pump manuals by other brands

Carrier
Carrier WeatherExpert 48LC installation instructions

York
York F*FP Technical guide

Dimplex
Dimplex DHW 250P Installation and operating instructions

Dimplex
Dimplex BWP 30 HS Installation and operating instructions

Immergas
Immergas MAGIS HERCULES PRO 4 Instructions and Recommendations

White Rodgers
White Rodgers 90 SERIES Installation


AAON
AAON CB-024 Installation operation & maintenance

Bryant
Bryant Preferred Series Owner's information manual

Sanden
Sanden GAUS-160FQS owner's manual

Mitsubishi Electric
Mitsubishi Electric Ecodan Homeowner quick start guide

alphainnoTec
alphainnoTec WWP series operating manual

Grandaire
Grandaire W4H7T installation instructions