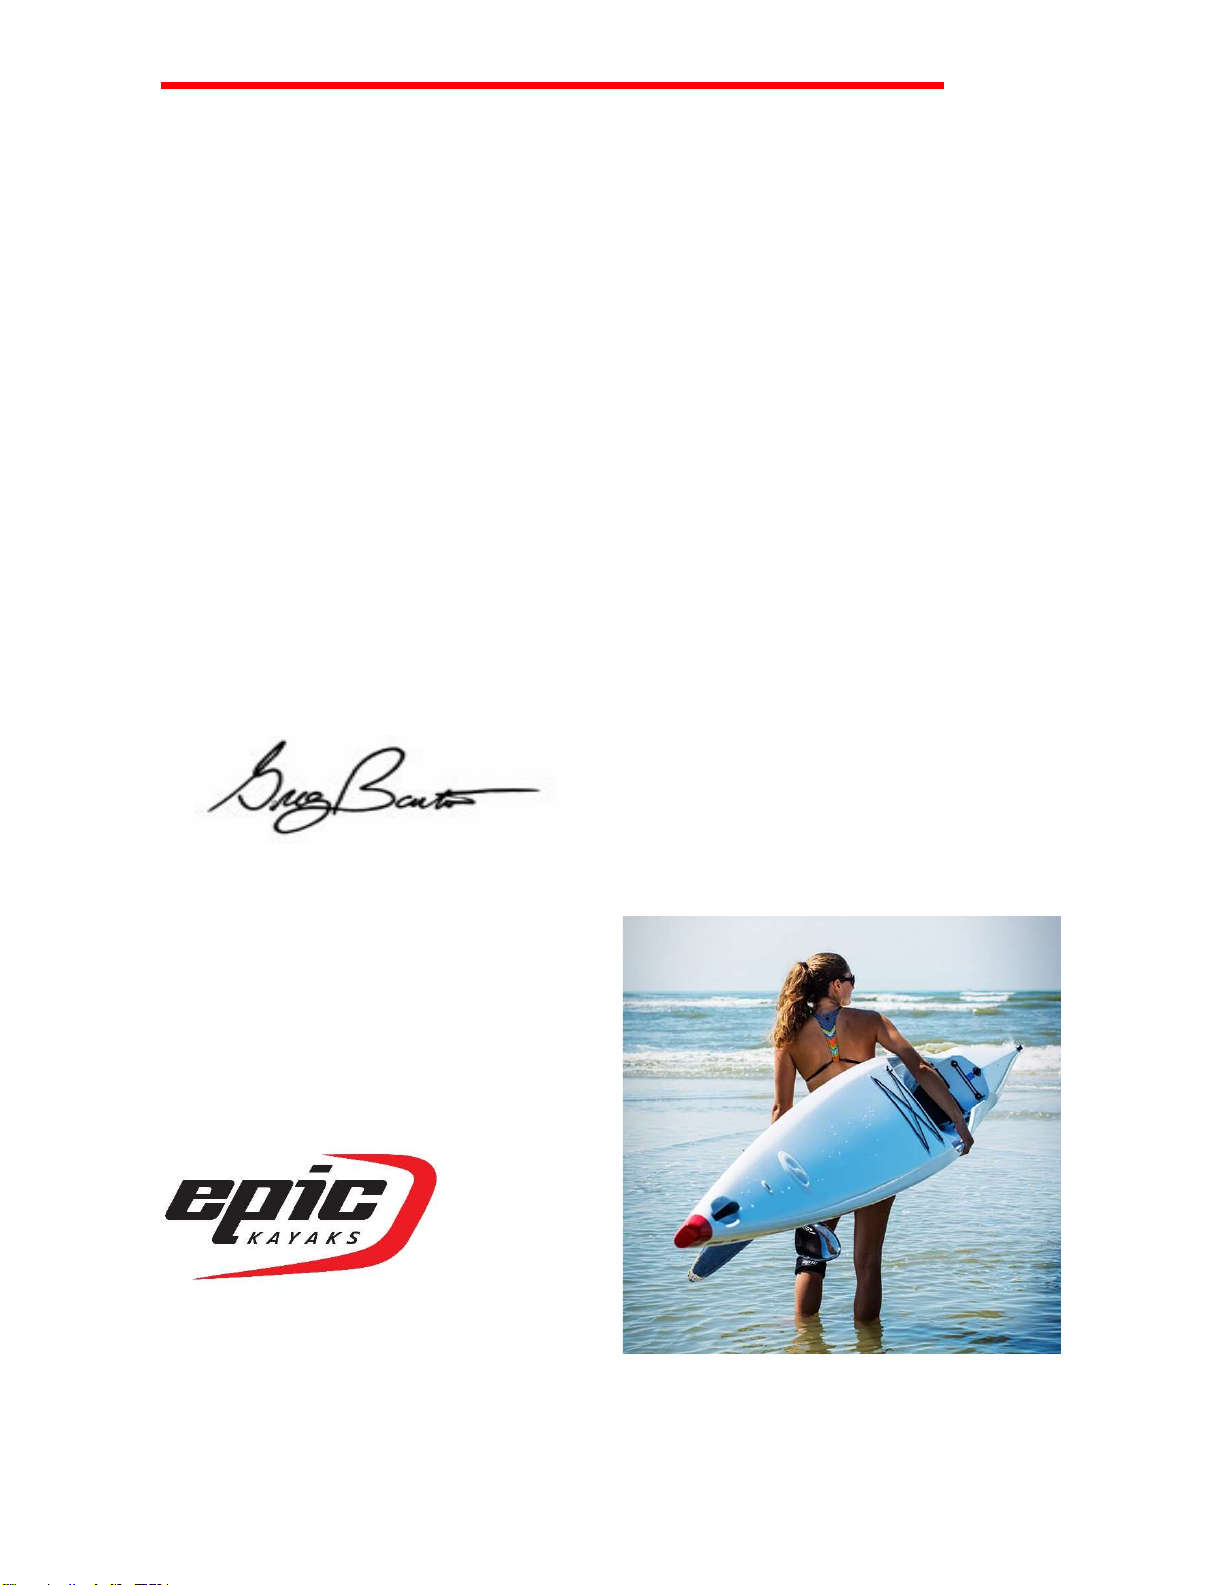
Epic V Series User manual

V-SERIES SURF SKI
USER GUIDE

USER GUIDE
PAGE 2
Congratulations
on your
purchase of an Epic surf ski!
Whether you're a beginning
recreational paddler or a highly
competitive racer, your new
Epic surf ski will improve your
paddling experience. Our
models are optimized for ease of
handling, efficiency in the water,
and
are extremely light weight.
We hope you enjoy our products
as much as we do. See you on
the water!
Greg Barton
2 X Olympic Gold Medalist
2 x Olympic Bronze Medalist
4 x World Championship Gold Medalist
Designed by Champions

USER GUIDE
PAGE 3
www.epickayaks.com
The Epic Kayaks website
ensures you have
convenient access to the latest paddling
news and articles, tips, user guides and
product
information ‐‐ all at your
fingertips!
Ease of navigation and content layout are
key elements of the Epic website. We hope
you enjoy the website,
and that it helps
answer any questions you have regarding
your new Epic and the exciting world of
surf ski paddling. Refer to our FAQ page
https://www.epickayaks.com/faq
for
answers to Frequently Asked Quest
ions.

USER GUIDE
PAGE 4
V‐SERIES SURF SKIS:
Layup Information:
Polyethylene
Rotomoulded Polyethylene
Molded in graphics
Performance
Infusion grade foam core
A composite hybrid of fiberglass, carbon fiber, and
Kevlar
Vacuum infused, heat-cured epoxy
Black bow & stern accents
Ultra
Nomex honeycomb core
A composite hybrid of Woven Kevlar fabric, carbon fiber
and fiberglass
Vacuum bagged, heat-cured epoxy
Red bow & stern accents
Elite
Nomex honeycomb core
3K carbon fiber laminate
Vacuum bagged, heat-cured epoxy
Black or Grey gel coat with white bow and stern accents.
light cosmetic imperfections should be expected in the
finish of the Elite layup boats.
V‐Series Specifications
See www.epickayaks.com for your model specifications or
reach out to info@epickayaks.com

USER GUIDE
PAGE 5
The V‐Series Footboard System
The V‐Series footboard system (photo 1) has been designed to enhance leg drive and
body rotation for an optimal forward stroke. The carbon fiber footboard fits across the
width of the single footwell, giving paddlers the luxury of comfortably centering both
feet and knees. A centered foot and knee position allows better leg movement and full
rotation for a more comfortable, powerful and efficient forward stroke.
The V‐Series footboard system is fully adjustable. We recommend you initially set the
footboard to your desired setting on land, or in calm shallow water, while protecting
the rudder. This will allow you to get in and out if necessary, and easily make
adjustments in a safe environment. Once set to the desired length, the footboard
remains locked in position.
Two pedals on top of the footboard operate the rudder at the back of the ski. This
provides a solid platform to brace your legs, while still allowing you to control the
rudder with your toes.
See our FAQ page for videos on how to set up your new Surfski
https://www.epickayaks.com/faq
Photo 1. V‐Series footboard system
Photo 2. V‐Series back side of footboard system, dyneema cord and pins to adjust
length
Footboard Operation
The footboard runs on two rails which are attached to either side of the footwell (photo
2). The rails have notched holes that catch pins coming from the back of the footboard.
Follow the procedure below to adjust the settings of your footboard:
1. Reach behind the footboard and grasp the dyneema cord running the length of
the backside.
2. Pull on the cord to release the pins that set the footboard in the rails.

USER GUIDE
PAGE 6
3. While pulling the cord (with the pins released) use the palm of your hand to
slide the footboard forward or back to the desired position.
4. Once the footboard is in position, let go of the cord. This will release the pins
back into the rails.
5. Apply pressure to ensure that the holes on the rails capture the pins and lock in
the footboard. The rudder lines running through the pedals on top of the
footboard are self‐adjusting. Simply set the footboard at the desired setting and
you’re ready to go.
It may take one or two tries to find the optimal position, but the luxury of this system is
that you can try as many as you like! And, use the handy number scale on the side of
the footwell to reset your footboard position if someone else uses your boat!
Correct Positioning of the Footboard
Setting up your surf ski is a personal task. We recommend you position the footboard
so it provides a solid platform for your feet, allows comfortable leg extension on your
forward stroke, and allows easy manipulation of the toe pedals for rudder control. A
slight bend to your knees will ensure you can rotate and work your legs while
paddling. Use the Velcro® strap adjustment to set footstrap tightness.
Footboard Maintenance
The V‐Series footboard is very user friendly and you should not encounter any
problems with its operation. Routinely rinsing the footboard, rails and footstrap after
use will keep salt, sand and other debris from collecting and hindering the action of the
footboard. A light application of silicone spray applied to the notched rails once or
twice a season will keep your footboard moving smoothly.

USER GUIDE
PAGE 7
The V‐Series Rudder
Rudder Operation
The V‐Series rudder is operated with the two toe pedals on top of the carbon footboard.
This “gas pedal” type system is extremely easy to operate. To turn the bow of the surf
ski to the right, simply push the right toe pedal forward. To bring it back to center,
push the left pedal forward until the two pedals are back in line vertically (and vice
versa to point the bow to the left.)
While underway the rudder does not lock in a fixed center position. To keep the rudder
centered and “neutral”, keep equal pressure on the toe pedals, keeping them both in
line. This is a natural and comfortable position, and allows for instant corrections while
paddling.
Do not over‐correct with your rudder! V‐Series surf skis are surprisingly
maneuverable, and the rudder is easy to use and very responsive. While underway,
start your corrections in small increments, with small adjustments to the rudder, and
then correct accordingly. Pushing the pedals back and forth aggressively will only
frustrate you and keep the ski from finding the line you want!
Rudder Options & Initial Rudder Installation
V‐Series surf skis are sold with either Epic’s surf, weedless, universal or roughwater
weedless rudder depending on where the ski is purchased. All rudder designs are
installed the same way. New surf skis are sent from Epic with the following materials
included: rudder, rudder pin, spreader bar (with rudder lines attached), and an allen
wrench. The smaller items are shipped inside the rudder access cover (photo 4) or
inside the Velcro pouch on your rudder flag. The rudder is wrapped separately for
protection, and then secured and shipped in the footwell.
Photo 3. V‐Series – installed Universal rudder and small weed guard
Photo 4. V‐Series – rudder access cover with materials as shipped: allen wrench,
spreader bar, rudder pins

USER GUIDE
PAGE 8
To install the rudder, begin by opening the rudder access cover (loosen in a counter‐
clockwise direction). Run the rudder post up through the rudder housing in the hull of
the ski (photo 5). Then put the rudder pin through the small hole in the top of the
rudder post and center the pin (photos 6 and 7). The pin ensures the rudder post is
firmly captured and cannot spin in the spreader bar assembly once the assembly is
tightened. Place the spreader bar over the top of the rudder post (photo 8) and tighten
the two spreader bar bolts so that the top of the rudder post and the pin ends are
pinched and held fast. Tighten the screws with the allen wrench (photos 9 and 10).
Photo 5. V‐Series – run rudder post up through rudder housing
in hull of boat
Photo 6. V‐Series – place rudder pin through hole in top of
rudder post
Photo 7. V‐Series – center rudder pin in rudder post
Photo 8. V‐Series – place spreader bar over top of rudder post

USER GUIDE
PAGE 9
Photo 9. V‐Series – once spreader bar is over the top of the rudder post, use allen
wrench to tighten the spreader bar bolts so that top of rudder post and pin ends are
pinched and held fast
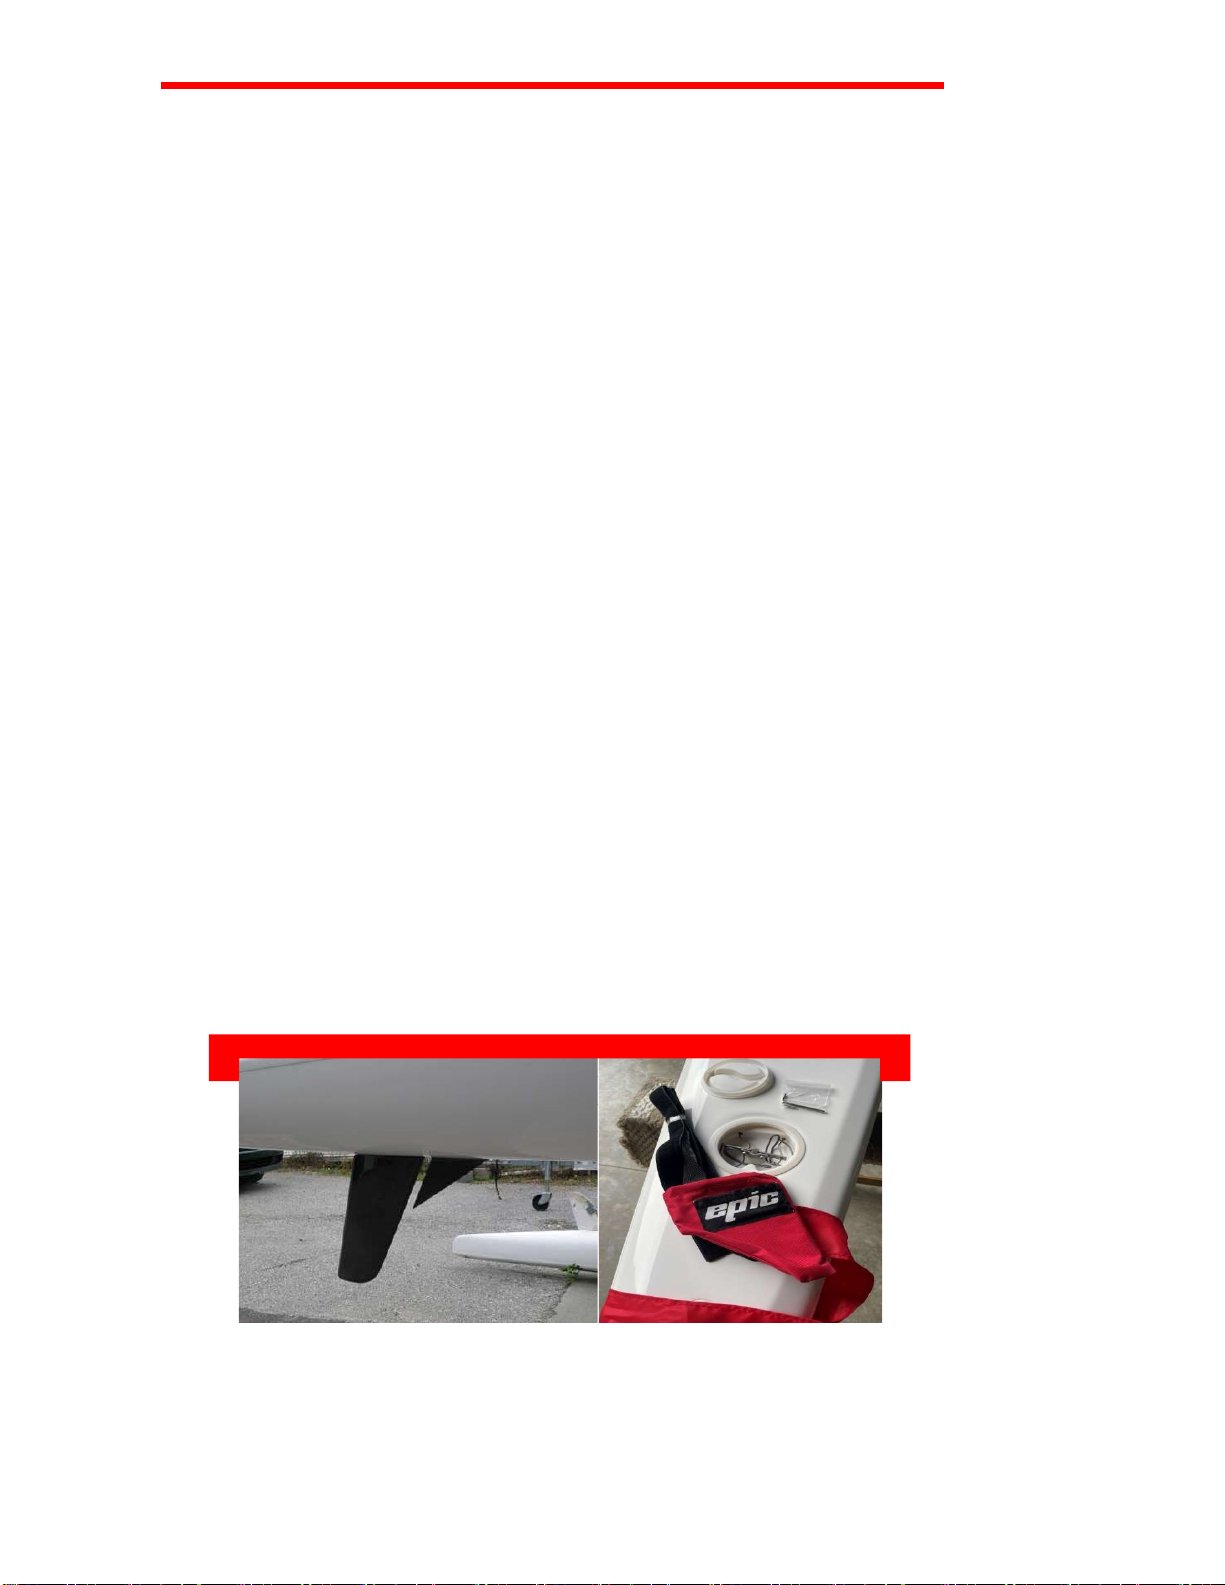
Photo 10. V‐Series – rudder installed
Correct Positioning/Adjustments of the Rudder
The rudder is controlled with rudder lines that run from the white barrel adjuster
(turnbuckle), through the footboard pedals back to a spreader bar in the stern. The
spreader bar is accessed by removing the small, round rudder access cover at the stern
of the ski. The cover loosens in a counter‐clockwise direction.
The rudder lines, by being joined at the barrel adjuster and spreader bar effectively
form a complete loop. This allows the footboard to be moved forward or backwards
along the track, without needing adjustment. If at any time the rudder becomes out of
alignment (Pedals are parallel and the rudder is not straight), corrections can be made
as follows: Align the rudder in a straight position (best done with a 2nd person who can
hold the rudder in the straight position) take up the slack at the pedals, one will be
further forward than the other (as they are out of alignment). Move the forward pedal
back half the distance between the two pedals, this will create a small amount of slack
behind this pedal, pass/work the slack through that pedal, through the rail end, across
the front of the cockpit and back through the opposing pedal, by so doing you have
brought the forward paddle back by half the distance between them and moved the rear
pedal forward by the same amount. They should now be aligned. If not, a 2nd ‘fine tune’
adjustment using the same method may be required.
Adjustments to the pedal angles (typically they line up with the footboard) can be made
using the barrel adjuster, to unscrew the adjuster creates more length in the loop, and
will allow the pedals to be further forward, to tighten/shorten brings the pedals back
towards the paddler. Those that paddle with footwear may want their pedals further
forward to limit unwanted pedal input during the leg drive.

USER GUIDE
PAGE 10
Rudder Maintenance & Removal
Maintaining and working with V‐Series rudders is easy. They are designed to be low
profile, unobtrusive and hassle free. There is very little hardware and few moving parts
to worry about. Remove the cover and rinse the rudder in fresh water after you paddle.
To switch out rudders or completely remove the rudder for maintenance or repair,
begin by opening the rudder access cover (loosen in a counter‐clockwise direction). The
spreader bar assembly is opened by loosening the two spreader bar bolts ‐‐ use the allen
wrench provided with your boat (photo 11). Once the spreader bar bolts are unfastened,
the rudder will be loose. BEFORE pulling the rudder post free from the hull, be sure to
remove the small pin inserted in the top of the rudder post. This will allow you to pull
the rudder blade and post completely clear of the rudder housing. Keep track of your
pin (e.g. tape it to your rudder) (photo 12)! Reattach a rudder by tightening the spreader
bar assembly back around the rudder post and pin when the rudder is back in place (if
needed see Initial Rudder Installation section above).
Photo 11. V‐Series – loosen spreader bar assembly using allen wrench
Photo 12. V‐Series – be sure to remove and keep track of rudder pin removed from
top of rudder post, e.g., tape it to your rudder post
Smart Track Overstern Rudder
Some Surf Skis (V6) come standard with the Smart Track overstern rudder.
For installation instruction please see our FAQ page. https://www.epickayaks.com/faq
Bailer operation and Maintenance
Your Epic Surfski comes standard with the Epic bailer. Our Patented Epic Bailer drains
up to 6 times faster than previous metal bailers or venturie systems. It also allows
multiple positions that can be adjusted to suit conditions, or closed off completely for a
more dry cockpit and no drag paddling in calmer conditions.

USER GUIDE
PAGE 11
There is the least amount of drag and no back-filling when the bailer is closed. This is
recommended for most paddling on calm and/or colder water.
There are four open positions. The full open position (lever all the way back) drains the
fastest but imparts the most drag and is not recommended for continuous use. Usually,
the bailer can be closed and then opened for 10-20 seconds at a time to drain as needed
before closing again. In steady surf conditions, it may work best to leave the bailer
continuously open in the in the first or second setting (¼ or half open).
Deck Design Features & Rigging
Epic’s groundbreaking seat design, adjustable footbrace, single footwell and high-
capacity bailer guarantee a comfortable ride in all our surf skis. Front deck cutaways
allow a close, efficient catch. In addition, all V‐Series skis are equipped with deck
rigging behind the cockpit and in front of the footwell. Elastic bungees immediately
behind the cockpit are there for safety and to provide extra storage space. Store items
such as extra safety gear and personal effects including: a spare paddle, maps and
charts and other accessories. The small elastic bungee setup in front of the footwell
provides just a little more space for accessories (photo 13). Many paddlers find this an
ideal location to store their water bottle, or to attach a GPS unit.
At the top front of the footwell is the drain plug/breather tube (photo 13). Open the
plug to drain water if necessary. Otherwise, keep the drain plug/breather tube closed to
keep water out. On very hot days we recommend opening your drain plug, when you
first set your ski in the water, before a paddle. Let your Surfski sit in the water for a

USER GUIDE
PAGE 12
minute or two to allow for equalization of pressure inside the ski. Then close the drain
plug and continue with paddle.
Photo 13. V‐Series – footwell bungee and drain plug/breather tube in closed position
Hatches (only available select models)
Some models come equipped with a storage hatch or hatches. These hatches provided
ample protected space for your personal belongings. Hatches are designed to be dry
and keep water out, but remember that this is a boat…never underestimate water’s
ability to find its way in! Before placing gear in your kayak, always pack and properly
seal your valuables and other storage items in “dry bags” or boxes/containers
specifically designed for this purpose. When sealed in your hatch, this protection will
ensure that even miniscule amounts of water will not reach and potentially damage
your belongings. The outside edges of the hatch covers are lined with a rubber seal that
fits into the hatch deck contour, preventing water from entering the compartment. Four
hatch levers fasten down to create a tight seal and keep each hatch cover firmly in place.
Photo 14. V5/V6 hatch & hatch levers
Hatch Cover Operation and Maintenance

USER GUIDE
PAGE 13
Hatch Operation: Release the 4 hatch levers, open the hatch cover and access the
compartment.
Reverse the steps to re‐fasten the hatch cover in place. It is best to work diagonally
when closing the levers to ensure the hatch cover is centered. Close one lever then close
the next lever that is diagonally opposite it. And then repeat with the remaining two
levers.
Hatch Maintenance: Check the hatches frequently to make sure your levers are in good
working order. Rinse them thoroughly with fresh water after paddling, particularly
when paddling in salt water. Look inside the hatches periodically, or when storing your
kayak outdoors in the rain. Sponge out any water that may have seeped in. Make sure
the hatch cover rubber seals remain sound and intact by keeping them clean and free of
salt, sand and contaminants. A light layer of 303 Protectant, or a similar product,
applied with a clean cloth, will help to keep the rubber seals in good condition

USER GUIDE
PAGE 14
OVERALL SURF SKI CARE
Your Epic surf ski is for the most part "wash and wear." If done on
a regular basis, maintenance should be minimal, consume little time
and can actually be an enjoyable part of paddling. Routine
maintenance not only takes care of yo
ur boat, but helps you foster a
bond with your surf ski. After all, your surf ski needs to take care of
you as well. It's an important relationship!
Perhaps the simplest (yet important) task is washing your ski. This
should be routine and
automatic, especially after every saltwater or
beach paddling session. A good rinse with fresh water is all it takes.
It is essential to keep the deck and its components (footbrace, rails,
rudder, drain plug, bailer, etc.) clear of salt and grit to prevent
corrosion and jamming of the parts. For a more detailed cleaning,
dish washing soap or mild boat cleaners can be used to remove any
dirt, grime or stains. We use a product called Roll‐Off. It is very
effective, biodegradable and comes in a convenient spray bottle.
Occasionally look your boat over thoroughly, on the exterior and
interior. On the exterior look for any damage or cracks, make sure
there are no structural problems. You're bound to find scratches.
Sometimes very fine sanding and polishing can help remove
scratches, but usually it is better to just leave them alone. Check the
condition of your deck bungee, cords and footstrap. Be sure to
replace anything worn or frayed, tighten any hardware that is loose,
and contact your local dealer for advice on repair work that needs
to be done.
Protecting your surf ski from harmful UV rays will keep it sound
and looking its best for many years. There are a number of products
available that work well. 303 Protectant and UV Tech are two
examples that may be s
prayed on the boat then wiped down with a
rag. This simple process protects, and restores shine. You only need
to do this
3‐4 times a year.
If the finish becomes dull from UV exposure, buffing with an
automotive grade polishing compound can restore shine.
See our repair section on our FAQ page for more tips.
www.epickayaks.com/faq

USER GUIDE
PAGE 15
Storing Your Surf Ski
Available storage options obviously depend on your available space. Ideally, store
your surf ski indoors, in a garage or barn.
Do not tie your Ultra ski directly onto hard metal racks! Appropriately shaped saddles
or padding are required to eliminate stress concentrations when transporting and
storing.
Your boat may be on the ground, on wall racks or stands, or suspended from the
ceiling (to save space.) For floor storage, use padded saw horses or kayak cradles.
Space the horses or cradles about 1/3 the distance from the bow and stern. For
suspended storage, use polypropylene straps that wrap around rafters or hooks in the
ceiling. Loop the straps under the surf ski about 1/3 the distance from the bow and
stern, so that it is balanced.
For outdoor storage use the same padded sawhorses and/or cradles that you would use
inside. However, take some additional critical steps to protect your surf ski from the
elements. Store your surf ski out of direct sunlight. Keep rain, snow and ice off your
surf ski; long‐term parking in the shade is not enough. From the hardware store get a
weatherproof tarp. Once you know where you want to store the boat, put the storage
racks and surf ski in place. Create a protective tent with the tarp, using some rope and
wooden stakes. You can even use existing fences and trees to tie off if needed. A “tent”
is better than wrapping the ski with the tarp. Wrapping can keep moisture and other
contaminants trapped close to the hull. Also, make sure the surf ski is well secured and
protected from the wind, so it does not blow off your stands and get damaged.
NB!
Take Special Care of Your Elite & Ultra Layup!
Epic Kayaks is committed to manufacturing the finest surf skis
available using only the highest quality materials. If you have
purchased an Elite or Ultra layup you know they are exceptionally
light, but they require more care when handling. Avoid direct
impact with hard objects such as rocks, which can dent and/or
delaminate lightweight honeycomb core.
Wherever possible keep black gel coat elites out of direct sun when
not in use. In Hot climates the surface temperature of the black
elites can quickly exceed 150°F, which can potentially cause
damage.

USER GUIDE
PAGE 16
Regardless of whether you store your surf ski inside or outside, here are a few simple
storage points:
• Place racks or straps under the surf ski for support; space about 1/3 the distance
from the bow and stern
• Make sure the surf ski is clean and completely dry, inside and out (especially in
cold climates)
• The decision of whether to store your surf ski in a cover is a personal one,
however, use one for long term storage only if you are sure your boat will remain
dry
• Apply a UV protectant for long term storage
• Store your surf ski with the bailer closed to prevent damage
Excellent storage rack options may be found at:
• www.maloneautoracks.com
• www.talic.com
Transporting Your Surf Ski
Even if you live on the water, eventually you’ll want to load up and drive your surf ski
somewhere. Luckily, there are a great selection of rack systems and car‐topping
accessories that make transportation a cinch. Many cars, vans and SUV’s also now
come standard with pretty decent factory roof racks. Transporting your surf ski right
side up or upside down is personal preference, as is the use of a boat cover.
NOTE: close the bailer and do not leave the optional accessories like seat pads, hip pad
or footwell cowlings on your ski, during transportation.

USER GUIDE
PAGE 17
The main objective is to make sure your surf ski is securely fastened to whatever rack
system you have chosen, and to ensure driver visibility is not compromised.
The systems can vary from inexpensive foam blocks to more pricey aftermarket cross
bars that incorporate all types of accessories for transporting. We recommend that you
talk with your local paddlesports retailer about what roof rack options are available for
the vehicle you use. Most retailers will have a variety of options, will be able to install
whatever you choose to use on your vehicle and will also show you how to properly
secure your surf ski.
Tying a Surfski directly onto hard, unpadded racks (especially small bars) can dent or
crack your ski.
For flat rails please note : The “Rails” (top of the cockpit in footwell area) is a strong
part of the ski and can be tied (upside down) directly onto flat and/or hard racks.
Adding a thin (3/8” or 10 mm) piece of foam to the rear rack will usually allow the rear
deck to be securely tied to a flat rack. It is not recommended to tie a Surfski upright
onto flat racks.
For upright transport, appropriate fitted cradles or V-racks should be used.
Be sure to check the fit of cradles to ensure that the pressure is not focused on the hard
part of the cradle.
Below are a few recommended companies to consider for surf ski transportation:
• Thule – www.thuleracks.com
• Malone – www.maloneautoracks.com
• Goodboy - https://www.goodboypaddlesports.com/home/
• Yakima – www.yakima.com
Always evaluate the suitability of roof racks depending on the distance, speed, and
conditions you will be transporting your ski under. If the racks and fit are not 100%
secure then adding bow and stern lines can help – especially on windy days.

USER GUIDE
PAGE 18
Warranty Terms
Epic Kayaks warrants all products to be free from defects in materials and
workmanship for one year from the date of purchase. This warranty applies to the
original owner and is non‐transferable. If damage is due to a material or
manufacturing defect, Epic will repair or replace the surf ski free of charge. Epic
reserves the right to determine if a product will be covered under warranty. Normal
wear, cosmetic blemishes, and damage due to improper use, modification, negligence
or transport are not covered under warranty. Demo equipment is not covered under
warranty. Your original invoice is your proof of purchase.
Recommended Gear & Accessories
The
following list of accessories and safety
items represents essential gear that should
be accounted for each time you head out on
the water. Having the items on this list will
help ensure you have the capability to
perform self
-rescues, signal for help, and
will make your overall paddling experience
more comfortable and enjoyable. Check
with the maritime authorities in your area
(e.g. the Coast Guard) to determine
applicable regulations.
• PFD (Personal Flotation Device)
• Whistle or other sound‐signaling
device
• Spare Paddle
• Compass and/or handheld GPS
• Cell Phone / VHF radio
• Waterproof case for above
• Sunscreen
• Sunglasses
• Hat
• Water
• Leg leash.

USER GUIDE
PAGE 19
Returns (Warranty/Repairs)
To pursue a customer warranty claim, contact your local dealer. We will work with you
through your local dealer. If this process does not meet your expectations, you are
welcome to contact Epic Kayaks directly. Follow the procedures below:
• Contact Epic – we need the surf ski serial number, model, color and location
where purchased. You will be assigned a Return Authorization number (RA#)
for tracking your claim. Failure to follow this procedure will result in a 10%
restocking fee
• Epic will provide a correct return address (we have several locations)
• Your shipment should include your RA#, name, address and clear contact
information, along with the reason for returning the item
• You are responsible for the shipping cost to Epic, however, Epic will pay return
shipping costs
• Please email info@epickayaks.com with any questions, NEVER send product to
Epic without an RA#
This manual suits for next models
2
Other Epic Boat manuals
Popular Boat manuals by other brands

Dufour
Dufour 412 owner's manual

Pro-Line Boats
Pro-Line Boats 2000 30 Sport owner's manual

Sea Ray
Sea Ray 240 Sundeck owner's manual

Walker Bay
Walker Bay Generation 450 Owners & safety manual

Pro-Line Boats
Pro-Line Boats 24 Super Sport owner's manual

San Juan Yachting
San Juan Yachting TIVOLI Owners’ Notes