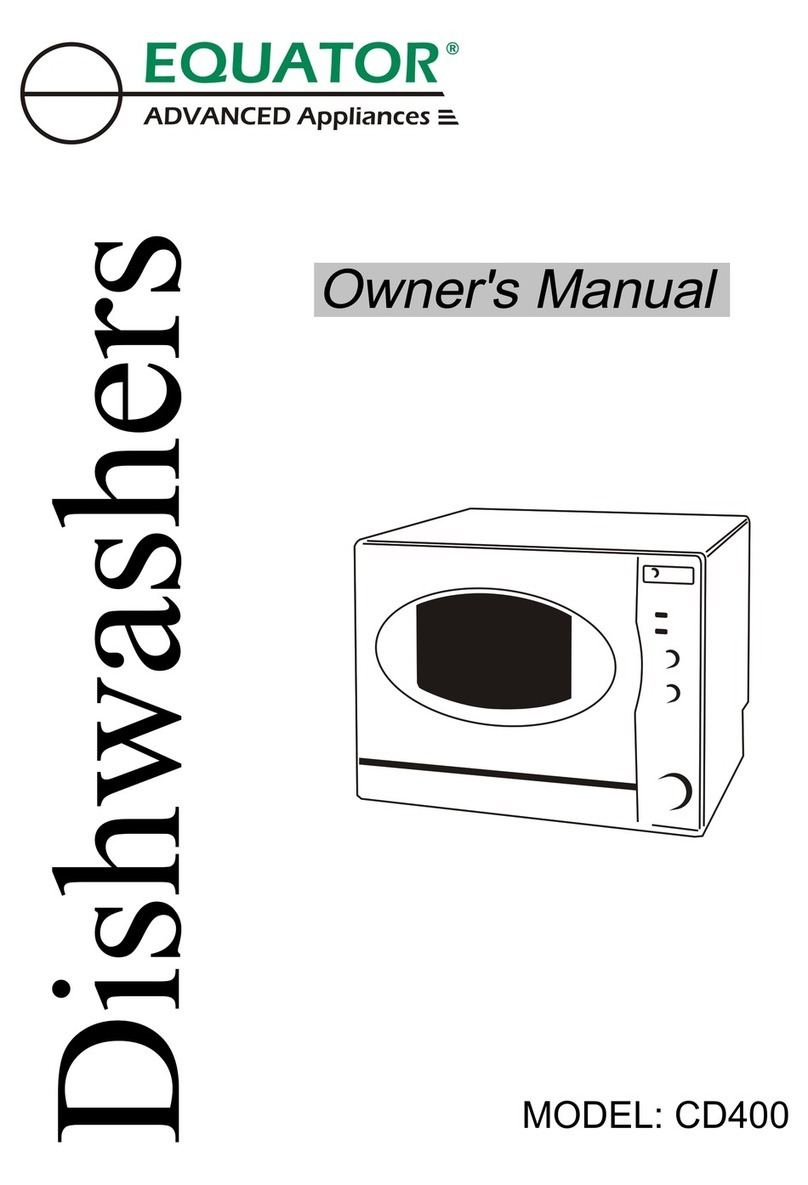
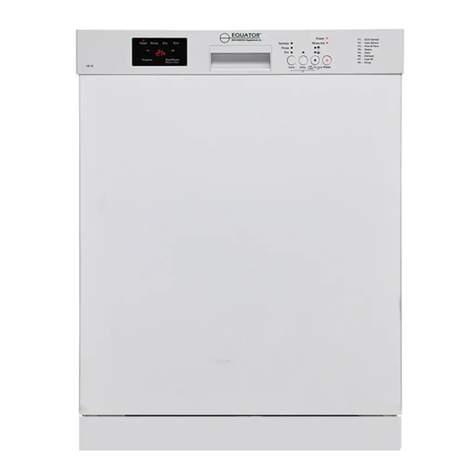
Equator WB 80 User manual

Instruction Manual
Safety Information
Operating Instructions
Control Panel. . . . . . . . . . . . . . . . . . . . . . . . . . . . . .3
Dishwasher Features . . . . . . . . . . . . . . . . . . . . . . 3
Was h Cy cl e Table . . . . . . . . . . . . . . . . . . . . . . . . . . 4
Detergent . . . . . . . . . . . . . . . . . . . . . . . . . . . . . . . . 5
Rinse Aid . . . . . . . . . . . . . . . . . . . . . . . . . . . . . . . . 5
Loading the Dishwasher Rack . . . . . . . . . . . . . . .6
Silverware Basket .. . . . . . . . . . . . . . . . . . . . . . . . .7
Filtering System . . . . . . . . . . . . . . . . . . . . . . . . . . 7
Tur ni ng O n th e App li an ce . . . . . . . . . . . . . . . . . . . 8
Caring for the Dishwasher . . . . . . . . . . . . . . . . . .8 ,9
. . . . . . . . . . . .. . . . . . . . . .2
. . . . . . . . . . . . . . . . 1
Troubleshooting Tips
Before calling for service . . . . . . . . . . . . . . . . . . 10,11
Dishwasher Features

1
The manufacturer, following a policy of constant
development and up-dating of the product, may
make modifications without giving prior notice.
Built-In Diagnostics
Fault codes would be displayed to inform the user of
any fault with the machine.
5 wash programs
You can choose the desired program according
to the soil level. The programs are:
Heavy, Normal, Quick Wash, China Crystal, Rinse Only
In addition you can heat the water to Hot (140° F) and
Super Hot ( 158° F ) levels
Below are the special features of the Equator Dishwasher Model WB 80/SB 80
Rinse aid Warning Indicator
If the rinse aid is running low, it will be displayed
on the panel alerting you to top it up to ensure that
the machine continues to operate at optimum performance.
Stainless steel tub
This allows you to keep the water temperature higher
without any damage to the interior, as well as keeping
the interior clean.
This allows the start of the program to be delayed
by 1-24 hours, enabling you to benefit by saving electricity,
or giving you the convenience to finish the program when
you want it to.
Delay Start

WARRANTY INFORMATION
Your Equator appliance is protected by this warranty under normal, personal,
family or household use(1 year) and limited commercial use (90 days) in the
USA and Canada.
WARRANTY
Equator Advanced Appliances undertakes to the
consumer-owner to repair or, at Equator’s option to
replace any part of this product which proves to be
defective in workmanship or material under normal
personal, family or household use in the USA and
Canada for a period of one year from the date of
original purchase.
For commercial use, the product is warrantied for a
period of 90 days.
During this period Equator Advanced Appliances will
provide all labor and parts necessary to correct such
defect, free of charge, if the appliances has been
installed and operated in accordance with Equator’s
written instructions with the appliance. Ready access
to the appliance, for service, is the responsibility of the
consumer-owner.
EXCLUSIONS
In no event shall Equator Advanced Appliances be
liable for incidental or consequential damages or for
damages resulting from external cause such as abuse,
misuse, incorrect voltage or acts of God.
This warranty does not cover service calls which do
not involve defective workmanship or materials
covered by this warranty. Accordingly, diagnosis and
repair costs for a service call which does not involve
defective workmanship or materials will be the
responsibility of the consumer-owner.
Specifically, the following work is not covered under
warranty and does not constitute warranty work:
• Installation - e.g Improper hook-up or leveling
• Maintenance - e.g cleaning of water filter
• Damage - e.g Replacing broken door handle
Most work is covered. The defining factor is, has the
machine malfunctioned (Equator is responsible) or has
the customer omitted or done something to cause
machine to malfunction (customer is responsible).
Some states do not allow the exclusion or limitation of
incidental or consequential damage so the above
limitation or exclusion may not apply to you.
WARRANTY SERVICE
This warranty is given by:
Equator Advanced Appliances
10216 Georgibelle Drive. Suite. 900D,
Houston TX 77043
Tel: 800-490-8018
Fax: 832-553-3252
Email: [email protected]
Service under this warranty must be obtained by the
following steps in order:
Call an Equator Authorized Service Agent (obtain
name of nearest agent from your dealer or by calling
Equator at 800-490-8018. Under normal
circumstances. Service will be provided during regular
business hours (9:00 am to 5:00 pm weekdays)
GENERAL
Since it is responsibility of the consumer-owner to
establish the warranty period by verifying the original
purchase date. Equator Advanced Appliances
recommends that a receipt, delivery slip or some other
appropriate payment record be kept for that purpose.
Remember to send in your Warranty Registration Card
so that a proof of your purchase exists with Equator.
This warranty gives you specific legal rights, and you
may also have other rights which vary from state to
state.
Corporate Office
Equator Advanced Appliances
10216 Georgibelle Drive. Suite. 900D,
Houston TX 77043
Tel: 800-490-8018
Fax: 832-553-3252
Email: [email protected]

Thisappliancemustbegrounded.Intheevent
ofamalfunctionorbreakdown,groundingwill
reducetheriskofelectricshockbyprovidinga
pathofleastresistanceofelectriccurrent.This
applianceisequippedwithacordhavingan
equipment-groundingconductorandagrounding
plug.Theplugmustbepluggedintoanappropriate
outletthatisinstalledandgroundedinaccordance
withalllocalcodesandordinances.
Improperconnectionoftheequipment-
groundingconductorcanresultinarisk
ofelectricshock.Checkwithaqualified
electricianorservicerepresentativeifyou
areindoubtwhethertheapplianceis
properlygrounded.Donotmodifytheplug
providedwiththeappliance;Ifitisnotfit
fortheoutlet.haveaproperoutletinstalled
byaqualifiedelectrician.
2
Keepchildawayfromdetergentandrinseaid,keep
childawayfromtheopendoorofthedishwasher,
therecouldstillbesomedetergentleftinside.
Donotabuse,siton,orstandonthedoorordish
rackofthedishwasher.
Donottouchtheheatingelementduringor
immediatelyafteruse.
Donotwashplasticitemsunlesstheyaremarked
dishwashersafeortheequivalent.Forplastic
itemsnotsomarked,checkthemanufactures
recommendations.
Useonlydetergentandrinseadditivesdesigned
foranautomaticdishwasher.Neverusesoap,
laundrydetergent,orhandwashingdetergent
inyourdishwasher.Keeptheseproductsoutof
children.
Duringinstallation,thepowersupplymustnot
beexcessivelyordangerouslybentorflattened.
Thedoorshouldnotbeleftintheopenposition
sincethiscouldpresentatrippinghazards.
Donottamperwithcontrols.
Donotoperateyourdishwasherunlessall
enclosurepanelsareproperlyinplace.Openthe
doorverycarefullyifthedishwasherisoperating,
thereisariskofwatersquirtingout.
Donotplaceanyheavyobjectsofstandonthedoor
whenitisopen.Theappliancecouldtipforward.
Whenloadingitemstobewashed:
1)Locatesharpitemssothattheyarenotlikelyto
damagethedoorseal;
2)Loadsharpkniveswiththehandlesuptoreduce
theriskofcut-typeinjuries.
Whenusingyourdishwasher,youshouldprevent
plasticitemfromcontactingwithheatingelement.
Ifthesupplycordisdamaged,itmustbereplaced
bythemanufactureroritsserviceagentora
similarlyqualifiedpersoninordertoavoida
hazard.
Pleasedisposeofpackingmaterialsproperly.
Usethedishwasheronlyforitsintendedfunction.
Removethedoortothewashingcompartmentwhen
removinganolddishwasherfromserviceordiscardingit.
Theapplianceisnotintendedforusebyyoung
childrenorinfirmpersonswithoutsupervision.
Dishwasherdetergentsarestronglyalkaline,they
canbeextremelydangerousifswallowed.Avoid
contactwithskinandeyesandkeepchildrenaway
fromthedishwasherwhenthedoorisopen.
Youngchildrenshouldbesupervisedtoensurethat
theydonotplaywiththeappliance.
Checkthatthedetergentreceptableisemptyafter
completionofthewashcycle.

To get the best performance from your dishwasher, read all operating instructions before using
it for the first time.
Dishwasher Features
IMPORTANT!
3
Control Panel
11
1
7 7
4
7
6
Display: To display delay time or fault codes.
3
1
Rinse Aid Warning Light: It will come on when the
dispenser needs to be refilled.
2
PROGRAM: To select washing program press the
button.
Delay Start Button: Press this button to set the
delay hours for washing. You can delay the start
of washing up to 24 hours. One press on this
button delays the start of washing by one hour.
5
6
7
8
9
3
2
14
1
2
3
4
5
6
7
8
9
S
1
2
1
2
Front view
Prog.
Super Hot Wash
Hot Wash
Heat Dry
Child Lock
1
2
3
4
5
6
7
89
5
START/Pause: To stop or reset the wash cycle, press
the START/Pause button, the dishwasher will stop
washing.
When Super Hot Wash is selected, the temperature
of the water will reach 158 F max.
Note : it is possible that the 158 F max may not
be reached if the temperature of the incoming hot water
does not meet the suggested temperatures.
When the Hot Wash is selected, the temperature
of the water will reach 140 F max,
When the Heat Dry option is selected,
the heater will work during the dry processes.
Press the SUPER HOT WASH and HEAT DRY buttons
for 3 seconds the
LOCK light will display on the LCD.
No buttons can be operated when the dishwasher controls
are locked.
To cancel the Child Lock option, press the
SUPER HOT WASH and
HEAT DRY buttons for 3
seconds, the LOCK light will no longer be shown
on the LCD and the dishwasher
controls will be unlocked.
8
9
Super
Hot Wash
Hot Wash
Heat Dry
PROGRAM
Delay
START
Pause

4
If the inlet water temperature is not 120°F, the dishwasher may not achieve full heating capacity.
Quic k
Heavy
Normal
For norm ally soiled loads, such as pots, plates,
glasses and li ghtly soiled pans. st andard dail y
cycl e.
For lightly soi led loads,such as pl ates, glasses,
bowls and l ight ly soiled pans.
For the heaviest soiled loads, such as pots, pans,
casserole dishes and dishes that have been sitting
with dried food on them for a while.
Rinse Only
Chi na
Crystal
( AHA M)
Pre- wash
Pre- wash
Pre- wash
Wash (120°F)
Rinse
Rinse (125.7°F)
Drying
Pre- wash
Wash (121.2°F)
Rinse
Rinse (129.7°F)
Drying
Pre- wash
Pre- wash
Wash (131°F)
Rinse
Rinse (135.3°F)
Drying
Pre- wash
Pre- wash
Pre- wash
Wash (146.6°F)
Rinse
Rinse
Rinse (142.1°F)
Drying
Longer inlet time.
Faucet is not opened, or water intake is restricted,or the water pressure
is too low.
Malfunction of temperature sensor or of heating element.
Longer heating time,
but not reaching required temperature
130/14 0
80
25
90
24.3
13.8
17.3
13.8
7.3
130 0.88 4
0.61 6
0 .52 7
0.57 8
0.1
This cycle is for lightly soiled china and crystal.
This cycle is for pre-rinsing d ishes or glasses.
This is onl y a rin se tha t keeps food from d rying
on y our dishes a nd reduces odor bu ild up in you r
dish washe r until you are read y to wash a full loa d.
Do n ot use deter gent.
When there is a malfunction, the appliance will display error codes to warn you:

5
Dishwasher detergent is corrosive!
Take care to keep it out of reach of children.
IF THE WATER ISN'T TOO HARD, YOU MAY ALSO PREVENT THE FORMATION OF DEPOSITS BY ADDING
DETERGENT.
The amount of detergent needed can vary due to differences in water hardness. To determine the water hardness in
you r area, contact your local water utility or area water softening company. The harder the water, the more detergent
you may need. Remember, you should adjust the amount of detergent you use by small amounts until you find the
correct amount.
To remove hard water spots, try the following:
Run dishes through a normal wash program.
Remove all metal dishware, such as cutlery, pans, etc.,
from the dishwasher.
Do not add detergent.
Pour two cups of vinegar into a bowl and set the bowl face
up on the lower rack of the dishwasher.
Run the dishes through a normal wash program.
If this doesn't work, try the same process with 1 / 4 cup of
citric acid crystals instead of vinegar.
Use only detergent specifically made for use in dishwashers.
Keep your detergent fresh and dry. Don't put powder detergent
into the dispenser until You're ready to wash dishes.
The rinse aid is released during the final rinse to prevent
water from forming droplets on your dishes that can leave
spots and streaks. It also improves drying by allowing
water to "sheet" off the dishes.
Your dishwashers are designed to use liquid rinse aids.
The rinse aid dispenser is located inside the door next to
the detergent dispenser. To fill the dispenser, open the
cap and pour the rinse aid into the dispenser until the level
indicator turns completely black. The dispenser holds
about 100 ml of liquid rinse aid.
Be careful not to overfill the dispenser, because this could
cause over sudsing. Wipe away any spills with a damp cloth.
Don't forget to replace the cap before you close the
dishwasher door.
If you have soft water, you may not need rinse aid for it may
cause a white film to develop on your dishes.
The dispe nser must be refilled before the start of each wash c ycle following the instructions provide d in the " Wa sh
Cycle
Ta b le". Your dishwas her s th an co nve ntion al di shw asher s. Gen eral ly, o nly o ne
tablespoon of
deterge nt is needed for a normal wash lo ad. Also, mo re heavil y soiled item s need more detergent. Always add the
det erge nt ju st
bef ore starting di shwasher, othe rw is e it cou ld get d amp a nd w ill not di ssol ve p rope rly.
us e les s de terg en t and rin se aid
To open the dispenser, turn the cap to the "open" (left)
arrow and lift it out.
Pour the rinse aid into the dispenser, being careful
not to overfill.
Replace the cap by inserting it aligned with "open"
arrow and turning it to the closed (right) arrow.
A measured amount of rinse aid is released during the final rinse. As with detergent, the amount
of rinse aid needed for your dishes depends on the hardness of the water in your area. Too much
rinse aid can result in lather of foaming and cause cloudiness or steaks on your dishes. If the
water in your area is very soft, you may not need rinse aid. If you do,you can dilute the rinse aid
with an equal amount of water.
The rinse aid dispenser has four settings. Always start with the dispenser set on " 2 ". If spots and
poor drying are problems, increase the amount of rinse aid dispensed by removing the dispenser
lid and rotating the dial to "3". If the dishes still are not drying properly or are spotted, adjust the
dial to"4".. We suggest you to set on "2" .
Button
Indicator
Dispenser cap
Adjustable setting
Adjustable setting
YOU SHOULD NOT ADD TOO MUCH DETERGENT TO PREVENT THE FORMATION OF DEPOSITS
BECAUSE YOUR DISHWASER HAS SPECIFICALLY DESIGNED WATER SOFTENERS

6
Ifthereisnorinseaidwarninglightinthecontrolpanel,youcanjudgetheamountofrinseaidbythefollowingmeans.
Theblackdotontherinseaiddispenserindicatestheamountofrinseaidinthedispenser.Astherinseaiddiminishes,
thesizeoftheblackdotdecreases.Youshouldneverlettherinseaidgetbelow1/4full.
Astherinseaiddiminishes,thesizeoftheblackdotontherinse
aidlevelindicatorchanges,asillustratedbelow.
Full
3/4full
1/2full
1/4full-Shouldrefilltoeliminatespotting
Empty
Indicator
Theupperrackisdesignedtoholdmoredelicateandlighterdishwaresuchasglasses,coffeeandteacupand
saucers,aswellasplates,smallbowlsandshallowpans(aslongastheyarenottoodirty).
Positionthedishesandcookwaresothattheydonotgetmovedbythesprayofwater.
Theupperrackcanbeadjustedforheightbyputtingwheelsofdifferentheightintotherails.
Werecommendthatyouplacelargeitemswhicharemostdifficulttocleanintothelowerrack:pots,pans,lids,
servingdishesandbowls,asshowninthefiguretotheright.
Itispreferabletoplaceservingdishesandlidsonthesideoftheracksinordertoavoidblockingtherotationofthe
topsprayarm.
Pots,servingbowls,etc,mustalwaysbeplacedtopdown.
Deeppotsshouldbeslantedtoallowwatertoflowout.
Thebottomrackfeaturefolddowntinerowssothatlargerormorepotsandpanscanbeloaded.
8
Saucer
10
7
9
Dinnerplates
Silverwarebasket
4
1Cups
2Servingbowl
3
4Glasses
Fruitbowl
6
4
Breadandbutterplates
Servingplate

Silverware should be placed in the silverware basket with handles at the bottom: If the rack has side baskets,
the spoon should be loaded individually into the appropriate slots, Especially long utensils should be placed
in the horizontal position at the front of the upper rack.
4
4
3 2
6
7
4
4
4
5
4
4
4
4
1
1
1
1
1
1
1
1
1
4
4
4
1
1
1
5
5
5
5
5
5
5
5
5
5
5
2
2
2
2
2
2
2
2
2
2
2
3
3
3
3
3
3
3
3
33
3
6
Do n ot le t an y ite m ex tend thro ugh bott om.
Teaspoons
4
So up spoo ns
2
Sa lad F ork s
1
Se rving fork
Serving spoon6
Knife 5
3
Dinner forks
7
7
When the washing cycle has finished, the buzzer of dishwasher will
urn off the appliance using the ON/OFF button,. Wait a few minutes before unloading the dishwasher to avoid
handling the dishes and utensils while they are still hot and more susceptible to breakage. They will also dry better.
t
A forgotten dish can be added any time before the detergent cup opens.
Open the door a little to stop the washing.
After the spray arms stop working,you can open the door
completely.
Add forgotten dishes.
Close the door, the dishwasher will work after ten second.
3
2
1
1. Ma k e su r e th a t t h e p lu g 0 f t h e a pp lia nc e i s in se r te d int o th e wa ll s o c ke t;
2. Ma k e su r e th a t th e w a te r s u pp l y i s tu r ne d o n t o fu ll p r es s ur e;
3. L o a d th e d is h (s e e th e se c tio n e n title d lo a d ing th e d is h w a s he r ;
4. P o ur th e d et e rge n t ( se e th e s ec t io n e nt it le d d et e rg en t an d R in s e a id ;
5.P re ss th e on/ off bu tto n ,th e o n/of f lig ht wil l tu rn o n;
6. P re s s t h e p ro gr am b u tto n to s ele c t p r og ra m ;
7.
“ ”
“ ”
C lo s e th e do or,a ft e r 1 0 s e co nd s , th e m a ch in e w ill w o rk.
It is dange rous to open the door when washing, because the hot water may scald you.
the ma chin e w ill workin g a fter 1 0 seco nds.con tinu e
If you open the door , the machine will pause. When you close the door ,during a wash cycle
A cycle that is underway can only be modified if it has only been running for a short
time. Otherwise, the detergent may have already been released, and the appliance may
have already drained the wash water. If this is the case, the detergent dispenser must
be refilled (see the section entitled " Loading the Detergent " ).
1
2Open the door a little to stop the washing. Press the program button 3 seconds to cancel the running
program.Then you can select other programs (see the section entitled " Starting a wash cycle. . . " ).
beep for 8 seconds, then stop. Open the door,
at least

8
Coarsefilter
Largeritems,suchaspiecesofboneorglass,thatcouldclogthedrainaretrapped
inthecoarsefilter.Toremoveanitemcaughtinthisfilter,gentlysqueezethetabs
ontopofthisfilterandliftitout.
Foryourconvenience,wehaveplacedthedrainpumpandfilteringsystemwithineasyreachinsidethetub.
Therearethreecomponentsofthefilteringsystem:themainfilter,thecoarsefilter,andthefinefilter.
Finefilter
Thisfilterholdssoilandfoodresidueinthesumpareaandpreventsitfrombeing
redepositedonthedishesduringacycle.
Mainfilter
Foodandsoilparticlestrappedbythisfilterarepulverizedbyaspecialjeton
thelowersprayarmandwasheddownthedrain.
Ifyourdishwasherisleftinanunheatedplaceduringthewinter,askaservicetechnicianto:
Cutoffelectricalpowertothedishwasher.Remove
fusesortripcircuitbreaker.
Turnoffthewatersupplyanddisconnectthewater
inletpipefromthewatervalve.
Drainwaterfromtheinletandwatervalve.pipe
(Useapantocatchthewater.)
Reconnectthewaterinlettothe
watervalve. pipe
Removetheplasticsumpcoverinthe
tubthebottomanduseaspongeto
soakupwaterinrubberboot.
Itisnecessarytocleanthesprayarmsregularlyforhardwaterchemicalswillclogthesprayarmjetsandbearings.
Toremovethesprayarm,Washthearmsinsoapyandwarmwateranduseasoftbrushtocleanthejets.
Replacethemafterrinsingthemthoroughly.
StepTurnthefilterinanti-clockwisedirection,
thenliftitup.
:1
SteplifttheMainfilterup:
2
SteplifttheFinefilterup
:3
2
13
Ifdoitfromstep1tostep3,thefiltersystemwillberemoved;Reverseoperatebyplacingthe
mainfilter,thenscrewupthefinefiltertofinishinstallation

9
Neveruseaspraycleanertocleanthedoorpanelforitcoulddamagethedoorlockandelectricalcomponents.
Itisnotallowedtousetheabrasiveagentorsomepapertowelbecauseoftheriskofscratchingorleavingspots
onthestainlesssteelsurface.
Tocleantheedgearoundthedoor,youshoulduseonlyasoftwarm,damprag.
Topreventpenetrationofwaterintothedoorlockandelectricalcomponents,
donotuseaspraycleanerofanykind.
Also,neveruseabrasivecleanersorscouringpadsontheoutersurfacesbecause
theywillscratchthefinish.Somepaperstowelscanalsoscratchorleavemarks
onthesurface.
Aftereverywash,turnoffthewatersupplytothe
applianceandleavethedoorslightlyajarsothat
moistureandodorsarenottrappedinside.
Beforecleaningorperformingmaintenance,always
removetheplugfromthesocket.Donotrunrisks.
Tocleantheexteriorandrubberpartsofthedishwasher,
donotusesolventsorabrasivecleaningproducts.
Rather,useonlyaclothandwarmsoapywater.
Toremovespotsorstainsfromthesurfaceofthe
interior,useaclothdampenedwithwaterandalittle
whitevinegar,oracleaningproductmadespecifically
fordishwashers.
Whenyougoonholiday,itisrecommenedthatyou
runawashcyclewiththedishwasheremptyandthen
removetheplugfromthesocket,turnoffthewater
supplyandleavethedooroftheapplianceslightlyajar.
Thiswillhelpthesealslastlongerandpreventodors
fromformingwithintheappliance.
Iftheappliancemustbemoved,trytokeepitinthe
verticalposition.Ifabsolutelynecessary,itcanbe
positionedonitsback.
Oneofthefactorsthatcauseodorstoforminthe
dishwasherisfoodthatremainstrappedintheseals.
Periodiccleaningwithadampspongewillpreventthis
fromoccurring.
Thisdishwasherisdesignedforoperationonanadequatelywiredindividual120VAC,60Hz.Userequiredfuse
Fusedelectricalsupplyisrequired-copperwireonly.Timedelayfuseorcircuitbreakerrecommended
andprovideseparatecircuitservingonlythisappliance.Outletshouldbeplacedinadjacentcabinet.
16amps.
Aftermakingsurethatthevoltageandthefrequencyvaluesforthecurrentinthehome
correspondtothoseontheratingplateandthattheelectricalsystemissizedtorthemaximum
voltageontheratingplate,inserttheplugintoanelectricalsocketwhichisearthedproperly.
Iftheelectricalsockettowhichtheappliancemustbeconnectedisnotappropriatetortheplug,
replacethesocket,ratherthanusingaadaptorsorthelikeastheycouldcauseoverheating
andburns.

10
Beforeyoucallforservice
ProblemPossibleCausesWhatToDo
Noise Someofthesoundsyou ll
Detergentcupopening.
heararenormal
Themotorstartingduringthedryingperiod.
Waterdrainingoutofthetubimmediatelyafteryou
startthedishwasher.
Utensilsarenotsecureinthe
Makesureeverythingissecuredindishwasher.
rackorsomethingsmallhas
droppedintotherack
Motorhums
.
Detergentleftin Dishesblockthe
Repositionthedishes.
dispensercups Detergentcover
Waterwillnotpump
Drainisclogged
outofthetub
Sudsinthetub
Rinseagentwasspilled
Alwayswipeuprinseagentspillsimmediately.
Staineddishwasherparts Detergentwith
Somedetergentscontaincolorant(pigmentordyes)that
Colorantwasused
willdiscolorthetubinteriorwithextendeduse.Checkthe
detergentcupforsignsofanydiscoloration.Ifcupis
discolored,changetodetergentwithoutanycolorant.
Cascade,CascadeCompleteandElectrasolDishwashing
Detergentshavebeenapprovedforuseinourdishwashers.
Sometomato-based
UseoftheRINSEONLY cycleafteraddingthedishtothe
foodscanstain
loadcandecreasethelevelofstaining.
Dishesandflatware Lowinletwatertemperature
Makesureinletwatertemperatureiscorrect(seepage4).
notclean Waterpressureistemporarilylow
Turnonafaucet.Iswatercomingoutmoreslowlythanusual?
Ifso,waituntilpressureisnormalbeforeusingyourdishwasher.
Airgapisclogged
Cleantheairgap.
Improperrackloading
Makesurelargedishwaredoesnotblockthedetergent
dispenserorthewasharms.
TroubleshootingTips
Savetimeandmoney!Reviewthechartsonthefollowingpages.
Youmaynotneedtocallforservice.
Correctdetergentwasnotused
Dishwasherhasnotbeenusedonaregularbasis.
Ifyoudonotuseyourdishwasherforlongtime,
pleaseselectandruntheshortestwashprogram
onceeveryweek.Thiswillhelpkeeptheseal
moisttoavoid Motorhums.
Checkifyourkitchensinkisdrainingwell.Ifnot,
pleaseaskplumbertodealwith.
.
Useonlythespecialdishwasherdetergenttoavoid
suds.Ifthisoccurs,openthedishwasherandletsuds
evaporate.Add1gallonofcoldwatertothetub.Close
andlatchthedishwasher,thenStartthewash
cycletodrainoutthewater.Repeatifnecessary.
Checkcoarsethefilter
(seesectiontitled)"CleaningTheFilter"
Checkdrainhose.

11
ProblemPossibleCausesWhatToDo
Spotsandfilming
UseJet-Dry
rinseagenttoremovespotsandpreventnewfilmbuildup.
onglassesand
Toremovestubbornspotsandpre-existingfilmfromglassware:
flatware
1Removeallmetalutensilsfromthedishwasher.
2Donotadddetergent.
3Startthedishwasherandallowtorunfor30minutes.Dishwasher
willnowbeinthemainwash.
4Openthedoorandpour2cups(500ml)ofwhitevinegarintothe
bottomofthedishwasher.
5Closethedoorandallowtocompletethecycle.Ifvinegarrinsedoesnot
work:Repeatasabove,Exceptuse1/4cup(60ml)of
citricacidcrystals
insteadofvinegar.
Cloudinesson
Combinationofsoftwaterand
ThisiscalledEtchingandispermanent.Topreventthisfromhappening,
glassware
toomuchdetergent
Uselessdetergentifyouhavesoftwater.Washglasswareintheshortest
cyclethatwillgetthemclean.
Watertemperatureentering
Lowerthewaterheatertemperature.
thedishwasherexceeds150°F
Blackorgray
Aluminumutensilshave
Removemarkswithamild,abrasivecleaner.
marksondishes
rubbedagainstdishes
Yelloworbrownfilm
Teaorcoffeestains
Removethestainbyhand,usingasolutionof1/2cupbleachand
oninsidesurfaces
3cupswarmwater.
CAUTION
Beforecleaninginteriorwaitatleast20minutesafteracycleforthe
temperaturetocooldown.Failuretodocanresultscald.
Anoverallyelloworbrownfilmcan
Aspecialfilterinthewatersupplylineistheonlywaytocorrect
becausedbyirondepositsinwater
thisproblem.Contactawatersoftenercompany.
Whitefilmoninside Hardwaterminerals
Tocleantheinterior,applydishwasherdetergenttoadampsponge.
surfaces
Wearrubbergloves.
Donot
useanytypeofcleanserotherthan
dishwasherdetergentbecauseitmaycausefoamingorsudsing.Cascade
CascadeCompleteAndElectrasolAutomaticDishwashingDetergents
havebeenapprovedforuseinyourdishwasher.
Dishesdontdry
'
Lowinletwatertemperature
Makesureinletwatertemperatureiscorrect(seepage4).
Rinseagentdispenserisempty
Checktherinseagentdispenser.
Dishwasherwont
'
Fuseisblown,orthe
Replacefuseorresetcircuitbreaker.Removeanyotherappliances
circuitbreakertripped
fromthecircuit.
Steam Thisisnormal
Steamcomesthroughtheventduringwashing,dryingandwhen
waterisbeingpumpedout.
Extremelyhardwater
Lowinletwatertemperature
Overloadingthedishwasher
Improperloading
Oldordamppowderdetergent
Rinseagentdispenserempty
Toolittledetergent
Beforeyoucallforservice
run

Theinstallationofthepipes
andelectricalequipments
shouldbedonebyprofessionals.
ElectricalShockHazard
Disconnectelectricalpower
before
installingdishwasher.
Failuretodosocanresultin
deathorelectricalshock.
Theinstallationpositionofdishwashershouldbeneartheexistinginletanddrainhosesand
powercord.
Onesideofthecabinetsinkshouldbechosentofacilitatetheconnectionofdrainhosesof
thedishwasher.
Installationpreparation
Note:pleasechecktheaccompanyinginstallationaccessories(hookforaestheticpanel,screw)
Minimumspacewhen
thedoorisopened
【】Figure2
Cabinetdimensions
【】Figure1
Cabinet
Dishwasher
Doorof
dishwasher
Minimumspaceof50mm
Lessthan5mm
betweenthetop
ofdishwasherand
cabinetandthe
outerdooraligned
tocabinet.
90 °90 °
600mm
825-860mm
100
580mm
80
Spacebetweencabinet
bottomandfloor
Electrical,drainand
watersupplyline
entrances
12
This manual suits for next models
1
Table of contents
Other Equator Dishwasher manuals

Equator
Equator BB 65 Instruction Manual

Equator
Equator PLS 600 V Guide

Equator
Equator PLS 600 V Service manual

Equator
Equator 2440WBT User manual

Equator
Equator SF 924 User manual

Equator
Equator pmn User manual

Equator
Equator SP 818 User manual

Equator
Equator SB77 User manual

Equator
Equator SB 818 Guide

Equator
Equator SF 924 Guide