ERA Protect 20275 User manual

INDOOR WIFI CAMERA
QUICK START GUIDE
SERIOUS ABOUT SECURITY
Unique Camera
ID:

Page 2
TABLE OF CONTENT
About your Indoor WiFi Camera 3
What’s in the box 4
Exploring your ERA Protect Camera 5
Getting the best from your Indoor Camera 6
ERA Protect Indoor Camera placement tips 7
Motion alert and notification tips 8
Setting up your Camera 9
LED status 10
Specifications 10
Create your account 11
Adding your Indoor Camera to your 12
ERA Protect account
Factory reset 13
Need support? 14
ERA Protect product guarantee 15

Page 3
See and hear what’s happening inside your property from anywhere, on your
smartphone or tablet. Your ERA Protect Indoor Camera alerts you when
motion is detected. Watch live or review recordings in the cloud.
SAFE & SECURE
Your camera is protected using 128 bit SSL security encryption.
Even if your camera is vandalised or stolen, your video clips are
stored in the ERA cloud. Save your clips for 30 days by upgrading
to ERA Protect Plus.
EASY TO USE
Your camera can be accessed using the ERA Protect app on your
smartphone or tablet. You can also use the app to control your
ERA Protect Alarm, Cameras, Doorbell or on its own. The settings
are intuitive and adjustable to your own requirements.
ABOUT YOUR
INDOOR WIFI CAMERA
Page 4
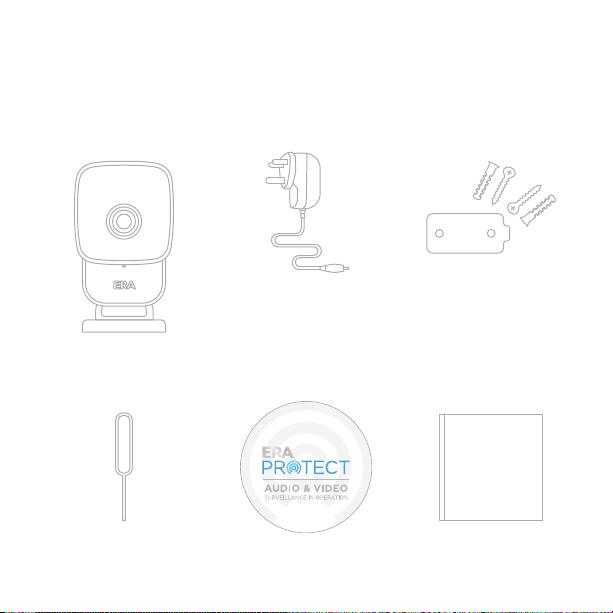
WHAT’S IN THE BOX
Camera
& Stand
Power Supply Fixing Kit
QUICK
START
GUIDE
Quick Start
Guide
Reset Pin Window Sticker
P
R
O
P
E
R
T
Y
P
R
O
T
E
C
T
E
D
B
Y
S
U
R
V
E
I
L
L
A
N
C
E
I
N
O
P
E
R
A
T
I
O
N
w
w
w
.
e
r
a
p
r
o
t
e
c
t
.
c
o
m

Page 5
EXPLORING YOUR CAMERA
Micro USB
power connector
Light sensor
Stand
Microphone
Lens
Speaker
Magnet
connector
for stand
Status
LED
Night vision LED’s

Page 6
GETTING THE BEST
FROM YOUR INDOOR CAMERA
Questions you may want to consider
What do I want to see in the field of view?
What kind of scenarios do I want to trigger a motion recording?
When do I want to have motion recorded?
Do I want a notification sent to me when motion recording is
triggered?
Make sure when setting up your Camera, you:
• Position the Camera securely facing what you want to see.
• Ensure the motion detection set up matches your needs.

Page 7
We recommend placing the camera no further than 10m/30ft away from
your router; closer if there are obstacles in the way such as walls, doors
or ceilings.
Outside of this range, we recommend using a WiFi signal extender
or repeater.
The ERA Protect Indoor Camera is only compatible with the 2.4 GHz
WiFi frequency.
Make sure your camera is securely attached to the magnetic stand.
•
•
•
•
ERA INDOOR CAMERA
PLACEMENT TIPS
• Ensure the Camera is properly attached to the supplied stand
before final installation and positioning.
• Compliance is only assured by using the included power supply.

Page 8
Your ERA Protect Indoor Camera uses a sophisticated motion algorithm
which detects when motion is happening, and can alert you instantly
by push notification.
To receive alerts every time motion is detected*, you may wish to consider
the following tips so that you achieve the best results and reduce the number
of false alerts:
MOTION ALERT & NOTIFICATION TIPS
Active pets (or children!) may trigger the motion recording.
Movements near busy doors or windows may set off multiple
notifications.
Depending on the location of the camera, you may trigger motion
alerts due to reflections, shadows or sunlight.
You will not be able to use night vision if your camera is positioned
to look through glass.
*In order to avoid multiple alerts for the same event, you will only receive an alert
once every 15 minutes (per Camera).

Page 9
It is important your ERA Indoor Camera Set up is configured according to
your individual requirements. Once you have completed the set up process
it is advisable to test the camera to ensure it is working.
SETTING UP YOUR CAMERA
1Camera Location
If your chosen location for the
camera is a wall. Attach the metal
plate to the wall either vertically
or horizontally where you want
to position your camera.
2Attach the stand
Attach the stand to the magnet
connector on the rear of the camera.
3Attach the power cable to the rear of the camera, and plug the
power supply into a power socket and turn on.

Page 10
Power Requirements:
Night Vision:
Viewing Angle:
Image Quality:
Connectivity:
Size (LxWxH) & Weight:
SPECIFICATIONS
5V DC Power Adapter Supplied
LED's with IR Cut switcher up to 6m
86º Horizontal / 46º Vertical
H.264 High profile, 1/3" CMOS Sensor,
Full HD (1920*1080P)
Wi-Fi 802.11 b/g/n 2.4GHz
65 x 112 x 33mm; 300g
LED STATUS
Solid LED and 4 Night Vision LED's – Booting Up.
Red Light Flashing (3 pulses) – Camera in Pairing Mode.
Continuous Red Light Flashing - Firmware update.
Red light flash – Will flash once when motion is detected,
or settings have been changed.
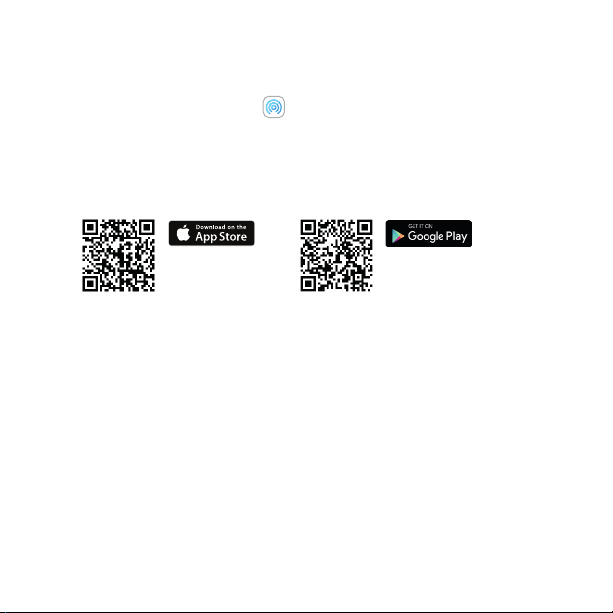
Download the ERA Protect app on your smartphone (search for
“ERA Protect” on Google Play or the iOS App Store) then follow the
steps on the screen.
If you’re having problems finding the app please scan the QR code below with your
smartphone.
Go to page 12 step 4 once you have set up your account.
Create your account by downloading the
ERA Protect iOS or Android app
Page 11

Page 12
SETTING UP YOUR INDOOR CAMERA
Power on the camera.
Wait for the camera to boot up, and then the status LED to pulse
three times.
Go to the ERA Protect app, and select Add new from the Camera
dashboard.
Select the ERA Protect Indoor Camera.
Follow the steps to connect the camera to your Wi-Fi network.
If the Wi-Fi set up fails, then you will need to put the camera into
Pair mode. Please follow the steps below to do this:
Using reset pin, press the reset button for 5 seconds. The reset button
is located on the underneath of the camera.
The camera will start booting up.
You can continue with the set up, once the status led starts pulsing
three times.
1
2
3
1
2
3
4
5

Page 13
FACTORY RESET
1
2
Open the ERA Protect app.
From the menu select Settings.
Choose your Camera.
Scroll to the bottom, and press Delete Camera.
Press OK to confirm you want to delete the Camera.
Close the app.
Using the Reset Pin, press the reset button down for 5 seconds.
The reset button is located on the underneath of the camera.
Once the Status LED's pulses three times the camera is reset.
3
4
5
6
7
8
To factory reset your Camera, please do the following:
Page 14
NEED SUPPORT?
Your ERA product is designed to be up and running in minutes.
Please contact us for assistance or support. A more detailed installation
and operation manual is available on our website.
Visit www.eraprotect.com
or phone us 0345 257 2500
ADD THE
ERA
PROTECT
PLUS
WANT THESE
GREAT FEATURES?
• 30 day rolling cloud
storage for video
recordings
• Access to 30 day
activity log via the app
• Additional security
features integrating your
camera, with the
ERA Protect Alarm,
Doorbell and Cameras.

Page 15
ERA PROTECT PRODUCT GUARANTEE
We at ERA firmly believe in the quality of our goods. Our technology achieves outstanding performance and durability
and we can therefore offer, in addition to your statutory rights, an additional limited guarantee. In the event of any
material defects in any product manufactured by us due to faulty design, materials and/or workmanship, and which arise
following correct installation and during normal use in accordance with our instructions, as included in the product
packaging, within the period of two years from the date of purchase, we will either repair, provide a replacement,
substitute with equivalent product free of charge from our then current range or refund in full the amount paid for the
product at point of purchase.
CONDITIONS
In order to take advantage of our guarantee, you must comply within the following conditions:-
1. This limited guarantee is not transferable and is extended only to, and is solely to the benefit of, the original
purchaser of the product. Please retain your dated sales invoice as proof of purchase and forward this to us if you
wish to make a claim under this guarantee.
2. Products must be installed, used and maintained in accordance with our instructions otherwise the guarantee will
be invalidated.
3. The product must not be damaged or modified in any way nor must it have been subjected to any unauthorised
repairs.
EXCLUSIONS
A full list of exclusions can be found within the full product guarantee, as detailed on our website www.eraprotect.com.
This guarantee is in addition to your contractual and statutory rights and does not affect your statutory rights.
TO MAKE A CLAIM
Please contact Customer Support either by telephone on 0345 257 2500 or email support@eraprotect.com with full
details of your claim. If your claim satisfies our Conditions and is not subject to any of our Exclusions, we will agree with
you repair, replacement, substitution or refund of payment of goods. For full details of the claims process, please visit our
website. *Terms and conditions apply.
RECYCLING AND DISPOSAL
Disposal of this product is covered by the Waste Electrical or Electronic Equipment (WEEE) Directive. It should not be
disposed of with other household or commercial waste. At the end of the product's useful life, the packaging and
product should be disposed of via a suitable recycling centre.
EC DECLARATION OF CONFORMITY
ERA hereby declare that this equipment complies with the essential requirements of the Radio and Telecommunications
Terminal Equipment Directive 2014/53/EU. A copy of the EU Declaration of Conformity is available at www.eraprotect.com.
All devices, with the exception of the External Siren are suitable for mounting in dry interior locations only.
© ERA Home Security Limited. All rights reserved. All trade names are registered trademarks of respective manufacturers
listed. App Store is a service mark of Apple Inc. Android and the “Google Play” logo are trademarks of Google Inc. Phone
not included.

Customer Helpline: 0345 257 2500
www.eraprotect.com
ERA Home Security Ltd
Valiant Way, Wolverhampton,
West Midlands, WV9 5GB
Table of contents
Other ERA Security Camera manuals


