Erbauer ERO400 User manual

ERO400
EAN 3663602796619
ORIGINAL INSTRUCTIONS
Safety instructions 7
Product description 14
Assembly 16
Use 19
Care & maintenance 21
Guarantee 24
Declaration of conformity 25
Product description 4
Safety instructions 6
Product description 13
Assembly 15
Use 18
Care & maintenance 20
Guarantee 24
Declaration of conformity 25
2
1
x1
Safety instructions 7
Product description 14
Assembly 16
Use 19
Care & maintenance 21
Guarantee 24
Declaration of conformity 25
WARNING! Please read all safety warnings carefully and be
sure that they are fully understood before handling the tool.
32

Product description
1
7b
7
7a
8
8a
7b
8a
9
1
23
6
4
5
A
5
9
B
47
C D
2.
1.
1.
2.
7b 7b
7
7a
7c
7
E F
1. 2.
84
8a 8a
8
1. 1.
2.
4

Product description
1
7b
7
7a
8
8a
7b
8a
9
1
23
6
4
5
A
5
9
B
47
C D
2.
1.
1.
2.
7b 7b
7
7a
7c
7
E F
1. 2.
84
8a 8a
8
1. 1.
2.
54

Safety instructions
GENERAL POWER TOOL SAFETY WARNING
WARNING Read all safety warnings, instructions, illustrations and
specications provided with this power tool. Failure to follow all
instructions listed below may result in electric shock, re and/or serious
injury.
Save all warnings and instructions for future reference.
The term “power tool” in the warnings refers to your mains-operated
(corded) power tool or battery-operated (cordless) power tool.
1) WORK AREA SAFETY
a) Keep work area clean and well lit. Cluttered or dark areas invite accidents.
b) Do not operate power tools in explosive atmospheres, such as in the
presence of ammable liquids, gases or dust. Power tools create sparks
which may ignite the dust or fumes.
c) Keep children and bystanders away while operating a power tool.
Distractions can cause you to lose control.
2) ELECTRICAL SAFETY
a) Power tool plugs must match the outlet. Never modify the plug in any
way. Do not use any adapter plugs with earthed (grounded) power tools.
Unmodied plugs and matching outlets will reduce risk of electric shock.
b) Avoid body contact with earthed or grounded surfaces, such as pipes,
radiators, ranges and refrigerators. There is an increased risk of electric
shock if your body is earthed or grounded.
c) Do not expose power tools to rain or wet conditions. Water entering a
power tool will increase the risk of electric shock.
d) Do not abuse the cord. Never use the cord for carrying, pulling or
unplugging the power tool. Keep cord away from heat, oil, sharp edges
or moving parts. Damaged or entangled cords increase the risk of electric
shock.
e) When operating a power tool outdoors, use an extension cord suitable
for outdoor use. Use of a cord suitable for outdoor use reduces the risk of
electric shock.
f) If operating a power tool in a damp location is unavoidable, use a residual
current device (RCD) protected supply. Use of an RCD reduces the risk of
electric shock.
3) PERSONAL SAFETY
a) Stay alert, watch what you are doing and use common sense when
operating a power tool. Do not use a power tool while you are tired
or under the inuence of drugs, alcohol or medication. A moment of
inattention while operating power tools may result in serious personal injury.
G H
1
1.2.
3
+
_
6

Safety instructions
GENERAL POWER TOOL SAFETY WARNING
WARNING Read all safety warnings, instructions, illustrations and
specications provided with this power tool. Failure to follow all
instructions listed below may result in electric shock, re and/or serious
injury.
Save all warnings and instructions for future reference.
The term “power tool” in the warnings refers to your mains-operated
(corded) power tool or battery-operated (cordless) power tool.
1) WORK AREA SAFETY
a) Keep work area clean and well lit. Cluttered or dark areas invite accidents.
b) Do not operate power tools in explosive atmospheres, such as in the
presence of ammable liquids, gases or dust. Power tools create sparks
which may ignite the dust or fumes.
c) Keep children and bystanders away while operating a power tool.
Distractions can cause you to lose control.
2) ELECTRICAL SAFETY
a) Power tool plugs must match the outlet. Never modify the plug in any
way. Do not use any adapter plugs with earthed (grounded) power tools.
Unmodied plugs and matching outlets will reduce risk of electric shock.
b) Avoid body contact with earthed or grounded surfaces, such as pipes,
radiators, ranges and refrigerators. There is an increased risk of electric
shock if your body is earthed or grounded.
c) Do not expose power tools to rain or wet conditions. Water entering a
power tool will increase the risk of electric shock.
d) Do not abuse the cord. Never use the cord for carrying, pulling or
unplugging the power tool. Keep cord away from heat, oil, sharp edges
or moving parts. Damaged or entangled cords increase the risk of electric
shock.
e) When operating a power tool outdoors, use an extension cord suitable
for outdoor use. Use of a cord suitable for outdoor use reduces the risk of
electric shock.
f) If operating a power tool in a damp location is unavoidable, use a residual
current device (RCD) protected supply. Use of an RCD reduces the risk of
electric shock.
3) PERSONAL SAFETY
a) Stay alert, watch what you are doing and use common sense when
operating a power tool. Do not use a power tool while you are tired
or under the inuence of drugs, alcohol or medication. A moment of
inattention while operating power tools may result in serious personal injury.
G H
1
1.2.
3
+
_
76

b) Use personal protective equipment. Always wear eye protection.
Protective equipment such as a dust mask, non-skid safety shoes, hard hat, or
hearing protection used for appropriate conditions will reduce personal injuries.
c) Prevent unintentional starting. Ensure the switch is in the off-position
before connecting to power source and/or battery pack, picking up or
carrying the tool. Carrying power tools with your finger on the switch or
energising power tools that have the switch on invites accidents.
d) Remove any adjusting key or wrench before turning the power tool on. A
wrench or a key left attached to a rotating part of the power tool may result in
personal injury.
e) Do not overreach. Keep proper footing and balance at all times. This
enables better control of the power tool in unexpected situations.
f) Dress properly. Do not wear loose clothing or jewellery. Keep your hair
and clothing away from moving parts. Loose clothes, jewellery or long
hair can be caught in moving parts.
g) If devices are provided for the connection of dust extraction and
collection facilities, ensure these are connected and properly used. Use
of dust collection can reduce dust-related hazards.
h) Do not let familiarity gained from frequent use of tools allow you to
become complacent and ignore tool safety principles. A careless action
can cause severe injury within a fraction of a second..
4) POWER TOOL USE AND CARE
a) Do not force the power tool. Use the correct power tool for your
application. The correct power tool will do the job better and safer at the rate
for which it was designed.
b) Do not use the power tool if the switch does not turn it on and off. Any
power tool that cannot be controlled with the switch is dangerous and must be
repaired.
c) Disconnect the plug from the power source and/or remove the battery
pack, if detachable, from the power tool before making any adjustments,
changing accessories, or storing power tools. Such preventive safety
measures reduce the risk of starting the power tool accidentally.
d) Store idle power tools out of the reach of children and do not allow
persons unfamiliar with the power tool or these instructions to operate
the power tool. Power tools are dangerous in the hands of untrained users.
e) Maintain power tools and accessories. Check for misalignment or
binding of moving parts, breakage of parts and any other condition that
may affect the power tool’s operation. If damaged, have the power tool
repaired before use. Many accidents are caused by poorly maintained power
tools.
f) Keep cutting tools sharp and clean. Properly maintained cutting tools with
sharp cutting edges are less likely to bind and are easier to control.
g) Use the power tool, accessories and tool bits etc. in accordance with
these instructions, taking into account the working conditions and the
work to be performed. Use of the power tool for operations different from
those intended could result in a hazardous situation.
h) Keep handles and grasping surfaces dry, clean and free from oil and
grease. Slippery handles and grasping surfaces do not allow for safe handling
and control of the tool in unexpected situations.
5) SERVICE
a) Have your power tool serviced by a qualied repair person using only
identical replacement parts. This will ensure that the safety of the power tool
is maintained.
SAFETY WARNINGS FOR SANDER
a) Take special care to protect yourself and people around against dusts,
including the following:
•All persons entering the work area must wear an appropriate dust mask
specially designed for protection against harmful / toxic dusts, in addition
to using the dust extraction facility and keeping work area well ventilated.
• Children and pregnant women must not enter the work area.
• Do not eat, drink or smoke in the work area.
b) Some wood and wood type products especially MDF (Medium Density
Fibreboard) can produce dust that can be hazardous to your health. We
recommend the use of a dust mask with replaceable lters when using this
product in addition to using the dust extraction facility.
c) The power tool shall not be wet or applied in wet environment.
d) The voltage of the power source must agree with the voltage specied on the
rating label of the machine.
e) Check the product, its power cord and plug as well as accessories for damage
before each use. Do not use the product if it is damaged or shows wear.
f) Double check that the accessories and attachments are properly xed. One
minute testing running in no-load condition will be helpful to identify any
problems.
g) Secure the workpiece. A workpiece clamped with clamping devices or in a vice
is held more secure than by hand.
h) Keep the handles dry to ensure safe control. Grip the product securely so you
have full control at all times.
i) Ensure that the air vents are always unobstructed and clear. Clean them if
necessary with a soft brush. Blocked air vents may lead to overheating and
damage the product.
j) Switch the product off immediately if you are disturbed while working by other
people entering the working area. Always let the product come to complete
stop before putting it down.
k) Do not overwork yourself. Take regular breaks to ensure you can concentrate
on the work and have full control over the product.
l) Always keep the power cord behind the power tool.
The following information applies to professional users only but is good practice for all
users:
ADDITIONAL SAFETY WARNINGS FOR CONSTRUCTION DUST
The updated Control of Substances Hazardous to Health Regulations 1st October
2012 now also targets to reduce the risks associated with silica, wood and gypsum
dusts.
8

b) Use personal protective equipment. Always wear eye protection.
Protective equipment such as a dust mask, non-skid safety shoes, hard hat, or
hearing protection used for appropriate conditions will reduce personal injuries.
c) Prevent unintentional starting. Ensure the switch is in the off-position
before connecting to power source and/or battery pack, picking up or
carrying the tool. Carrying power tools with your nger on the switch or
energising power tools that have the switch on invites accidents.
d) Remove any adjusting key or wrench before turning the power tool on. A
wrench or a key left attached to a rotating part of the power tool may result in
personal injury.
e) Do not overreach. Keep proper footing and balance at all times. This
enables better control of the power tool in unexpected situations.
f) Dress properly. Do not wear loose clothing or jewellery. Keep your hair,
clothing and gloves away from moving parts. Loose clothes, jewellery or
long hair can be caught in moving parts.
g) If devices are provided for the connection of dust extraction and
collection facilities, ensure these are connected and properly used. Use
of dust collection can reduce dust-related hazards.
h) Do not let familiarity gained from frequent use of tools allow you to
become complacent and ignore tool safety principles. A careless action
can cause severe injury within a fraction of a second..
4) POWER TOOL USE AND CARE
a) Do not force the power tool. Use the correct power tool for your
application. The correct power tool will do the job better and safer at the rate
for which it was designed.
b) Do not use the power tool if the switch does not turn it on and off. Any
power tool that cannot be controlled with the switch is dangerous and must be
repaired.
c) Disconnect the plug from the power source and/or remove the battery
pack, if detachable, from the power tool before making any adjustments,
changing accessories, or storing power tools. Such preventive safety
measures reduce the risk of starting the power tool accidentally.
d) Store idle power tools out of the reach of children and do not allow
persons unfamiliar with the power tool or these instructions to operate
the power tool. Power tools are dangerous in the hands of untrained users.
e) Maintain power tools and accessories. Check for misalignment or
binding of moving parts, breakage of parts and any other condition that
may affect the power tool’s operation. If damaged, have the power tool
repaired before use. Many accidents are caused by poorly maintained power
tools.
f) Keep cutting tools sharp and clean. Properly maintained cutting tools with
sharp cutting edges are less likely to bind and are easier to control.
g) Use the power tool, accessories and tool bits etc. in accordance with
these instructions, taking into account the working conditions and the
work to be performed. Use of the power tool for operations different from
those intended could result in a hazardous situation.
h) Keep handles and grasping surfaces dry, clean and free from oil and
grease. Slippery handles and grasping surfaces do not allow for safe handling
and control of the tool in unexpected situations.
5) SERVICE
a) Have your power tool serviced by a qualied repair person using only
identical replacement parts. This will ensure that the safety of the power tool
is maintained.
SAFETY WARNINGS FOR SANDER
a) Take special care to protect yourself and people around against dusts,
including the following:
• All persons entering the work area must wear an appropriate dust mask
specially designed for protection against harmful / toxic dusts, in addition
to using the dust extraction facility and keeping work area well ventilated.
• Children and pregnant women must not enter the work area.
• Do not eat, drink or smoke in the work area.
b) Some wood and wood type products especially MDF (Medium Density
Fibreboard) can produce dust that can be hazardous to your health. We
recommend the use of a dust mask with replaceable lters when using this
product in addition to using the dust extraction facility.
c) The power tool shall not be wet or applied in wet environment.
d) The voltage of the power source must agree with the voltage specied on the
rating label of the machine.
e) Check the product, its power cord and plug as well as accessories for damage
before each use. Do not use the product if it is damaged or shows wear.
f) Double check that the accessories and attachments are properly xed. One
minute testing running in no-load condition will be helpful to identify any
problems.
g) Secure the workpiece. A workpiece clamped with clamping devices or in a vice
is held more secure than by hand.
h) Keep the handles dry to ensure safe control. Grip the product securely so you
have full control at all times.
i) Ensure that the air vents are always unobstructed and clear. Clean them if
necessary with a soft brush. Blocked air vents may lead to overheating and
damage the product.
j) Switch the product off immediately if you are disturbed while working by other
people entering the working area. Always let the product come to complete
stop before putting it down.
k) Do not overwork yourself. Take regular breaks to ensure you can concentrate
on the work and have full control over the product.
l) Always keep the power cord behind the power tool.
The following information applies to professional users only but is good practice for all
users:
ADDITIONAL SAFETY WARNINGS FOR CONSTRUCTION DUST
The updated Control of Substances Hazardous to Health Regulations 1st October
2012 now also targets to reduce the risks associated with silica, wood and gypsum
dusts.
98

Construction workers are one of the at-risk groups within this because of the dust that
they breathe: silica dust is not just a nuisance; it is a real risk to your lungs!
Silica is a natural mineral present in large amounts in things like sand, sandstone and
granite. It is also commonly found in many construction materials such as concrete and
mortar. The silica is broken into very ne dust (also known as Respirable Crystalline
Silica or RCS) during many common tasks such as cutting, drilling and grinding.
Breathing in very ne particles of crystalline silica can lead to the development of:
• lung cancer
• Silicosis
• Chronic obstructive pulmonary disease (COPD).
And breathing in ne particles of wood dust can lead to the development of Asthma.
The risk of lung disease is linked to people who regularly breathe construction dust
over a period of time, not on the odd occasion.
To protect the lung, the COSHH Regulations sets a limit on the amount of these dusts
that you can breathe (called a Workplace Exposure Limit or WEL) when averaged over
a normal working day. These limits are not a large amount of dust: when compared to
a penny it is tiny – like a small pinch of salt:
This limit is the legal maximum; the most you can breathe after the right controls have
been used.
How to reduce the amount of dust?
1. Reduce the amount of cutting by using the best sizes of building products.
2. Use a less powerful tool e.g. a block cutter instead of angle grinder.
3. Using a different method of work altogether – e.g. using a nail gun to direct fasten
cable trays instead of drilling holes rst.
Please always work with approved safety equipment, such as those dust masks that
specially designed to lter out microscopic particles and use the dust extraction facility
at all time.
For more information please see the HSE website:
http://www.hse.gov.uk/construction or http://www.hse.gov.uk/pubns/cis69.pdf
WARNING! Some dust particles created by power sanding, sawing,
grinding, drill and other construction jobs contain chemicals known
to cause cancer, birth defects or other reproductive harm. Some
examples of these chemicals are:
• Lead from lead-based paints.
• Crystalline silica from bricks and cement and other masonry products.
• Arsenic and chromium from chemically treated timber.
Your risk from these exposures varies, depending upon how often you do
this type of work. To reduce your exposure to these dusts:
• Work in a well-ventilated.
• Work with approved protective equipment, such as those dust masks
that are specially designed to lter microscopic particles.
VIBRATION
The European Physical Agents (Vibration) Directive has been brought in to help reduce
hand arm vibration syndrome injuries to power tool users. The directive requires power
tool manufacturers and suppliers to provide indicative vibration test results to enable
users to make informed decisions as to the period of time a power tool can be used
safely on a daily basis and the choice of tool.
SEE TECHNICAL SPECIFICATIONS IN THE INSTRUCTION MANUAL FOR THE
VIBRATION LEVELS OF YOUR TOOL.
The declared vibration emission value should be used as a minimum level and should
be used with the current guidance on vibration.
Calculating the actual period of use can be difcult and the HSE website has further
information.
The declared vibration total value has been measured in accordance with EN 62841-1
and EN 62841-2-4 and may be used for compare one tool with another.
The declared vibration total value may also be used in a preliminary assessment of
exposure.
10

Construction workers are one of the at-risk groups within this because of the dust that
they breathe: silica dust is not just a nuisance; it is a real risk to your lungs!
Silica is a natural mineral present in large amounts in things like sand, sandstone and
granite. It is also commonly found in many construction materials such as concrete and
mortar. The silica is broken into very ne dust (also known as Respirable Crystalline
Silica or RCS) during many common tasks such as cutting, drilling and grinding.
Breathing in very ne particles of crystalline silica can lead to the development of:
• lung cancer
• Silicosis
• Chronic obstructive pulmonary disease (COPD).
And breathing in ne particles of wood dust can lead to the development of Asthma.
The risk of lung disease is linked to people who regularly breathe construction dust
over a period of time, not on the odd occasion.
To protect the lung, the COSHH Regulations sets a limit on the amount of these dusts
that you can breathe (called a Workplace Exposure Limit or WEL) when averaged over
a normal working day. These limits are not a large amount of dust: when compared to
a penny it is tiny – like a small pinch of salt:
This limit is the legal maximum; the most you can breathe after the right controls have
been used.
How to reduce the amount of dust?
1. Reduce the amount of cutting by using the best sizes of building products.
2. Use a less powerful tool e.g. a block cutter instead of angle grinder.
3. Using a different method of work altogether – e.g. using a nail gun to direct fasten
cable trays instead of drilling holes rst.
Please always work with approved safety equipment, such as those dust masks that
specially designed to lter out microscopic particles and use the dust extraction facility
at all time.
For more information please see the HSE website:
http://www.hse.gov.uk/construction or http://www.hse.gov.uk/pubns/cis69.pdf
WARNING! Some dust particles created by power sanding, sawing,
grinding, drill and other construction jobs contain chemicals known
to cause cancer, birth defects or other reproductive harm. Some
examples of these chemicals are:
• Lead from lead-based paints.
• Crystalline silica from bricks and cement and other masonry products.
• Arsenic and chromium from chemically treated timber.
Your risk from these exposures varies, depending upon how often you do
this type of work. To reduce your exposure to these dusts:
• Work in a well-ventilated.
• Work with approved protective equipment, such as those dust masks
that are specially designed to lter microscopic particles.
VIBRATION
The European Physical Agents (Vibration) Directive has been brought in to help reduce
hand arm vibration syndrome injuries to power tool users. The directive requires power
tool manufacturers and suppliers to provide indicative vibration test results to enable
users to make informed decisions as to the period of time a power tool can be used
safely on a daily basis and the choice of tool.
SEE TECHNICAL SPECIFICATIONS IN THE INSTRUCTION MANUAL FOR THE
VIBRATION LEVELS OF YOUR TOOL.
The declared vibration emission value should be used as a minimum level and should
be used with the current guidance on vibration.
Calculating the actual period of use can be difcult and the HSE website has further
information.
The declared vibration total value has been measured in accordance with EN 62841-1
and EN 62841-2-4 and may be used for compare one tool with another.
The declared vibration total value may also be used in a preliminary assessment of
exposure.
1110

WARNING! The vibration emission during actual use of the power tool
can differ from the declared total value depending on the ways in which
the tool is used:
• How the materials are grinded, cut or drilled.
• If the tool is in good condition and well maintained.
• Use correct accessory for the tool and ensure it is sharp and in good
condition.
• The tightness of the grip on the handles.
• And the tool is being used as intended by its design and these
instructions.
While working with this power tool, hand/arm vibrations occur.
Adopt the correct working practices in order to reduce the exposure
to vibration. This tool may cause hand-arm vibration syndrome if its
use is not adequately managed.
WARNING! Identify safety measures to protect the operator that are
based on an estimation of exposure in the actual conditions of use (taking
account of all parts of the operating cycle such as the times when the tool
is switched off and when it is running idle in addition to the trigger time).
Note:
• The use of other tools will reduce the users’ total working period on
this tool.
• Helping to minimise your vibration exposure risk. ALWAYS use sharp
chisels, drills and blades.
• Maintain this tool in accordance with these instructions and keep well
lubricated (where appropriate).
• Avoid using tools in temperatures of 10ºC or less. Plan your work
schedule to spread any high vibration tool use across a number of
days.
Health surveillance
All employees should be part of an employer’s health surveillance scheme to help
identity any vibration related diseases at an early stage, prevent disease progression
and help employees stay in work.
VIBRATION AND NOISE REDUCTION
To reduce the impact of noise and vibration emission, limit the time of operation,
use low-vibration and low-noise operating modes as well as wear personal
protective equipment.
Take the following points into account to minimise the vibration and noise exposure
risks:
1. Only use the product as intended by its design and these instructions.
2. Ensure that the product is in good condition and well maintained.
3. Use correct attachments for the product and ensure they are in good condition.
4. Keep tight grip on the handles/grip surface.
5. Maintain this product in accordance with these instructions and keep it well lubri-
cated (where appropriate).
6. Plan your work schedule to spread any high vibration tool use across a longer pe-
riod of time.
7. Prolonged use of the product exposes the user to vibrations that can cause a
range of conditions collectively known as hand-arm vibration syndrome (HAVS)
e.g. ngers going white; as well as specic diseases such as carpal tunnel syn-
drome. To reduce this risk when using the product, always wear protective gloves
and keep your hands warm.
RESIDUAL RISKS
Even if you are operating this product in accordance with all the safety
requirements, potential risks of injury and damage remain. The following
dangers can arise in connection with the structure and design of this product:
1. Health defects resulting from vibration emission if the product is being used over
long periods of time or not adequately managed and properly maintained.
2. Injuries and damage to property due to broken attachments or the sudden impact
of hidden objects during use.
3. Danger of injury and property damage caused by ying objects or poor power tool
accessories.
WARNING! This product produces an electromagnetic eld during
operation! This eld may under some circumstances interfere with active
or passive medical implants! To reduce the risk of serious or fatal injury,
we recommend persons with medical implants to consult their doctor and
the medical implant manufacturer before operating this product!
12

WARNING! The vibration emission during actual use of the power tool
can differ from the declared total value depending on the ways in which
the tool is used:
• How the materials are grinded, cut or drilled.
• If the tool is in good condition and well maintained.
• Use correct accessory for the tool and ensure it is sharp and in good
condition.
• The tightness of the grip on the handles.
• And the tool is being used as intended by its design and these
instructions.
While working with this power tool, hand/arm vibrations occur.
Adopt the correct working practices in order to reduce the exposure
to vibration. This tool may cause hand-arm vibration syndrome if its
use is not adequately managed.
WARNING! Identify safety measures to protect the operator that are
based on an estimation of exposure in the actual conditions of use (taking
account of all parts of the operating cycle such as the times when the tool
is switched off and when it is running idle in addition to the trigger time).
Note:
• The use of other tools will reduce the users’ total working period on
this tool.
• Helping to minimise your vibration exposure risk. ALWAYS use sharp
chisels, drills and blades.
• Maintain this tool in accordance with these instructions and keep well
lubricated (where appropriate).
• Avoid using tools in temperatures of 10ºC or less. Plan your work
schedule to spread any high vibration tool use across a number of
days.
Health surveillance
All employees should be part of an employer’s health surveillance scheme to help
identity any vibration related diseases at an early stage, prevent disease progression
and help employees stay in work.
VIBRATION AND NOISE REDUCTION
To reduce the impact of noise and vibration emission, limit the time of operation,
use low-vibration and low-noise operating modes as well as wear personal
protective equipment.
Take the following points into account to minimise the vibration and noise exposure
risks:
1. Only use the product as intended by its design and these instructions.
2. Ensure that the product is in good condition and well maintained.
3. Use correct attachments for the product and ensure they are in good condition.
4. Keep tight grip on the handles/grip surface.
5. Maintain this product in accordance with these instructions and keep it well lubri-
cated (where appropriate).
6. Plan your work schedule to spread any high vibration tool use across a longer pe-
riod of time.
7. Prolonged use of the product exposes the user to vibrations that can cause a
range of conditions collectively known as hand-arm vibration syndrome (HAVS)
e.g. ngers going white; as well as specic diseases such as carpal tunnel syn-
drome. To reduce this risk when using the product, always wear protective gloves
and keep your hands warm.
RESIDUAL RISKS
Even if you are operating this product in accordance with all the safety
requirements, potential risks of injury and damage remain. The following
dangers can arise in connection with the structure and design of this product:
1. Health defects resulting from vibration emission if the product is being used over
long periods of time or not adequately managed and properly maintained.
2. Injuries and damage to property due to broken attachments or the sudden impact
of hidden objects during use.
3. Danger of injury and property damage caused by ying objects or poor power tool
accessories.
WARNING! This product produces an electromagnetic eld during
operation! This eld may under some circumstances interfere with active
or passive medical implants! To reduce the risk of serious or fatal injury,
we recommend persons with medical implants to consult their doctor and
the medical implant manufacturer before operating this product!
1312

Product description
Part index
The index below refers to Fig. 1 on page 4.
1. On/off switch
2. Hand grip
3. Speed dial
4. Dust extraction outlet
5. Base plate
6. Air vents
7. Dust collection box
a. Release button
b. Release lever (x2)
c. Window*(in Fig. D)
8. Dust extraction adaptor
a. Release lever (x2)
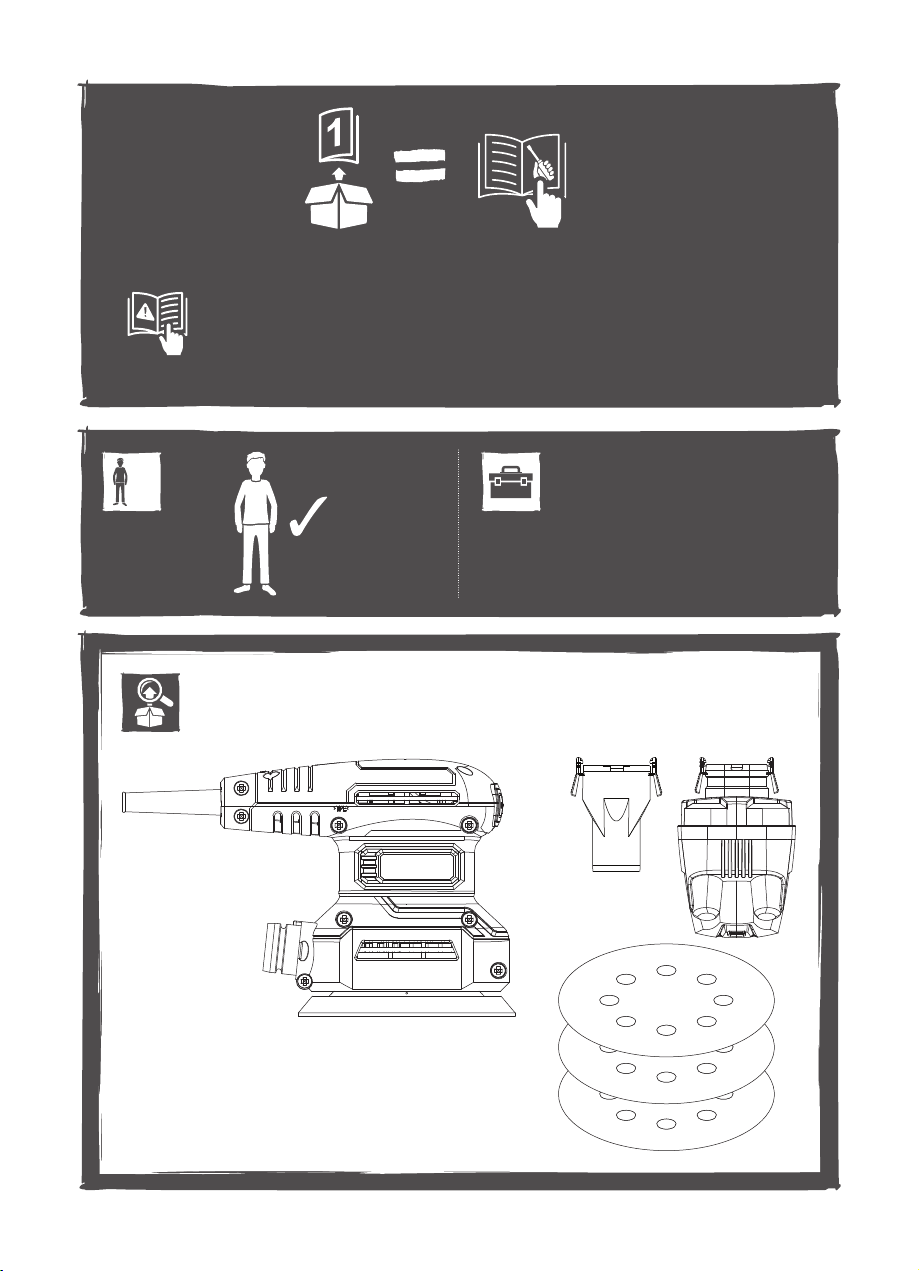
9. Sanding paper (60#,120#,240# )
NOTE: Parts marked with * are not shown in this overview. Please refer
to the respective section in the instruction manual.
Symbols
the following symbols and abbreviations. Familiarize yourself with them to reduce
hazards like personal injuries and damage to property.
Always wear eye protection. Always wear ear protection.
Wear a dust mask. Wear protective gloves.
Note / Remark. Caution / Warning.
To reduce the risk of injury, user must read instruction manual.
Switch the product off and disconnect it from the power supply
before assembly, cleaning, adjustments, maintenance, storage and
transportation.
This product is of protection class II. That means it is equipped with
enhanced or double insulation.
The product complies with the applicable European directives and an
evaluation method of conformity for these directives was done.
Rated voltage, frequency
Rated power input
No-load speed
Base plate size
Protection class
Weight
Sound pressure level L
Sound power level L
Uncertainty K
Vibration total value: a
Uncertainty K
The sound emission values have been obtained according to the noise test code given
in EN 62841-1 and EN 62841-2-4. The noise for the operator may exceed 80 dB(A)
and ear protection measures are necessary.
ERO400 = Model number
E = Erbauer
RO = Random Orbit Sander
400 = Power (Watts)
14
Parts marked with * are not shown in this overview. Please refer
the following symbols and abbreviations. Familiarize yourself with them to reduce
This product is of protection class II. That means it is equipped with
The product complies with the applicable European directives and an
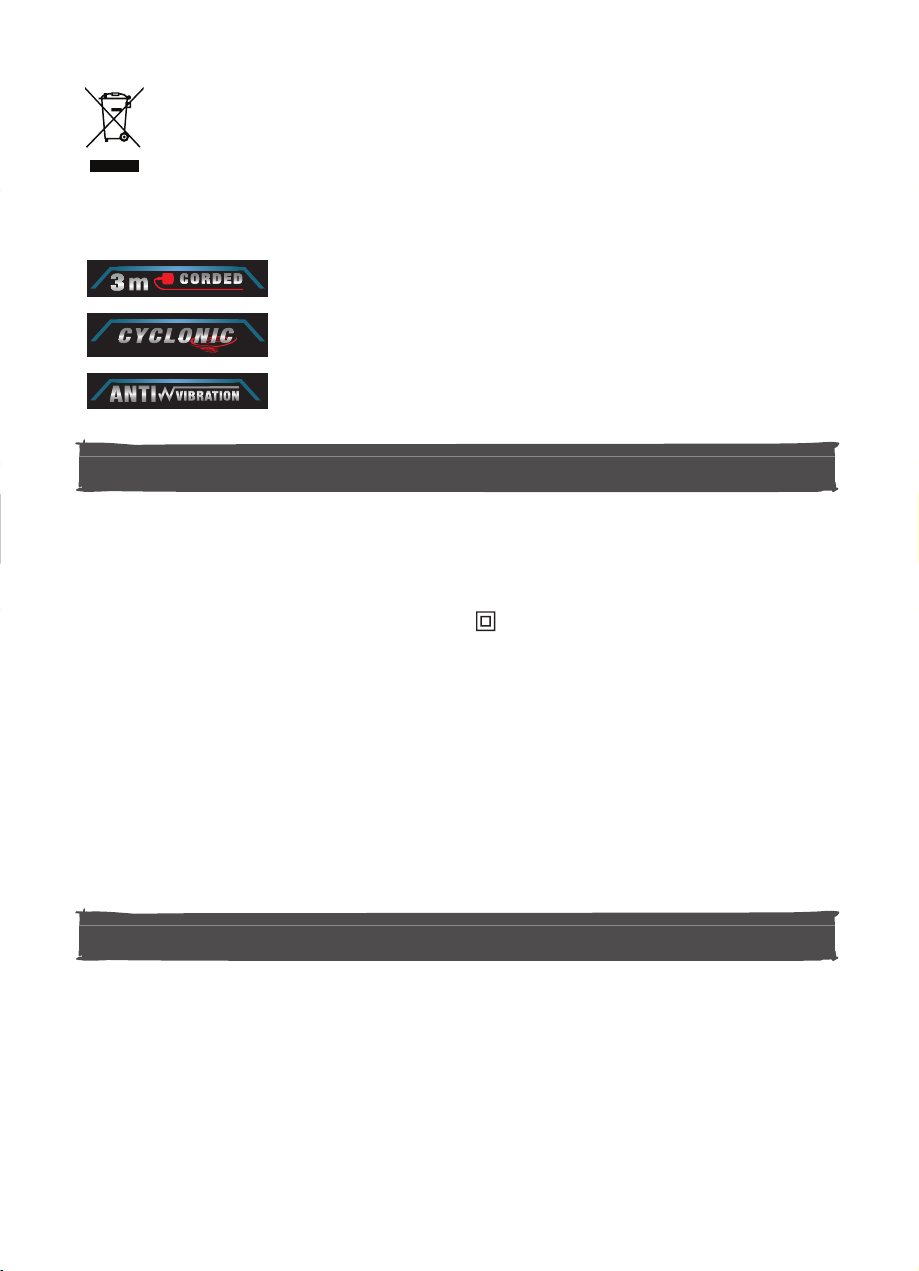
WEEE symbol. Waste electrical products should not be disposed of with
household waste. Please recycle where facilities exist. Check with your
Local Authority or local store for recycling advice.
yyWxx Manufacturing date code; year of manufacturing (20yy) and week of
manufacturing (Wxx)
3 metre Power Cord Length
Cyclonic Dust Collection Technology
Built in Anti-Vibration Technology
Technical data
Rated voltage, frequency : 220 – 240 V~, 50 Hz
Rated power input : 400 W
No-load speed : 5000-14000 /min
Base plate size : 125 mm
Protection class : II
Weight : Approx. 1.9 kg
Sound pressure level LpA : 86.5 dB(A)
Sound power level LWA : 97.5 dB(A)
Uncertainty KpA, KWA : 3 dB(A)
Vibration total value: ah: 12.7 m/s2
Uncertainty K : 1.5 m/s2
The sound emission values have been obtained according to the noise test code given
in EN 62841-1 and EN 62841-2-4. The noise for the operator may exceed 80 dB(A)
and ear protection measures are necessary.
Rating label explanation
ERO400 = Model number
E = Erbauer
RO = Random Orbit Sander
400 = Power (Watts)
1514

Assembly
01 Unpacking
1. Unpack all parts and lay them on a at, stable surface.
2. Remove all packing materials and shipping devices, if applicable.
3. Make sure the delivery contents are complete and free of any damage. If you nd
that parts are missing or show damage do not use the product but contact your
dealer. Using an incomplete or damaged product represents a hazard to people
and property.
4. Ensure that you have all the accessories and tools needed for assembly and oper-
ation. This also includes suitable personal protective equipment.
WARNING! The product must be fully assembled before operation!
Do not use a product that is only partly assembled or assembled with
damaged parts!
Wear protective gloves for this assembly work and always lay the product
on a at and stable surface while assembling.
Follow the assembly instructions step-by-step and use the pictures
provided as a visual guide to easily assemble the product!
Do not connect the product to power supply before it is completely
assembled!
WARNING! The product and the packaging are not children’s toys!
Children must not play with plastic bags, sheets and small parts! There is
a danger of choking and suffocation!
Rated voltage, frequency : 220 – 240 V~ ,50 Hz
Rated power input : 500 W
Rated speed n : 11000 min-1
Max. grinding wheel diameter : Ø 115 mm
Max. thickness of grinding wheel : 6 mm
Diameter of wheel bore : 22.23 mm
Spindle thread size : M 14
Protection class : ||
Weight : 1.43 kg
Sound pressure level LpA :87.2 dB (A)
Sound power level LWA :98.2 dB (A)
Uncertainty KpA, KWA :3 dB (A)
Vibration total value:ah, AG : 6.1 m/s2
Uncertainty K : 1.5 m/s2
02 Sanding paper (Fig. A)
Always remove dust and chips from the sanding base plate (5) before
attaching sanding paper (9) to reduce the wear of sanding base plate and
sanding paper.
Choosing the right sanding paper
Sanding paper is available with different grain sizes (grit) and for different materials.
The grain size is indicated with a number on the reverse of the sanding paper, the
higher the number, the ner the grain size.
Grain size Class Application
< 80 Coarse Removal of paint and varnish, preparation of rough
surfaces.
80-120 Medium For face sanding and smoothing small irregularities.
>180 Fine Finishing, cleaning plaster and water stain from wood.
• Only use suitable sanding papers in terms of application and size. Do not use
papers that are bigger than the base plate of the product.
• Replace worn or damaged sanding papers immediately.
• Start with a coarse sanding paper and nish with a ne-grained one to achieve a
satisfactory result.
• Do not use the same sanding paper on different materials, e. g. do not use the
sanding paper that has been used for sanding metal to sand wood. Small metal
particles remaining in the sanding paper will lead to scratches.
• We recommend using sanding papers with a hole pattern for sufcient dust
extraction.
Changing/attaching sanding paper with hook-and-loop system
1. With the hook-and-loop system, sanding paper is simply removed by pulling off.
2. Align the hole pattern of the new sanding paper (9) with the one in the base plate
(5) to ensure efcient dust extraction if available.
3. With the hook-and-loop system, sanding paper is simply pressed on the base
plate.
16

Assembly
01 Unpacking
1. Unpack all parts and lay them on a at, stable surface.
2. Remove all packing materials and shipping devices, if applicable.
3. Make sure the delivery contents are complete and free of any damage. If you nd
that parts are missing or show damage do not use the product but contact your
dealer. Using an incomplete or damaged product represents a hazard to people
and property.
4. Ensure that you have all the accessories and tools needed for assembly and oper-
ation. This also includes suitable personal protective equipment.
WARNING! The product must be fully assembled before operation!
Do not use a product that is only partly assembled or assembled with
damaged parts!
Wear protective gloves for this assembly work and always lay the product
on a at and stable surface while assembling.
Follow the assembly instructions step-by-step and use the pictures
provided as a visual guide to easily assemble the product!
Do not connect the product to power supply before it is completely
assembled!
WARNING! The product and the packaging are not children’s toys!
Children must not play with plastic bags, sheets and small parts! There is
a danger of choking and suffocation!
02 Sanding paper (Fig. A)
Always remove dust and chips from the sanding base plate (5) before
attaching sanding paper (9) to reduce the wear of sanding base plate and
sanding paper.
Choosing the right sanding paper
Sanding paper is available with different grain sizes (grit) and for different materials.
The grain size is indicated with a number on the reverse of the sanding paper, the
higher the number, the ner the grain size.
Grain size Class Application
< 80 Coarse Removal of paint and varnish, preparation of rough
surfaces.
80-120 Medium For face sanding and smoothing small irregularities.
>180 Fine Finishing, cleaning plaster and water stain from wood.
• Only use suitable sanding papers in terms of application and size. Do not use
papers that are bigger than the base plate of the product.
• Replace worn or damaged sanding papers immediately.
• Start with a coarse sanding paper and nish with a ne-grained one to achieve a
satisfactory result.
• Do not use the same sanding paper on different materials, e. g. do not use the
sanding paper that has been used for sanding metal to sand wood. Small metal
particles remaining in the sanding paper will lead to scratches.
• We recommend using sanding papers with a hole pattern for sufcient dust
extraction.
Changing/attaching sanding paper with hook-and-loop system
1. With the hook-and-loop system, sanding paper is simply removed by pulling off.
2. Align the hole pattern of the new sanding paper (9) with the one in the base plate
(5) to ensure efcient dust extraction if available.
3. With the hook-and-loop system, sanding paper is simply pressed on the base
plate.
1716

03 Dust extraction (Fig. B, C, D, E, F)
The product can be used with the dust collection box (7) or an external dust extraction
device.
Dust collection box
1. Attach the dust collection box (7) to the dust extraction outlet (4). Fig. B.
2. To remove the dust collection box (7), press both release levers (7b) and pull the
box off. Fig. C.
3. To empty the dust collection box, open the window of dust collection box (7c) by
pressing the release button (7a). Fig. D.
External dust extraction device
1. Attach an external dust extraction device, e.g. a suitable vacuum cleaner
attachment (Ø35mm), to the dust extraction adaptor (8) and then attach to dust
extraction outlet (4). Fig. E.
2. To remove the dust extraction adaptor, press both release levers (8a) and pull the
dust extraction adaptor off. Fig. F.
Use
Intended use
This product is intended for dry sanding of wood, plastic, metal, llers and coated
surfaces. This product should not be used on other materials or those harmful to
health.
Before you start
01 Protection
Controls
01 On/Off switch (Fig. G)
Operate the product in continuous mode.
1. Switch the product on by pressing the “ON / ─” button of the on/off switch (1).
2. Press the “OFF / O” button of the on/off switch (1) to switch the product off.
02 Speed dial (Fig. H)
Limit the maximum speed using the speed dial (3).
1. Turn the speed dial (3) clockwise to increase the maximum speed. A higher setting
is suitable for sanding with ne-grained sanding papers to achieve a ne nish.
2. Turn the speed dial (3) anti-clockwise to decrease the maximum speed. A lower
setting is suitable for sanding with coarse-grained sanding papers to remove
paints and varnishes.
18

03 Dust extraction (Fig. B, C, D, E, F)
The product can be used with the dust collection box (7) or an external dust extraction
device.
Dust collection box
1. Attach the dust collection box (7) to the dust extraction outlet (4). Fig. B.
2. To remove the dust collection box (7), press both release levers (7b) and pull the
box off. Fig. C.
3. To empty the dust collection box, open the window of dust collection box (7c) by
pressing the release button (7a). Fig. D.
External dust extraction device
1. Attach an external dust extraction device, e.g. a suitable vacuum cleaner
attachment (Ø35mm), to the dust extraction adaptor (8) and then attach to dust
extraction outlet (4). Fig. E.
2. To remove the dust extraction adaptor, press both release levers (8a) and pull the
dust extraction adaptor off. Fig. F.
Use
Intended use
This product is intended for dry sanding of wood, plastic, metal, llers and coated
surfaces. This product should not be used on other materials or those harmful to
health.
Before you start
01 Protection
Controls
01 On/Off switch (Fig. G)
Operate the product in continuous mode.
1. Switch the product on by pressing the “ON / ─” button of the on/off switch (1).
2. Press the “OFF / O” button of the on/off switch (1) to switch the product off.
02 Speed dial (Fig. H)
Limit the maximum speed using the speed dial (3).
1. Turn the speed dial (3) clockwise to increase the maximum speed. A higher setting
is suitable for sanding with ne-grained sanding papers to achieve a ne nish.
2. Turn the speed dial (3) anti-clockwise to decrease the maximum speed. A lower
setting is suitable for sanding with coarse-grained sanding papers to remove
paints and varnishes.
1918

Operation
WARNING! Certain dusts, such as oak or beech dust, are considered
as carcinogenic, especially in connection with wood-treatment
additives (chromate, wood preservative). Materials containing
asbestos may only be worked by specialists. Use a dust extraction
system suitable for the material as far as possible.
01 Sanding
• Do not use the same sanding paper on different materials, e. g. do not use the
sanding paper that has been used for sanding metal to sand wood. Small metal
particles remaining in the sanding paper will lead to scratches.
• Ensure the workpiece is free of obstacles like nails or screws before operation.
Remove them if required. Where possible, secure smaller workpieces to prevent
them from moving under the product.
• Hold the product with one hand on the hand grip (2) rmly and with the other hand
on the housing.
• Switch the product on and wait until it runs at full speed before placing it on the
workpiece.
• Move the product slowly and steadily over the workpiece surface in parallel and
overlapping stokes.
• Only apply the least possible pressure to keep the product at on the workpiece.
Higher pressure will not increase but lower the performance of the product,
increase wear of the sanding paper and lead to uneven results.
• Work with a dust extraction system particularly when sanding coats of varnish as
the varnish could melt and smear the surface of the workpiece and the sanding
paper.
• Keep the product moving at all times, do not stop in one position to avoid grooves.
• Lift the product from the workpiece before switching it off.
After use
• Switch the product off, wait for complete stop, disconnect it from the power supply
and let it cool down.
• Check, clean and store the product as described below.
Care & maintenance
WARNING! Always switch the product off, disconnect the product from
the power supply and let the product cool down before performing
inspection, maintenance and cleaning work!
Only perform care and maintenance work according to these instructions!
All further works must be performed by a qualied specialist!
Clean
1. Clean the product with a dry cloth. Use a brush for areas that are hard to reach.
2. In particular clean the base plate, switches and air vents after every use with a
cloth and brush.
3. Remove stubborn dirt with high pressure air (max. 3 bar).
4. Check for worn or damaged parts. Replace worn parts as necessary or contact an
authorised service centre for repair before using the product again.
Do not use chemical, alkaline, abrasive or other aggressive detergents or
disinfectants to clean this product as they might be harmful to its surfaces.
Maintenance
Your power tool requires no additional lubrication or maintenance.
There are no user serviceable parts in your power tool.
Before and after each use, check the product and accessories (or attachments) for
wear and damage. If required, exchange them for new ones as described in this
instruction manual.
01 Power cord
If the replacement of the supply cord is necessary, this has to be done by the
manufacturer or his agent in order to avoid a safety hazard.
20
Table of contents
Other Erbauer Grinder manuals

Erbauer
Erbauer EAG18-Li User manual

Erbauer
Erbauer ERB8DLC User manual

Erbauer
Erbauer EAG2200 User manual

Erbauer
Erbauer ERB564GRD User manual

Erbauer
Erbauer ERB371GRD User manual

Erbauer
Erbauer ERB612GRD User manual

Erbauer
Erbauer EBS950 User manual

Erbauer
Erbauer ERB112BTE User manual

Erbauer
Erbauer ERB666GRD User manual

Erbauer
Erbauer ERB017GRD User manual


Popular Grinder manuals by other brands


Ryobi
Ryobi EAG-7511 user manual

Black & Decker
Black & Decker KG8200 operating instructions

Allwin
Allwin MEGR4200 Owner's operating manual

Woodstar
Woodstar gg 76 Translation from the original instruction manual

Parkside
Parkside PWS 230 A1 translation of original operation manual

Clarke
Clarke Metalworker CBG8370LW Operation & maintenance instructions