Ercolina Top Bender 050 Operation instructions
1
CML International S.p.A.
Electric Metal Bending Machine
ERCOLINA® by CML International S.p.A. ITALY
Tel. +39 0776 40281
Fax +39 0776 404801
www.ercolina.it - www.ercolina.com
e-mail: info@ercolina.it
USE AND MAINTENANCE
INSTRUCTION MANUAL
This manual was written according to
prescriptions of attachment I-1.7.4.
of :
EEC DIRECTIVE 89/392 →
98/37/CEE
«MACHINERY DIRECTIVE»
MODIFIED BY DIRECTIVE 91/368
RECEIVED BY PRESIDENTIAL
DECREE NR. 459/1996
EEC Directive 89/392 →98/37/CEE –
published on the European Community
Official Journal
nr. L183 dated June 29, 1989
EEC Directive 91/368 – published on
the European Community Official
Journal
nr. L198 dated July 22, 1991
2
CML International S.p.A.
We wish to thank you for your excellent choice in purchasing an Ercolina® Top
Bender 050. By following these instructions the Top Bender will be a simple and
useful working tool.
Remember: after reading this manual, keep it in a safe place for future reference!
!!WARNING
Before using the machine read carefully this instruction
manual!
Any use of the machine which does not
strictly conform to the instructions of
this manual will immediately invalidate
the warranty and free the
Manufacturer of any responsibility.
The Manufacturer is not liable for any
damages due to the use of not original
Ercolina® tooling

3
CML International S.p.A.
WARRANTY ............................................................................................................... 4
WARRANTY CONDITIONS AND RESTRICTIONS ..................................................................4
GENERAL SAFETY NORMS .................................................................................. 6
PROGRAM PROCEDURES ..................................................................................... 9
PROCEDURES FOR BEND MAKING........................................................................................11
SETTING C AXIS .........................................................................................................................12
HOW TO CORRECT THE SPRING-BACK ANGLE .................................................................13
EDITING THE ACTUAL BEND ANGLE ...................................................................................13
CHANGING THE LANGUAGE ..................................................................................................14
PRACTICAL USE OF THE MACHINE ............................................................... 14
BENDING FILE ........................................................................................................ 20

4
CML International S.p.A.
WARRANTY
Every machine is carefully controlled and tested before shipment. Machine
installation is under customer’s responsibility, if qualified personnel is required for
assistance and training, the cost of the operation will be charged.
WARRANTY CONDITIONS AND RESTRICTIONS
1. Each ERCOLINA bender has a 12 month warranty effective from delivery date,
against any component’s defect. The company reserves the right to request a copy
of the sale invoice.
2. Defects must be notified to us within 2 months from the date the defect has been
found.
3. Defects are checked on our premises, so every ERCOLINA® bender must be
sent, FREIGHT PREPAID, to our address or to authorised service centres. ANY
FREIGHT COLLECT DELIVERY WILL BE REJECTED. If checking at
customer’s premises is required, a cost for checking on site will be charged.
4. Warranty includes the defective component’s replacement or repair excluding
labour cost.
5. Electrical parts are not included in the warranty in case of incompatibility with
power supply ( caused by overvoltage and / or atmospheric events ).
6. Operations performed under warranty do not extend warranty terms.
7. Warranty does not respond to damages caused by wear.
8. The warranty does not apply if damages are a result of incorrect handling or of a
use that does not conform with specifications described in this manual.
9. The warranty does not apply if the machine has been modified or tampered with.
10. The warranty certificate IS INVALID if dealer stamp with sales date is not
included at the bottom of the document and in the attached coupon. Furthermore,
the part to be sent to us must be mailed within 8 days following the invoice date.
11. The buyer can not claim compensation for damages in any way.

5
CML International S.p.A.
12. The warranty does not provide a replacement even temporarily of the machine.
13. The whole warranty declines if:
The machine has been repaired or maintained by personnel that has not been
authorised by Ercolina®;
Not original parts have been used;
Damages or errors are due to connections not performed according to the using
instructions;
Errors due to the machine wear.
6
CML International S.p.A.
GENERAL SAFETY NORMS
The Ercolina® Top Bender has been manufactured according to state-of-the-art
technology and in compliance with safety regulations officially accepted.
Nevertheless the machine can be dangerous for the operator or a third person if used
in a improper manner. It is important therefore to read the following safety norms.
Use the machine only and specifically for the use which it has been
manufactured for and with full respect of the general safety norms. The
Manufacturer will not be liable for any injury or damage to objects due to an
incorrect use of the machine;
Do not switch on power supply and use the machine without
reading carefully the instruction manual;
Do not install and use the machine in environments containing:
flammable gases or liquids;
explosive materials;
Do not install and use the machine in humid or wet environments;
Do not expose the machine to the rain;
Do not touch parts in motion;
Do not put hands on the tube during bending;
Have not more than one person working on the same machine;
Working area should not be restricted to a too limited space in proportion
to the tube lengths to be bent;
FORBIDDEN
7
CML International S.p.A.
Do not use the machine beyond the maximum capacities indicated;
Non qualified and non authorised personnel should be prohibited from
effecting maintenance work or repair on the machine;
Do not clean the machine without switching off power supply;
Do not tamper with electrical and electronic circuits in any way for safety
reasons and in order not to invalidate the warranty conditions;
Do not effect transportation of the machine dragging it by the power cable;
Do not modify the machine structure.
!!WARNING: Use only Ercolina® line accessories. Any alterations will cause
the invalidation of the warranty. The Manufacturer reserves the right to not supply
accessories or replacement parts in case the machine has been altered;
Avoid putting fingers between former and machine while mounting the former;
Do not leave the machine unattended with power supply switched on.

8
CML International S.p.A.
Check that the line voltage is always compatible with the power supply for
which the machine has been manufactured for;
Make sure that only trained personnel operates the machine;
Keep the machine in a dry and safe place;
Delimit the machine’s working area with barriers and / or chains in order to
avoid non authorised persons entering the working area of the machine when
both in motion and switched off ;
Mark the working area with appropriate signals ;
Go to a safe place when the machine is in use;
Never stand next the machine on the opposite side of the controls;
Disconnect main power cable prior to transporting the machine;
Verify on a regular basis if formers and counterbending dies are worn out;
Wear protective gloves when handling the material;
Wear a protective helmet for upward moving or suspended tubes;
! Train adequately the operator in
charge of the machine.
MANDATORY

9
CML International S.p.A.
Wear safety shoes in case of heavy parts falling ;
Read carefully the warning labels and plates on the machine.
PROGRAM PROCEDURES
1. Activate data entry mode:
•Switch on power supply (by using main switch) and press set up button ;
•Press the button ; the display should show as follows:
Program Start
2. Press the or keys to continue or not the data entry mode;
3. If you have chosen to insert new data pressing the plus , you will have to
choose the block in which you would like to work with using again the plus
button to select a group to work with from P0 to P9.
!!WARNING: other protections can be adopted by the
operator or by the person in charge of the machine. Our
technical office is at complete disposal for any further
advice needed.
DATA ENTRY MODE
+=YES ENTER = NO

10
CML International S.p.A.
By pressing minus button for 4 seconds while the program number is
displayed, all the previous stored data will be lost and new data can be
memorised.
4. Once the group has been selected and it is ready to be programmed, the display
will show as below ; you may now insert the bend angle value and store it with
the button.
Insert bend angle
5. To insert the bend angle values press and buttons to increase or decrease
the value of the bend angle values or it will be possible with the use of the ,
, to insert quick bend angle values such as 135°, 90° e 45°.
6. To store the bend angle values press the button and the following message
will appear on the display:
Stored bend angle
7. Once the first bend angle has been inserted, the program will automatically ask
for the second bend angle which can be inserted in the same way as the first. The
same can be done for the third, the fourth and so on until the ninth of the same
group by repeating steps 5and 6. If instead you wish to end the data entry you
must press the button without inserting any angle value the display will show
:
End of data storage
8. For programming new groups press button and repeat steps from 3 to 7.
To end data storage press .
INSERT BEND 1(1…P)
000
STORED
END OF DATA ENTRY
11
CML International S.p.A.
PROCEDURES FOR BEND MAKING
After the full data entry will be finished the machine will be in stand by mode with
the following message :
Stand by mode
In this position if the bend angles memorised are more than one, with the use of the
button you may scroll through and choose the bend angle you would like to use .
Set all tooling on the machine, former and counterbending die of the same size of the
material to be bent. Set in position the support bracket and adjust initial pressure on
tube against the former. With the use of the keys, and you will need to
memorize the cursor counterbending die postion :
Setting the electronic counterbending die position
The position of the counterbending die (mm 000.0) is controlled by the
microprocessor which enables the machine to carry out the following bends repeating
exactly the position of the cursor and counterbending die with a tolerance of +
0.2mm.
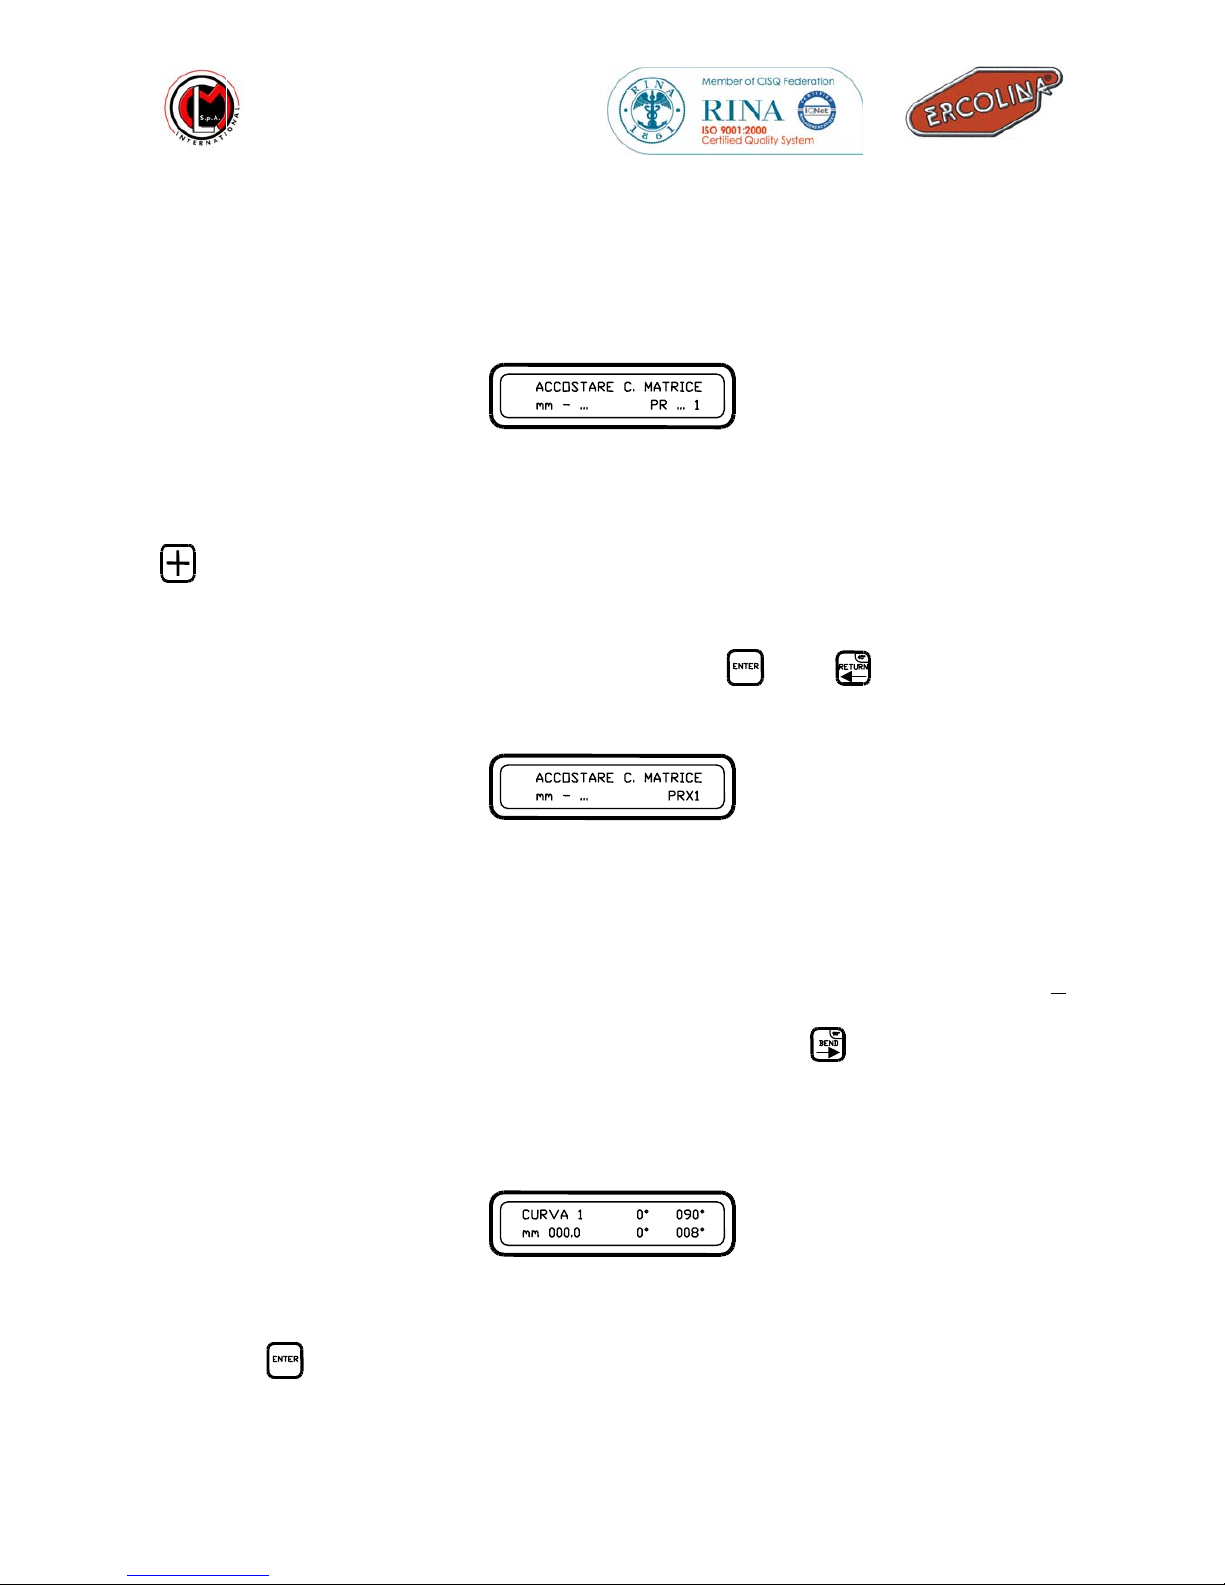
It will be possible to begin the first bend now by pressing the button; the tube will
begin to move in the tools until it will be possible that it will visibly begin to bend the
angle moved will be our spring-back angle. See example in the bottom indicating
what the display will show:
Spring back
Press the button to memorise the spring back angle (see below).
FORWARD C.BEND DIE
Mm - … PR … 1
FORWARD C.BEND DIE
Mm - … PRX1
BEND 1 0° 090°
Mm 000.0 0° 008°
12
CML International S.p.A.
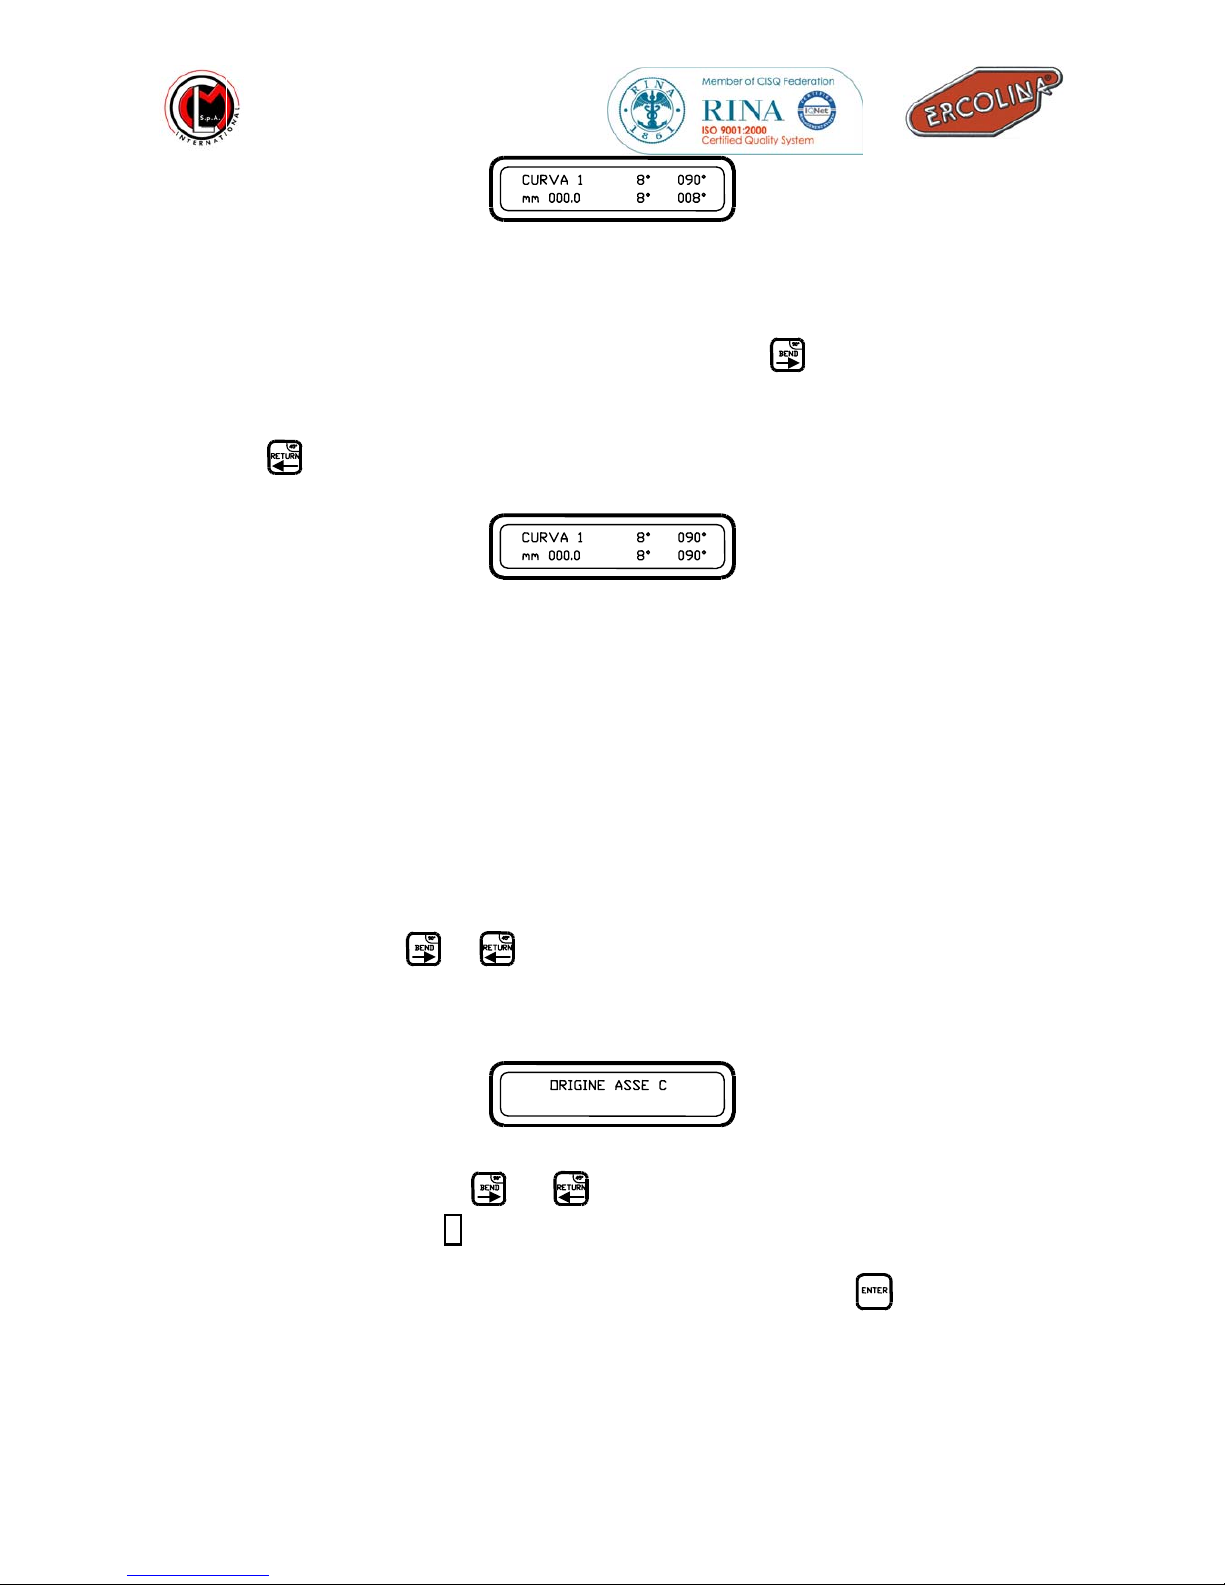
Spring back storage
It will be possible now to bend by continuing to press the button.
Once the bend angle will be achieved, the machine will stop automatically and the
yellow light will flash.
Press the button to bring the machine back to the 0 origin point.
Completed memorised bend
SETTING C AXIS
Should the (0) position of the machine shaft be lost or offset it will be necessary to set
the machine in the shaft reset mode to bring the hexagonal shaft (axis C) back in its
original position.
The shaft reset procedure can be accomplished as follows:
•The machine shaft should be without any kind of tools;
•Keeping the button or pressed by turning on the machine simultaneously,
you will enter the shaft reset mode.
•When the mode is entered the display should show the following message:
Shaft (axis C) reset mode
In this mode press the or pedals, to move the hexagonal shaft base
aligned with the mark, placed on the aluminium body of the machine
itself.
•To store the new origin or 0 point, you need to press the button and the
display will show as follows:
0
BEND 1 8° 090°
Mm 000.0 8° 000°
BEND 1 8° 090°
Mm 000.0 8° 090°
SHAFT RESET MODE
13
CML International S.p.A.
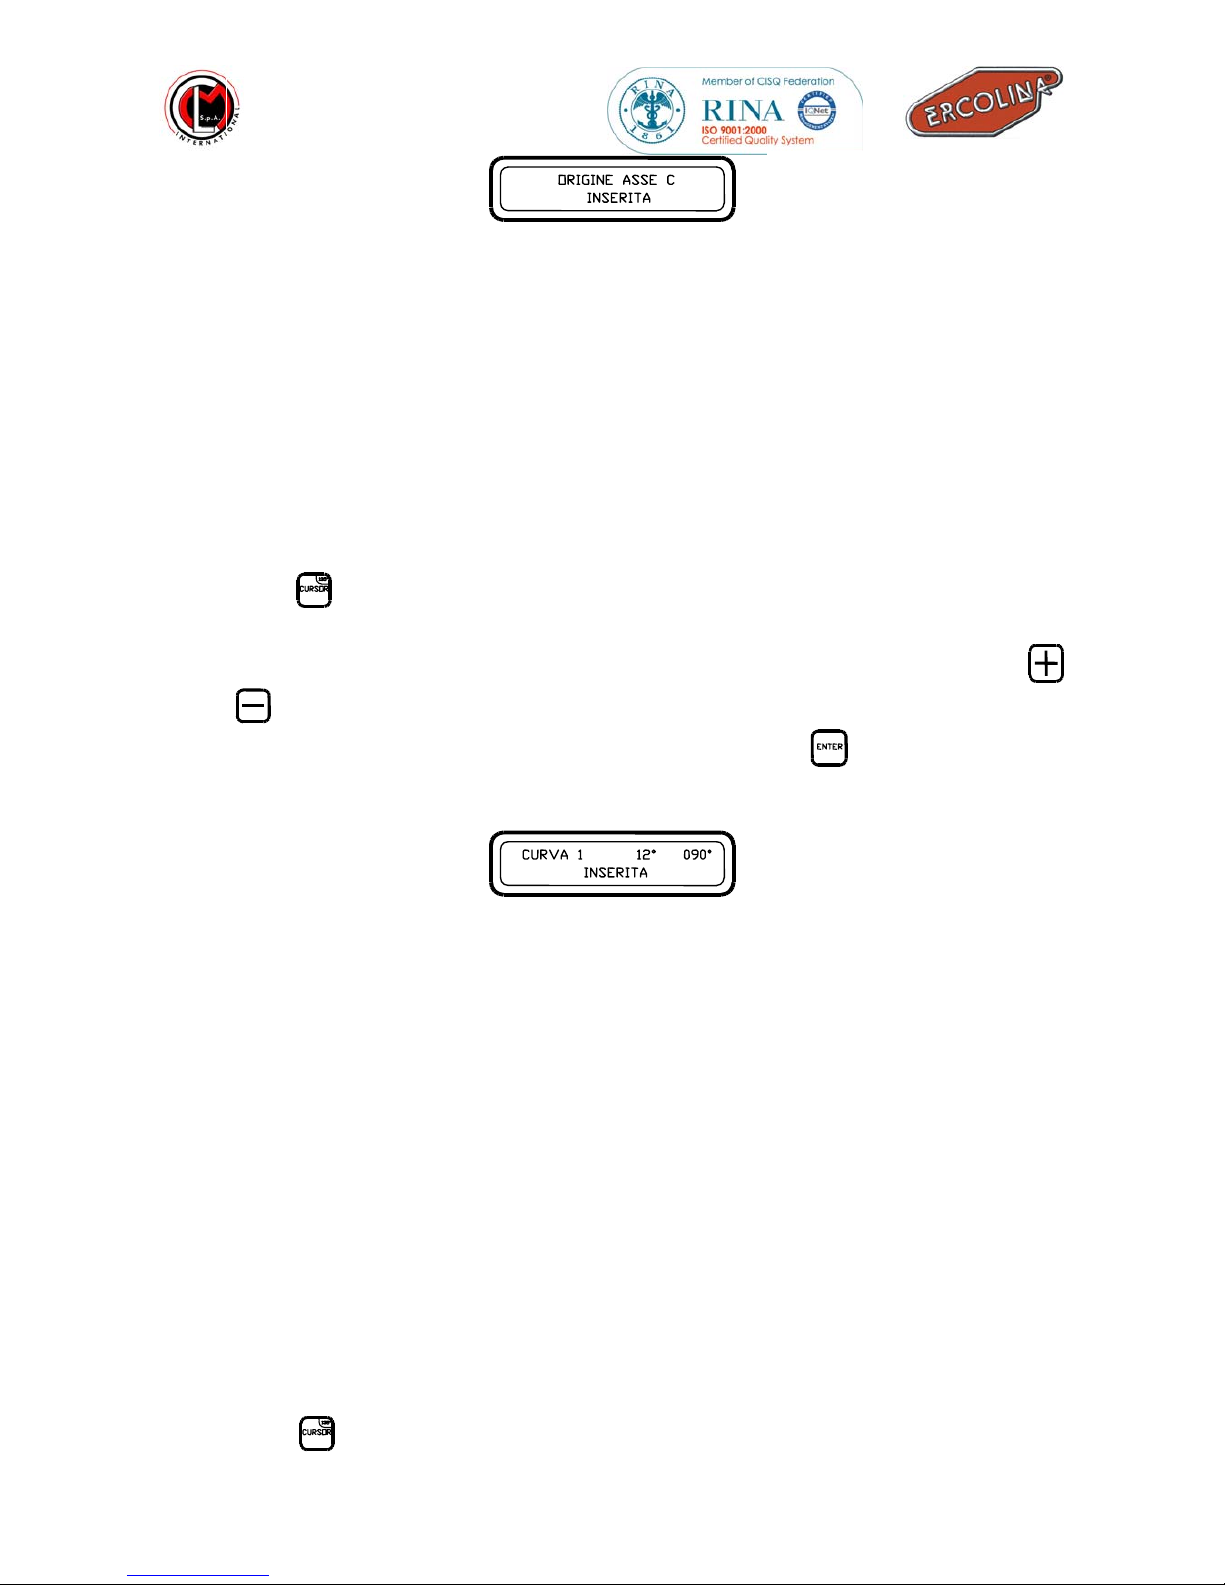
New position of the shaft stored ( Axis C )
HOW TO CORRECT THE SPRING-BACK ANGLE
If while working you notice that the required bend angle achieved is not conforming
to the desired angle you may adjust the spring-back angle to correct the angle in the
machine program.
To correct the bend angle, while working you need to :
•stop the machine from working by releasing all keys;
•press the button , then a flashing cursor will appear on the spring-back angle
value;
•the value of the spring-back angle can be changed with the use of the buttons
and ;
•The new set value will be stored only after having the button pressed, the
following message will then be displayed :
Spring-back angle change storage
In the example shown in the above picture the new spring-back value (12°)
has been stored on the first 90° bend.
•After the new angle has been stored you may proceed continuing the bend until
completed.
EDITING THE ACTUAL BEND ANGLE
As the spring-back angle you may also modify the bend angle without changing a
whole program. To edit a single bend angle you must:
•interrupt bending ;
•press the button until the flashing cursor is on the bend angle value;
SHAFT RESET STORED
BEND 1 12° 090°
STORED

14
CML International S.p.A.
•at this point with the use of the and buttons you may add or subtract
degrees to your original stored angle;
•Once the bend angle has been changed you will need to store it by pressing the
button.
CHANGING THE LANGUAGE
In order to change the machine language on the display please act as follows:
•Place the machine in the off position and then press the , ,
simultaneously while turning on the machine;
•On the display the following message should be shown:
Language selection
By pressing the button you may scroll through all the available languages;
•Make your selection then store with the use of the button.
PRACTICAL USE OF THE MACHINE
Main points to keep in mind for bending correctly with the Ercolina® system:
♦Before bending make sure that the outside diameter of the tube is of the same
size as the one printed on the former and the counterbending die.
!!Note: if you measure the former groove with a calibre, do not be surprised
to find it a few mm smaller ( if the wall thickness of the tube is smaller than
2,5mm ) or a decimal part of a mm smaller ( if the wall thickness of the tube
is greater than 2,5mm ) than the actual marked diameter size. It is perfectly
normal and it is part of the Ercolina® bending technology.

15
CML International S.p.A.
♦Remember that the minimum bend radius depends on the material to be
bent, the tube external diameter and the wall thickness of the tube.
♦Correct pressure between
former and counterbending
die. You must apply just
enough pressure to avoid
wrinkles on the inside bend
of the tube.
!!Note: If even with a
higher pressure there are still
wrinkles in the inside bend
use a former with a larger
radius.
♦In case of excessive
constriction of the tube on its
inside radius use the special
screw on support bracket: as
soon as tube starts visibly
bending tighten screw so
that the screw touches the
back of the counterbending
support bracket. After this
continue the bending process
as normal. Fine adjustment
of this screw will further
improve the bend quality.
!!Remember to adjust the position of this screw for different tube sizes /
materials.
♦Former and counterbending die must never touch otherwise the tube may break
or have wrinkles on the inside bend and the machine can be damaged.
♦Do not keep tubes in dusty/dirty places, in these conditions the counterbending
dies will wear out faster due to increased friction between the dirty tube and
counterbending die
Special screw
Results achieved
after bending with
no special screw or
by using it in a too
backward position
Improvement of bend quality
achieved by fine adjustment
of special screw
Results achieved after bending
with no special screw or by
using it in a too forward
position.
16
CML International S.p.A.
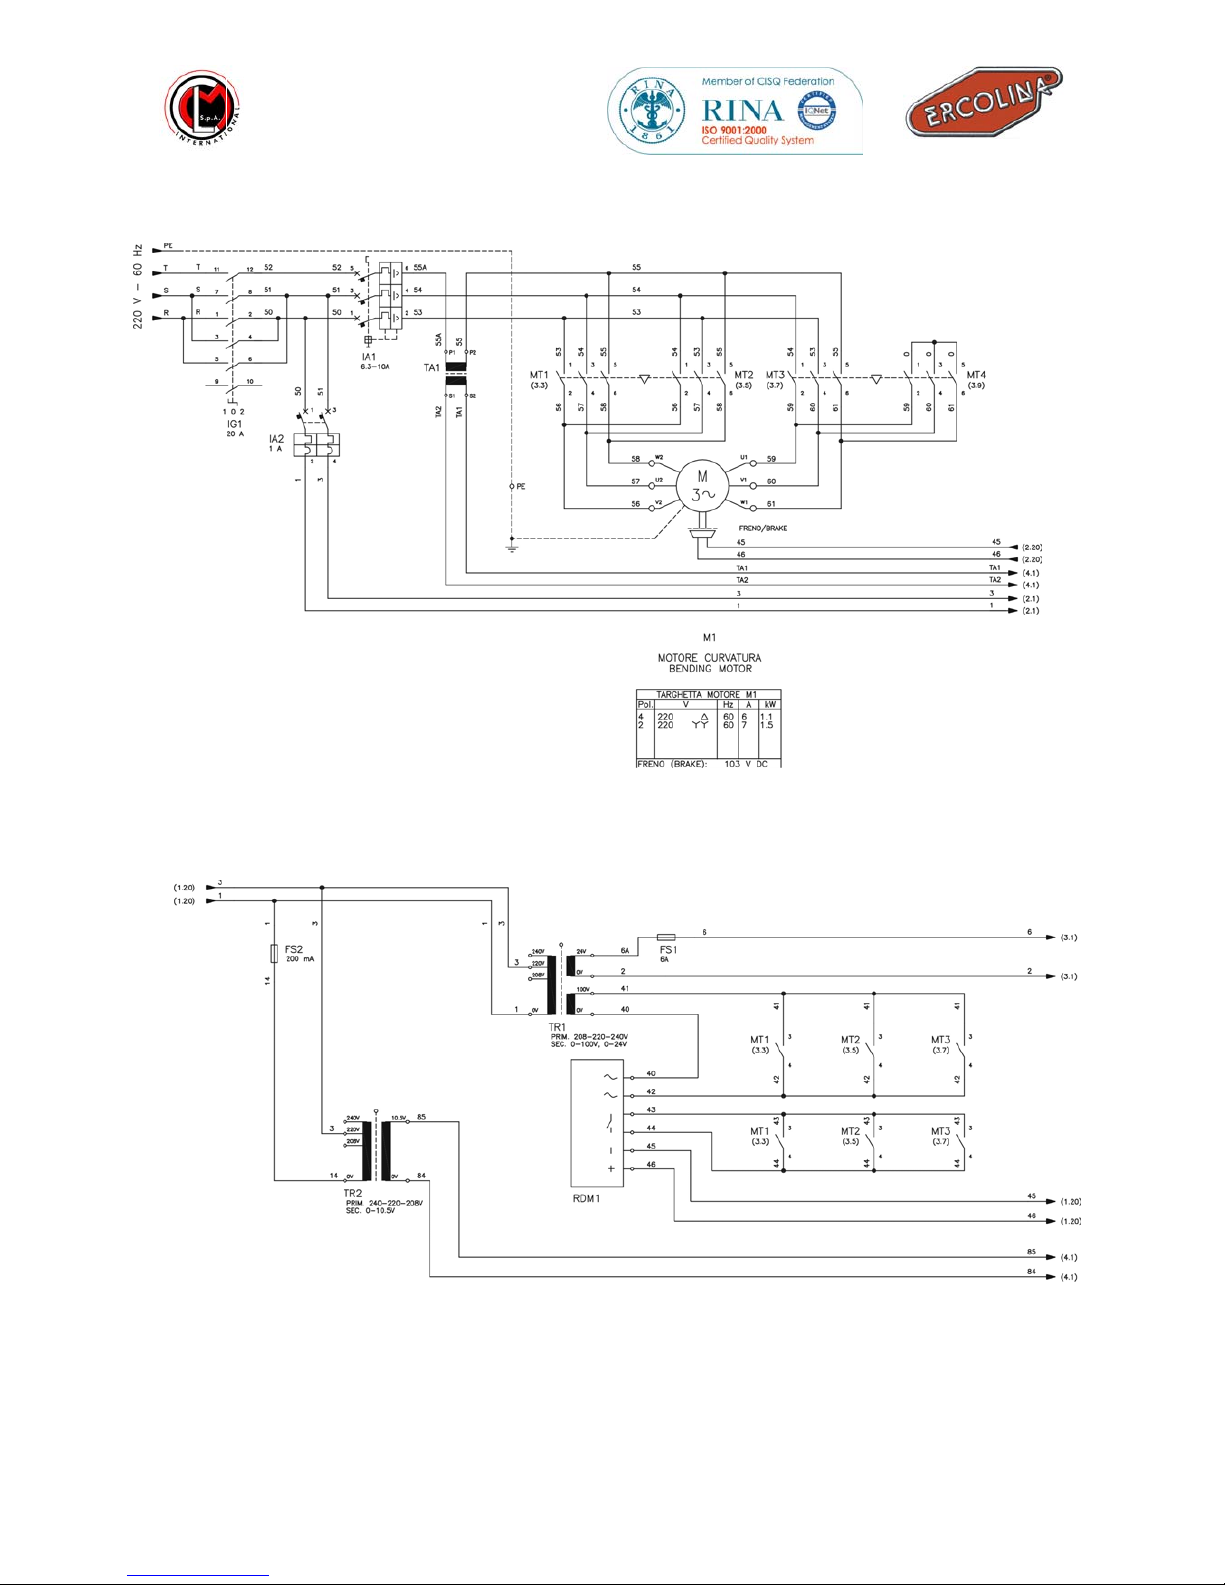
ELECTRICAL DRAWINGS 220V

17
CML International S.p.A.
ELECTRICAL DRAWINGS 400V

18
CML International S.p.A.

19
CML International S.p.A.
20
CML International S.p.A.
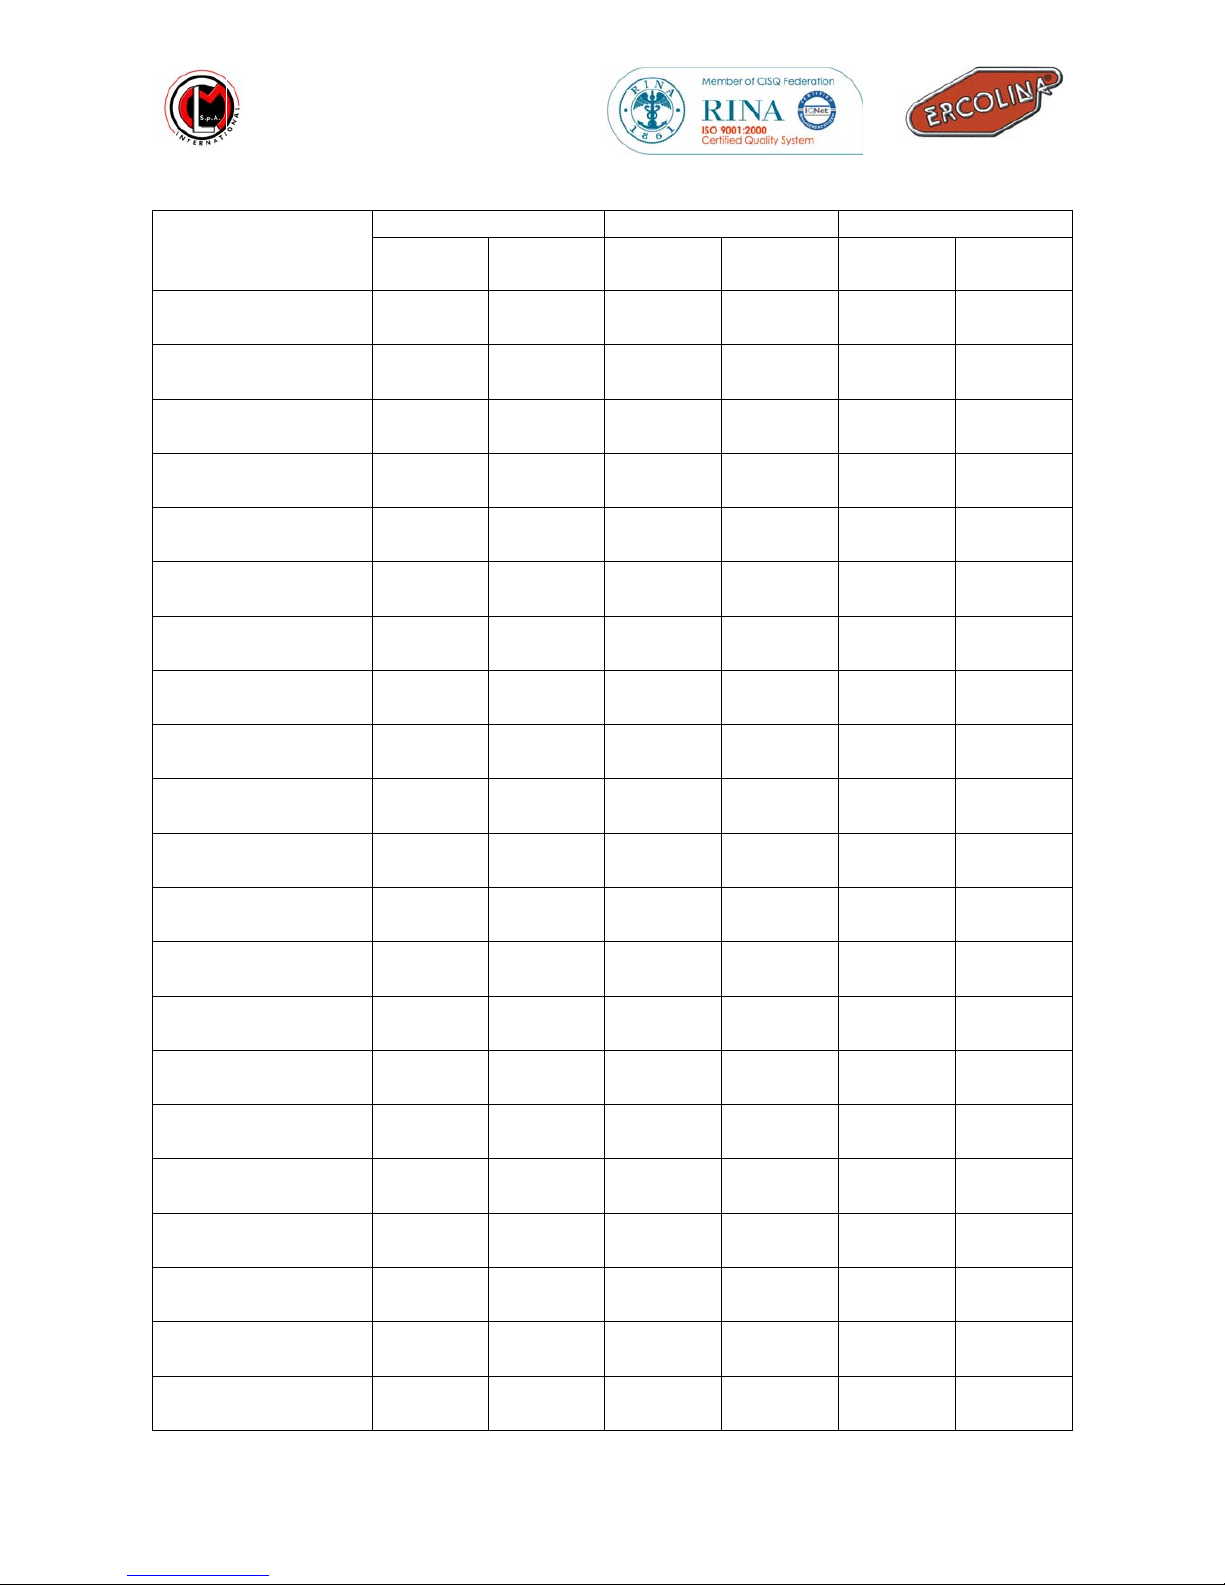
BENDING FILE
Tube sizes Bend data Storage
Type of tube ØWall
thickness
Spring
back angle
Bending
radius Group N° Bend N°
1._____________
2._____________
3._____________
4._____________
5._____________
6._____________
7._____________
8._____________
9._____________
10._____________
11._____________
12._____________
13._____________
14._____________
15._____________
16._____________
17._____________
18._____________
19._____________
20._____________
21._____________
Table of contents
Other Ercolina Power Tools manuals

Popular Power Tools manuals by other brands

Stahls
Stahls HOTRONIX AIR FUSION IQ quick start guide

Ingersoll-Rand
Ingersoll-Rand QE Series Product information

EINHELL Expert
EINHELL Expert GE-CG 10,8 Li Original operating instructions

Matatakitoyo Torque Tools
Matatakitoyo Torque Tools MET-NU Operation manual

Ryobi
Ryobi CW-1801/165 Operator's manual

Baileigh
Baileigh AP-3R Operator's manual


