ERECTASTEP F1 Quick start guide
Cordless drill with
3/8” hex driver
Rubber mallet or
dead blow hammer
Wire tie twister
Pliers
Assembly Instructions
#103315
ESF1-0820
MADE
IN
NOTICE:
EYE PROTECTION
REQUIRED
GLOVES
RECOMMENDED
IMPORTANT NOTES AND SPECIFICATIONS
Read carefully and understand all instructions before starting installation. Adhere to all instructions in manual.
FAILURE TO FOLLOW ALL INSTRUCTIONS MAY RESULT IN SERIOUS PERSONAL INJURY OR DEATH
Proir to installation, ensure the mounting surface is flat, level and adequate to support the equipment
Equipment should not be altered or modified from its original design without consultation with the manufacturer.
Equipment which is damaged or becomes damaged during use, handling, or shipping should be set aside and not used.
Do not use impact wrenches to tighten. Doing so may cause damage to the equipment and its safe operation.
WARNING!: Protect hands while assembly by wearing protective gloves. Product has sharp edges.
WARNING!: Equipment must be installed on flat level grade.
FAILURE TO DO SO MAY RESULT IN SERIOUS PERSONAL INJURY OR DEATH
Contact our Customer Service
team for help.
Call: 1-888-878-1839 (toll free)
Visit: www.erectastep.com/f1
Scan QR code to view a video
of the ErectaStep F1 assembly
This product and/or it’s components may be covered
by one or more patents. For more information, go to
www.saferack.com/patents
WARNING!: This product can expose you to
chemicals known to the State of California to cause
cancer, and/or birth defect or other reproductive harm.
For more information, go to www.p65warnings.ca.gov
Concrete Form Kit
Kit Parts List
TOOLS NEEDED
FOR INSTALLATION
103220 ES-Foundation-Hardware-Kit
Includes:
(4x) 102289
ES-Foundation-Form-Side-Panel
(8x) 102305
ES-Foundation-Form-Rebar x 43" long
(1) 102298
ES-Foundation-Form-Anchor-Bolt-Support
(2x) 102299
ES-Foundation-Form-Tie
(8x) 102873
ES-Foundation-Rebar-Chair w/ base
(4x) 102902
ES-Foundation-Threaded-Rod-5/8-11 x 11" long
(20x) 102871
8” Rebar Ties
(20x) 102878
1/4 -14 x 3/4” HX Drill Screw
(12x) 10634
5/8-11 Galv. Nut
(4x) 11035
5/8 Galv. Washer
102316
ES-Foundation-Form-A
Prepare a flat surface to locate
your foundation. Use of proper
PPE is required, gloves & eye
protection minimum
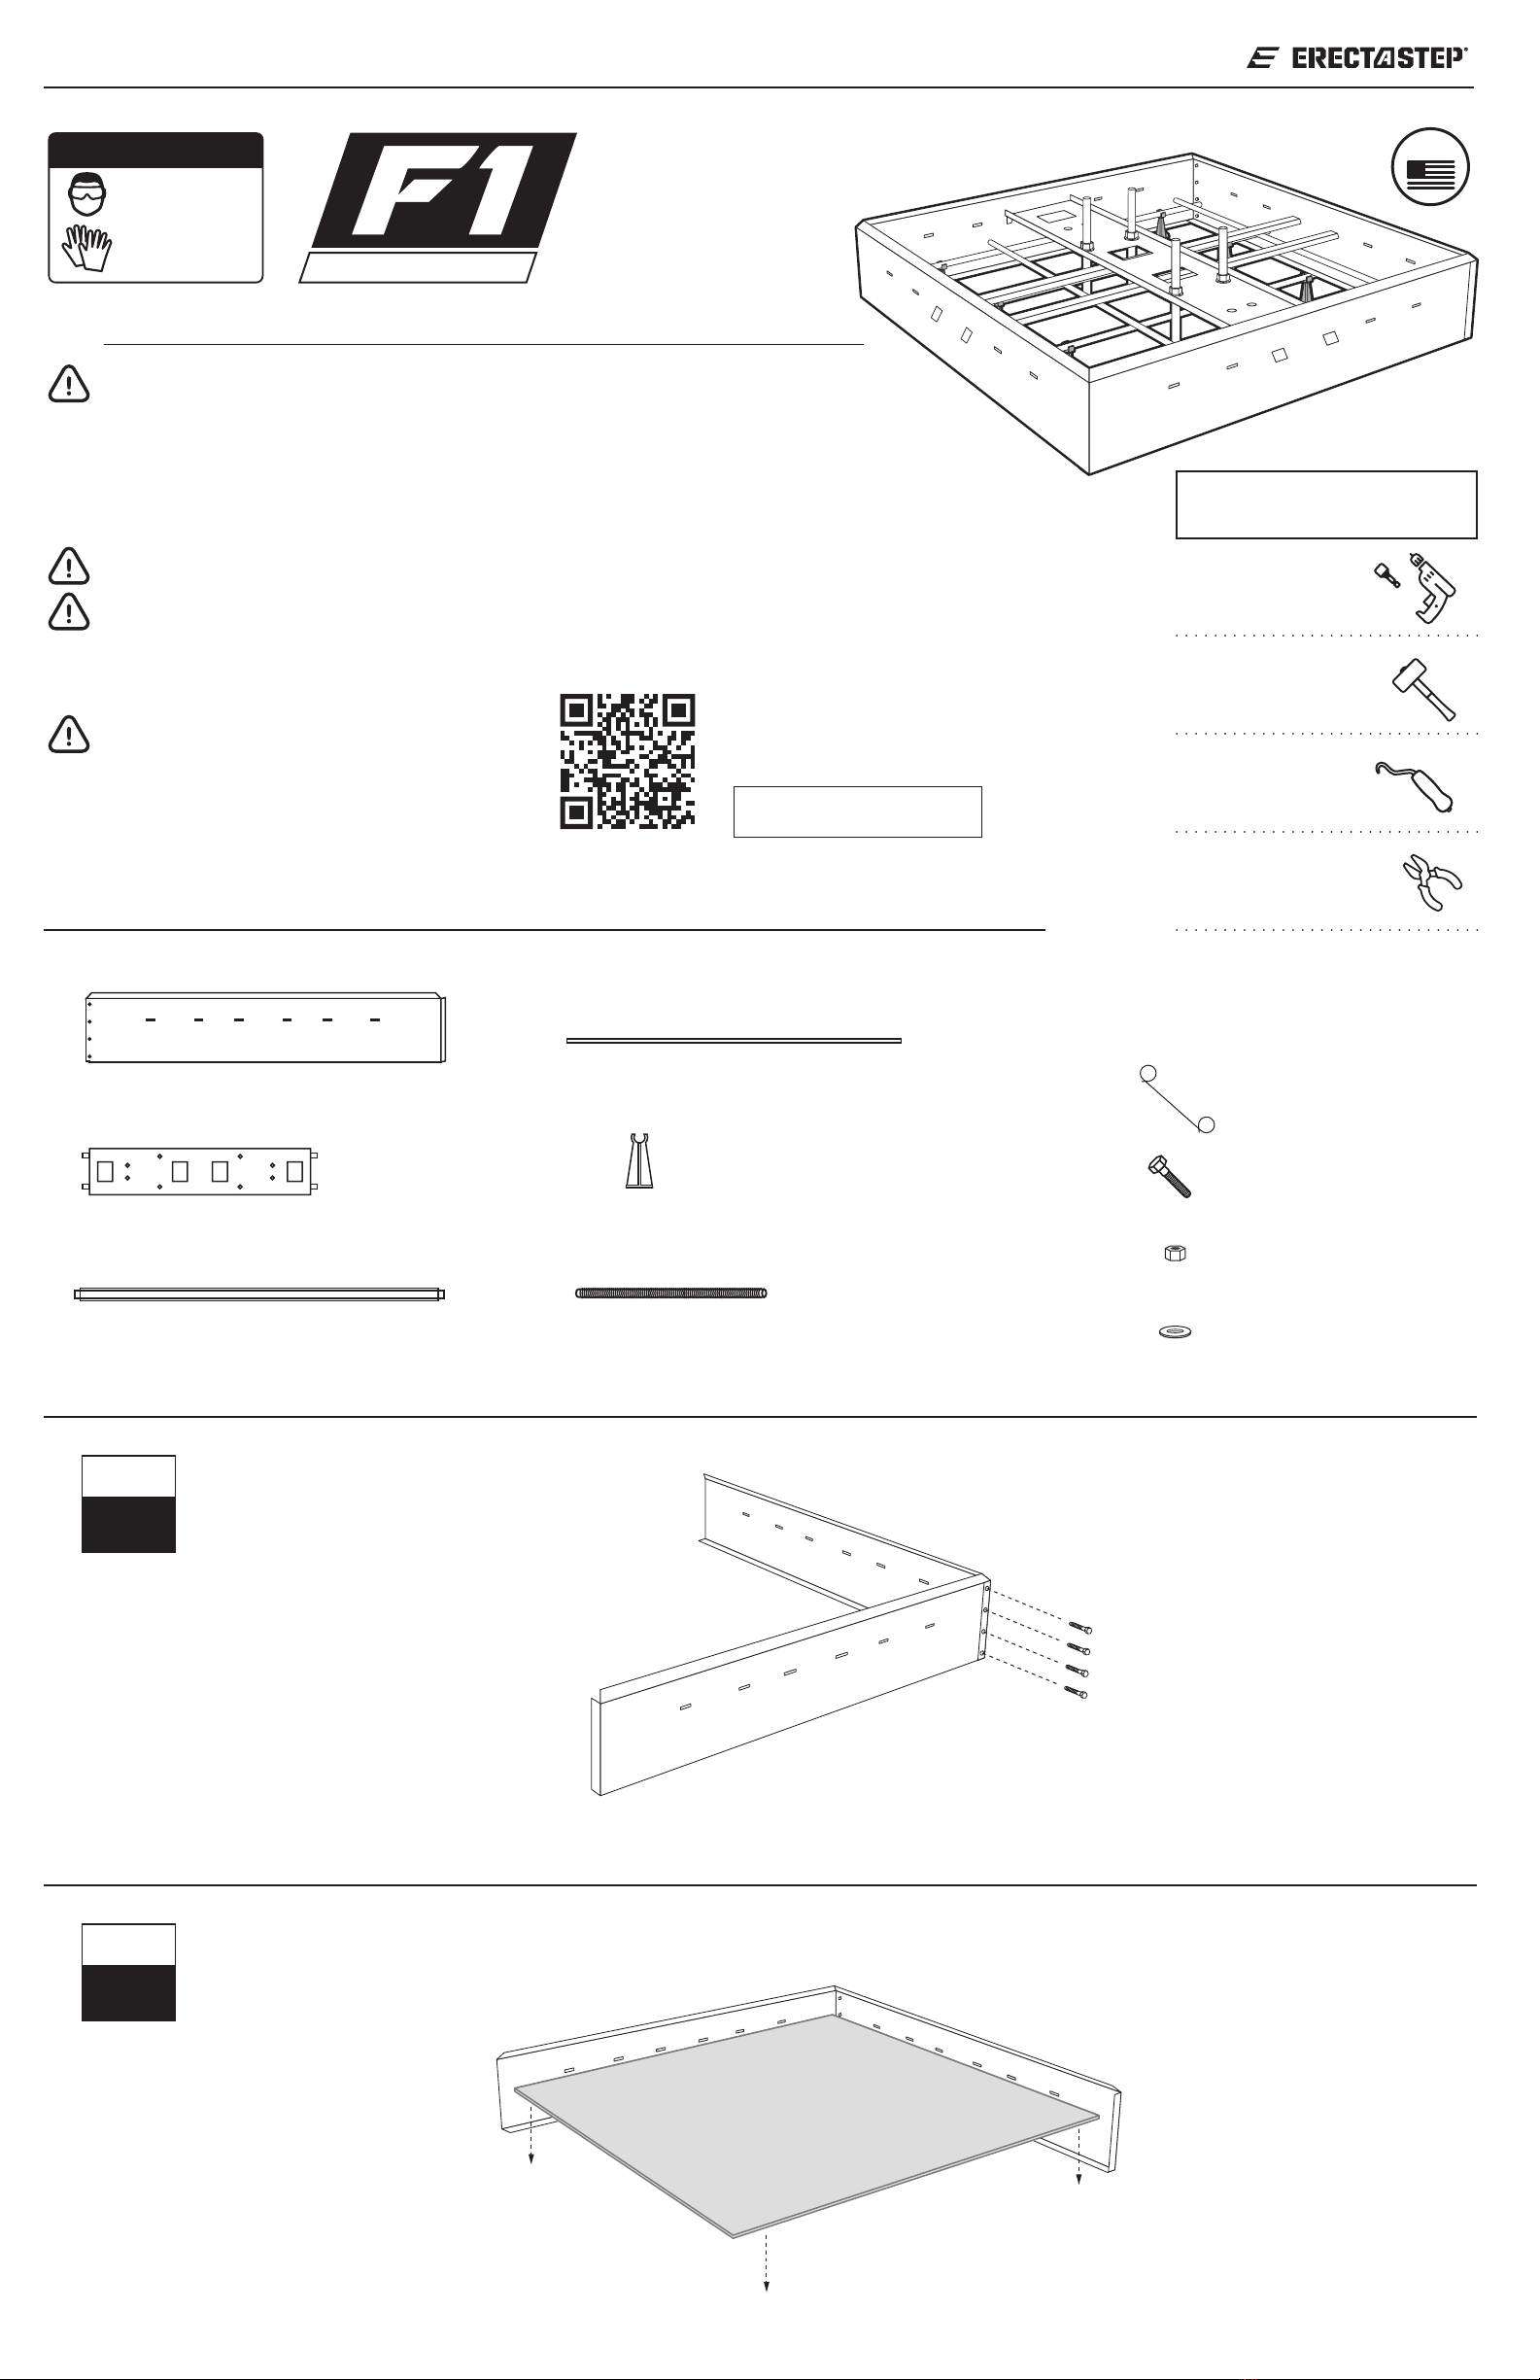
Begin by connecting two side
panels together using the supplied
1/4" hex head drill point screws
STEP
1
If the optional roof top tray is to be used,
place it in the bottom before placing rebar
STEP
2
FOR ROOFTOP OPTION

Assembly Instructions
ESF1_2020.08.001
Concrete Form Kit
Tower Configuration Stair Configuration
Flush to 1in
from bottom
5/8-11 Galv. Nut
One on bottom and
one on top of anchor
support plate
Narrow pattern
for tower
Wide pattern for stairs
Place a rebar chair at each end of four rebars
and place them equal distances from one
another inside the base of the form.
Next place the remaining rebar equally spaced in the opposite direct, forming
a grid, & connect each crossing point with the supplied rebar wire ties.
STEP
3
Determine the intended use of the
foundation, either a Tower or Stair
application, & install the anchor
support panel. Note the location
for stairs are off set in order to
create a OSHA compliant landing.
STEP
4
Place the form ties into
positioned first then the
anchor support over them.
This must be done prior to
the last two side panels
being secured into place.
Install the final two sides of the form inserting the form tie and
anchor support plate tabs in the slots. Once the remaining
corner screws have been tighten securely, tap the tabs down
flush to the side panel with the mallet or hammer
Pour concrete level with the top beveled edge of the form,
working concrete down under ties and anchor support to
remove all voids and air pockets. Finish surface with trowel or
broom as desired. Check that the anchor rods are square to
one another and perpendicular to the top surface.
Clean any excess concrete from the anchor bolts.
STEP
5
Insert the supplied anchor
rods into the required holes.
NOTE: The wider hole pattern is for stairs (with the anchor
support plate offset in the form) & the narrower hole pattern
for towers (anchor support plate centered).
The anchors should be flush to 1" from the bottom. Place a nut top & bottom of the
anchor support plate to hold the anchors in place, tightening securely
STEP
6
STEP
7You're ready to pour the foundation
NOTE: The 4 side rebar
should be placed 3” away
from the form sides.
3”
3”
3”
3”
Place the
anchor rods
into the
required holes.
Popular Construction Equipment manuals by other brands


Broderson
Broderson RT-400-A Operation and maintenance manual

Genesis
Genesis Versi Pro 07 Operator's manual

XCMG
XCMG XCT80 Operation manual

STEINEL PROFESSIONAL
STEINEL PROFESSIONAL HG 2120 E Translation of the original operating instructions

Kato
Kato PREMIUM CITYRANGE CR-200RF instruction manual

SafeWaze
SafeWaze FS-EX330-LERF instructions