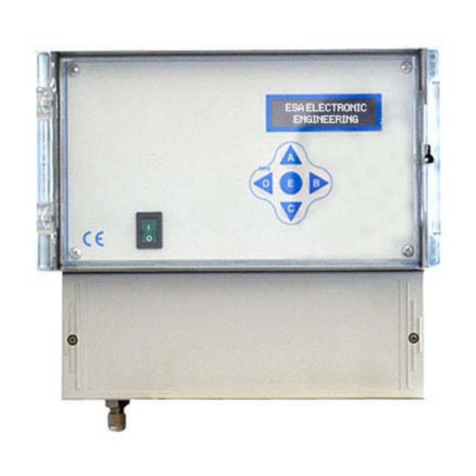
ESA CC-10 User manual

SCORE BOARD CONTROL CONSOLE
Model: CC-10
INSTRUCTION MANUAL
part of the game
esa.com.au Phone: 08 7225 7221

part of the game
esa.com.au 2
E
D
I
N
R
A
U
T
U
C
S
T
A
F
R
U
A
N
L
I
A
A
M
Instruction Manual for CC-10 Control Console
Index
CC-10 Control Console Overview 3
Basic Operations Common to this Manual 4
Score Board Game Timer 5
Score Board and Score Bench Indicators 6
Score Board Operation 7-8
Shot Clock Operation - 4 button console 9
Shot Clock Operation - 3 button console 10
Functions 11
Programming 12
Advanced Programming 13
Radio Controlled Scoreboards 14
Select Game Type 15
Netball and NBL Extra 16
X-Times 17
Siren Sound Set Up 18
Team Names 19
Player Number, Personal Fouls & Points 20-22
RTC, Display Brightness & Key Beep 23
Volleyball 24
Carnival Mode Set Up 25
Slave Carnival Mode 26
Local Carnival Mode 27
Master Carnival Mode 28
Carnival Mode Programming 29
Carnival Mode Programming Demos/Samples 30-32
Output Modes and Special Operations 33
Radio Scoreboard Accessories 34
License, Disclaimer and Warranty 37

!! Please look after your keyboard !!
Only use your finger tip Do NOT use a finger nail Do NOT use any object
CC-10 Control Console
Yellow buttons = Score/Team Fouls/Time Outs - A-Light Team
Orange buttons = Score/Team Fouls/Time Outs - B-Dark Team
Green buttons = Timer
Blue buttons = Other Functions
Red buttons = Functions
part of the game
esa.com.au 3

Entering a TWO digit number:
Press a number key 0 to 9. Each time a number is pressed the displayed numbers on the LCD display
will be shifted to the left. The number that is displayed at the time the ‘ENTER’ button is pressed is the
number used.
Keyboard numbers are displayed at the top left of the buttons.
Example:
To enter 15, press 1, 5, Enter. If you make a mistake just
keep typing until the correct number is shown, eg 162315
Press ENTER or use the ‘ERROR/Prev’ key to move back.
Escaping an incorrect operation:
In any Function or Program mode pressing the ‘NEW GAME/ESC’ button will abort
the current operation.
Settings are saved to memory:
All settings, timers, options etc, are saved in permanent memory (EPROM) and will remain there until
they are re-programmed.
‘Yes’ and ‘No’ buttons:
The ‘Yes’ and ‘No’ buttons are used frequently.
These serve as timer adjustment, ‘Up’ and ‘Down’, and also ‘A’ and ‘B’ selection.
Error:
When any of the (Scores, Team Fouls, Time Outs or Period) buttons are
pressed in error, press the ‘ERROR/-1' button to subtract from the
previously added to value.
ONCE for Function mode TWICE for Program Mode p
20:00
24
NewTime 20:00
Minutes > 15
Basic Operations Common To This Manual
From now, this instruction manual will refer to Function or Program buttons like this:
Function Mode f+ OR Programming Mode p+
Function and Program Modes:
This button is used to select Function - “f” or Program - “p” modes, ENTER or Next.
Different scoreboard modes, game types, and settings are adjustable via alternate keyboard functions.
f = Function Mode.
p = Program Mode.
Press this button to cycle through selection
of f or p.
f
20:00
24
( NOTE: This button will NOT operate
while the timer is running. )
part of the game
esa.com.au 4
- SEC
+ MIN
- SEC
+ MIN
ADJUST
A B
Yes No

Score Board Game Timer
Set Up Game Time:
Press the ‘FUNC’N/ENTER’ button once.
Press the ‘TIMER/RESET’ button.
Type in the game time required, (refer to pages 4 & 11 for further detail) then press ENTER.
NOTE: The timer can be set for minutes and seconds. (see below)
Start Timer: Press TIMER START.
Hold Time: Press TIMER HOLD.
Reset Timer: Press TIMER/RESET (once the timer is stopped). This will reset the timer to its original
setting “NewTime”.
Adjust Timer Minutes: If a timer adjustment is required then press the ADJUST +MIN or -MIN (refer to
above figure or page 11) to add or subtract one minute from the game time.
Adjust Timer Seconds: Press the ‘FUNC’N/ENTER’ button once then press the ADJUST +SEC or -SEC
button to add or subtract one second from the game time. When done press ESC.
When the time = 00:00 more time can be placed by pressing the ADJUST buttons. eg. press the +MIN
twice to add two minutes, then press the ‘START’ button to count down this time to zero. (e.g. during a
break in the game).
Continuously Repeating Timer: The timer can be set up to time in MINUTES and SECONDS and to
continuously repeat itself. Enter program mode for the timer,
set the required minutes and seconds and then enable the repeating timer by pressing ‘Yes’.
When the repeating timer is enabled - the letter “r”
will be placed in front of the remaining time on the LCD screen.
When the repeating timer is enabled, the ‘NEW GAME’ button is also
accessible while the timer is running to allow for the next game without
stopping or resetting the timer.
p+
0 0 0 r 08:30
0 0 0
Repeating timer
is enabled
part of the game
esa.com.au 5

Team Fouls Indicators:
The score bench has two Team Fouls indicators, one for each team. This illuminates
when the button is pressed one before the maximum number of team fouls. (e.g. the set
maximum number for team fouls is 5, the team has just taken it’s 4th team foul, the
button is pressed for that team and 4 is displayed on the scoreboard. When the ball
goes back into play the TEAM FOULS button for that team is pressed again, this turns
ON the indicator). This is also displayed on the LCD next to the TEAM FOULS digit.
Possession Arrow:
The score bench has Possession Arrows, one for each team, When the
Possession button is pressed the corresponding team’s arrow is
illuminated. Pressing the opposite side button will turn this arrow OFF and
turn the other possession arrow ON. Pressing the same button twice will
turn both arrows OFF. This is also displayed on the LCD.
Time Out Request Arrows:
The scoreboard and score bench have Time Out Request arrows, one for each team.
When the TIME OUTS button is pressed once, the arrow for that team is illuminated to
indicate a time out has been requested. When the button is pressed a second time, the
arrow is turned off, 1 is added (or subtracted) and the time out value displayed on the
scoreboard. This is also displayed on the LCD next to the TIME OUTS digit.
GP Indicators:
The scoreboard and score bench has two general purpose indicators (dots), one for
Team A and one for Team B. When the INDICATOR/On/Off button is pressed the dot
will be illuminated for the corresponding team. Pressing the button again will turn it Off.
This is also displayed on the control console LCD screen.
Team Fouls
Indicators
Time Out
Request
Indicator
General Purpose
(Sub’s, Injury)
Indicators
Possession
Arrow
Indicator
Score Board and Score Bench Indicators
part of the game
esa.com.au 6

Score Board Operation
Scores, Team Fouls, Time Outs
Team Foul
Indicator = ON
56 4 2 12:30
22 2 1
*T/O SUB F
Score bench indicators
Add to Scores:
Press the SCORE/+1 button for Team A or Team B to add 1 to the score.
Add to Team Fouls:
Press the TEAM FOULS/+1 button for either team to
add 1 to team fouls.
The score bench has an indicator for each team’s fouls (refer to page 6).
If this feature is not required set the maximum number of team fouls greater than the maximum that will
be used (e.g. 9).
Time Outs - Add to, Subtract from:
Press the TIME OUTS button, a Time Out Request arrow will display (flashing on the LCD screen) first.
This will also turn the Time Out Request arrow on both the score board and the score bench on.
By pressing the same button again after the time out, the Time Out Request will turn off, 1 will be added
(or subtracted) and the time out value displayed on the scoreboard.
Note: The time outs can be programmed to count UP (time outs taken) or DOWN (time outs left). Refer to
page 11 - Functions.
10 2 2 12:30<
12 3 1
Time outs “request”
indicators ON
part of the game
esa.com.au 7

f+
Error:
When any of the (Scores, Team Fouls, Time Outs or Period) buttons
are pressed in error, press ‘ERROR -1' button to subtract from the
previously added to value.
Reset:
Only accessible with the timer stopped (HOLD).
Team Fouls: Press ‘RESET FOULS T/OUTS’ button once to reset.
Time Outs: Press ‘RESET FOULS T/OUT’ button again.
New Game: Press ‘RESET NEW GAME’ button. This will reset the
timer, timeouts, team fouls and scores.
Period:
Press the ‘+1 P’ button to add 1 to the period value.
Indicator (Subs):
Turns ON/OFF the general purpose indicator (sub’s or injury, pass etc.).
Possession:
Pressing a possession indicator button will turn
on the bench possession arrow and display on
the LCD.
Pressing the opposite side button will reverse the possession indicator.
Pressing the same button twice will turn the indicator OFF.
Press f + to change the direction of the scoreboard possession
arrow indicator panel. This will allow the score bench panel to match up
in the event the scoreboard is behind or in front of the score bench.
Score Board Operation
Reset, Period, Error, Indicator, Possession, Siren
POSSESSION T/OSUBF
Score bench indicators
10 2 2 12:30
12 3 1
Siren:
Press the button to activate the siren. The siren will sound while the button is held.
The sound of the siren is programmable (refer to page 18 - Sirens).
To manually sound the “End Of Game” siren press f +
part of the game
esa.com.au 8

Basic Operation
NOTE: The Shot Clock displays will remain blank until the Shot Clock Control Console is plugged in, and
the RESET button is pressed.
Start: Press the START button.
Stop: Press the STOP button.
Alt Reset (14 seconds): Press the ALT RESET button.
Reset (24 seconds): Press RESET.
When a shot is in progress, press and hold down the RESET button. This will blank the Shot Clock
displays and will reset the timer to the Shot Time - 24 seconds. When the RESET button is released the
Shot Clocks will start counting down from the Shot Time.
When an Alt Shot Time is required, press and hold down the ALT RESET button. This will blank the Shot
Clock displays and will reset the timer to the Alt Shot Time - 14 seconds. When the ALT RESET button is
released the Shot Clocks will start counting down from the Alt Shot Time. (Set-up described below).
Shot Time Adjustment:
Hold the STOP button and press the START (+1 second), or the RESET button (-1 second).
Automatic Blanking:
Once the Game Clock is below the set time (default 24 seconds), pressing the RESET button will clear
the Shot Clock display. NOTE: the START and STOP buttons will still operate normally.
Siren and Backboard Lighting:
If the Shot Clock timer counts down to 0, the siren will sound. Where the backboard lighting system is
fitted and enabled, the End Of Game dots (within Shot Clock displays) and lighting strips will flash.
Non-Standard Shot Clock Time:
To program the Shot Clock for a value other than the default 24 seconds press f + on the Control
Console, then type in a two digit number and press ENTER. This new Shot Clock time will remain until it
is programmed to another time. Continue the set-up described below.
Advanced Shot Clock Operation:
New FIBA rules call for an alternate reset time (default 14 seconds). Because this Control Console is
used for games other than Basketball the options are programmable. If this feature is required it must be
enabled. Press f + (as above).
< Enter the value of the main shot time (default 24
seconds) and press ENTER.
> Y will cause the Game Clock to stop if the Shot Clock
timer counts down to 0.
< Y will cause the Shot Clock timer to stop if the Game
Clock is stopped.
> Y will cause the back board lighting system & EOG
dots to flash if the shot timer counts down to 0.
< Y will enable the Alternate Reset Shot Clock timer.
> Enter the Alternate Shot Clock time in seconds and
press ENTER.
< Y will ensure the 4 button Shot Clock Timer operates
correctly (N enables the RESET button double press).
Shot Clock Operation
New Shot Time
Seconds ? g24>
Stop game timer
when SC=00 Y/N
Stop SC when
Timer STOP Y/N
Enable BB Lights
when SC=00 Y/N
Enable Alt
Shot timer Y/N
Alt Shot Time
Seconds ? g14>
part of the game
esa.com.au 9
4 Button Shot
Clock Timer Y/N
START
STOP
TIME OUTS
START
STOP
TIME OUTS

Shot Clock Operation - 3 button console
part of the game
esa.com.au 10
Normal Operation
Start: Press the START button.
Stop: Press the STOP button.
Reset (24 seconds): Press the RESET button.
When a shot is in progress, press and hold down the RESET button. This will blank the Shot Clock
displays and will reset the timer to the Shot Time - 24 seconds. When the RESET button is released the
Shot Clocks will start counting down from the Shot Time.
To adjust the Shot Clock time, the Shot Clock timer must be stopped. Press and hold the STOP button,
then press START to +1 second or RESET to -1 second.
Advanced Alternate Reset
Where the Control Console is already enabled for Alternate Reset (refer to set-up on page 9):
If the Shot Clock is stopped and the RESET button pressed, the Shot Clock timer will reset to 24
seconds.
Pressing the RESET button a second time will reset the Shot Clock timer back to the alternate time.
Pressing the RESET button twice more will toggle the time back to 24 seconds.
To reset the alternate time when the Shot Clock timer is running, hold down the RESET button, then
press and release the START button. When the RESET button is released the Shot Clock will resume its
countdown from 14 seconds.
The Shot Clock timer can always be seen on the control console screen.
20:00
14
S/C

Functions (‘f’)
part of the game
esa.com.au 11
Use the ‘FUNC’N/ENTER’ button similar to how “Caps Lock” is utilised on a normal
keyboard. This allows a greater range of functions/options to be available with keys on
the keypad, adding another “layer of functionality”.
To enter Function mode press the ‘FUNC’N’ button once,
the letter “f” will be displayed on the LCD screen.
Press the ‘ESC’ button at any time to abort changes and return
to the previous display.
Functions Available
TIMER setting. Enter a 2 digit number for “NewTime” in minutes. Press ENTER. This time
is saved to EPROM and will remain as the game timer until this function is changed.
The timer can be adjusted up or down by one second.
When the time has been adjusted press the ESC key to exit function mode.
When scoreboards are fitted with alpha-numeric team names, ‘SCORE A +1'
will enable a programmed team name for Team A to be selected and placed
on the score board. ‘SCORE B + 1' for Team B. Use the ADJUST buttons to
scroll to the team name’s number, and press ENTER to set the display (refer
to page 19 - Team Names).
Select CARNIVAL functions. Use the ADJUST buttons to turn on or off. Once a decision
is made the system will then go to AUTO DETECT, then to SLAVE then to MASTER.
(refer to page 25 - Carnival Control).
(enabling Carnival Mode refer to page 13 - Advanced Programming).
Select Game Type, e.g. Basketball, Netball, etc. (refer to page 15).
Set the maximum number of Team Fouls (1 - 9). This will enable the Team Fouls score
bench indicator to operate.
Set Time Outs to count Up or Down. The maximum number of time outs is hard set to 3.
Select an auxiliary timer to be displayed (1-9 options). Press START to run the timer and
it will automatically clear when finished. (refer to page 17 - X-Times).
Sound the End Of Game SIREN.
Set the SHOT CLOCK time and other Shot Clock options. (refer to page 9)
The ESA, IA-CC10, LGE or LEDtronix logos are a “secret” button.
1:- Set a Real Time Clock on a scoreboard, (when fitted).
2:- Set the Brightness level on a scoreboard, (when fitted).
3:- Set Keyboard Beeper Duration (0-9). 0 = off, 9 = max duration.
CC-10
ESA
+1
GHI
3
1
+
-
JKL
4
FUNC’N
ENTER
PROG’M
Next
RESET
ABC
0
TIMER
SIREN
+1
STU
7
TEAM
FOULS
+1
VWX
8
TIME
OUTS
START
STOP
TIME OUTS
ESC
NEW GAME
X-TIME
+1 P
- SEC
+ MIN
- SEC
+ MIN
ADJUST
A B
Yes No
SCORE
+1
PQR
6+1
DEF
2
A B
f
20:00
24
Model IA-CC10

part of the game
esa.com.au 12
Programming (‘p’)
Using programming mode adds another extra “layer of functionality”.
To enter Programming mode press the ‘PROG’M/FUNC’N/ENTER’
button twice.
The letter “p” will be displayed on the LCD screen.
Press the ESC button at any time to abort changes and return
to the previous display.
Programming Steps Available
When score boards are fitted with alpha-numeric team names, button 2 will enable a
team name to be programmed into the control console. A maximum of 36 team names
can be entered.
Button 6 will allow set up of option for team names to be displayed when power on or
reset. (refer to page 19 - Team Names).
Button 3 is used to program a Carnival run-time sequence. (refer to page 26 - Carnival
Control).
Set up X-Times. (refer to page 17 - X-Times).
Siren set up. Test Sirens. Program End Of Game (E.O.G.) type, End of Shot Clock siren
type, End of X-Time siren type, Push Button siren type, adjust high (H) & low (L) tone and
volume.
To enable a continuously repeating timer and/or a timer with minutes and seconds.
When the repeating timer is enabled the letter “r” is placed in front of
the remaining time on the screen.
p
20:00
FUNC’N
ENTER
PROG’M
Next
ESC
NEW GAME
+1
DEF
2
B
+1
GHI
3
+1
PQR
6
A
X-TIME
+1 P
SIREN
RESET
ABC
0
TIMER

part of the game
esa.com.au 13
Advanced Programming
Programming - Advanced
The ESA, IA-CC10, LGE or LEDtronix logo is also a button. In Programming mode this
button selects the Advanced Programming mode.
The display will show “Special Set Up Pin”. The pin number is “1951".
To step through each programmable option press Yes or No.
When entering/editing data in this mode, you can press the ESC button twice to exit when
you have finished your set up. Changes will be saved. It is advisable however to scroll
through all options selecting the Yes/No buttons to ensure you have all options covered.
Advanced Programmable Options - Options cycle through sequence 1 to 7
1: Restore defaults Erase All? YES/NO.
Sets all functions, options and X-Times back to factory settings.
CAUTION! This will also erase all team names and all Carnival settings.
2: Set/Change Radio Channel YES/NO.
Press Yes and the system will look for a radio and return its channel number. Use the
Yes/No (Up/Down) buttons to select the required channel. Press ENTER to select the
channel, or ESC to abort. Refer to page 14 - Radio Controlled Score Boards for more
details on this option.
3: Select available game types.
Press Yes or No to allow each game type available to be selected. The game types
available will scroll on selection of Yes or No to the next game type (Basketball, Netball,
Rugby, Soccer, NBL Extra, PfPp, Water Polo, Indoor Cricket, Football). Game types
chosen can then be selected from the F4 option (refer to page 15 - Select Game Type).
4: Set various options for output modes and special operations.
CAUTION! This will drastically affect the operation of this Control Console.
Operations include TV Out, Team Name Pin, Radio Out, Volley 2, Split Mode, PEHC2
Compatible, Pwr ON Dis./Opt. 7, and Baud=9600. All options and outputs are detailed on
page 33 - Options.
5: Enable Carnival Mode.
If Carnival mode is enabled the F3 and P3 buttons are enabled.
6: Rebuild Carnival demo. YES/NO.
Replaces sequence no 7, 8 and 9 with the documented DEMO sequence.
7: Number of Characters for Team Names.
Different models of scoreboards have the ability to display various numbers of characters
for team names, depending on the scoreboard model. The default is 12.
FUNC’N
ENTER
PROG’M
Next
CC-10
ESA
Model IA-CC10

part of the game
esa.com.au 14
Radio Controlled Scoreboards
When wireless console is required, the scoreboard and the CC-10 Control Console are fitted
with a 2.4GHz (IEEE 802.15.4 standard) radio transceiver. Each scoreboard operating
separately in the system MUST be set to a different frequency (channel number). The score
boards are factory set to channel “17” if there is only one supplied. For stadiums with several
courts the scoreboards are set to a two channel separation. Eg C, E, 10, 12, etc. Each
scoreboard in the system is then labeled with its channel number. The CC-10’s channel must
match the score board it is to operate.
The channels available are 0C, 0D, 0E, 0F, 10, 11, 12, 13, 14, 15, 16, and 17. The channel
number can be changed in CC-10s, but the channel number on a particular scoreboard is set
and unmodifiable (technical assistance required).
Changing Channels:
Enter Programming Mode (refer to page 12 - Advanced Programming). Set/Change Radio
Channel Yes/No to ‘Y’. The CC-10 then tries to find a radio, and either returns “RADIO NOT
FOUND” or “RadioCh = 0x “. x = the current set channel.
Press the ADJUST Up or Down buttons (Up A Yes) (Down B No) to scroll through the available
channels.
Press the ENTER button to write the new channel to the radio module in the CC-10.
When the new channel is written it is then read back and verified to the channel selected.
A message is displayed: “Error in Radio” or “Channel Change OK”
The next programming function is then asked for, to discontinue in programming mode press
ESC button twice. Changes will be saved.
Radio Controlled Scoreboards - Standby Mode
A scoreboard fitted with radio control as standard (this usually does not apply to retro-fit
scoreboards) will have a single dim flashing colon lamp to indicate the scoreboard has main
power connected and is waiting to be switched on by a controller (CC-10 or RC-24).
When the scoreboard is switched on, the lamp will trigger to operating brightness and the
scoreboard will start up. The game timer and scores will display under normal operating
conditions and settings. The scoreboard will display the data transmitted from the controller.
When the scoreboard is switched off it will return to standby mode.

part of the game
esa.com.au 15
Select Game Type
Selecting a Game Type
Press FUNC’N/ENTER once to enter the Function mode.
Press the number 4 button to enter the set game mode.
Press the ‘No’ button to scroll through the available game types.
Press the ‘Yes’ button to select the game type.
NOTE: The games available on this menu are enabled or disabled using the Advanced
Programming mode. (refer to page 13)
Game Type Specific Settings
Basketball:
During last 60 seconds of the remaining time the time display changes from displaying
minutes and seconds, to displaying seconds and 1/10 second.
Netball:
Programmable option for the last 1 minute of remaining game time, and the control of the
siren at End Of Game (EOG).
Rugby:
The timer displays minutes and seconds remaining to the end of the game.
Soccer:
Not intended for Futsal games. Use Basketball or Netball game type for Futsal.
The time display will show a real-time clock (when fitted). The timer on the control
console screen remains active and can be used independently if required.
NBL - Extra:
Several CC-10 control consoles can be connected together if required to form a multi-
person score bench to meet the requirements of FIBA or NBL. NOTE: In this mode all
timer functions on the CC-10s are disabled.
Pf / Pp:
The CC-10 control console is used for PRO Series scoreboards with additional panels
installed to enter player numbers, personal fouls and personal points.
Water Polo, Indoor Cricket, Football, Tennis:
Separate manual for these sports.
Volleyball:
Volleyball can be played using the standard scoreboard. Score = SCORES, Team Fouls =
SETS, Time Out = TIME OUT. The timer counts up or down. The time outs timer is
displayed on the main clock. There is a 3 minute timer activated when NEW GAME is
pressed.
FUNC’N
ENTER
PROG’M
Next 1
+
-
JKL
4
- SEC
+ MIN
B
No
- SEC
+ MIN
A
Yes
Set Game = ?
Basketball Y/N

Netball Options
Stop Clock at 1:00 ? Y/N
If Yes, the clock will stop as soon as it counts down to 1:00 minute remaining. Since the
clock is stopped there will be no siren and the display will show 1:00.
Clear Clock at 1:00 ? Y/N
If Yes, then at 1:00 the display will go blank and the clock will keep running. The siren will
or will not sound depending on the siren setting.
Sound siren at 0:00 ? Y/N
If Yes, the siren will sound when the clock reaches 0:00, regardless of the previous
setting.
NBL Mode
When required by FIBA or NBL regulations, 3 CC-10 Control Consoles can be connected
together to become a multi-person score bench.
Regulation layout for a 6 person score bench.
Using the supplied cable (CCC-NBL-x cable) connect the CC-10s as follows:
1. CC-10 is the ‘Master’ console and is programmed in standard ‘Basketball’ game.
2 & 3. CC-10s are the ‘Extra’ consoles and are programmed to ‘NBL Extra’ game type.
4. Is the Shot Clock controller and plugs into the Master console.
See instructions for programming on page 12 & 13. (NBL Extra game type enabled and function
selected).
Connection of CC-10 and Shot Clock
The CC-10s MUST be connected as
shown below with the supplied cable.
part of the game
esa.com.au 16
Netball and NBL Extra
Master
Time Keeper
Set to
Basketball
Chairperson
Set to NBL
Extra
Visual Scorer
Set to NBL
Extra
Shot Clock
Operator
To wall or bench socket (score board)
21 34
Time Keeper Chairperson
(Time Outs,
Subs, etc)
Paper Scorer Visual Scorer Additional
Scorer
Shot Clock
Operator
To Score Boards
23
41

part of the game
esa.com.au 17
X-Times
There are 9 Programmable timers. Each of these 9 timers can be set to time from a maximum of 99 minutes
and 99 seconds (99:99), to a minimum time of zero minutes and 1 second. (00:01).
X-Times can be used for two purposes:
1. In normal scoreboard mode (no Carnival Modes set), the timers can be used for any timing
requirement. e.g. Injury timing, 1/4 and 1/2 time breaks, lunch break.
When one of these timers is used, the remaining time is displayed on the control console and
the scoreboard. The Game Time on the scoreboard will be replaced with the X-Time timer and
the colon between minutes and seconds will be changed to an upper dot to indicate the different
type of time being displayed.
When the X-Time timer is finished or the ‘ESC’ button is pressed, the remaining Game Time will
be re-displayed on the scoreboard and the control console screen reverts to its previous display
mode.
2. These timers are used in the “LOCAL” and “MASTER” Carnival timing modes. When used in
“LOCAL” mode the X-Times that are programmed in the control console that is operating the
scoreboard will contain the timers used.
When used in the “MASTER” control console, the “SLAVE” X-Times are NOT altered in any
way. All timers are sent as data from the “MASTER” Control Console.
Program X-Times
Press twice then press
If the time displayed for this timer is correct then press ‘Next’ to display Seconds for this timer. If
the time is to be changed, then type in the new time, and then press ‘Next’.
NOTE. When the ‘Next’ button is pressed the timer value is saved to EPROM memory.
Press the ‘ESC’ button at any time to exit from this function.
Display and use X-Times
Press the X-Time button repeatedly until the desire time is displayed, then press the
‘TIMER START’ button.
The X-Time timer can be put on HOLD and restarted as often as
necessary.
Press the ‘ESC’ button at any time to exit this timer function.
When the auxiliary time is completed the Game Time will be automatically re-displayed on the
scoreboard, and the control console will revert to its previous state.
X-TIME
+1 P
FUNC’N
ENTER
PROG’M
Next
Aux Time 1 20:00
Minutes ? > 01
Aux Time 4 20:00
04:00 f
ESC
NEW GAME
START HOLD
TIMER
X-TIME
+1 P
f+

part of the game
esa.com.au 18
Siren Sound Set Up
Siren sequences are produced from a two-tone sound generator with a high tone and a low tone. Some
scoreboards have a fixed tone pitch for each low and high tone sound. The latest models have a variable
sound card which means the pitch of the low and high tones can be adjusted using the CC-10 Control
Console. The siren volume is also adjustable.
In either case there are 9 pre-programmed sequences available to use. (See chart below)
The End Of Game siren and the End Of Shot Clock siren has a programmable duration up to 9.9 seconds.
Any of the 9 sequences can be used for either siren purpose.
The X-Timer siren is fixed at 2 seconds.
When the siren sequences are used in a Carnival sequence, either from the Master or Local control mode,
the siren duration is fixed at 2 seconds.
Each step is 1/10 of a second. Total siren time is 2 seconds.
Set Up Siren
Enter Programming mode. Press twice then press
Listen to each siren sequence by
pressing a button from 0 to 9.
When you have selected a siren sequence press ESC to exit, or the ‘FUNC’N/ENTER’ button for
the next option. (See below for the options sequence)
1. Set End Of Game siren type (0-9). Press ESC to exit, or ENTER for the next option.
2. Set the End Of Game siren duration. NOTE: This value is in 1/10s of a second. If durations
greater than 2 seconds (20) are set the sequence will begin again. Press ESC to exit, or ENTER
for the next option.
3. Set the End Of Shot Clock siren sequence (0-9). When/if the shot clock timer counts down to 00
seconds, this siren will sound. Press ESC to exit, or ENTER for the next option.
4. Set the End Of Shot Clock siren duration. Press ESC to exit, or ENTER for the next option.
5. Set the X-Time End siren sequence. Press ESC to exit, or ENTER for the next option.
6. Set the siren sequence that will sound when the ‘SIREN’ button is pressed. Press ESC to exit, or
the red ENTER for the next option.
7. Set the pitch for the low and high tones. Use the Yes/No (Up/Down) buttons. Press ESC to exit,
or ENTER for the next option.
8. Set the siren volume. Use the Yes/No (Up/Down) buttons to adjust. Press ENTER or ESC to
complete set-up.
Siren No 1 2 3 4 5 6 7 8 9 10 11 12 13 14 15 16 17 18 19 20
0H L H L H L H L H L H L H L H L H L H L
1LLLLLLLLLLLLLLLLLLLL
2H H H H H H H H H H H H H H H H H H H H
3H H H H H L L L L L H H H H H L L L L L
4H H H H H H H H H H
5H H H H L L L L L
6H H L L H H L L H H L L H H L L H H L L
7H H H H L L L L H H H H
8H L H L H
9H H L L H H L L H H
SIREN
FUNC’N
ENTER
PROG’M
Next

part of the game
esa.com.au 19
Team Names
Enter a New Team Name
Press twice then press
(Optional PIN number may be required here. See page 33 and page 13).
NOTE: At this stage Team Names are not allocated to Team A or B.
Press the ‘No’ button to scroll through the list of team names. When a blank line appears between
the “ “ a name can be entered here. Press ENTER and the letter ‘A’ will appear with the cursor
underneath it. Use the ‘Up/Down’ buttons to scroll through the alphabet. Alternately press the
required letter on the keyboard. Press ENTER to enter a character and the cursor will move to the
next space. Continue until all characters are entered.
When all characters are entered continue pressing the ENTER button so the cursor moves off the
end of the line. This will save the Team Name into memory. The control console screen will return
to the previous screen.
DO NOT leave spaces in front of the first character. The scoreboard will automatically centre the
team name in the alpha-numeric panel.
Edit or Remove a Team Name
Repeat the process above to enter the Team Name screen.
Press the ‘Down’ button to scroll through the list of team names. When a Team Name to edit or
remove appears press the ‘ENTER’ button. The cursor will underline the first character.
The character with the cursor underlining it can now be changed. Use the ‘Up/Down’ buttons to
scroll through the alphabet. Alternately press the required letter on the keyboard. Press ENTER to
enter a character or move to the next character or the ‘Error/Prev’ button to move to the previous
character. Additional punctuation characters and numbers are available by
pressing the ‘Down’ button. Continue until all characters are entered.
To remove a team name simply type over it with a new name or fill it with spaces.
Display a Team Name on the Scoreboard
For Team A
For Team B
Press ‘Up/Down’ buttons to scroll through the team names.
When the required team name is displayed on screen press ENTER to transmit the team name to
the scoreboard.
New Game Team Names Displayed
When the score board is switched on or the ‘NEW GAME’ button is pressed the default team
names can be place on the scoreboard. The first two locations in the memory file are used for the
two team names. The factory settings are “A LIGHT” and “B DARK”. The first name is always for
Team A and the second name is always for Team B.
Select using ‘Yes/No’ buttons. ‘Yes’ will enable this feature. ‘No’ will leave blank Team Names
display at power on, and the NEW GAME button will not change the set display.
FUNC’N
ENTER
PROG’M
Next
+1
DEF
2
B
U/D-FindNameEnter
“ “
+1
DEF
2
f+
+1
PQR
6
f+
U/D-FindNamEnter
01“_ “
New-Game Team-
Name Default Y/N
+1
PQR
6
P+

part of the game
esa.com.au 20
Player Numbers, Personal Fouls & Points
Enable Pf / Pp Game Mode
See instructions for programming on page 13.
(Pf / Pp game type must be enabled in Advanced Programming).
Pf / Pp game type is function selected (f + ).
The control console will re-boot and the game mode for
Pf / Pp starts with the banner >
..continued on next page
Enable Game >F4
Pf / Pp Y/N
Personal
Fouls and Points
Set Game = ?
Pf / Pp Y/N
1
+
-
JKL
4
Table of contents
Other ESA Control Unit manuals
Popular Control Unit manuals by other brands

Broadcom
Broadcom BRCM1033 quick start guide

BTR
BTR BCR - 2 A Installation and commissioning instructions

A-T Controls
A-T Controls Triac D9 Series Installation & maintenance manual

Bosch
Bosch API-AMC2-4WE installation manual

Emerson
Emerson Fisher N201 Series instruction manual

VAT
VAT 162 Series Installation, operating, & maintenance instructions