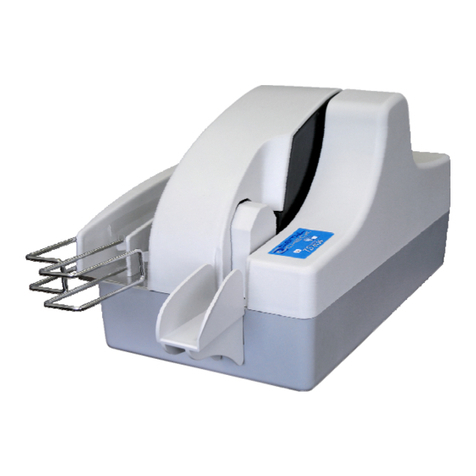
ES&S 100 User manual

Model 100
v5.2.0
Pre-Election Day Checklist
Checking Supplies and the Equipment
1.
2.
3.
4.
1 paper spool per scanner per election
1 PCMCIA card with election definition
Sufficient number of BIC medium point black pens for voters at each
polling location
2 pressurized cans of air
Copyright 2004 by Election Systems & Software, Inc. Model 100 Pre-Election Day Checklist
All rights reserved.
1

Copyright 2004 by Election Systems & Software, Inc. Model 100 Pre-Election Day Checklist
All rights reserved.
2
5.
6.
7.
8.
9.
10.
11.
12.
13.
1 clean cotton cloth
1 bottle of Isopropyl rubbing alcohol
1 ballot box per scanner
1 set of scanner keys
1 power cord
1 set of ballot box keys
Extension cord if required
1 flashlight
1 feather duster
Assembling and Cleaning the Plastic Ballot Box (If you are
using a metal ballot box, skip to Step 29.)
14.
15.
16.
17.
18.
19.
Unlock cover of the ballot box with the key provided (one key fits all
locks).
Remove the cover by lifting it straight up and off the box and set the
cover aside.
Locate the divider (a flat piece of plastic with a cutout handle), remove it
and set it aside.
Swing the hinged handles up from inside the ballot box. Pull the
handles until the top section of the box separates from the bottom
section. Set the top section aside.
Using a cleaning solution and damp cloth, clean the dust and debris off
the ballot box.
Clean the inside of the bin first and then the outside.

Copyright 2004 by Election Systems & Software, Inc. Model 100 Pre-Election Day Checklist
All rights reserved.
3
20.
21.
22.
23.
24.
25.
26.
27.
28.
Wipe down the interior ballot divider and the ballot cover.
On the top section, clean the recessed area that holds the scanner.
Clean dust and debris from the inside of the ballot box.
Align the edges of the divider with the vertical grooves on the inside of
the bottom section of the box. Push the divider down until the bottom tab
in the center of the divider fits into the center slot at the bottom of the
box.
Turn the top section of the box upside down so that the handles hang
down.
Position the top section of the box over the bottom section making sure
that the indentations on the front of box sections face the same direction.
Lower the top section until it fits inside the bottom. The handles should
fit inside the bottom section when the top is lowered.
Lock the two locks located on the front and the back of the box.
Slide the latch on the top section through the hole in the side of the
bottom section of the box.
Cleaning the Scanner and the Metal Ballot Box
29.
30.
31.
32.
Remove the scanner, scanner keys, and power cord from the carrying
case.
Clean the ballot entrance and exit slots with a can of pressurized, clean,
dry air. Aim the air spray tube into the ballot entrance and exit slots and
blow out all the debris. Using a flashlight, inspect the slots for remaining
debris and repeat the procedure if necessary.
Clean the scanner from top to bottom with a clean cloth slightly
dampened with either isopropyl (rubbing) alcohol or a mild solution of
water and soap.
Clean the LCD menu display window with the damp cloth being careful
not to scratch the display panel.

Copyright 2004 by Election Systems & Software, Inc. Model 100 Pre-Election Day Checklist
All rights reserved.
4
33.
34.
35.
36.
37.
Clean the area around the four control buttons and the buttons
themselves.
Clean the outer casing of the scanner.
Wipe all traces of the cleaning solution after cleaning.
Wipe dust and debris out of both of the ballot box’s bins.
Using a feather duster, remove any dust or debris from the diverter
assembly. BE CAREFUL NOT TO DAMAGE ANY OF THE PARTS
OF THE DIVERTER ASSEMBLY.
Mounting the Scanner In the Metal Ballot Box
38.
39.
Inspect the power cord for damage. If the cord is damaged, discard it and
contact ES&S for a new cord.
Insert the female end of the cord through the opening on the left side of
the ballot box.

Copyright 2004 by Election Systems & Software, Inc. Model 100 Pre-Election Day Checklist
All rights reserved.
5
40.
41.
42.
43.
Thread the cord through the opening on the back of the ballot box
until it appears through the slot at the back of the top recessed
area.
Pull the cord until it extends a few inches into the recessed
opening.
Unlock and open the Counter Access panel. Place the scanner
about 1/3 of the way into the recessed area and slide it on the
mounting rails until it is four to five inches from the back of the
recessed area.
Plug the female end of the power cord into the Power Entry
Module on the back of the scanner.
WARNING: Only plug the scanner into a grounded, three-
pronged electrical outlet. Plug only one scanner into an
outlet. ES&S recommends that you do not use an extension
cord.
44.
45.
46.
Lift the metal tab which covers the ballot box’s ballot entrance
slot (located in the back of the box’s recessed area and marked
with “LIFT TO OPERATE”) so that that the slot is exposed.
Slide the scanner until it is against the back of the ballot box
ensuring that the diverter connector at the back of the scanner
slides into its mate on the ballot box. Leave the Counter Access
Panel (located on the front of the scanner) in the down
position.
Plug the male end of the cord into a wall outlet. NOTE: If the
cord is plugged in incorrectly, the message, “NO-AC” will
appear when you turn on the scanner.

Changing the Paper in the Scanner’s Internal Printer
NOTE: ES&S recommends that you change the paper on
each scanner before every election.
47. Open the Key Access Panel by pressing the ridge tab located on the
top left side of the scanner.
Paper Manual Advance knob
Carriage release Lever
48.
49.
50.
51.
52.
To access the internal printer, slightly press in and pull up on the
ridged tab located on the printer cover just below the key switch.
Set the cover aside.
Tear off any paper that is in the printer assembly and remove
from the printer area.
Lift the carriage release lever to the UP position. The lever is
located next to the paper manual advance knob to the right of
the printer.
Make note of the orientation of the paper on the roll. Paper should
come off the roll from the bottom. Remove the paper roller bar from
the paper roller by pressing out on the silver mounting brackets on
each side of the paper roll and lifting the roll out of the unit.
Place the white plastic paper spool into the new paper roll.
Copyright 2004 by Election Systems & Software, Inc. Model 100 Pre-Election Day Checklist
All rights reserved.
6

Copyright 2004 by Election Systems & Software, Inc. Model 100 Pre-Election Day Checklist
All rights reserved.
7
53.
54.
55.
56.
57.
58.
59.
60.
Making note of the orientation of the paper as it comes off the roll,
(From the bottom of the roll) insert the new roll into the mounting
brackets on the printer.
Unroll approximately 6” of paper from the new paper roll.
Place the carriage release lever to its DOWN position.
Feed the end of the paper into the printer assembly while slowly turning
the manual feed knob until approximately 1” of paper appears.
Lift the carriage release lever to its UP position and pull approximately
6” of paper through the printer assembly. Ensure the paper is centered in
the assembly.
Place the carriage release in its DOWN position.
Feed the paper through the slot on the printer cover.
Replace the printer cover snapping it into place.
Loading the Election Definition
61.
62.
Open the door on the front of the scanner to access the two PCMCIA
card slots.
Insert the card containing the election definition in either slot. An arrow
on the card indicates the proper horizontal orientation for inserting the
card. The eject button next to the slot will stick out when the card is
properly installed. If one slot does not accept the card, try the other.

Copyright 2004 by Election Systems & Software, Inc. Model 100 Pre-Election Day Checklist
All rights reserved.
8
63.
64.
Insert the scanner key and turn it to the OPEN/CLOSE POLL position.
It will take approximately two minutes for the scanner to load the
election definition from the card into its operating system. The scanner
will display “S-MODE” in the upper left corner of the LCD screen and
the message “ELECTION CARD INSERTED, OPEN POLLS
NOW?” DO NOT PRESS YES TO OPEN THE POLLS AT THIS
TIME.
Review the Initial State Report for accuracy. The scanner automatically
prints this report after it completes system initialization. Ensure the date
and time are set correctly (this is the current date and time). Ensure the
election information is correct (jurisdiction name, polling place, number
of precincts, etc.)

Checking the Scanner’s Battery
WARNING: Only a qualified ES&S technician should change a
scanner’s battery.
65.
66.
67.
68.
69.
70.
Press the first and third buttons from the left at the same time to access
the DIAGNOSTIC –TEST menu.
Press DIAGS.
Press MORE DIAGS.
Press BATTERY STATUS. If the screen displays FULL, then the
scanner’s battery is fully charged. The battery requires charging if the
screen displays BULK or TAPER.
NOTE: If the scanner flashes the message, “NO-AC” in the upper
right corner of the menu display after you turn on the scanner, the
AC power is not connected and the scanner is running on battery
power.
Plug the scanner into an outlet and turn the scanner for at least 12 hours
to charge the battery.
Press PREVIOUS MENU three times to return to the DIAGNOTSIC
TEST menu.
Setting the Date and Time
71.
72.
73.
PressSYSTEM SETTINGS to access the SYSTEM SETTINGS
menu.
Press DATE TIME.
Press SET DATE or SET TIME, whichever must be changed.
Copyright 2004 by Election Systems & Software, Inc. Model 100 Pre-Election Day Checklist
All rights reserved.
9

Copyright 2004 by Election Systems & Software, Inc. Model 100 Pre-Election Day Checklist
All rights reserved.
10
74.
75.
Adjust the date or time, by pressing the SELECT button to move through
the number positions and press PLUS or MINUS to increase or decrease
the values.
Press PREVIOUS when you have set the correct date and/or time.
Locking Out the System Settings
Press PREVIOUS MENU twice to return to the DIAGNOSTIC TEST
menu. The message, “LOCK OUT SYSTEM SETTINGS?” appears.
76.
77. CAUTION! Only press “YES” if you wish to Lock the system settings
for your election. These settings cannot be changed unless a new
PCMCIA card is loaded into the scanner. You will probably want to
select “NO” during all testing and training phases of preparing for
the election.
Checking the Status of the Wireless CDPD Modem
WARNING: Do not perform these steps if you do not have the
CDPD modem. The scanner will lock up if you perform Steps 78-
81 without a wireless CDPD modem installed. If you lock up the
scanner, turn it off and on again.
NOTE: Steps 78-81 are necessary only if your Model 100 is
equipped with a wireless CDPD modem and you are using that
capability in the election.
Press PREVIOUS until the message, “ELECTION CARD
INSERTED, OPEN POLLS NOW?” appears.
78.
79.
80.
81.
Press the first and second buttons from the left at the same time to open
the MODEM menu.
Press MODEM SETTINGS to change phone numbers, set up the
CDPD modem, and to configure other modem functions.
Press CDPD STATUS to verify the status of the modem itself.

Testing the Election Definition
82.
83.
84.
85.
86.
87.
88.
89.
90.
91.
92.
93.
Press PREVIOUS until the message, “ELECTION CARD
INSERTED, OPEN POLLS NOW?” appears.
Press YES.
When prompted, turn the key switch to VOTE to open the polls. The
scanner will automatically print the reports that were programmed into
the election definition. The scanner will display the message, INSERT
BALLOT.”
Run a test deck of ballots through the scanner. ES&S recommends you
test each scanner with a test deck of ballots that will be used at the
precinct where you will place that scanner.
After scanning all the ballots, turn the key to the OPEN/CLOSE POLL
position.
Press CLOSE POLLS. The scanner will automatically print the reports
that were programmed into the election definition.
Check that the reports reflect the appropriate test deck results. If they
match, skip to Step 101. If the results do not match, continue with Step
89 to perform the test again.
Press MORE to display the MORE SELECTIONS menu.
Press RE-OPEN POLLS to display the ENTER PASSWORD KEYS
screen.
Enter the password 1-2-3 (or the programmed password) using the
NEXT KEY to advance between the three numerical positions and the
KEY UP and KEY DOWN buttons to increase and decrease the
numbers in the three positions.
Press ENTER after you have entered the password. The message,
“CLEAR ELECTION DAY TOTALS?” appears.
Press YES to clear the totals from the scanner and the PCMCIA card.
Copyright 2004 by Election Systems & Software, Inc. Model 100 Pre-Election Day Checklist
All rights reserved.
11

Copyright 2004 by Election Systems & Software, Inc. Model 100 Pre-Election Day Checklist
All rights reserved.
12
94.
95.
96.
97.
98.
99.
100.
101.
102.
103.
104.
Press YES again to confirm your desire to clear the totals. The message,
”ELECTION CARD INSERTED OPEN POLLS NOW” will appear.
Press YES.
When prompted, turn the key switch to VOTE to open the polls. The
scanner will automatically print the reports that were programmed into
the election definition. The scanner will display the message, INSERT
BALLOT.”
Run a test deck of ballots through the scanner. ES&S recommends you
test each scanner with a test deck of ballots that will be used at the
precinct where you will place that scanner.
After scanning all the ballots, turn the key to the OPEN/CLOSE POLL
position.
Press CLOSE POLLS. The scanner will automatically print the reports
that were programmed into the election definition.
Check that the reports reflect the appropriate test deck results. If they
match, continue with Step 101. If the results still do not match after the
second test, call ES&S Customer Service at 1-800-247-VOTE (8683) for
assistance. If the results match, continue with the next step.
After the reports have stopped printing, turn the scanner key to the OFF
position and remove the PCMCIA card.
In the method required by your network configuration, transfer the
election results from the PCMCIA card into Election Reporting
Manager. Print the election reports and confirm that the results match
the results from scanner’s internal printer. If they match, skip to Step
118. If the results do not match, continue with Step 103 to perform the
test again.
Insert the PCMCIA election card into the scanner.
Turn the scanner key to OPEN/CLOSE POLL. After the scanner has
initialized, the POLLS CLOSED menu will appear.

Copyright 2004 by Election Systems & Software, Inc. Model 100 Pre-Election Day Checklist
All rights reserved.
13
105.
106.
107.
108.
109.
110.
111.
112.
113.
114.
115.
116.
Press MORE to display the MORE SELECTIONS menu.
Press RE-OPEN POLLS to display the ENTER PASSWORD KEYS
screen.
Enter the password 1-2-3 (or the programmed password) using the
NEXT KEY to advance between the three numerical positions and the
KEY UP and KEY DOWN buttons to increase and decrease the
numbers in the three positions.
Press ENTER after you have entered the password. The message,
“CLEAR ELECTION DAY TOTALS?” appears.
Press YES to clear the totals from the scanner and the PCMCIA card.
Press YES again to confirm your desire to clear the totals. The
message, ”ELECTION CARD INSERTED OPEN POLLS NOW”
will appear.
Press YES.
When prompted, turn the key switch to VOTE to open the polls. The
scanner will automatically print the reports that were programmed into
the election definition. The scanner will display the message, INSERT
BALLOT.”
Run a test deck of ballots through the scanner. ES&S recommends you
test each scanner with a test deck of ballots that will be used at the
precinct where you will place that scanner.
After scanning all the ballots, turn the key to the OPEN/CLOSE
POLL position.
Press CLOSE POLLS. The scanner will automatically print the reports
that were programmed into the election definition.
After the reports have stopped printing, turn the scanner key to the OFF
position and remove the PCMCIA card.

Copyright 2004 by Election Systems & Software, Inc. Model 100 Pre-Election Day Checklist
All rights reserved.
14
117.
118.
119.
120.
121.
122.
123.
124.
125.
126.
In the method required by your network configuration, transfer the
election results from the PCMCIA card into Election Reporting
Manager.
Print the election reports and confirm that the results match the results
from scanner’s internal printer. If they match, continue to Step 118.
If the results still do not match after the second test, call ES&S
Customer Service at 1-800-247-VOTE (8683) for assistance.
Reinsert the PCMCIA election definition into the scanner.
Turn the key to the OPEN/CLOSE POLL position. After initializing,
the POLLS CLOSED menu appears.
Press MORE to display the MORE SELECTIONS menu.
Press RE-OPEN POLLS to display the ENTER PASSWORD KEYS
screen.
Enter the password 1-2-3 (or the programmed password) using the
NEXT KEY to advance between the three numerical positions and the
KEY UP and KEY DOWN buttons to increase and decrease the
numbers in the three positions.
Press ENTER after you have entered the password. The message,
“CLEAR ELECTION DAY TOTALS?” appears.
Press YES to clear the totals from the scanner and the PCMCIA card.
Press YES again to confirm your desire to clear the totals.
Once the totals are cleared, turn the scanner off, remove the key, close
the Key Access Panel and prepare the scanner for transportation to the
polling location.
YOU HAVE COMPLETED PREPARING THE MODEL 100 SCANNER FOR
THE ELECTION.
This manual suits for next models
1
