What is a Channel Programmer?...
An explanaon for householders
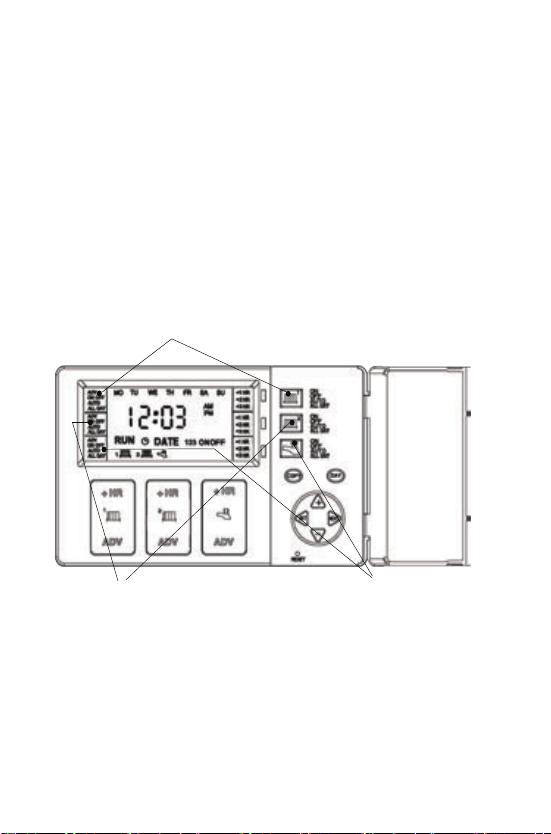
Introducon to the 3 Channel Programmer
This programmer can automacally switch your Central Heang or
Hot Water ON and OFF up to 3 mes a day, at whatever mes you
choose. Timekeeping is maintained through power interrupons
by a non replaceable baery designed to last for the lifeme of the
programmer and the clock is automacally put forward 1 hour at
1:00am on the last Sunday of March and back 1 hour at 2:00am on
the last Sunday of October. The clock is factory pre-set to UK me
and date, but you can alter it if you wish. During installaon, the
installer selects 24 hour, or 5 day/ 2day, or 7 day programming and
2 or 3 on/off periods per day, via a 4 posion DIP switch on the back
of the unit (see installaon instrucons).
The large, easy to read display makes programming easy and the
unit is designed to eliminate the possibility of accidental changes to
your programme. Buons normally visible, only affect your set
programme temporarily. All buons which can permanently change
your programme are located behind the flip over facia.
- The 24 hour programmer opon runs the same programme every
day.
- The 5/2 Day programmer opon allows different ON/OFF mes at
weekends.
- The 7 Day programmer opon allows different ON/OFF mes for
each day of the week.
- Pumped System (PU) allows independent control of Central
Heang and Hot Water.
- Gravity System (Gr) does not allow Central Heang without Hot
Water but can provide Hot Water without Central Heang.
IMPORTANT: These sengs should only be changed by a qualified
person. Contact your installer. This programmer is not suitable for
the switching of devices greater than 6Amp rated. (e.g. Not suitable
for use as an immersion mer)
2