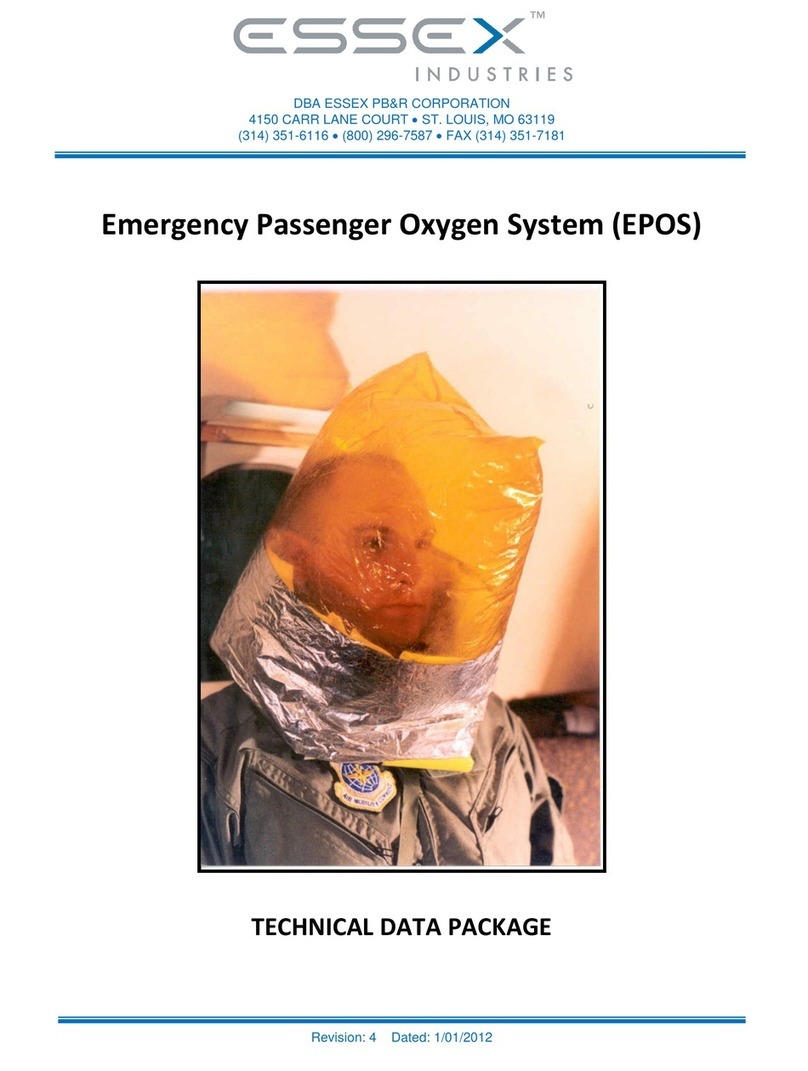
Essex Electronics MR-10022NAA Reference guide

DBA ESSEX PB&R CORPORATION
4150 CARR LANE COURT ST. LOUIS, MO 63119
(314) 351-6116 (800) 296-7587 FAX (314) 351-7181
Document No: PRM-02, Revision: 9 Dated: 1/01/2012
Crewmember
Protective Breathing Equipment (PBE)
User Reference and Procedures Manual
for
FAA TSO-C116 & TSO-C99 Approved
United Kingdom - Civil Aviation Authority (CAA) Approved
European Aviation Safety Agency (EASA) Approved
Civil Aviation Authority of China (CAAC) Approved
Brazilian Civil Aviation Authority (ANAC) Approved
Crewmember PBE Assemblies
Part No: DP3113(A)
Model No’s: MR-10022NAA and MR-10021NAA

DBA Essex PB&R Corporation
User Reference and Procedures Manual for the Essex Crewmember PBE
Document No: PRM-02, Revision: 9 Dated: 1/01/2012
2
TABLE OF CONTENTS
REVISION RECORD SHEET 4
FAA TSO-C116, TSO-C99, CAA, EASA, CAAC and ANAC APPROVED
PBE ASSEMBLIES 5
1. DESCRIPTION AND OPERATION 5
General Description of Equipment 5
Purpose of the Equipment 5
Hood Shell Construction 5
Oxygen System 6
Service/End-of-Service Indicator 7
Packaging and Stowage Container 7
Compliance 7
Useful Service Life 7
Operating Features 7
Tamper-Evident Seals 7
Pouch Access 7
Breathing System 8
Time Required to Put On and Take Off Hood 8
Maneuverability During Use 8
Carbon Dioxide Control 8
Interpersonal Communications 8
Operating Steps 11
General Sequence of Steps 11
Accessing the Essex Crewmember PBE Equipment Pouch 11
Open the Sealed Pouch 12
Activate the Oxygen Supply 13
Don the Activated Hood 14
Wearing the Hood 16
Remove and Discard the Hood 17
Dispose of Equipment Properly 17

DBA Essex PB&R Corporation
User Reference and Procedures Manual for the Essex Crewmember PBE
Document No: PRM-02, Revision: 9 Dated: 1/01/2012
3
2. INSPECTION AND FAULT ISOLATION 19
General 19
Inspection Procedures 19
Statement of Warranty 21
Return Procedures 22
3. REPAIR 24
General 24
Refitting a Broken or Missing Tamper-Evident Seal 24
4. INSTALLATION AND ASSEMBLY 24
Mounting Locations 24
Installation Steps 25
5. THE ESSEX CREWMEMBER PBE TRAINING UNIT 25
Introduction 25
Operating Features 26
Operating Steps 26
Plastic Training Liner (Optional) 26
General Sequence of Steps 26
Verbal Communications 27
Replacing Torn or Damaged Neck Seals 27
Replacing The Pull Cord Assembly 29
Maintenance Procedures 29
Handling and Storage 29

DBA Essex PB&R Corporation
User Reference and Procedures Manual for the Essex Crewmember PBE
Document No: PRM-02, Revision: 9 Dated: 1/01/2012
4
Revision Record Sheet
Rev
#
Date
Description of Revision
5
12/16/04
Added Revision Sheet, page 4 to manual; revised Statement of Warranty; and re-numbered all
pages accordingly.
6
08/11/05
Added part number 6851007-14 to tamper-evident seal on page 7, and changed part number of
tamper-evident seal on page 24 to from 6851007-2 to 6851007-14.
7
08/04/06
Revision includes: changed all address and phone number references to the new, St. Louis,
Mo. location; adding new AS9100B & ISO9001-200 Certified logo; adding approval by the
European Aviation Safety Agency (EASA) and the Civil Aviation Authority of China (CAAC)
to cover page and to 1.A.(6) Compliance; and a revised Statement of Warranty that changed
the warranty period from 10 years to 10 years 6 months and added an additional “foregoing
warranty statement”.
8
08/01/11
Revisions include: change all address references to a new St. Louis, Mo location; added
Brazilian Civil Aviation Authority approval (ANAC);
9
01/01/12
Changed Company Name from Essex PB&R Corporation to Essex Industries dba Essex PB&R
Corporation.

DBA Essex PB&R Corporation
User Reference and Procedures Manual for the Essex Crewmember PBE
Document No: PRM-02, Revision: 9 Dated: 1/01/2012
5
FAA TSO-C116, TSO C-99, CAA, EASA, CAAC and ANAC APPROVED PBE
ASSEMBLIES
Model Number Description
MR-10021NAA Crewmember PBE - Training Unit
MR-10022NAA Crewmember PBE with Concealed Mounting Holes and Clear Lid
Note: Part Number DP3113(A) is the Essex Crewmember PBE without a barrier pouch or any
type of stowage bracket. The Model Number, MR-10022NAA, designates the type of
bracket configuration that Part Number DP3113(A) is assembled into. The Model
Number, MR-10021NAA does not require a bracket configuration.
1. DESCRIPTION AND OPERATION
A. General Description of Equipment
(1) Purpose of the Equipment
The Essex Crewmember PBE (Ref. Figure 1 on page 6) is a self-contained,
portable, personal breathing device designed to safeguard the wearer from the
effects of smoke, carbon dioxide, harmful gases, and oxygen deficiency while
managing in-flight fire, smoke or fume emergencies.
The equipment improves the wearer’s visibility in smoke-filled compartments,
protects the head and face from melting or dripping plastics, and shields the head
against brief exposure to heat and flame.
The primary functional component in the Essex Crewmember PBE is a portable
hood that contains both a breathable oxygen supply, and lithium hydroxide
scrubber panels that absorb exhaled carbon dioxide.
The hood has a self-fitting neck opening that seals out contaminants, retains the
oxygen and keeps the hood inflated during use. The entire unit is hermetically
sealed at Essex PB&R Corp. to protect the LiOH scrubber panels from outside air.
(2) Hood Shell Construction
The Essex Crewmember PBE hood is fabricated from a durable, tear-resistant
combination of polyimide and PFA films. The hood’s inner surface has an anti-fog
coating to improve visibility.

DBA Essex PB&R Corporation
User Reference and Procedures Manual for the Essex Crewmember PBE
Document No: PRM-02, Revision: 9 Dated: 1/01/2012
6
(3) Oxygen System
The Essex Crewmember PBE has two oxygen cylinders. Together they hold a
minimum of 36 liters of Aviator Grade oxygen. These cylinders meet SAE
Standard AS 8010 for breathing-oxygen purity, and have rupture protection in case
of over pressurization.
Overall View of Essex Crewmember PBE (As Worn)
Figure 1
Location of End-of-Service
Indicator (EOSI)

DBA Essex PB&R Corporation
User Reference and Procedures Manual for the Essex Crewmember PBE
Document No: PRM-02, Revision: 9 Dated: 1/01/2012
7
(4) Service/End-of-Service Indicator
The Essex Crewmember PBE features a battery-powered green and red light
Service/End-of-Service Indicator. Mounted slightly below eye level on the left
inner side of the hood, this indicator functions as a secondary indicator for
monitoring oxygen activation, reassuring the wearer that the equipment is
functioning, and signaling when the equipment’s service life is ended. (Ref.
Figure 1 on page 6).
(5) Packaging and Stowage Container
The Essex Crewmember PBE alone weighs 3.2 lbs (1.45 kg). It is folded and
packaged in a moisture resistant pouch, and stowed in a protective container. A
packaged Crewmember PBE is normally installed within 3 ft (.9 m) of each
required on-board fire extinguisher. Each airline should receive regulatory
approval for installation locations.
(6) Compliance
The Essex Crewmember PBE complies with the requirements of FAA Action
Notice A8150.2 and is approved according to FAA TSO-C116 and TSO-C99. The
Essex Crewmember PBE is also approved: under BCAR B4-8, United Kingdom –
Civil Aviation Authority (CAA) requirements thereby we are also approved by the
European Aviation Safety Agency (EASA); by the Civil Aviation Authority of
China (CAAC), and the Brazilian Civil Aviation Authority (ANAC).
(7) Useful Service Life (Warranty Period)
The Essex Crewmember PBE has a 10-year 6-month, warranted, useful service life,
beginning from the date of manufacture.
B. Operating Features
(1) Tamper-Evident Seals
To ensure that the Essex Crewmember PBE has not been tampered with, each stowage
container has a tamper-evident seal, P/N 6851007-14. The tamper-evident seal for
Model # MR-10022NAA, is a green-knotted cable tie. (Ref. Figure 2 on page 10)
(2) Pouch Access
The sealed barrier pouch containing the Essex Crewmember PBE is easily accessed and
removed from its stowage container (Ref. para. 1.C. (2) on page 11). A force of
approximately 18-28 pounds will be required to remove the pouch, or to lift the lid &

DBA Essex PB&R Corporation
User Reference and Procedures Manual for the Essex Crewmember PBE
Document No: PRM-02, Revision: 9 Dated: 1/01/2012
8
break the tamper-evident seals.
(3) Breathing System
Once the pouch is removed from its container and opened, oxygen flow is initiated by
grasping one cylinder with one hand, and pulling the red ball with the other hand until it
is completely released from the PBE, which in turn activates the flashing green light on
the Service/End-of-Service Indicator. The red ball, pull cords, and release levers
should be discarded immediately upon activation. One bottle releases oxygen rapidly,
whereas the second bottle discharges oxygen slowly. An audible hissing sound and
inflation of the unit within (2) minutes indicates the PBE is operating properly.
Once donned, the Essex Crewmember PBE will protect the wearer for up to 15
minutes. Although both bottles will completely discharge in 8 to 10 minutes, enough
oxygen will remain for the full, specified 15 minutes of respiratory protection. When
the unit deflates to the point where it touches the wearer’s head and face, or when the
red light on the Service/End-of-Service Indicator flashes, the unit’s useful life has
ended and must be removed.
The Essex Crewmember PBE operates at a positive pressure. The neck seal acts as a
relief valve to prevent excessive pressure from building up inside the hood.
(4) Time Required to Put On and Take Off Hood
A trained user can access, and don the hood in approximately 15 seconds. It
can be removed in less than 5 seconds.
(5) Maneuverability During Use
The Essex Crewmember PBE does not restrict or interfere with normal body
movements. Even when fully inflated, it is compact enough that the wearer can pass
through openings as small as 18 x 18 in (460 mm x 460 mm).
(6) Carbon Dioxide Control
Special fabric panels inside the hood control carbon dioxide buildup. These panels
contain a dustless lithium hydroxide absorbent sealed inside a double walled membrane,
which keeps carbon dioxide concentrations at safe levels during the hood’s 15-minute
service period.
(7) Interpersonal Communications
Persons wearing the Essex Crewmember PBE can communicate by unaided voice with
other people wearing hoods, at a distance of at least 13.1 ft (4 m) away.

DBA Essex PB&R Corporation
User Reference and Procedures Manual for the Essex Crewmember PBE
Document No: PRM-02, Revision: 9 Dated: 1/01/2012
9
When using an interphone, megaphone or microphone, it may be necessary to pull the
skirt of the hood down so the scrubber is below mouth level. Press the phone unit
firmly against the hood film in front of the mouth as shown in Figure 1A below,
minimizing the gap between the mouth and device.
Megaphone Operation Illustration
Figure 1A

DBA Essex PB&R Corporation
User Reference and Procedures Manual for the Essex Crewmember PBE
Document No: PRM-02, Revision: 9 Dated: 1/01/2012
10
Tamper Evident Seal
Figure 2
C. Operating Steps
(1) General Sequence of Steps
The normal operating sequence is: access the PBE, open the equipment pouch, activate
the system, don the hood, wear it as needed, then remove and dispose of it after use.
(2) Accessing the Essex Crewmember PBE Equipment Pouch
Grasp the strap attached to the lid and pull sharply to break the green-knotted cable tie.
Approximately 18 to 28 pounds of force will be required to lift the lid and break the
tamper-evident seal. Grasp the yellow nylon strap and pull the PBE from the bracket.
Note: The yellow nylon strap is located at the bottom of the pouch.

DBA Essex PB&R Corporation
User Reference and Procedures Manual for the Essex Crewmember PBE
Document No: PRM-02, Revision: 9 Dated: 1/01/2012
11
Accessing the Essex PBE Pouch from the Internal-Mounted Stowage Case with Clear Lid
Weight
4.7 lbs
H
W
D
Inches
9 1/4
8 1/2
3 3/8
Cm
23.5
21.59
8.57
Figure 3
MR-10022NAA

DBA Essex PB&R Corporation
User Reference and Procedures Manual for the Essex Crewmember PBE
Document No: PRM-02, Revision: 9 Dated: 1/01/2012
12
(3) Open the Sealed Pouch (Ref. Figure 4 below)
(a) The top of the pouch is recognizable by the bright red tear strip across the width of
the pouch. To open, grasp the pouch in one hand at either of the small red grip tabs
located on each side of the pouch. With the other hand grasp the red tear strip and
tear across the pouch in the direction of the arrows. This pouch may be opened
from either direction.
(b) Remove the hood from the pouch, then discard the pouch.
CAUTION: BEFORE ACTIVATING THE OXYGEN, REMOVE OBJECTS
FROM AROUND THE HEAD (SUCH AS HAIR COMBS,
LONG EARRINGS OR JEWELRY) TO PREVENT THEM
FROM PUNCTURING THE HOOD OR DAMAGING THE
NECK SEAL.
Opening the Sealed Equipment Pouch to Remove the Essex PBE
Figure 4

DBA Essex PB&R Corporation
User Reference and Procedures Manual for the Essex Crewmember PBE
Document No: PRM-02, Revision: 9 Dated: 1/01/2012
13
(4) Activate the Oxygen Supply.
(a) Before activating the oxygen supply, be sure to position the front of the hood
correctly. If visibility permits, locate the amber-colored, transparent, non-metalized
area of the hood. This is the front of the hood. It should not be visible during the
activation and donning. The user should see only the metalized area.
Unfold the hood far enough to reveal the oxygen cylinders. Grasp either cylinder
securely with one hand, and grasp the red ball with the other hand (Ref. Figure 5a
below). Pull the red ball sharply, the cords and levers should separate completely
from the PBE (Ref. Figure 5b on page 14). This sharp action triggers the oxygen
flow and activates the green light on the Service/End-of-Service Indicator. Discard
the red ball and its components.
WARNING: TO AVOID LOSING OXYGEN ONCE THE SYSTEM IS
ACTIVATED, AND TO MINIMIZE THE AMOUNT OF TOXINS THAT
MAY ENTER THE HOOD, DON THE HOOD PROMPTLY AFTER
ACTIVATION.
Activating the Essex PBE Oxygen Supply Preparatory to Donning It
Figure 5a

DBA Essex PB&R Corporation
User Reference and Procedures Manual for the Essex Crewmember PBE
Document No: PRM-02, Revision: 9 Dated: 1/01/2012
14
Activating the Essex PBE Oxygen Supply Preparatory to Donning It
Figure 5b
(5) Don the Activated Hood (Ref. Figure 6 on page 15)
(a) After the sharp pulling action required to activate the equipment, the self-fitting
elastic neck seal will be revealed.
(b) Hold the equipment at about waist level. Place both hands inside the neck seal
opening, with palms facing each other. Stretch the neck seal open by spreading the
hands apart.
(c) Lift up the opened hood with both hands, and then lower it down over the head
until it fits securely around the neck.
NOTE: EYEGLASS WEARERS SHOULD FIRST POSITION THE NECK
SEAL AGAINST THE BACK OF THE HEAD, THEN PULL THE
HOOD FORWARD AND DOWN OVER THE EYEGLASSES.
NOTE: MAKE SURE THAT SHIRT COLLARS OR SCARVES DO
NOT INTERFERE WITH THE NECKSEAL.

DBA Essex PB&R Corporation
User Reference and Procedures Manual for the Essex Crewmember PBE
Document No: PRM-02, Revision: 9 Dated: 1/01/2012
15
Donning the Activated Essex PBE
Figure 6
WARNING: AFTER DONNING THE HOOD, DO NOT OPEN THE
NECK SEAL EXCEPT TO QUICKLY TUCK IN HAIR,
OR TO ADJUST THE HOOD’S POSITION. HAVE
ANOTHER PERSON HELP IF NEEDED.

DBA Essex PB&R Corporation
User Reference and Procedures Manual for the Essex Crewmember PBE
Document No: PRM-02, Revision: 9 Dated: 1/01/2012
16
(d) The equipment is donned correctly if the oxygen cylinders are positioned over the
shoulders under each ear and the transparent amber-colored area is facing front.
If the hood is accidentally donned backwards, do not remove it. Instead, rotate the
hood until it is properly positioned.
WARNING: IF EITHER OF THE FOLLOWING CONDITIONS
EXIST, REMOVE THE EQUIPMENT AND DISCARD
IT IMMEDIATELY:
(1) THE SOUND OF THE OXYGEN FLOW IS
INAUDIBLE IMMEDIATELY AFTER DONNING.
(2) THE HOOD DOES NOT INFLATE WITHIN 2 TO 3
MINUTES, OR COLLAPSES.
WARNING: DO NOT PASS ALONG AN ACTIVATED HOOD TO
ANOTHER PERSON ONCE IT IS DONNED. THIS
WILL CAUSE OXYGEN TO ESCAPE AND CAN
SUBSTANTIALLY REDUCE PERFORMANCE.
(6) Wearing the Hood
Full hood inflation takes from 2 to 3 minutes but the equipment is ready for use
immediately. During the first few minutes the oxygen makes a noticeably loud, hissing
sound that gradually diminishes. The oxygen stops flowing after 8 to 10 minutes, but
enough remains in the hood for a full 15 minutes of usage.
WARNING: IF THE HOOD COLLAPSES AROUND THE FACE AT
ANYTIME, REMOVE IT IMMEDIATELY AND OBTAIN
A NEW ONE.
WARNING: DO NOT APPROACH ANY CLOSER TO A FIRE OR
FLAMES THAN THE NORMAL RANGE OF AN
APPROVED FIRE EXTINGUISHER, SINCE THE USER
WILL ORDINARILY NOT BE WEARING FIRE-
RESISTANT CLOTHING.
(a) Observe the flashing green Service/End-of-Service Indicator light inside the hood,
located to the left and just below eye level. When the red light flashes with the
green light, or when the hood collapses, move immediately to a safe area and
remove the unit.

DBA Essex PB&R Corporation
User Reference and Procedures Manual for the Essex Crewmember PBE
Document No: PRM-02, Revision: 9 Dated: 1/01/2012
17
(b) Note that warming and condensation inside the hood may occur. If this
interferes with vision, press the hood against the face to wipe away
condensation.
(c) Some users may experience mild ear popping as the air pressure inside the hood
gradually increases due to the oxygen flow.
(d) Interphone, megaphone and microphone communication are possible while the
hood is still inflating and during its operation. Press the phone device directly
against the hood for best operation. Or, place the phone device up against the
Adam’s apple.
WARNING: DO NOT REMOVE THE HOOD WHILE NEAR SPARKS
OR OPEN FLAME. SOME RESIDUAL OXYGEN
MAY REMAIN IN BOTH THE HOOD AND HAIR.
(7) Remove and Discard the Hood
Remove the PBE if the hood collapses over the face, or as soon as the red light in the
Service/End-of-Service indicator comes on, or immediately after the emergency is
under control, whichever comes first.
(a) Leave the area of the emergency before attempting to remove the hood.
(b) To remove the hood, insert both hands under the neck seal, beneath the
chin. Lift the hood up and out to clear the face.
NOTE: EYEGLASS WEARERS SHOULD FIRST INSERT BOTH HANDS
UNDER THE NECK SEAL, THEN PULL THE HOOD FORWARD
AND OUTWARD, LIFTING IT UP OVER THE HEAD TO AVOID
DISLODGING THE EYEGLASSES.
(8) Dispose of Equipment Properly
WARNING: DO NOT CUT INTO THE WHITE PANELS AROUND THE
COLLAR OR UP THE BACK OF THE HOOD. THIS MAY
EXPOSE LITHIUM HYDROXIDE & LITHIUM CARBONATE,
WHICH CAN IRRITATE THE SKIN AND BREATHING
PASSAGES.
Follow these steps in properly disposing of spent equipment.
(a) Cut the neck seal into four quadrants.

DBA Essex PB&R Corporation
User Reference and Procedures Manual for the Essex Crewmember PBE
Document No: PRM-02, Revision: 9 Dated: 1/01/2012
18
(b) Cut a hole in the amber-colored transparent film area at least 5 inches
across.
(c) If the oxygen system has not yet been activated, do so before disposing
of the equipment.
(i) Handle the oxygen disposal in an area where there is no potential
danger from sparks or other fire hazards.
(ii) After equipment has been activated, leave it alone for at least one hour, so
that all residual oxygen will dissipate.
(d) Dispose of the hood in compliance with federal, state and local EPA
regulations. Contact the appropriate agency for proper disposal procedures.
The white scrubber panels contain about 200 grams of lithium hydroxide
and/or lithium carbonate.

DBA Essex PB&R Corporation
User Reference and Procedures Manual for the Essex Crewmember PBE
Document No: PRM-02, Revision: 9 Dated: 1/01/2012
19
2. INSPECTION AND FAULT ISOLATION
A. General
Inspection and inspection frequency of PBE’s in stowage containers should be in
accordance with your governing regulatory authority and your airline operating
procedure. The PBE will be inspected by the following indicators: replace by date label,
tamper-evident seals, and humidity indicator.
B. Methods of Inspection after verification that the unit has not exceeded the replace by
date (also refer to Figure 8 on page 20 for Essex Industries dba Essex PB&R
Corporation’s recommended inspection procedures).
(1) Replace by Date Label: The first step is to inspect the date on the replace by date
label. If the replace by date has not been exceeded proceed to the next inspection
step. If the replace by date has been exceeded, the unit must be immediately
replaced.
(2) Tamper-Evident Seals: Tamper-evident seals are the second step for determining
serviceability of the PBE.
(3) Humidity Indicator: The humidity indicator represents the third step of inspection.
The purpose of the humidity indicator is to show that moisture has gotten inside of
the barrier pouch, and may come in contact with the lithium hydroxide scrubbers
inside of the hood. Please see Figure 7 below that illustrates acceptance criteria.
Blue Indicator: Unit is Acceptable Pink Indicator: Remove Unit
from Service within one (1)
calendar day (42 hrs. max).
Humidity Indicator Acceptance Criteria
Figure 7
The method of inspection for the PBE can be found in an easy to read flow chart
provided in Figure 8 on page 20. Deviation from the recommended inspection
method for your particular PBE is not covered by the factory warranty, and is
the sole responsibility of the operator.

DBA Essex PB&R Corporation
User Reference and Procedures Manual for the Essex Crewmember PBE
Document No: PRM-02, Revision: 9 Dated: 1/01/2012
20
Inspection Procedure Flow Chart
Figure 8
VERIFY REPLACE BY
DATE HAS NOT EXPIRED
TAMPER SEAL
UNDAMAGED
TAMPER SEAL
DAMAGED
COLOR:
PINK
REMOVE UNIT
FROM SERVICE
WITHIN ONE
CALENDAR DAY
(42 HOURS MAX).
COLOR:
BLUE
REPLACE BROKEN
SEAL AS SOON AS
POSSIBLE
INSPECTION
COMPLETE
INSPECT THE
HUMIDITY
INDICATOR’S COLOR
(REF. FIG.7)
INSPECT THE
HUMIDITY
INDICATOR’S COLOR
(REF. FIG.7)
COLOR:
PINK
COLOR:
BLUE
REMOVE UNIT
FROM SERVICE
WITHIN ONE
CALENDAR DAY
(42 HOURS MAX).
INSPECTION
COMPLETE
This manual suits for next models
2
Table of contents
Other Essex Electronics Safety Equipment manuals
Popular Safety Equipment manuals by other brands

Safety Link
Safety Link Classic Tuff-Post Concrete Lifeline Installation handbook

Adam Hall
Adam Hall Defender Series user manual

STRUMIN
STRUMIN SYSTEMIC EDGE PROTECTION manual

Bodypoint
Bodypoint EvoFlex EBE100 Installation and user instructions

zarges
zarges 44800042 quick start guide

Honeywell
Honeywell Howard Leight VERISHIELD VS 321 User instructions

Munchkin
Munchkin Sleep Safety Bed Rail owner's guide

Thiele
Thiele TWN 0827/1 Mounting instructions

NOVOLUX
NOVOLUX ES725-VISERA.POLIC. instructions

Dräger
Dräger Bodyguard 1500 Instructions for use

bolle SAFETY
bolle SAFETY OMF167 quick start guide

TAKATA
TAKATA DRIFT II Installation and operating instructions