Estron TIMMKOO User manual

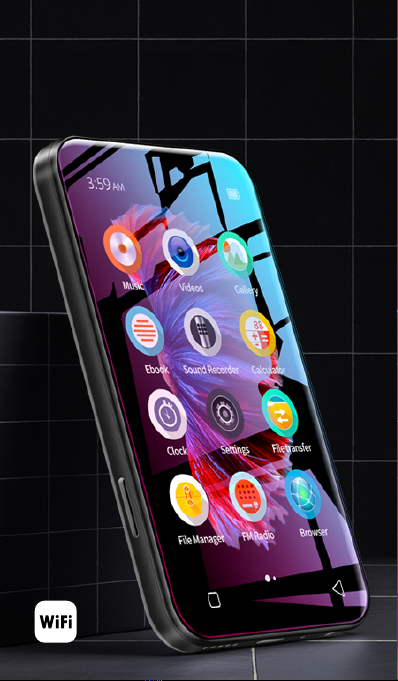
FULL SCREEN MP4 PLAYER
TIMMKOO NEW STYLE
WiFi available

Volume+
Volume-
Power
HOME BACK
USB-C Port
Reset
3.5mm Port
SD Slot
Built-in Speaker

Power: In shutdown state, press and hold for 3
seconds to turn on.
In the boot state, long press for 3 seconds to
activate the shutdown options: Power o, Restart,
Airplane mode.
Short press to turn o/on the screen.
Volume +/-: Press + / - to turn up/down the volume.
USB-C Port: Used for Charging and File transfer.
Reset: Long press it for 3 seconds, the device will
be restored to factory settings.
Back: Click to come back to the previous page.
Home: Click to come back to homepage. Long
press to open the background process management
(Recently used apps), swipe left/right to remove
the selected process.
SD Slot: Expand storage of the device, maximum
support 512g TF/ Micro-SD card.
3.5mm Output: Connect your headphones or
external speakers.

Upload from your computer:
1. Use the included USB cable to connect the player
to your computer. The computer will automatically
recognize the device and install the driver. After the
installation is successful, Click "My Computer", you
will find an MTP device named "Q5" in the list of
devices and drives, click on it to access the player's
internal/external SD card and its folders.
2. Copy the downloaded music or videos, e-books
and other files from your computer and paste them
into the folder here, just like using a normal USB
flash drive.
Tips: If you are a Mac device, please download the
MTP device file transfer software before proceeding
with the above operations. The recommended
software is as follows:
OpenMTP: https://openmtp.ganeshrvel.com/
MacDroid: https://www.macdroid.app/
Upload from your cellphone:
Upload music or video to the player via your
smartphone, and require your phone to install the
specified App.
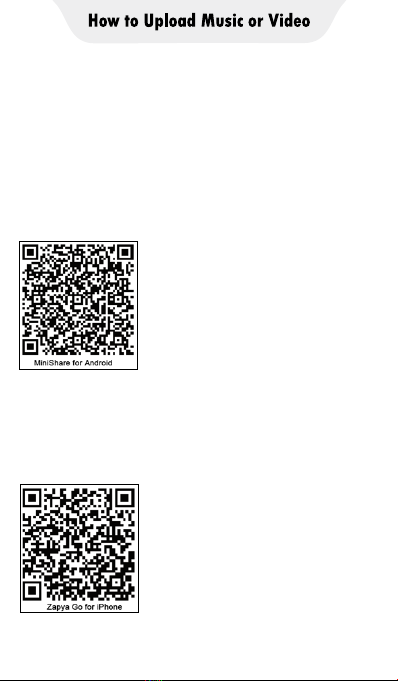
MiniShare (for Android phone)
Scan the following QR code to download and
install MiniShare.
ZapyaGo (for iPhone)
Search for “Zapya Go” in the AppStore or scan the
following QR code to download and install
ZapyaGo.

Unidirectional Upload
In Minishare's Send/Receive mode, you can only
transfer files from the sender to the receiver,
but not to each other.
iPhone →Q5 Player
A. Click the “File transfer” icon on the desktop of
the Q5 player to open the MiniShare app. And
click the icon in the middle of the window to
switch to Send/Receive mode, and then click
the "Receive" icon, and the device will start
hotspot and pop up a QR code for scanning.
B. Open the ZapyaGo app on iPhone, and also
click the icon in the middle of the window to
switch to Send/Receive mode, click the "Send"
icon, then select the photos, music or videos to
be transferred, and click the "Send" button that
pops up below. Next, click "Scan to connect
now" in the pop-up window to activate the
camera scanning function, and scan the QR
code on Q5 player.
C. According to the pop-up prompt, Click “Go to
Settings” to jump to the WiFi settings of your
iPhone, and set the currently connected WIFI
to the hotspot of Q5 (If you have set a hotspot
password, you will be asked to enter it). Then
return to ZapyaGo, and the app will starts
uploading files to the player.

A. Click the “File transfer” icon on the desktop of
the Q5 player to open the MiniShare app. And
click the icon in the middle of the window to
switch to Send/Receive mode, and then click
the "Receive" icon, and the device will start
hotspot and pop up a QR code for scanning.
B. Open the MiniShare app on Android phone,
also click the icon in the middle of the window
to switch to Send/Receive mode, and click the
"Send" icon, then select the photos, music and
videos to be transferred, and click the "Send"
button that pops up below. Next, you can find
the avatar and name of Q5 player in the search
radar, click it to establish a connection and start
transferring files (If you have set a hotspot
password, you will be asked to enter it). If not
found in the search radar, you can also click
the "Scan QR Code" button below to activate
the camera scanning function, and scan the
QR code of Q5 player to establish a connection,
and then start to transfer files.
Android phone →Q5 Player

Q5 player →Q5 Player
A. Click the “File transfer” icon on the desktop of
the Q5_A player to open the MiniShare app.
And click the icon in the middle of the window
to switch to Send/Receive mode, and then click
the "Receive" icon, and the device will start
hotspot and pop up a QR code for scanning..
B. Click the “File transfer” icon on the desktop of
the Q5_B player to open the MiniShare app.
Also click the icon in the middle of the window
to switch to Send/Receive mode, and click the
"Send" icon, then select the photos, music and
videos to be transferred, and click the "Send"
button that pops up below. Next, you can find
the avatar and name of Q5_A player in the
search radar, click it to establish a connection
and start transferring files (If you have set a
hotspot password, you will be asked to enter it).
*Because of the lack of a camera, Q5 player cannot establish
a connection by scanning the QR code.
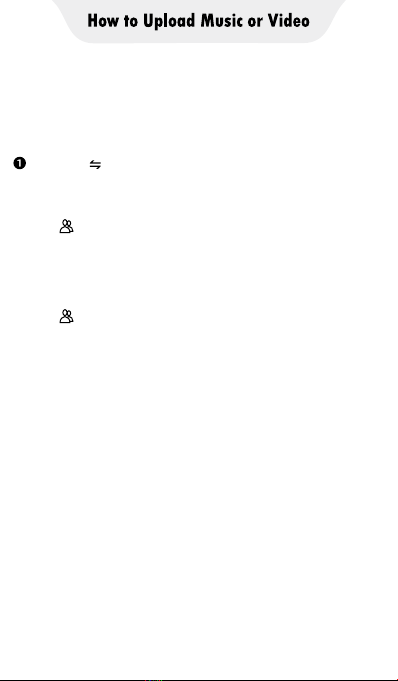
Mutual Upload
In Minishare’s Create Group/Join Group mode, you
can transfer files between two devices
iPhone Q5 Player
A. Click the “File transfer” icon on the desktop of the
Q5 player to open the MiniShare app. And click
the icon in the middle of the window to switch
to Create Group/Join mode, and then click the
"Create Group" icon, and the device will start
hotspot and pop up a QR code for scanning.
B. Open the ZapyaGo app on iPhone, and also click
the icon in the middle of the window to switch
to Join mode, click the "Join" icon, Next, click
"Scan to connect now" in the pop-up window to
activate the camera scanning function, and scan
the QR code on Q5 player.
C. According to the pop-up prompt, Click “Go to
Settings” to jump to the WIFI settings of your
iPhone, and set the currently connected WIFI to
the hotspot of Q5 (If you have set a hotspot
password, you will be asked to enter it). Then
return to Zapya Go, The mutual connection is
successfully established. You can upload files
from the iPhone to the player, or upload files
from the player to the iPhone.
→

A. Click the “File transfer” icon on the desktop of the
Q5 player to open the MiniShare app. And click
the icon in the middle of the window to switch
to Create Group/Join mode, and then click the
"Create Group" icon, and the device will start
hotspot and pop up a QR code for scanning.
B. Open the MiniShare app on Android phone, and
also click the icon in the middle of the
window to switch to Create Group/Join mode,
click the "Join Group" icon. Next, you can find the
avatar and name of Q5 player in the search
radar, click it to establish a connection and start
transferring files (If you have set a hotspot
password, you will be asked to enter it). If not
found in the search radar, you can also click the
"Scan QR Code" button below to activate the
camera scanning function, and scan the QR
code of Q5 player to establish a connection,
and then start to transfer files.

A. Click the “File transfer” icon on the desktop of
the Q5_A player to open the MiniShare app.
And click the icon in the middle of the
window to switch to Create Group/Join mode,
and then click the "Create Group" icon, and the
device will start hotspot and pop up a QR code
for scanning.
B. Click the “File transfer” icon on the desktop of
the Q5_B player to open the MiniShare app.
And click the icon in the middle of the
window to switch to Create Group/Join mode,
and then click the "Join Group" icon. Next, you
can find the avatar and name of Q5_A player
in the search radar, click it to establish a
connection and start transferring files (If you
have set a hotspot password, you will be asked
to enter it).
*Because of the lack of a camera, Q5 player
cannot establish a connection by scanning
the QR code
Tips: In the Create Group/Join Group mode,
multiple devices are allowed to join the same
group to transfer files between each other.

1. Know The Main Interface of Music App
Click the Music app on the player’s desktop to
enter the main interface. Here,
1) Your songs are organized by Artists,
Albums, and Songs.
2) Click the " Playlists" icon in the upper right
corner to quickly access the playlist you created.
3) Click the thumbnail bar at the bottom to
enter the music playing window.
4) Click the search icon in the lower right corner,
you can enter the partial or complete name
of the song/artist/album to search for the
corresponding target.
In addition, there are more menu options to
provide you with more convenient operation.
1) In the artists/albums/songs view, long press
any artist/album/song, the menu options
will pop up. As follows:
Play → Click it to play the current artist, album
or song.
Add to playlist → Click it to add the current artist,
album, song to my playlist.
Delete → Click it to delete the current artist, album,
song from the devices
Use as phone ringtone → Click it to use the current
song as alarm ringtone
Search → Click on it, you can choose to search for
information related to the artist/album/song in the
browser or app.
Tips: The menu items in dierent views are dierent.

2) In the Playlists view, click the icon in the upper
right corner, you can get the following shortcut
menu:
Party shue → Play the songs in the list in Party
shue mode.
Shue all → Play the songs in the list in Shue
all mode.
Save as playlist →Save the songs in the list as
another playlist
2. Know The Music Playing Window
Click the thumbnail bar at the bottom of the main
interface to access the music playing window. Here
-- Artist name
-- Album title
-- Song title
-- Quick access to the current playing sequence
-- Quick on/o shue
-- Switching loop mode: Repeating all songs,
Repeating current song, Repeat is o
-- Click to switch to the next song, long press to
fast forward.
-- Click to switch to the previous song, long press
to rewind
-- Play/Pause
And click the icon in the upper right corner of the
music playing window to pop up menu options:
Party shue →Quickly switch to the playing mode
of Party shue.
Add to playlist →Add the current song to an
existing or new playlist.

Use as ringtone →Use the current song as alarm
ringtone.
Delete →Delete the current song.
Library →Quickly jump to the music library.
3.FAQ
1) Can I create a playlist by myself? Is there a limit
to the number of playlists?
Yes, you can create your own playlist, and there is no
limit on the number.
2) How to create a playlist?
When you add songs to the playlist, the device will
ask you whether to add to an existing
playlist or create a new playlist. Select “New“”, then
enter the name of the list you need and save it to
create a new playlist.
3) How to add music to the playlist?
Long press the artist/album/song you want to add
to the playlist, then select "Add to playlist" in the
pop-up menu, Next, Select an existing playlist or
click “New” to create a new playlist.
4) How to do shue play?
The player provides 2 types of shuffle playing: Party
shuffle and Shuffle all.
Click the icon in the upper right corner of the
playlist, you can find them in the pop-up menus.
Click the icon in the upper right corner of the
music playing window, you can also find Party
shuffle. And here you also can click the icon
to enable or disable shuffle.


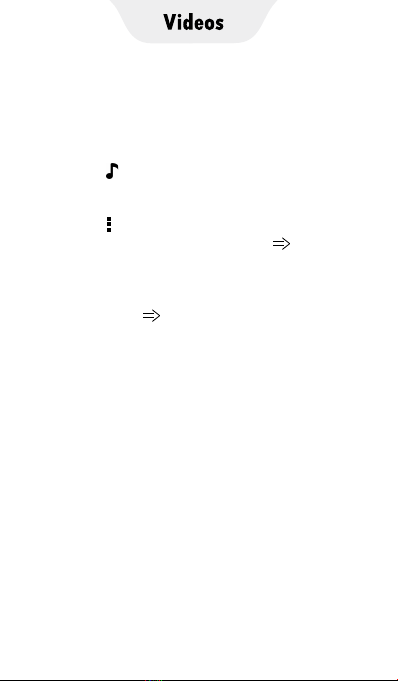
1.Know the video management window
Click the Videos app on the player’s desktop to
enter the video management window. Here,
1) All folders with videos are displayed. Click to
open any folder and you can see all the videos
in that folder.
2) Click the icon in the upper right corner, you
can get more menu options to help you better
manage video files.
Search →Search by the partial or complete
video name and quickly locate the target video.
View →Select the view type and sorting method
of the video management window, and what
information fields are displayed.
Select →Activate the selection function to select
folders or files and edit them, such as
Mark as, Delete, Rename, Share, Hide, etc.
Settings →Set various functions and parameters
of videos App, such as style, decoding,
audio, subtitles, etc. (It is not recommended to
modify frequently)
2.Know the video playback window
Click the video you want to play in the video
management window to enter the playback
window. Here, there are many shortcut buttons
for you to watch the video better.
→Rotate the screen to portrait or landscape
→Lock the operation on the window, all keys
are invalid in this state. Click it again to restore.
→Choose the right decoder, such as HW
decoder, SW decoder.
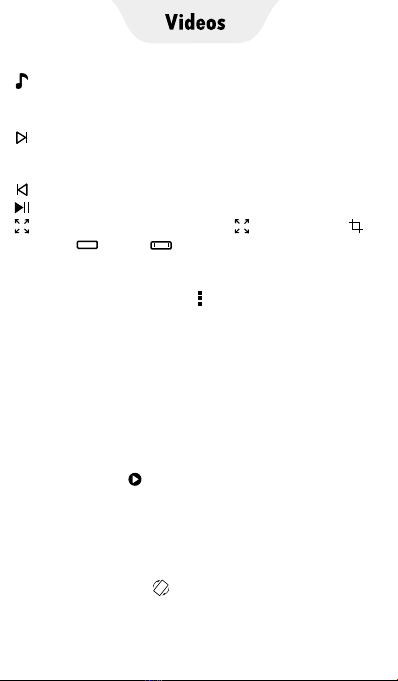
→Choose the audio track you want, if available.
If you select “Disable”, there will be no sound when
playing the video.
→ Click to switch to the next video; Long press,
a pop-up menu will let you choose the playback
mode: Loop one, Loop all, Shue.
→Click to switch to the previous video.
→Play/Pause
→Switch the viewing size : Fit to screen,
Stretch, CROP, 100% full screen
In addition, click the icon in the upper right
corner, more menu options will give you more help.
Speed →Select the “Speed” option in “Play” item
to activate the speed adjustment bar, and you can
speed up/slow down the playback speed by
pressing the +/- keys.
Background play →Check this option
“Background play” in “Play” item, you can continue
to operate other applications without exiting the
video playback. To return to watching the video,
please click the icon in the lower right corner of
the video management window.
Video →Uncheck this option in “Display” item,
the playback screen will be blocked, and only the
audio track of the video will be played.
Screen Rotation →Uncheck this option in
“Display” item, the icon will disappear and
you will not be able to rotate the screen.

Video zoom →Click this option, you can change
the viewing size, the options are: Fit to screen,
Stretch, Crop, 100%, Custom. You can also change
the viewing size with GMD gesture control.
Subtitle →This option allows you to open the
downloaded subtitles or search for subtitles online.
Tools →This option allows you to Share, Delete,
and Rename the current video.
3. FAQ
1) How to fast forward or rewind?
① Press and hold in the playing window and drag
the progress bar forward or backward to the
target osition.
② Click the target position you want to play on the
progress bar.
2) Can I speed up or slow down the playing speed?
How to do?
Yes, you can. Click the icon in the upper right
corner of the playing window to open the menu,
and select “Play—Speed”, and then use the + / -
key in the pop-up speed adjustment bar to speed
up or slow down the playback speed.
3) If shuts down unexpectedly during playing, after
restarting, can the player continue to play from
where it stopped last time?
Yes it can. The player has the feature of
memorizing the playing position. When you
come back again, the app will ask you to choose
"START OVER" or "RESUME". Click "RESUME" to
continue play from where it stopped last time.
4) My video has audio tracks in dierent languages,
such as English, Portuguese, can I choose one of
them to play.
Yes. There are several ways to choose or open
your audio tracks:
① Click the icon in the play window, and then
select the target audio track in the pop-up
window
② Click the icon in the upper right corner of the
playback window, and click “Audio Audio track”,
and then select the target audio track in the
pop-up window.
③ If your audio track is a separate file, you can
also click “Audio Open”, then find its path
and open it.
Table of contents


