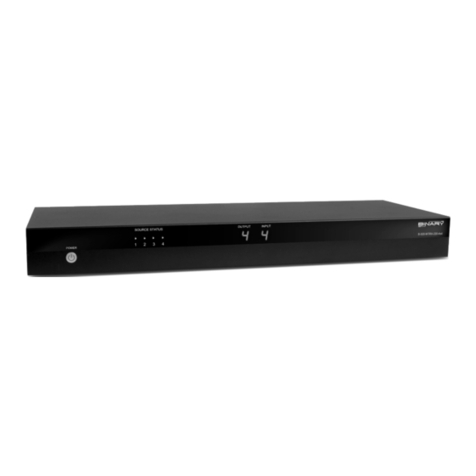
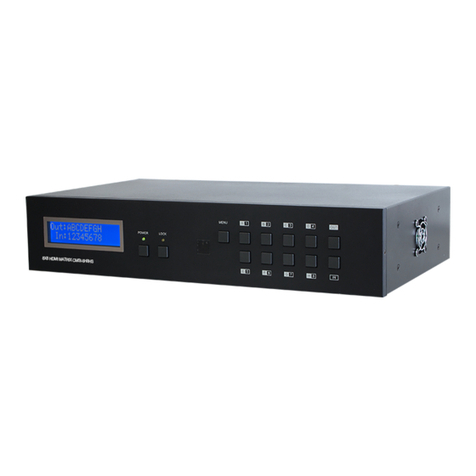
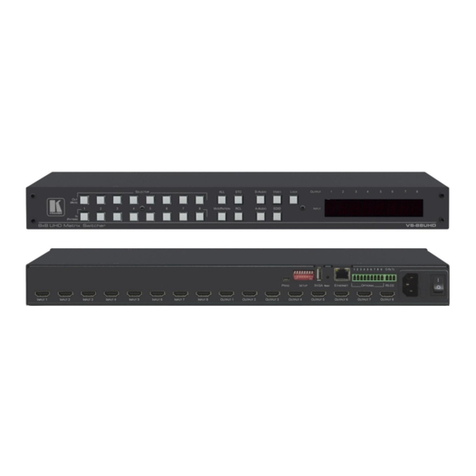
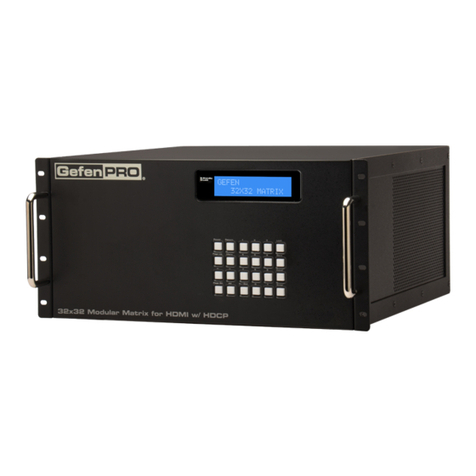
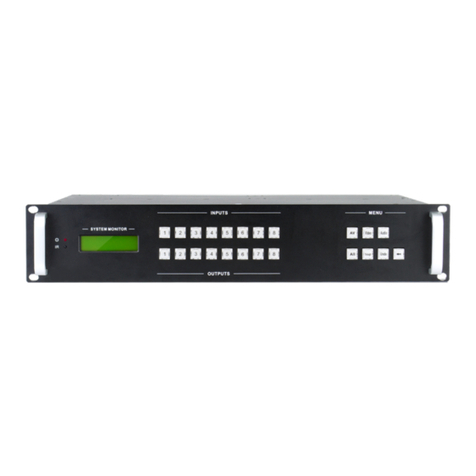
Ethereal CS-88MHDBTS User manual

User Manual
CS-88MHDBTS, CS-44MHDBTS
8x8 and 4x4 4K HDMI and HDbaseT Matrix
The CS-88MHDBTS and CS-44MHDBTS are true 18Gbps 4K60 (4:4:4) 8x8 and 4x4 HDMI matrix
switches. Supporting HDMI 2.0(a/b), HDCP 2.2, up to 4K video resolution, and up to 18 Gbps
bandwidth. The CS-88MHDBTS supports 8 HDMI sources (Blu-ray, UHD Blu-ray, satellite receiver,
game consoles, PCs, etc. ...) and 8 separate displays, while the CS-44MHDBTS supports 4 HDMI
sources and 4 HDMI or mirrored HDbT displays. Allowing you to view any of the connected sources
on any of the connected displays at any one time.
Features:
•HDMI 2.0 (a/b)
•4K60 4:4:4 Support
•Full HDR Support (HDR 10 & 12 Bit)
•Dolby Vision, HDR10+ and HLG Support
•HDCP 2.2 (up-to)
•Web GUI Interface
•4 or 8 HDMI with Mirrored HDbT
Outputs
•Scaling from 1080p up to 4K on the
HDMI outputs
•Scaling from 4K down to 1080p on the
HDbT outputs
•Advanced EDID Management
•IR, RS-232 and LAN Control Options
•Audio De-Embedding via SPIDF &
3.5mm jack
•Install in seconds
•Powerful EDID management
•Front Panel Control
•IR Remote
•IR & RS-232 Control
•LAN Control
•Driver Support for Crestron, C4, Etc.
•Bi-Directional IR and RS-232 on
extenders
•Built in Test Pattern for each Output
In The Box:
•CS-88MHDBTS or CS-44MHDBTS HDMI
Matrix
•IR Remote Control
•12V/4A Locking Power Supply

Front Panel Control
Switching
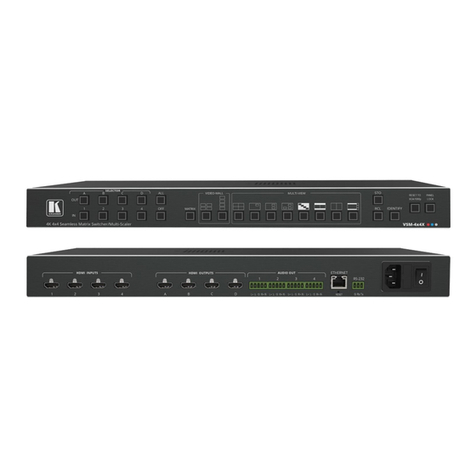
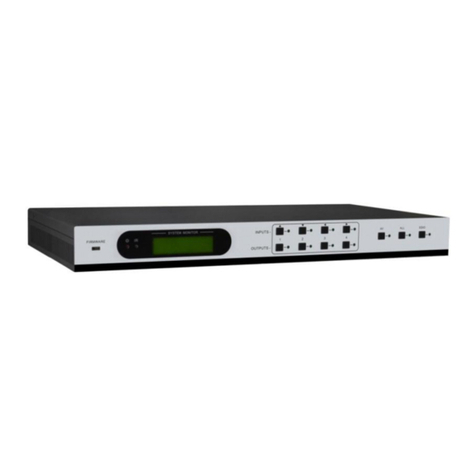
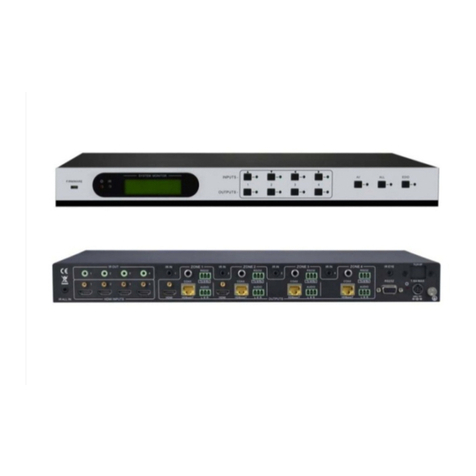
The CS-88MHDBTS and CS-44MHDBTS can be switched from the front panel by selecting the OUTPUT button first and
then selecting the INPUT button:
1. Press the OUTPUT button (1 through 8) on the bottom row that corresponds with the OUTPUT (Display, or Sink
Device) you would like to send to a source.
2. Once pressed, the switch will illuminate the OUTPUT button that you have selected, along with the INPUT row,
indicating that it is ready for you to select the INPUT.
3. Select the desired INPUT.
EDID
The CS-88MHDBTS and CS-44MHDBTS has the ability to control the EDID that the source devices sees as a display
1. Press and hold the INPUT button of the source you want to set EDID for 3 seconds
2. Use the selected INPUT button as UP and the corresponding OUTPUT button as DOWN to select the desired
EDID setting
3. To set the selected EDID setting press and hold for 3 seconds the original INPUT button
Toggle DHCP
The CS-88MHDBTS and CS-44MHDBTS comes from the factory with DHCP turned off. To enable DHCP from the front
panel:
1. Press and hold INPUT 1 and INPUT 4 together for 3 seconds

View Network Settings
1. Press and hold INPUT 3 and INPUT4 together for 3 seconds
The CS-88MHDBTS and CS-44MHDBTS will cycle through the following information: Device IP, Host IP, Subnet Mask, and
MAC Address.
View Firmware Version
To view the current firmware on the CS-88MHDBTS or the CS-44MHDBTS:
1. Press and hold INPUT 2 and INPUT 4 together for 3 seconds
Locking Front Panel Buttons
You have the ability to lock the front panel buttons so any accidental button presses can be ignored.
1. Press and hold INPUT 2 and INPUT 3 together for 3 seconds

Web Interface
In order to access the Web Interface use a web browser (e.g. Internet Explorer, Chrome, Edge, Safari, etc.) and go to the
IP address of the Matrix.
Live Switch
Use this page to switch between inputs and outputs from the web interface live.
Link Info
Use this screen to monitor the EDID information of the connected input devices.

IR Setting
The IR switching allows you to route the IR signals on the IR outputs manually if you need to have a fixed route.
Note: By default the IR OUT is automatically routed with the active source.
Video Setting
On this screen you can modify the video signal that is being output by the matrix.
•either upscale, downscale or bypass the scaling feature
•Enable to disable the Output Signal Generator
oNOTE: The HDMI and HDbT outputs can be tested independent from each other.

Audio Setting
Here you can turn on or off the extracted audio for the SPDIF digital Coax or 3.5 Stereo ports. You can also set the audio
delay for the audio breakouts in order to combat any audio sync issues.
Audio Matrix and EX-Audio Matrix Mode
Here you can set the route of the audio in a matrix fashion for the extracted audio connections and bind the audio to
follow either the INPUT, OUTPUT, or set it to be Matrixed.
•Audio Delay – This allows you to change the audio delay to combat lip-sync issues on the extracted audio. Each
audio output can be delayed independently of the others.
•Bind to Input – The extracted audio binds to its corresponding input. E.g. Audio out 3 will always output audio
from INPUT 3.
•Bind to Output – The extracted audio binds to its corresponding output. E.g. Audio Out 3 will always output
audio from whichever input is selected for OUTPUT 3.
•Matrix – The extracted audio can be set manually to specific Audio Outs. E.g. Audio Out 3 will always play audio
from INPUT 4 regardless of what INPUT is selected for OUTPUT 3.

EDID Manage
Here you can set or control the EDID for the individual inputs.
System Settings
IP Settings – Here you can set the network configurations. E.g. set the static IP address, change the TCP port, or find the
MAC address.
Port Alias Setting – Here you can give the individual inputs or outputs an Alias, or a name. E.g. if INPUT 1 is a cable box,
you can name it “Cable”, or if OUTPUT 3 is the Master Bedroom TV, you can name it “Master Bed”

EDID Management
The CS-88MHDBTS and CS-44MHDBTS matrices have 29 pre-configured EDID settings.
NOTE: In order to maximize compatibility, by default the matrix is set to a 1080p EDID. When using 4K sources, you will
want to define a 4K EDID on that input (or read from the display).
To Change the EDID setting with the face buttons:
1. Press and hold the INPUT you want to change for 3 seconds8
2. Now "press" the desired INPUT/OUTPUT (Example: Setting EDID for INPUT3, use IN 3 & OUT 3)
to toggle through the available EDID options
3. Once you are on the EDID you want to select, press and hold the INPUT button again for 3
seconds. The LCD Screen will say "Please Wait", then "OK" once the EDID is set.
To change the EDID setting with the Web Interface, login to the Matrix through a web browser using the
IP address and then select EDID. From there you can select the desired/required EDID for each input
individually.
These are the pre-configured EDID settings that are available to toggle through:
0: 1080P_2CH(PCM)
1: 1080P_6CH
2: 1080P_8CH
3: 1080P_3D_2CH(PCM)
4: 1080P_3D_6CH
5: 1080P_3D_8CH
6: 4K30Hz_3D_2CH(PCM)
7: 4K30HZ_3D_6CH
8: 4K30HZ_3D_8CH
9: 4K60Hz(Y420)_3D_2CH(PCM)
10: 4K60Hz(Y420)_3D_6CH
11: 4K60Hz(Y420)_3D_8CH
12: 4K60HZ_3D_2CH
13: 4K60HZ_3D_6CH
14: 4K60HZ_3D_8CH
15: 1080P_2CH(PCM)_HDR
16: 1080P_6CH_HDR
17: 1080P_8CH_HDR
18: 1080P_3D_2CH(PCM)_HDR
19: 1080P_3D_6CH_HDR
20: 1080P_3D_8CH_HDR
21: 4K30Hz_3D_2CH(PCM)_HDR
22: 4K30Hz_3D_6CH_HDR
23: 4K30Hz_3D_8CH_HDR
24: 4K60Hz(Y420)_3D_2CH(PCM)_HDR
25: 4K60Hz(Y420)_3D_6CH_HDR
26: 4K60Hz(Y420)_3D_8CH_HDR
27: 4K60Hz_3D_2CH(PCM)_HDR
28: 4K60Hz_3D_6CH_HDR
29: 4K60Hz_3D_8CH_HDR
30: USER_EDID_ 1
31: USER_EDID_2
32: USER_EDID_3
The first 30 EDID settings cannot be changed. The three USER EDID settings are programmed using RS-
232 or the web interface. However, you can read an EDID from any output and it will automatically store
in USER EDID 1. Remember, each INPUT has an independent EDID setting and you may need to program
each one. To read and set an EDID to a specified input the steps are the same as switching the EDID
normally, except when you see the following figure, press and hold the original INPUT button again for 3
seconds. This will read, store, and set the EDID for that INPUT based on the OUTPUT selected.

IR Remote Control
The HDMI matrix can also be controlled by using the supplied IR remote. The left arrow button switches
to the previous button in the sequence, and the right arrow switches to the next input in sequence.
RS-232 TCP/IP Control Commands
These commands apply to both the CS-88MHDBTS and the CS-44MHDBTS. Where applicable, commands
that show 1-8 for inputs or outputs if used with the CS-44MHDBTS do not exceed 4 for the inputs and
outputs.
•Note: Add a return (Enter Key) after each command when using direct commands.
•Note: To send control commands to the Matrix, be sure to use the RS232-CTL port NOT the
HDbT RS232 port.
How to route RS232 commands when using the HDbT extenders:
To ensure that you format the commands correctly take note of the following:
1. You first send a route command then send the device command
2. You MUST know the baud rate of the device you are sending commands to.
3. For “hybrid” ASCII commands, it may be necessary to convert the numbers to a decimal value

Your first Command is for the route, and looks like this:
•A= Device Address (use this even if using a single unit, just put 00)
•OUT = The Output you want to route the forthcoming command to
•LEN = Forthcoming command length - for ASCII this includes EVERY character including spaces.
For HEX it includes only the BYTE count.
oEx1: If the ASCII command is "ka 0 1" the length is 6. Count spaces. NOTE: You can
exceed the length by 2 if unsure. If you exceed the length by more than 2 it will not
work.
oEx2: If HEX command is "6B 68 20 30 20 31" the length is 6. Do not count spaces. Again,
you can exceed by 2.
•BR = Baud Rate of the device you are sending to - You use a single digit to replace "x"
o0 - 9600, 1 - 14400, 2 - 19200, 3 - 38400, 4 - 57600, 5 – 115200
Using Telnet (IP)
System HELP
System Address = 00
F/W Version : 1.00
Azz
All Commands start by Prefix System Address zz, if [01-99]
H
Help
STA
Show Global System Status
SET RST
Reset to Factory Defaults
SET ADDR xx
Set System Address to xx {xx=[00~99](00=Single)}
SET LCD ON Tx
Set LCD Remain On Time{x=[0~3](0=Always ON,1=15,2=30,3=60Sec)}
SET KEY LOCK ON/OFF
Set Key Lock On/Off
GET ADDR
Get System Address
GET STA
Get System System Status
GET INx SIG STA
Get Input x Signal Status{x=[0~4](0=ALL)}
GET LCD ON T
Get LCD Remain On Time
GET KEY LOCK
Get Key Lock Status
Output Setup Commands

SET OUTx VS Iny
Set Output x To Input y{x=[0~4](0=ALL), y=[1~4]}
SET OUTx HP VIDEOy
Set HDMI Output VIDEO Mode {x=[0~4](0=ALL), y=[1,3](1=BYPASS,3=2K->4K)}
SET OUTx TP VIDEOy
Set HDBT Output VIDEO Mode {x=[0~4](0=ALL), y=[2,5](2=4K->2K,5=ICT Mode)}
SET OUTx EXA EN/DIS
Set Ex-Audio Output Enable/Disable{x=[0~4](0=ALL)}
SET OUTx EXADL PHy
Set Ex-Audio Delay{x=[0~4](0=ALL),
y=[0~7](0=Bypass,1~7=90,180,270,360,450,540,630MS)}
SET EXAMX MODEx
Set Ex-Audio Matrix Mode{x=[0~2](0=Bind To Output,1=Bind To Input,2=Matrix}
SET OUTx AS INy
Set Ex-Audio Output x To Input y{x=[0~4](0=ALL), y=[1~4]}
SET OUTx HP SGM EN/DIS
Set HDMI Output Signal Generator Enable/Disable{x=[0~8](0=ALL)}
SET OUTx TP SGM EN/DIS
Set HDBT Output Signal Generator Enable/Disable{x=[0~8](0=ALL)}
SET OUTx HP STREAM
ON/OFF
Set HDMI Output x Stream ON/OFF{x=[0~4](0=ALL)}
SET OUTx TP STREAM
ON/OFF
Set HDBT Output x Stream ON/OFF{x=[0~4](0=ALL)}
GET OUTx VS
Get Output x Video Route{x=[0~4](0=ALL)}
GET OUTx HP VIDEO
Get HDMI Output x Video Mode{x=[0~4](0=ALL)}
GET OUTx TP VIDEO
Get HDBT Output x Video Mode{x=[0~4](0=ALL)}
GET OUTx HP EDID DATA
Get HDMI Output x EDID DATA{x=[1~4]}
GET OUTx TP EDID DATA
Get HDBT Output x EDID DATA{x=[1~4]}
GET OUTx EXA
Get Ex-Audio Output Enable/Disable Status{x=[0~4](0=ALL)}
GET OUTx EXADL PH
Get Ex-Audio Output Delay Status{x=[0~4](0=ALL)}
GET EXAMX MODE
Get Ex-Audio Matrix Mode
GET OUTx AS IN
Get Output x Ex-Audio Route{x=[0~4](0=ALL)}
GET OUTx HP SGM
Get HDMI Output Signal Generator Enable/Disable Status{x=[0~4](0=ALL)}
GET OUTx TP SGM
Get HDBT Output Signal Generator Enable/Disable Status{x=[0~4](0=ALL)}
GET OUTx HP STREAM
Get HDMI Output x Stream ON/OFF Status{x=[0~4](0=ALL)}
GET OUTx TP STREAM
Get HDBT Output x Stream ON/OFF Status{x=[0~4](0=ALL)}
Input Setup Commands
SET INx EDID y
Set Input x EDID{x=[0~4](0=ALL), y=[0~32]}
0:1080P_2CH 1:1080P_6CH 2:1080P_8CH 3:1080P_3D_2CH
4:1080P_3D_6CH 5:1080P_3D_8CH 6:4K30HZ_3D_2CH 7:4K30HZ_3D_6CH
8:4K30HZ_3D_8CH 9:4K60HzY420_3D_2CH 10:4K60HzY420_3D_6CH
11:4K60HzY420_3D_8CH
12:4K60HZ_3D_2CH 13:4K60HZ_3D_6CH 14:4K60HZ_3D_8CH 15:1080P_2CH_HDR
16:1080P_6CH_HDR 17:1080P_8CH_HDR 18:1080P_3D_2CH_HDR
19:1080P_3D_6CH_HDR
20:1080P_3D_8CH_HDR 21:4K30HZ_3D_2CH_HDR 22:4K30HZ_3D_6CH_HDR
23:4K30HZ_3D_8CH_HDR
24:4K60HzY420_3D_2CH_HDR 25:4K60HzY420_3D_6CH_HDR
26:4K60HzY420_3D_8CH_HDR
27:4K60HZ_3D_2CH_HDR 28:4K60HZ_3D_6CH_HDR 29:4K60HZ_3D_8CH_HDR
30:USER1_EDID 31:USER2_EDID 32:USER3_EDID
SET INx EDID CY OUTy HP
Copy HDMI Output y EDID To Input x(USER1 BUF){x=[0~4](0=ALL), y=[1~4]}

SET INx EDID CY OUTy TP
Copy HDBT Output y EDID To Input x(USER1 BUF){x=[0~4](0=ALL), y=[1~4]}
SET INx EDID Uy DATAz
Write EDID To User y Buffer of Input x{x=[0~4](0=ALL), y=[1~3],z=[EDID Data]}
GET INx EDID
Get Input x EDID Index{x=[0~4](0=ALL)}
GET INx EDID y DATA
Get Input x EDID y Data{x=[1~4],y=[0~32]}
Network Setup Command
( xxx=[000-255], zzzz=[0001~9999]
SET RIP xxx.xxx.xxx.xxx
Set Route IP Address to xxx.xxx.xxx.xxx
SET HIP xxx.xxx.xxx.xxx
Set Host IP Address to xxx.xxx.xxx.xxx
SET NMK xxx.xxx.xxx.xxx
Set Net Mask to xxx.xxx.xxx.xxx
SET TIP zzzz
Set TCP/IP Port to zzzz
SET DHCP y
Set DHCP {y=[0~1](0=Dis,1=Enable)}
GET RIP
Get Route IP Address
GET HIP
Get Host IP Address
GET NMK
Get Net Mask
GET TIP
Get TCP/IP Port
GET DHCP
Get DHCP Status
GET MAC
Get MAC Address
IR Route Setup Command
SET IRC OUTx IS INy
Set Local Output x IR Route{x=[0-4](0=all),y=[1-4]}
SET IR EXT SW x1.x2.x3.x4
Set IR Extender Switch{x1~x4=[0-1](0=Disable,1=Enable)}
GET IRC OUTx IS
Get Local Output x IR Route{x=[0-4](0=all)}
GET IR EXT SW
Get IR Extender Switch Status
RS232 Route Setup
Command
SET RS PTH OUTx LENy BRz
Set RS232 Pass Through to Outputx {x=[0-
9](0=ALL),y=[1~100],z=[0~5](0=9600,1=14400,2=19200,3=38400,4=57600,5=115200)}
IR Code Setup Command
SET IR SYS xx.yy
Set IR Custom Code{xx=[00-FFH],yy=[00-FFH]}
SET IR OUTx INy CODE zz
Set IR Data Code{x=[1~4],y=[1~4],zz=[00-FFH]}
GET IR SYS
Get IR Custom Code
GET IR OUTx INy Code
GET IR DATA Code

Specifications
Video
Supported Video Resolutions
Up to 4K 60Hz 4:2:0, 4K 30Hz 4:4:4, DCI 4K
(1096x2160
Supported HDR Formats
4:2:0, 4:2:2, 4:4:4 10 and 12 Bit Deep Color -
HDR10, HDR10+, Dolby Vision (24/30
Frames), HLG
Supported Color Space
YUV, RGB - CSV: REC. 601, REC. 709, BT2020,
DCI, P3 D6500
Supported Chroma Subsampling
4:4:4, 4:2:2, 4:2:0
Supported Deep Color
Up to 16bit @ 1080p, Up to 12bit @ 4K
HDMI Scaling
1080p to 4K (Resolution only, not Framerate)
HDbaseT
4K to 1080p (Resolution only, not Framerate)
Audio
Support HDMI Audio Formats
PCM 2.0 CH, LPCM 5.1 & 7.1, Dolby Digital,
DTS 5.1, Dolby Digital Plus, Dolby TrueHD,
DTS-HD Master Audio, DTS-X, Dolby Atmos
Supported Extracted Audio Digital Coax
PCM 2.0 CH, LPCM 6CH, Dolby Digital, DTS
Supported Extracted Audio 3.5mm Stereo
PCM 2.0 CH (No Downmixing)
Other
HDMI Bandwidth
18Gbps
HDbaseT Bandwith
18Gbps Using MLC (Minimal Loss
Compression) 10.2 Gbps signal
PoC Power over cable for HDbaseT Receivers
Yes on all ports
Supported HDCP
HDCP 2.2 and earlier
Control
Ports
IR, RS-232, LAN
Web GUI
Yes
Ports
HDMI
4x In, 4x Out CS-44MHDBTS
8x In, 8x Out CS-88MHDBTS
HDbaseT
70 Meters/230Ft with
4K@60, 4:4:4, & HDR
4x Out CS-
44MHDBTS
100 Meters/328Ft with
1080p
8x Out CS-
88MHDBTS
LAN
1x RJ45 10/100
Audio
4x Coax SPDIF Out, 4x 3.5mm Stereo Out CS-
44MHDBTS
8x Coax SPDIF Out, 4x 3.5mm Stereo Out CS-
88MHDBTS
IR
1x IR 3 conductor input

RS232
1x DB9 Female
Environmental
Operating Temperatures
23 to 125°F (-5 to 51°C)
Storage Temperatures
-4 to 140°F (-20 to 60°C)
Humidity Range
5-90% RH (No Condensation)
Power
Consumption
92 Watts Max
Power Supply
Input: AC 100-240V ~ 50/60Hz
Output: DC 12V 3A
Physical
Dimensions
CS-88MHDBTS:
MM: 50.8 x 256 x
441.33
Inch: 2 x 10.07 x
17.375
CS-44MHDBTS:
MM: 44.45 x
225.42 x 438.15
Inch: 1.75 x 8.75
x 17.25
Rack Units
1x RU
Weight
7 Lbs / 3.5 Kg CS-44MHDBTS, 8Lbs /3.5Kg CS-
88MHDBTS
Weights and Dimensions are approximate, Specifications may change without notice.

Safety Instructions
To protect the safety of any person using or handling these devices and to ensure the reliable operation
of these products, please follow these instructions:
1. Use provided power supplies
a. If alternate power supply is necessary, check Voltage, Polarity and Amperage to ensure
sufficient and correct power is supplied to the device.
2. Operate these products within specified temperature and humidity ranges
3. Ensure adequate ventilation
4. Repair should be handled only by qualified professionals due to sensitive devices that may be
damaged if mistreated.
5. Only operate in a dry environment. These devices are not meant for outdoor or marine
environments
Troubleshooting
•Verify Power - The LCD screen on the front of the matrix should be lit up when power is applied.
Check that both power supplies are connected to the matrix and powered
•Verify Connections - Check that all cables are properly connected
•Issues with one INPUT/OUTPUT - Swap ports/cables/etc to help narrow down if the issue stays
with the input/output/etc
oFollows the device, then it may be an EDID issue. Default out of the box is a 1080p 2ch.
Try another canned EDID or use the COPY FROM OUTx command to copy the connected
displays EDID - Pg.12, 17, 23
•Issues with 4k but 1080p or less is working
oVerify all connected devices are capable of the signal you are sending
Warranty
If your device does not work properly because of a defect in material or manufacturing, Metra Home
Theater will either repair or replace with a new or refurbished unit for a period of 10 Years. You must
mail-in your product during the warranty period. This Limited Warranty is available only to the original
purchaser and only covers products purchased as new. A receipt or other proof of original purchase with
the purchase date is required for warranty service.
©2019 Metra Electronics Corporation
460 Walker Street, Holly Hill, FL 32117-2699
Specifications are subject to change without notice.
All trademarks are the property of their respective owners.
386-255-0234 • MetraHomeTheater.com
This manual suits for next models
1
Table of contents
Other Ethereal Matrix Switcher manuals
