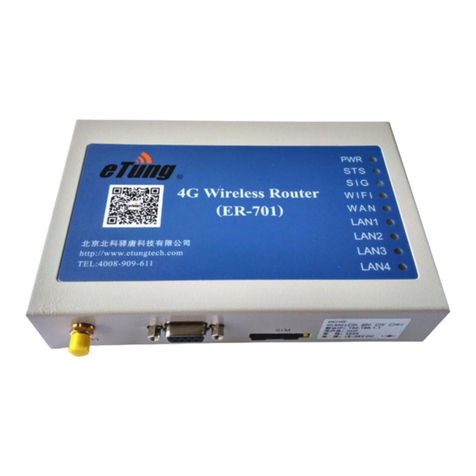
eTung MR-900W User manual

Instruction Manual for High Speed WCDMA 3G Serial
Product MR-900W
MR-900WAppearance,Specifications,andAccessories
MR-900WCommonNetworkingApplicationStructure
Appendix
BriefIntroduction
Application caseA: Configure MR-900W for high-speed internet connection
Application case B: Configure MR-900W for connecting web video device
MR-900WConfiguringProcedure
ApplicationcaseC:ConfiguringMR-900WforserialportDTUfunction
1
FQA
Example 1: Connecting MR-900W toAIXS 205 (webcam) for wireless video surveillance
Example 2: Configuring MR-900W for remotely controlling color LED screen
Application case D: Configuring MR-900W for using Ethernet port and serial port simultaneously
ApplicationcaseE:MR-900WusedforremoteconnectingtoLANbyVPN
Others

Brief Introduction
Thank you for choosing E-Tung high speed WCDMA 3G product MR-900W。This manual will help you to
know the function and usage of this product. Please read carefully about this manual.
MR-900W Specification
Product Outlook
Port RJ45
Serial Port RS232
+5~36V DC Supply
Mounting Kit
2
Antenna
Indicator
For Configuration
Serial Port RS232
Mounting Kit
SIM Card
Product Specification
Power Supplier:+5 ~ +36V DC Supplier
Power Interface:inner(+) outer(-)
Max Current:800mA@+5V DC
Standby Current :220mA@+5V DC

3
Data interface:RS232/RJ45
Network:WCDMA network
Buffer Size:RAM 64M FLASH 4M
Frequency:UMTS/HSDPA/HSDPA850/1900/2100MHz
Quad-BandGSM850/900/1800/1900MHz
Working Temperature:-25℃~ +70℃
Working Max Humidity:95%@+40℃
Size:80x104x38mm (Not include antenna and mounting kit)
Basic Function
Network Interface IP Adjustable
Supporting NAT Online Sharing
Supporting DHCP Server
Supporting DNS Proxy
Supporting Interface Mapping
Supporting DMZ Host(IPAddress Mapping)
Supporting VPN Function
Supporting DDNS Automatic Registration
Supporting Static Routes Configuration
Supporting GSM/WCDMA
Supporting Display Wireless Transmitting Speed
Supporting Serial Port Configuration, Telnet Configuration, WEB Page Frame Configuration
Supporting Serial Port DTU Function,Both Ethernet port and Serial port are usable
Indicator
LED
Indicator color Status description
On Power on
Power Red Off Power off
On Connected to Data Base
Off No Connection with Data Base
Quick Flash Connecting to Data Base
Online Green
Slow Flash Dialing
Flash Data is Transmitting/Stand By
Transmitting Red Off No Data Transmition
Flash Ethernet is connected
Ethernet Red Off Ethernet is not connected
Interface Definition

MR-900W Serial Port Configuration(Standard RS-232 DB9 Female Port)Socket definition
is as following:
Types RS-232
Socket 235
Definition
RXD(out) TXD(in) GND
MR-900W user serial port:
Types RS-232 RS-485
Socket 235782 3 5
Definition
RXD(in) TXD(out) GND RTS(out) CTS(in) ABGND
Accessory
3G Sucking Antenna
Cross Cable
4

Power Supplier
MR-900W Common NetworkingApplication Chart
5

6

MR-900W Configuration Procedure
Step 1:Plug in cables
•Put in the SIM card with WCDMA function
•Using a cross cable to connect MR-900W’s Ethernet port with a computer’s Ethernet port
•Plug in Power Supplier
Step 2:Sign in for configuration
•Turn on computer, and set the computer’s IP address as “Automatically obtaining IP address”
•Opening The IE browser,and key in “http://192.168.1.1” on the browser and press “enter”.
•In the new window, key in “root” as the username,and “1234” as password,and then press “enter” to get
into web configuration interface.
7

Application case A: Configure MR-900W for high-speed internet connection
MR-900W may be directly connected to one computer Ethernet port to achieve wireless online, and also it
may be connected to a switcher or a HUB to make a few computers sharing the internet. We will illustrate these 2
types of connection as following.
1、 Direct connecting a computer to the internet through MR-900W
Set up procedure:
(1) Connecting the computer’s Ethernet port with MR-900W through a cross cable.
(2) Choose computer’s IP as “automatically obtain IP address”
Click on “control panel ”Γnetwork connecting”Γlocal connecting”,Îright click on“local
connecting”, and then click on “property”, and then choose “automatically obtain IP address”
8

If you would like to set a IP address for MR-900W, then you should set the IP address for MR-900W as
192.168.1.1,and IP address as 192.168.1.20,(as show in the following figure):
9

(3) Put an WCDMA SIM card into the MR-900W wireless router, and turn on the power. MR-900W will dial
up for online automatically, then we can browse website and send/receive email. We can also check the
device’s working status through the following interface. We Key in “http://192.168.1.1” on the address
bar, and then type in the user name as “root” and password as “1234” for login. After login the working
interface for MR-900W,we can check the device’s online speed as well as data traffic.
10

2、 Connecting multiple computers with internet through MR-900W
Set up procedure:
(1) Connecting MR-900W to the upstream port of a switcher or a HUB through a cross cable,and connecting
all the computers which are in the network to the downstream port of the switcher or the HUB.
(2) Choose computer’s IP as “automatically obtain IP address”
Click on “control panel ”Γnetwork connecting”Γlocal connecting”,Îright click on“local
connecting”, and then click on “property”, and then choose “automatically obtain IP address”.
11

If you would like to set a IP address for MR-900W, then you should set the IP address for MR-900W as
192.168.1.1,and IP address as 192.168.1.20,(as explained above ):
(3) Put a WCDMA SIM card into the MR-900W wireless router, and turn on the power. MR-900W will dial
up for online automatically, then we can browse website and send/receive email. We can also check the
device’s working status through the following interface. We Key in “http://192.168.1.1” on the address
bar, and then type in the user name as “root” and password as “1234” for login. After login the working
interface for MR-900W,we can check the device’s online speed as well as data traffic.
MR-900W wireless router has “Port Forwarding”,“DMZ Host”, and“DHCP Server”functions,so that customers
can use it as a normal router for data transfer as well.
Application case B: Configure MR-900W for web video device
MR-900W 3G WCDMA device can be used for long distance wireless video monitoring. It’s easy for use and
provides high quality image. We illustrate the procedure for connecting web video through MR-900W by DMZ
12

host method as following.
Setup Steps:
1. Reading IP address from web video camera
Each web video camera has its own IP address, and we can set the IP address. You may set the IP address as:
192.168.1.20。
2. Configuring MR-900W
a) Log into the configuring interface for MR-900W. The default gateway IP address for MR-900W is
“192.168.1.1”,Please key in “http://192.168.1.1” on the IE browser,and then put user name as “root”
and password as “1234”. You will be able to see the configuring interface for MR-900W. (As show in
the following figure:
13

b) Configuring DDNS。
i. Why should we use DDNS?
The IP address we get from WCDMA is the dynamic IP (IP address changes for each dialing
online). If we configure the DDNS for MR-900W, then we can access the device, no matter what IP
address we get from each dialing.
ii. Is it necessary that we use DDNS?
It is not necessary that we use DDNS. The reason for choosing DDNS is because the IP address we
get from each WCDMA dialing is different and that will affect device accessing. However if the
WCDMA card provides the fixed IP address, then we do not need DDNS in that situation.
iii. How to configure DDNS?
Log-into MR-900W configuration interface, and click on left side “DDNS” button, then click on
DDNS service and configure domain name and password, then click on “save”.
14

c) Configuring DMZ Host: Log-into MR-900W configuration interface, and configure the IP address of
web camera as the IP address of DMZ host from MR-900W. After all these steps, click on “restart”, and
restart the device.
3. Video Access
First, set up the MR-900W and then connect the MR-900W to webcam network port with a crossover cable,
and then turn on the power for both devices. You may open an IE browser on a computer connecting to the
internet, and enter the domain name to get video access. (Such as http://etungtest. gnway.net)
15

4. Notes:
1. Must use crossover cable for connecting MR-900W to computer and webcam;
2. MR-900W and the network camera must be in the same network segment. The factory default gateway IP for
MR-900W is: 192.168.1.1, therefore you should set up the webcam’s IP between 192.168.1.2 and
192.168.1.254. Of cause, you may change the gateway IP for MR-900W to other network segment, as long as
you keep MR-900W and webcam in the same network segment. MR-900W is required after each change the
settings to take effect after restart.
Application case C: Configuring MR-900W for serial port DTU function
MR-900W not only has the function for wireless router, but also has the function for DTU. Here’s how
MR-900W can be featured as DTU.
1、Set up mServer
See “mServer installation manual”
2、Configuring MR-900W
You may go to the configuring interface and setup the following parameter (As show in the following figure):
1. IP address (or domain name) for primary data center
2. primary data center port
3. user serial port configuration
16

After finishing the configuration, click on “save” and restart the device.
3、Get MR-900W online
After MR-900W is configured correctly, and the antenna and power supply connected correctly, you should
make sure to put a WCDMA card into MR-900W to access the internet. MR-900W will dial-up to connect to
mServer automatically. When the MR-900W connected to the mServer, it will appear online on the mServer.
At this point, the MR-900W can be mapped to a virtual serial port or a TCP port over mServer. It can also
remotely send and receive data through DCC interface and PC software.
Application case D: Configuring MR-900 for using Ethernet port and serial port simultaneously
MR-900W has both Ethernet port and serial port, and these ports can be used simultaneously. Let’s assume that
we would like to connect a PLC to report the collecting data (such as concentration, and pressure etc.), and at the
same time we need to connect a webcam for real time video surveillance. In this case we use point to center mode
for serial port transmission and DMZ host mode for Ethernet port transmission simultaneously.
1、Setup mServer
See “mServer installation manual”
17

2、Configuring MR-900W
You may go to the configuring interface and setup the following parameter (As show in the following figure):
a) IP address (or domain name) for primary data center
b) primary data center port
c) user serial port configuration (match to PLC serial port parameter)
Then, configure the parameter for network camera (configuring DMZ host and DDNS). See the steps in
application case B
18

3、Get MR-900W online
After MR-900W is configured correctly, and the antenna and power supply connected correctly, you
should make sure to put a WCDMA card into MR-900W to access the internet. MR-900W will dial-up to
connect to mServer automatically. When the MR-900W connected to the mServer, it will appear online
on the mServer. At this point, the MR-900W can be mapped to a virtual serial port or a TCP port over
mServer. It can also remotely send and receive data through DCC interface and PC software. At the same
time, you may type in configured domain name into the IE browser, and visit the device that connecting
to MR-900W.
Application case E: MR-900W used for remote connecting to LAN by VPN
MR-900W can be used for expanding corporate virtual network and remote accessing virtual network through
VPN function. For example, users can access corporate LAN through MR-900W dialing up. However this
approach requires the local area network router support VPN function, and PPTP tunnel access, since the current
MR-900W only support PPTP network protocol. Here are some ways to implement this VPN connection.
1. System Structure
19

MR-900W Remote Access LAN by using VPN Mode
2. Hardware and network preparation
a) One network router supporting VPN function (Supporting PPTP connecting mode as well),
b) This router connects to a LAN and is able to access internet,
c) One set MR-900W(Include accessory),
d) One WCDMA card
e) One computer
3. Setup Steps
a) Configuring router for PPTPlogin
We use RV042 router (from Linksys) as example to explain the steps for configuring PPTP login. First of
all, this router has VPN function and supports PPTP accessing. Second, we login to the router and click
on “VPN” ΓPPTP” for enable the PPTP server, and then, set up an IP segment for VPN connection.
After then we may set up a user name and the password for VPN accessing (As show in the following
figure).
20
Table of contents
Other eTung Wireless Router manuals
