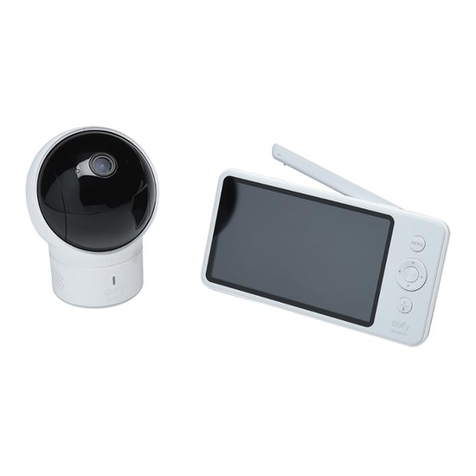
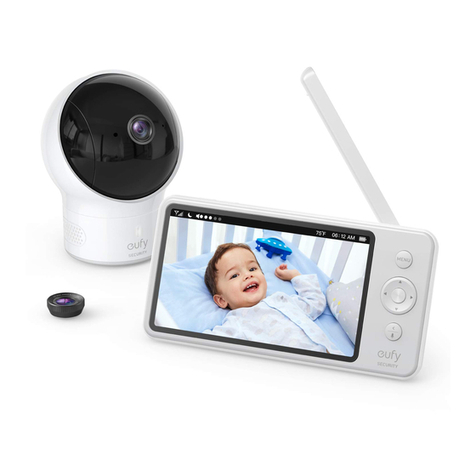
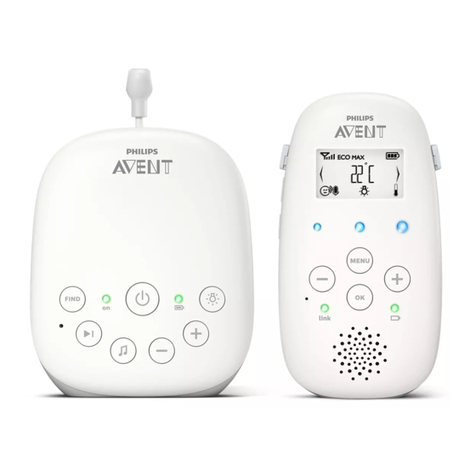
eufy Security SpaceView User manual

Anker Innovations Limited. All rights reserved. Eufy and
the Eufy logo are trademarks of Anker Innovations Limited,
registered in the United States and other countries. All other
trademarks are the property of their respective owners.
51005001526 V01
User Manual
eufy Security SpaceView
Benutzerhandbuch I Manual del usuario
Manuel de l'utilisateur

English 01
English 01
Deutsch 13
Español 23
Français 33
Tabel of Content
What’s in the Box 02
Setting Up the Camera 04
Replacing the Camera lens 08
Wide-angle lens Installation 09
Safety 10
EN Note: make sure you get the latest firmware upgrade for
your baby monitor.
DE Hinweis: Stellen Sie sicher, dass Ihr Babyphon auf die
neueste Firmware aktualisiert ist.
ES Nota: Asegúrese de implementar la actualización de
firmware más reciente del monitor para bebés.
FR Remarque : assurez-vous d'utiliser la mise à niveau du
firmware la plus récente pour votre écran de surveillance
bébé.

02 English English 03
What’s in the Box
Mounting
Screws
User manual
Wide-Angle Lens
Camera Micro-USB
Power Cable (3 m)
Camera Adapter
(5V 2A)
Baby Camera Wall Mount
Power adapter varies by region.
Camera Features:
2
1
3
4
5
6
1Standard camera lens 4Speaker
2Microphone 5Micro USB port
3Power LED Status indicator 6Pairing button

04 English English 05
Setting Up the Camera
Camera Installation
Connect the baby camera’s Micro USB power cable to the camera
adapter (5V 2A), and then connect the adapter to a power outlet.
Finally, connect the other end of the baby camera’s micro USB
power cable to the micro USB port in the camera.
Adding a new Baby Camera to the Baby Monitor
1. Check the firmware version of the monitor (see image
below), to make sure your SpaceView Baby Monitor is
running firmware version v2.3.0 or above. Contact our
customer service team for the latest firmware updates at:
2. Enter menu settings, go to Camera -> Add Camera, then
follow onscreen instructions to start the pairing.
3. Press and hold the pairing button on the rear of the
camera for 1 second until a notification prompt is heard.

06 English English 07
4. You can enable the Cycle Camera function when the
monitor has two or more baby cameras linked to it; a
maximum of 4 cameras can be paired to a monitor. The
monitor will cycle through the video of each camera
paired to it. Press the OK button on the monitor to switch
between the different cameras.
Camera Placement (on the Wall Mount)
1. Use the monitor to test the viewing angle from your
desired mounting spot.
2. Mark the screw holes with a pencil.
3. Drill 1/5” holes into the wall and then insert the anchors
into the holes.
4. Insert the screws through the mounting holes of the wall
mount and screw into the anchors.
90°vertical installation 180°horizontal wall installation
5. Place the camera on the wall mount.

08 English English 09
Replacing the Camera lens
Lens type Usage Lens
Standard camera
lens (default lens)
This lens is
recommended for
general viewing;
infants are clearly
seen within a 2~3m
range.
The lens angle of
view for standard
camera lens is 62°.
Wide-angle lens This lens provides a
wide-angle view of
the room. The lens
angle of view for
wide-angle lens is
110°.
Back Front
The standard camera lens is not removable. When you want
to use the wide-angle lens, simply place it over the standard
camera lens and fasten.
Wide-angle lens Installation
Place the baby camera on a flat surface to install the
wide-angle lens. Clean the lens with soft cloth.
1. Place the wide-angle lens over the standard camera lens.
2. Turn the wide-angle lens clockwise to fasten onto
the standard camera lens; stop turning once you feel
resistance.
Back Front
12

Safety
Warning
Strangulation Hazard: Children have STRANGLED in cords. Keep this cord out
of the reach of children (more than 1m (3ft) away). Never use extension cords
with AC Adapters. Only use the AC Adapters provided.
This product complies with the radio interference requirements of
the European Community.
Declaration of Conformity
Hereby, Anker Innovations Limited declares that this device is in compliance
with the essential requirements and other relevant provisions of Directive
2014/53/EU.For the declaration of conformity, visit the Web site https://
www.eufylife.com/.
This product can be used across EU member states.
Due to the used enclosure material, the product shall only be connected to a
USB Interface of version 2.0 or higher. The connection to so called power USB
is prohibited.
A statement regarding the AC/DC adapter as disconnect device is missing in
the user manual.
The statement shall require a socket outlet that is installed near equipment
and that shall be easily accessible.
The adapter shall be installed near the equipment and shall be easily
accessible.
Do not use the Device in the environment at too high or too low temperature,
never expose the Device under strong sunshine or too wet environment.
The suitable temperature for T8300-C and accessories is -20°C-40°C.
When charging, please place the device in an environment that has a normal
room temperature and good ventilation.
It is recommended to charge the device in an environment with a
temperature that ranges from -10°C~40°C.
Please ensure to use only the charger offered by the manufacturer. Using
unauthorized charger may cause danger and violate the authorization of the
projecter and the guarantee article.
The charger output voltage/current is 5Vdc/2A. The plug considered as
disconnect device of adapter.
If you use a third-party charger, the recommended outputvoltage/current of
the adaptor is 5Vdc/2A,and the adapter shall be CE approval type.
CAUTION RISK OF EXPLOSION IF BATTERY IS REPLACED BY AN INCORRECT
TYPE. DISPOSE OF USED BATTERIES ACCORDING TO THE INSTRUCTIONS
RF exposure information: The Maximum Permissible Exposure (MPE) level
has been calculated based on a distance of d=20 cm between the device and
the human body. To maintain compliance with RF exposure requirement, use
product that maintain a 20cm distance between the device and human body.
Operating Frequency Range: 2410-2477MHz
The T8300-C Max Output Power: 18.04dBm
The T3800-C device has been evaluated to meet general RF exposure
requirements and can be used in fixed exposure condition. RF exposure
information: The Maximum Permissible Exposure (MPE) level has been
calculated based on a distance of d=20 cm between the device and the
human body. To maintain compliance with RF exposure requirement, use
product that maintain a 20cm distance between the device and human body.
The following importer is the responsible party (contact for EU matters only)
Importer:Anker Technology (UK) Ltd
Importer Address:Suite B, Fairgate House, 205 Kings Road, Tyseley,
Birmingham,United Kingdom B11 2AA
This product is designed and manufactured with high quality
materials and components, which can be recycled and reused.
This symbol means the product must not be discarded as household
waste, and should be delivered to an appropriate collection facility
for recycling. Proper disposal and recycling helps protect natural
resources, human health and the environment. For more information
on disposal and recycling of this product, contact your local
municipality, disposal service, or the shop where you bought this
product.
10 English English 11

Deutsch 1312 English
FCC Statement
This device complies with Part 15 of the FCC Rules. Operation is subject
to the following two conditions: (1) this device may not cause harmful
interference, and (2) this device must accept any interference received,
including interference that may cause undesired operation.
Warning: Changes or modifications not expressly approved by the party
responsible for compliance could void the user's authority to operate the
equipment.
Note: This equipment has been tested and found to comply with the limits
for a Class B digital device, pursuant to Part 15 of the FCC Rules. These limits
are designed to provide reasonable protection against harmful interference
in a residential installation.
This equipment generates uses and can radiate radio frequency energy and, if
not installed and used in accordance with the instructions, may cause harmful
interference to radio communications. However, there is no guarantee that
interference will not occur in a particular installation. If this equipment does
cause harmful interference to radio or television reception, which can be
determined by turning the equipment off and on, the user is encouraged to
try to correct the interference by one or more of the following measures:
(1) Reorient or relocate the receiving antenna. (2) Increase the separation
between the equipment and receiver. (3) Connect the equipment into an outlet
on a circuit different from that to which the receiver is connected. (4) Consult
the dealer or an experienced radio/TV technician for help.
FCC Radio Frequency Exposure Statement
The T8300-C device has been evaluated to meet general RF exposure
requirements. The T8300-C can be used in fixed exposure condition. The min
separation distance is 20cm.
The following importer is the responsible partyCompany Name:
POWER MOBILE LIFE, LLC
Address: 400 108th Ave NE Ste 400, Bellevue, WA 98004-5541
Telephone:1-206-383-8247
Inhalt
Im Lieferumfang 14
Einrichten der Kamera 16
Austauschen des Kameraobjektivs 20
Installation des Weitwinkelobjektivs 21
Sicherheit 22

14 Deutsch Deutsch 15
Im Lieferumfang
Befestigungsschrauben
Benutzerhandbuch
Weitwinkelobjektiv
Mikro-USB-Netzkabel
für Kamera (3 m)
Kameraadapter
(5 V, 2 A)
Babyphon-Kamera Wandhalterung
Das Netzteil ist je nach Region unterschiedlich.
Kamerafunktionen:
2
1
3
4
5
6
1Standard-Kameraobjektiv 4Lautsprecher
2Mikrofon 5Mikro-USB-Anschluss
3Ein-/Aus-LED-
Statusanzeige
6Kopplungstaste

16 Deutsch Deutsch 17
Einrichten der Kamera
Installation der Kamera
Verbinden Sie das Micro-USB-Netzkabel der Babyphon-Kamera mit
dem Kameraadapter (5 V, 2 A) und schließen Sie den Adapter dann
an eine Steckdose an. Verbinden Sie abschließend das andere Ende
des Mikro-USB-Netzkabels der Babyphon-Kamera mit dem Mikro-
USB-Anschluss der Kamera.
Hinzufügen einer neuen Babyphon-Kamera zum
Babyphon-Monitor
1. Überprüfen Sie die Firmware-Version des Monitors
(siehe nachfolgendes Bild), um sicherzustellen, dass die
Firmware-Version v2.3.0 oder höher auf Ihrem Babyphon-
Monitor ausgeführt wird. Die neuesten Firmware-
Aktualisierungen erhalten Sie von unserem Kundendienst-
Team über die E-Mail-Adresse: support@eufylife.com.
2. Rufen Sie die Menüeinstellungen auf, gehen Sie zu
Kamera -> Kamera hinzufügen und befolgen Sie dann
die Anweisungen auf dem Display, um die Kopplung zu
starten.
3. Halten Sie die Kopplungstaste an der Rückseite
der Kamera 1 Sekunde lang gedrückt, bis eine
Benachrichtigung zu hören ist.

18 Deutsch Deutsch 19
4. Sie können die Zykluskamera-Funktion aktivieren,
wenn der Monitor mit zwei oder mehr Babyphon-
Kameras gekoppelt ist; es können maximal 4 Kameras
mit einem Monitor gekoppelt werden. Der Monitor wird
die Videos aller gekoppelten Kameras nacheinander
anzeigen. Drücken Sie auf die OK-Taste, um zwischen den
verschiedenen Kameras zu wechseln.
Befestigen der Kamera (an der Wandhalterung)
1. Verwenden Sie den Monitor, um den Blickwinkel vom
gewünschten Befestigungsort zu testen.
2. Markieren Sie die Position der Schraubenlöcher mit einem
Bleistift.
3. Bohren Sie Löcher mit einem Durchmesser von 3,81 cm
in die Wand und stecken Sie anschließend die Dübel in die
Löcher.
4. Drücken Sie die Schrauben durch die Befestigungslöcher
der Wandhalterung und schrauben Sie sie in die Dübel
hinein.
Vertikale Montage mit 90° Horizontale Wandmontage mit 180°
5. Platzieren Sie die Kamera auf der Wandhalterung.

20 Deutsch Deutsch 21
Austauschen des Kameraobjektivs
Objektivtyp Verwendung Objektiv
Standard-
Kameraobjektiv
(Standardobjektiv)
Dieses Objektiv wird
für die allgemeine
Betrachtung
empfohlen; Säuglinge
sind innerhalb einer
Reichweiter von
2 bis 3 Metern klar
erkennbar.
Beim Standard-
Kameraobjektiv
beträgt der
Objektivwinkel 62°.
Weitwinkelobjektiv
Dieses Objektiv
bietet eine
Weitwinkelansicht
des Zimmers. Der
Objektivwinkel des
Weitwinkelobjektivs
beträgt 110°.
Back Front
Das Standard-Kameraobjektiv kann nicht entfernt werden.
Wenn Sie das Weitwinkelobjektiv verwenden möchten,
setzen Sie es einfach auf das Standard-Kameraobjektiv und
befestigen es.
Installation des Weitwinkelobjektivs
Stellen Sie die Babyphon-Kamera auf eine flache
Oberfläche, wenn Sie das Weitwinkelobjektiv
anbringen. Reinigen Sie das Objektiv mit einem
weichen Tuch.
1. Setzen Sie das Weitwinkelobjektiv auf das Standard-
Kameraobjektiv.
2. Drehen Sie das Weitwinkelobjektiv im Uhrzeigersinn, um
das Standard-Kameraobjektiv zu befestigen. Drehen Sie
nicht weiter, sobald Sie Widerstand spüren.
Back Front
12

Español 23
Sicherheit
Warnung
Strangulationsgefahr: Kinder sind bereits an Strangulierung durch Kabel
gestorben. Halten Sie dieses Kabel außerhalb der Reichweite von Kindern
(mehr als 1 m entfernt). Verwenden Sie niemals Verlängerungskabel mit
NETZADAPTER. Verwenden Sie nur die mitgelieferten Netzadapter.
22 Deutsch
Índice
Contenido de la caja 24
Configuración de la cámara 26
Sustitución de la lente de la cámara 30
Instalación de la lente gran angular 31
Seguridad 32

24 Español Español 25
Contenido de la caja
Tornillos de
montaje
Manual del usuario
Lente gran angular
Cable de alimentación
micro-USB de la
cámara (3 m)
Adaptador de la
cámara (5 V, 2 A)
Cámara para bebés Soporte de
montaje en pared
El adaptador de alimentación varía según la región.
Características de la cámara:
2
1
3
4
5
6
1Lente estándar de la cámara 4Altavoz
2Micrófono 5Puerto micro-USB
3Indicador led de estado de
alimentación
6Botón de
emparejamiento

26 Español Español 27
Configuración de la cámara
Instalación de la cámara
Conecte el cable de alimentación micro-USB de la cámara para
bebés al adaptador de la cámara (5 V, 2 A) y, a continuación, enchufe
el adaptador a una toma de corriente. Por último, conecte el otro
extremo del cable de alimentación micro-USB de la cámara para
bebés al puerto micro-USB de la cámara.
Adición de una nueva cámara al monitor para bebés
1. Compruebe la versión de firmware del monitor (consulte
la imagen a continuación) para garantizar que el monitor
para bebés SpaceView ejecute la versión de firmware 2.3.0
o posterior. Para obtener las actualizaciones de firmware
más recientes, póngase en contacto con nuestro equipo de
2. Acceda al menú de configuración, vaya a Cámara > Añadir
cámara y, a continuación, siga las instrucciones que
aparecen en la pantalla para iniciar el emparejamiento.
3. Mantenga pulsado el botón de emparejamiento de la
parte posterior de la cámara durante 1 segundo hasta que
escuche un sonido de notificación.

28 Español Español 29
4. Cuando el monitor está emparejado a dos o más cámaras,
puede activar la función Alternar cámaras. Se pueden
emparejar hasta 4 cámaras para bebés a un monitor. El
monitor alternará entre el vídeo de cada cámara con la que
está emparejado. Pulse el botón Aceptar del monitor para
alternar entre las distintas cámaras.
Colocación de la cámara (sobre el soporte de montaje
en pared)
1. Utilice el monitor para comprobar el ángulo de visión
desde la ubicación de montaje que desee.
2. Marque los orificios para los tornillos con un lápiz.
3. Taladre orificios de 0,5 cm en la pared e introduzca las
fijaciones en los orificios.
4. Introduzca los tornillos a través de los orificios del soporte
de montaje en pared y atorníllelos a las fijaciones.
Instalación vertical de 90° Instalación horizontal de 180°
5. Coloque la cámara en el soporte de montaje en pared.

30 Español Español 31
Sustitución de la lente de la cámara
Tipo de lente Uso Lente
Lente estándar
de la cámara
(predeterminada)
Esta lente se
recomienda para
obtener una visión
general; los niños se
ven claramente a una
distancia de 2-3 m. El
ángulo de visión de la
lente estándar de la
cámara es de 62°.
Lente gran angular Esta lente
proporciona una
perspectiva más
amplia de la
habitación. El ángulo
de visión de la lente
gran angular es de
110°.
Back Front
La lente estándar de la cámara no se puede extraer. Si desea
utilizar la lente gran angular, simplemente colóquela sobre la
lente estándar de la cámara y fíjela.
Instalación de la lente gran angular
Coloque la cámara para bebés sobre una superficie
plana para instalar la lente gran angular. Limpie la
lente con un paño suave.
1. Coloque la lente gran angular sobre la lente estándar de la
cámara.
2. Gire la lente gran angular hacia la derecha para fijarla a
la lente estándar de la cámara; deje de girar cuando note
resistencia..
Back Front
12

Français 33
Seguridad
Advertencia
Peligro de estrangulación: Existe la posibilidad de que los niños se
ESTRANGULEN con los cables. Mantenga este cable fuera del alcance de
los niños (a más de 1 m de distancia). No utilice cables alargadores con los
adaptadores de CA. Utilice únicamente los adaptadores de CA suministrados.
Table des matières
Contenu de la boîte 34
Configuration de la caméra 36
Remplacement de l'objectif de la caméra 40
Installation de l'objectif grand-angle 41
Sécurité 42
32 Español

34 Français Français 35
Contenu de la boîte
Vis de montage
Manuel de l'utilisateur
Objectif grand-angle
Câble d'alimentation
micro-USB de la
caméra (3 m)
Adaptateur
d'alimentation de
la caméra (5 V 2 A)
Caméra bébé Support mural
l'adaptateur d'alimentation varie selon la région.
Caractéristiques de la caméra :
2
1
3
4
5
6
1Objectif standard 4Haut-parleur
2Microphone 5Port micro-USB
3Voyant d'alimentation 6Bouton de couplage

36 Français Français 37
Configuration de la caméra
Installation de la caméra
Branchez le câble d'alimentation micro-USB de la caméra bébé à
son adaptateur d'alimentation (5 V 2 A), puis insérez ce dernier dans
une prise de courant. Enfin, connectez l'autre extrémité du câble
d'alimentation micro-USB de la caméra bébé au port micro-USB de
la caméra.
Adding a new Baby Camera to the Baby Monitor
1. Ajout d'une nouvelle caméra bébé à l'écran de surveillance
bébé Vérifiez que le firmware (voir l'image ci-dessous)
de votre écran de surveillance SpaceView est d'une
version 2.3.0 ou ultérieure. Contactez notre service
clientèle au sujet des mises à jour du firmware les plus
récentes à l'adresse: support@eufylife.com
2. Dans les paramètres de menu, allez à Caméra > Ajouter
caméra, puis suivez les instructions qui s'affichent pour
lancer le couplage.
3. Appuyez sur le bouton de couplage situé à l'arrière de la
caméra pendant 1 seconde jusqu'à ce que vous entendiez
un signal sonore.
Other manuals for SpaceView
2
Table of contents
Languages:
Other eufy Security Baby Monitor manuals
