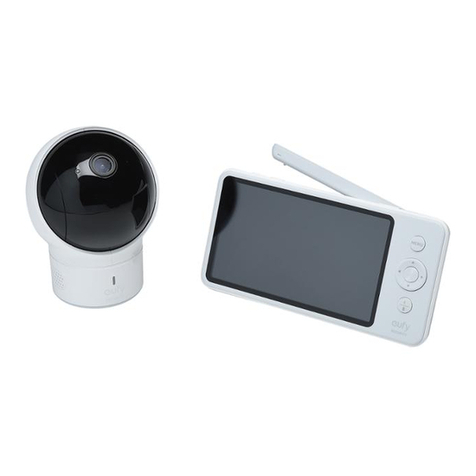
eufy Security T8300-C User manual

QUICK
START GUIDE
EUFY SECURITY
SPACEVIEW BABY MONITOR
Anker Innovations Limited.All rights reserved. eufy Security and eufy Security Logo are
trademarks of Anker Innovations Limited, registered in the United States and other
countries.All other trademarks are the property of their respective owners.
51005002011 V04

English 01
Deutsch 19
Español 32
Français 46
60
Table of Contents
What’s in the Box 01
Feature Introduction 02
Setting Up the Camera and Monitor 04
Adding a Camera to the Baby Monitor 05
Placing the Camera (Wall Mount & Corner Mount) 06
Monitor Menu Settings 07
Replacing the Camera Lens 12
Notice 13

01 English English 02
WHAT’S IN THE BOX
Baby Monitor
((T8300-M)
Monitor Micro-USB
Power Cable (1.5 m)
Monitor Adapter
(5V 2A)
Mounting
Screws
DocumentsWide-Angle Lens
Camera Micro-USB
Power Cable (3 m)
Camera Adapter
(5V 2A)
Baby Camera
(T8300-C)
Wall Mount
Power adapter varies by region.
FEATURE INTRODUCTION
Monitor Features:
6
5
7
2
1
34
9
10
12
11
13
8
1Volume controls
2Screen
3Power button
• Press to switch on / off the monitor screen
• Press and hold for 2 seconds to power on / off
4Menu button
5Navigation buttons
6
OK button
• Press to conrm the selection
• Press to switch camera display if more than 2 cameras
added
7
Return to previous level of menu /Talk button
• Press and hold to speak to the camera
• When menu is opened, press to return to the
previous level of menu

03 English English 04
8Monitor Antenna
9Support stand
10
Micro USB charging port
11 LED indicator
• Red: charging
• White: Fully charged
12 Microphone
13 Speaker
Camera Features:
2
1
3
4
5
6
1Standard camera lens 4Speaker
2Microphone 5Micro USB port
3Power LED Status indicator 6Pairing button
SETTING UP THE CAMERA AND
MONITOR
Charge the Monitor
Fully charge the monitor before use.To charge:
1. Connect one end of the micro USB cable to the baby monitor,
and the other end to the power adapter.
2. Plug the adapter into a power outlet.
3. Press and hold the power button for 2 seconds to turn the
baby monitor on.
Charge the Camera
1. Connect one end of the micro USB cable to the baby
camera, and the other end to the power adapter (5V 2A)
2. Plug the adapter into a power outlet.

05 English English 06
The new baby monitor and camera will set up
automatically.You are all set to use the products after
monitor and camera are charged.
ADDING A CAMERA TO THE BABY
MONITOR
The baby camera and baby monitor are paired out of
the box. Refer to the following steps when adding extra
baby cameras or after resetting a baby camera.
Make sure the baby monitor’s version is the same as
the baby camera’s.
1. Enter menu settings, go to Camera -> Add Camera, then
follow onscreen instructions to start the pairing.
2. Press and hold the pairing button on the rear of the camera
for 1 second until a notication prompt is heard.
When more than 2 cameras are added, you can manually switch
among cameras.
Press the OK button, the screen will be switched to the next
camera’s screen.The icon of the camera you select will appear.
You can also select the “Cycle Camera” option.The screen
cycles through the list of connected baby cameras according to
preset intervals.
When the volume is set to high, monitor will emit
a loud noise if placed close to the camera.This is a
normal phenomenon and can be resolved when camera
is moved away from the monitor.
PLACING THE CAMERA (WALL
MOUNT & CORNER MOUNT)
1. Use the monitor to test the viewing angle from your desired
mounting spot.
2. Mark the screw holes with a pencil.
3. Drill 1/5” holes into the wall and then insert the anchors
into the holes.
4. Insert the screws through the mounting holes of the wall
mount and screw into the anchors.

07 English English 08
5. Place the camera on the wall mount.
You can select the way you like to install the camera.
MONITOR MENU SETTINGS
Press and hold the power button to power on the monitor.
Press the menu button to open Menu Settings.
1
Menu Options Description
Brightness Set the brightness of the screen.
Sleep Mode Enable to automatically turn off the screen
after 1 min, 3 min, 5 min or Off.
Sound Alert
You can set the baby monitor to alert you
when a specic noise level is detected.
Note: Surrounding noise might set off false
alarm.
AlarmVolume
VOX
You can set the baby monitor to alert you
when the screen is lit on.
Note: Surrounding noise might set off false
alarm.
Alert duration
Time Set the time on the monitor.
Lullaby
Select your desired lullaby song.You can
adjust the volume by selecting the volume
button.
Note: Sound Alert is automatically disabled
when Lullaby function is enabled.
Warning:Your baby’s cry might be obscured
by the sound of a lullaby.
Zoom Set the zoom level.

09 English English 10
Menu Options Description
Camera
Add Camera
Note:You can add up to 4 cameras per baby
monitor.
Delete Camera
Cycle Cameras
Note: Cycles through the list of connected
baby cameras according to preset intervals.
Time Set the time on the monitor.
Night Vision
Mode
When enabled, the camera will change the
screen color according to the light conditions
in the room.When disabled, the camera will
stick to daylight screen color and will not
change when the surrounding environment is
getting dark.
Note:We recommend setting this function to
On for most of the situations.
Anti-Screen
Flicker
To solve ickering, change the refresh rate
of the screen.
Language Sets the on-screen display menu language.
Default Settings Resets all options to their default setting.
Temperature
Unit
Select your desired temperature measure
unit.
Menu Options Description
About Displays the current hardware version,
software version, and product number.
Connect with Us Contact details.
The interval duration between each sound alert is
30 seconds. It will not alert during this interval even
if there is alert trigger condition.
Menu option is subject to change without notice.
4
06 12 AM
:
Brightness

11 English English 12
On-screen Menu Icons
Icon Icon Description
Wireless signal strength
NightVision Mode is enabled
1
Shows the camera that is currently presenting
on the baby monitor screen
Note:This icon will not appear on the screen
when there is only one camera connected to
monitor.
Cycle Cameras enabled
Sound Alert enabled
Sound level of the room the camera is in
08: 30 AM Current time
Current battery level of the baby monitor
REPLACING THE CAMERA LENS
Lens type Usage Lens
Standard camera
lens (default lens)
This lens is
recommended for
general viewing; infants
are clearly seen within
a 2~3m range.
The lens angle of view
for standard camera
lens is 60°.
Wide-angle lens This lens provides a
wide-angle view of
the room.The lens
angle of view for
wide-angle lens is
110°.
Back Front
The standard camera lens is not removable.When you want to
use the wide-angle lens, simply place it over the standard camera
lens and fasten.

13 English English 14
NOTICE
Warning
Strangulation Hazard: Children have STRANGLED in cords. Keep this cord out
of the reach of children (more than 1m (3ft) away). Never use extension cords
with AC Adapters. Only use the AC Adapters provided.
This product complies with the radio interference requirements of the
European Community.
Declaration of Conformity
Hereby,Anker Innovations Limited declares that this device is in compliance
with the essential requirements and other relevant provisions of Directive
2014/53/EU.For the declaration of conformity, visit the Web site https://www.
eufylife.com/.
This product can be used across EU member states.
Due to the used enclosure material, the product shall only be connected to a
USB Interface of version 2.0 or higher.The connection to so called power USB
is prohibited.
A statement regarding the AC/DC adapter as disconnect device is missing in
the user manual.
The statement shall require a socket outlet that is installed near equipment and
that shall be easily accessible.
The adapter shall be installed near the equipment and shall be easily accessible.
Do not use the Device in the environment at too high or too low temperature,
never expose the Device under strong sunshine or too wet environment.
The suitable temperature forT8300-M and accessories is -20°C-45°C.
The suitable temperature forT8300-C and accessories is -20°C-40°C.
When charging, please place the device in an environment that has a normal
room temperature and good ventilation.
It is recommended to charge the device in an environment with a temperature
that ranges from 5°C~25°C.
Please ensure to use only the charger offered by the manufacturer. Using
unauthorized charger may cause danger and violate the authorization of the
projecter and the guarantee article.
The charger output voltage/current is 5Vdc/2A.The plug considered as
disconnect device of adapter.
If you use a third-party charger, the recommended outputvoltage/current of the
adaptor is 5Vdc/2A, and the adapter shall be CE approval type.
CAUTION RISK OF EXPLOSION IF BATTERY IS REPLACED BY AN
INCORRECT TYPE. DISPOSE OF USED BATTERIES ACCORDINGTO THE
INSTRUCTIONS
RF exposure information:The Maximum Permissible Exposure (MPE) level
has been calculated based on a distance of d=20 cm between the device and
the human body.To maintain compliance with RF exposure requirement, use
product that maintain a 20cm distance between the device and human body.
Operating Frequency Range: 2410-2477MHz
The T8300-C Max Output Power: 18.04 dBm,The T8300-M Max Output Power:
14.89 dBm
This T8300-M was tested for typical body-worn operations with the back of the
handset kept 0 mm from the body.The SAR limit of Europe is 4.0W/kg. Device
types T8300-M has also been tested against this SAR limit.The highest SAR
value reported under this standard during product certication for use at the
limb is1.707W/kg .This device was tested for typical hand held operations with
the back of the device kept 0mm from the Limb.
The T3800-C device has been evaluated to meet general RF exposure
requirements and can be used in xed exposure condition. RF exposure
information:The Maximum Permissible Exposure (MPE) level has been
calculated based on a distance of d=20 cm between the device and the human
body.To maintain compliance with RF exposure requirement, use product that
maintain a 20cm distance between the device and human body.
The following importer is the responsible party (contact for EU matters only)
Importer:AnkerTechnology (UK) Ltd
Importer Address:Suite B, Fairgate House, 205 Kings Road,Tyseley,
Birmingham,United Kingdom B11 2AA

15 English English 16
This product is designed and manufactured with high quality materials
and components, which can be recycled and reused.
This symbol means the product must not be discarded as household
waste, and should be delivered to an appropriate collection facility for
recycling. Proper disposal and recycling helps protect natural resources,
human health and the environment. For more information on disposal
and recycling of this product, contact your local municipality, disposal
service, or the shop where you bought this product.
FCC Statement
This device complies with Part 15 of the FCC Rules. Operation is subject to the
following two conditions: (1) this device may not cause harmful interference,
and (2) this device must accept any interference received, including interference
that may cause undesired operation.
Warning: Changes or modications not expressly approved by the party
responsible for compliance could void the user's authority to operate the
equipment.
Note: This equipment has been tested and found to comply with the limits for
a Class B digital device, pursuant to Part 15 of the FCC Rules.These limits are
designed to provide reasonable protection against harmful interference in a
residential installation.
This equipment generates uses and can radiate radio frequency energy and, if
not installed and used in accordance with the instructions, may cause harmful
interference to radio communications. However, there is no guarantee that
interference will not occur in a particular installation. If this equipment does
cause harmful interference to radio or television reception, which can be
determined by turning the equipment off and on, the user is encouraged to
try to correct the interference by one or more of the following measures: (1)
Reorient or relocate the receiving antenna. (2) Increase the separation between
the equipment and receiver. (3) Connect the equipment into an outlet on a
circuit different from that to which the receiver is connected. (4) Consult the
dealer or an experienced radio/TV technician for help.
FCC Radio Frequency Exposure Statement
The T8300-C device has been evaluated to meet general RF exposure
requirements. The T8300-C can be used in xed exposure condition. The min
separation distance is 20cm.
This T8300-M was tested for typical body-worn operations with the back of the
handset kept 0 mm from the body.
RF Exposure Information(SAR)
The Extremity SAR limit of FCC for Hand held is 4.0W/kg.
Device is recommended to use in hand held only and SAR when hand held is
1.804W/kg
Worn on body will have unexpected RF exposure RISK.
Notice: Shielded cables
All connections to other computing devices must be made using shielded cables
to maintain compliance with FCC regulations.
FCC ID (for T8300-C): 2AOKB-T8300C
FCC ID (for T8300-M): 2AOKB-T8300M
The following importer is the responsible party.
Company Name:
POWER MOBILE LIFE, LLC
Address: 400 108th Ave., NE Suite 400, Bellevue,WA 98004-5541
Telephone: 1-800-988-7973
IC Statement
This device complies with Industry Canada licence-exempt RSS standard(s).
Operation is subject to the following two conditions:
(1) this device may not cause interference, and
(2) this device must accept any interference, including interference that may
cause undesired operation of the device."
Le présent appareil est conforme aux CNR d'Industrie Canada applicables
aux appareils radio exempts de licence. L'exploitation est autorisée aux deux
conditions suivantes:
(1) l'appareil nedoit pas produire de brouillage, et
(2) l'utilisateur de l'appareil doit accepter tout brouillage radioélectrique subi,
même si le brouillage est susceptible d'en compromettre le fonctionnement."

17 English
This Class B digital apparatus complies with Canadian ICES-003.
Cet appareil numérique de la classe B est conforme à la norme NMB-003 du
Canada.
IC RF Statement:
When using the product, maintain a distance of 20cm from the body to ensure
compliance with RF exposure requirements.
Lors de l'utilisation du produit, maintenez une distance de 20 cm du corps an
de vous conformer aux exigences en matière d'exposition RF.
Anker Innovations Limited
Room 1318-19, Hollywood Plaza, 610 Nathan Road, Mongkok, Kowloon, Hong
Kong
Inhalt
Im Lieferumfang 19
Vorstellung der Funktionen 20
Einrichten der Kamera und des Monitors 22
Befestigen der Kamera (an der Wandhalterung) 24
Austauschen des Kameraobjektivs 29
Sicherheit 30
Inhalt
Im Lieferumfang 19
Vorstellung der Funktionen 20
Einrichten der Kamera und des Monitors 22
Hinzufügen einer neuen Babyphon-Kamera
zum Babyphon-Monitor 23
Befestigen der Kamera (an der Wandhalterung) 24
Monitor-Menüeinstellungen 25
Austauschen des Kameraobjektivs 29
Sicherheit 30

19 Eeutsch Deutsch 20
IM LIEFERUMFANG
Babyphon-Monitor
Mikro-USB-Netzkabel
für Monitor (1,5 m)
Monitor-Netzteil
(5V 2 A)
Befestigun-
gsschrauben
Gebrauch-
sanweisung
Weitwinkelobjektiv
Mikro-USB-Netzkabel
für Kamera (3 m)
Kamera-Netzteil
(5V 2 A)
Babyphon-Kamera Wandhalterung
Das Netzteil ist je nach Region unterschiedlich.
VORSTELLUNG DER FUNKTIONEN
Monitorfunktion :
6
5
7
2
1
34
9
10
12
11
13
8
1Lautstärkeregler 8Monitorantenne
2Display 9Standfuß
3Ein- / Aus-Taste 10
Mikro-USB-Ladeanschluss
4Menütaste 11 LED-Anzeige
5Navigationstasten 12 Mikrofon
6
OK-Taste
13 Lautsprecher
7
Zurück zur vorherigen
Menüebene / Sprechtaste
Halten Sie die Sprechtaste gedrückt,um mit der Kamera
zu sprechen.Drücken Sie bei geöffnetem Menü einmal die
Sprechtaste, um zur vorherigen Menüebene zurückzukehren.
Drücken Sie die Ein- /Aus-Taste, um den Monitorbildschirm ein-
bzw. auszuschalten. Halten Sie die Ein- / Aus-Taste 2 Sekunden
lang gedrückt, um den Monitor ein- bzw. auszuschalten.

21 Eeutsch Deutsch 22
Die microSD-Speicherkarte kann nur für Firmware-
Upgrades verwendet werden, nicht aber zum Speichern
vonVideoaufzeichnungen.
Kamerafunktion:
2
1
3
4
5
6
1Standard-Kameraobjektiv 4Lautsprecher
2Mikrofon 5Mikro-USB-Anschluss
3
Ein- / Aus-LED-Statusanzeige
6Kopplungstaste
EINRICHTEN DER KAMERA UND DES
MONITORS
Installation des Monitors
Laden Sie den Monitor vor dem Gebrauch vollständig auf. Zum Laden:
Verbinden Sie den Babyphon-Monitor über das Mikro-USB-Kabel
mit dem Monitor-Netzteil und schließen Sie den Adapter dann an
eine Steckdose an.Verbinden Sie das andere Ende des Mikro-USB-
Netzkabels mit dem Mikro-USB-Anschluss des Monitors, um diesen
aufzuladen. Halten Sie die Ein- / Aus-Taste 2 Sekunden lang gedrückt,
um den Babyphon-Monitor einzuschalten.
Installation der Kamera
Verbinden Sie das Micro-USB-Netzkabel der Babyphon-Kamera mit
dem Kamera-Netzteil (5V 2 A) und schließen Sie den Adapter dann
an eine Steckdose an.Verbinden Sie abschließend das andere Ende des
Mikro-USB-Netzkabels der Babyphon-Kamera mit dem Mikro-USB-
Anschluss der Kamera.

23 Eeutsch Deutsch 24
HINZUFÜGEN EINER NEUEN
BABYPHON-KAMERA ZUM
BABYPHON-MONITOR
Die Babyphon-Kamera und der Babyphon-Monitor sind
werkseitig gekoppelt. Beachten Sie die folgenden Schritte
beim Hinzufügen zusätzlicher Babyphon-Kameras oder
nach dem Zurücksetzen einer Babyphon-Kamera.
1. Rufen Sie die Menüeinstellungen auf, gehen Sie zu Kamera ->
Kamera hinzufügen und befolgen Sie dann die Anweisungen
auf dem Display, um die Kopplung zu starten.
2. Halten Sie die Kopplungstaste an der Rückseite der Kamera 1
Sekunde lang gedrückt, bis eine Benachrichtigung zu hören ist.
Wenn die Lautstärke auf „Hoch“ eingestellt ist,gibt der
Monitor ein lautes Geräusch aus, wenn er zu nah an der
Kamera platziert wird. Dies ist normal und kann behoben
werden, indem die Kamera vom Monitor weg bewegt wird.
BEFESTIGEN DER KAMERA (AN
DER WANDHALTERUNG)
1. Verwenden Sie den Monitor, um den Blickwinkel vom
gewünschten Befestigungsort zu testen.
2. Markieren Sie die Position der Schraubenlöcher mit einem
Bleistift.
3. Bohren Sie Löcher mit einem Durchmesser von 5,08 mm in
die Wand und setzen Sie die Dübel in die Löcher ein.
4. Drücken Sie die Schrauben durch die Befestigungslöcher der
Wandhalterung und schrauben Sie sie in die Dübel hinein
.
5. Platzieren Sie die Kamera auf derWandhalterung.

25 Eeutsch Deutsch 26
MONITOR-MENÜEINSTELLUNGEN
Halten Sie die Ein- / Aus-Taste gedrückt, um den Monitor
einzuschalten.
Drücken Sie die Menütaste, um die Menüeinstellungen zu öffnen.
1
Menüoptionen
Beschreibung
Helligkeit Stellen Sie die Helligkeit des Bildschirms ein.
Standby-Modus
Wählen Sie aus, ob der Bildschirm nach 1 Min.,
3 Min. oder 5 Min. oder sofort ausgeschaltet
werden soll.
Warnton
Sie können das Babyphon so einstellen, dass Sie
benachrichtigt werden, wenn ein bestimmter
Geräuschpegel erkannt wird.
Hinweis: Umgebungsgeräusche können zu
Fehlalarmen führen.
Menüoptionen
Beschreibung
Schlaflied
Wählen Sie das gewünschte Schlaied
aus. Sie können die Lautstärke mit dem
Lautstärkeregler einstellen.
Hinweis: Die Geräusch-Warnung wird
automatisch deaktiviert, wenn die
Schlaiedfunktion aktiviert ist.
Warnung: Das Weinen des Babys wird
möglicherweise durch das Schlaied übertönt.
Zoom Zoomstufe einstellen
Kamera
Kamera hinzufügen
Hinweis: Sie können bis zu 4 Kameras pro
Babyphon hinzufügen.
Kamera löschen
Kameras umschalten
Hinweis: Schaltet den voreingestellten
Intervallen entsprechend durch die Liste der
angeschlossenen Babyphon-Kameras.
Zeiteinstellung Stellen Sie die Uhrzeit auf dem Monitor ein.
Nachtsichtmodus
Wenn diese Option aktiviert ist, wird die
Bildschirmfarbe den Lichtverhältnissen im Raum
entsprechend angepasst. Ist die Option deaktiviert,
behält die Kamera die Tageslichteinstellung und
passt sich nicht an dieVerdunklung der Umgebung
an.
Hinweis: In der Regel ist die Aktivierung dieser
Funktion zu empfehlen.

27 Eeutsch Deutsch 28
Menüoptionen
Beschreibung
Flimmerfrei Ändern Sie den Bildschirmmodus, um das
Flimmern zu beheben.
Sprache Legt die Anzeigesprache des Bildschirmmenüs
fest.
Standardein-
stellungen
Setzt alle Optionen auf ihre
Standardeinstellung zurück.
Maßeinheit
Temperatur
Wählen Sie die gewünschte Maßeinheit für die
Temperatur aus.
Info Zeigt die aktuelle Hardwareversion,
Softwareversion und Artikelnummer an.
Kontakt Kontaktdetails.
Die Intervalldauer zwischen den einzelnen
Warntönen beträgt 30 Sekunden. Innerhalb des
Intervalls gibt es keine weiteren Warntöne, selbst
wenn eine bestimmte Warnbedingung eintritt.
Symbole auf dem Bildschirm
Symbol Symbolbeschreibung
Stärke des WLAN-Signals
Nachtsichtmodus ist aktiviert.
1
Zeigt die Kamera, deren Bild derzeit auf dem
Babyphon-Monitor zu sehen ist.
Hinweis: Dieses Symbol wird nicht auf dem
Bildschirm angezeigt, wenn nur eine Kamera an
den Monitor angeschlossen ist.
„Kameras umschalten“ aktiviert
Warnton aktiviert
Geräuschpegel des Zimmers, in dem sich die
Kamera bendet
08: 30 AM Aktuelle Uhrzeit
Aktueller Akkustand des Babyphon-Monitors

29 Eeutsch Deutsch 30
AUSTAUSCHEN DES
KAMERAOBJEKTIVS
Objektivtyp Verwendung Objektiv
Standard-
Kameraobjektiv
(Standardobjektiv)
Dieses Objektiv wird
für die allgemeine
Betrachtung empfohlen;
Säuglinge sind innerhalb
einer Reichweiter von
2 bis 3 Metern klar
erkennbar.
Beim Standard-
Kameraobjektiv beträgt
der Objektivwinkel 62°.
Weitwinkelobjektiv Dieses Objektiv bietet
eine Weitwinkelansicht
des Zimmers. Der
Objektivwinkel des
Weitwinkelobjektivs
beträgt 110°.
Back Front
Das Standard-Kameraobjektiv kann nicht entfernt werden.Wenn
Sie das Weitwinkelobjektiv verwenden möchten, setzen Sie es
einfach auf das Standard-Kameraobjektiv und befestigen es.
SICHERHEIT
Dieses Produkt entspricht den EU-Bestimmungen zur Störfestigkeit.
VORSICHT: EXPLOSIONSGEFAHR,WENN DIE BATTERIE DURCH EINEN
FALSCHEN BATTERIETYP ERSETZT WIRD. ENTSORGEN SIEVERBRAUCHTE
BATTERIEN GEMÄß DEN ANWEISUNGEN.
Dieses Produkt ist mit hochwertigen Materialien und Komponenten
für Recycling und Wiederverwertung konzipiert.
Dieses Symbol bedeutet, dass das Produkt nicht als Hausmüll
entsorgt werden darf, sondern einer angemessenen Sammelstelle für
das Recycling zugeführt werden muss. Durch das ordnungsgemäße
Entsorgen und Recyceln tragen Sie zum Schutz natürlicher Ressourcen
und zurVermeidung von Umwelt- und Gesundheitsschäden bei.
Weitere Informationen zum Entsorgen und Recyceln dieses Produkts
erhalten Sie von Ihrer Gemeindeverwaltung, Ihrem zuständigen
Entsorgungsdienst oder dem Geschäft, in dem Sie dieses Produkt
erworben haben.

Español 32
CONTENIDO DE LA CAJA
Monitor para
bebés
Cable de alimentación
micro-USB del
monitor (1,5 m)
Adaptador del
monitor (5 V, 2 A)
Tornillos de
montaje
Manual del
usuario
Lente gran
angular
Cable de alimentación
micro-USB de la
cámara (3 m)
Adaptador de la
cámara (5 V, 2 A)
Cámara para bebés Soporte de
montaje en pared
El adaptador de alimentación varía según la región.
Índice
Contenido de la caja 32
Características 33
Conguración de la cámara y el monitor 35
Adición de una nueva cámara al monitor para bebés 36
Colocación de la cámara (sobre el soporte de montaje en pared) 37
Conguración del menú del monitor 38
Sustitución de la lente de la cámara 42
Seguridad 43

33 Español Español 34
CARACTERÍSTICAS
Características del monitor:
6
5
7
2
1
34
9
10
12
11
13
8
1Controles de volumen 8Antena del monitor
2Pantalla 9Soporte de apoyo
3Botón de encendido 10
Puerto de carga micro-USB
4Botón de menú 11 Indicador LED
5Botones de navegación 12 Micrófono
6Botón OK 13 Altavoz
7
Botón para hablar/volver
al nivel anterior del menú
Mantenga pulsado el botón Hablar para hablar a la
cámara. Si tiene abierto el menú, pulse el botón Hablar
una vez para volver al nivel anterior de este. Pulse el
botón de encendido para encender o apagar la pantalla
del monitor. Mantenga pulsado el botón de encendido
durante 2 segundos para encender o apagar el monitor.
La tarjeta de memoria microSD solo se puede utilizar para
realizar actualizaciones de rmware, no para almacenar
grabaciones de vídeo.
Características de la cámara:
2
1
3
4
5
6
1Lente estándar de la cámara 4Altavoz
2Micrófono 5Puerto micro-USB
3Indicador LED del estado de
la alimentación
6Botón de
emparejamiento

35 Español Español 36
CONFIGURACIÓN DE LA CÁMARA Y
EL MONITOR
Instalación del monitor
Cargue por completo el monitor antes de utilizarlo. Para cargarlo:
Conecte el monitor para bebés al adaptador del monitor con el
cable micro-USB y, a continuación, enchufe el adaptador a una toma
de corriente. Conecte el otro extremo del cable de alimentación
micro-USB del monitor para bebés al puerto micro-USB del monitor
para cargarlo. Mantenga pulsado el botón de encendido durante 2
segundos para encender el monitor para bebés.
Instalación de la cámara
Conecte el cable de alimentación micro-USB de la cámara para
bebés al adaptador de la cámara (5V, 2 A) y, a continuación, enchufe
el adaptador a una toma de corriente. Por último, conecte el otro
extremo del cable de alimentación micro-USB de la cámara para
bebés al puerto micro-USB de la cámara.
ADICIÓN DE UNA NUEVA CÁMARA
AL MONITOR PARA BEBÉS
La cámara y el monitor para bebés vienen emparejados
de fábrica. Consulte los siguientes pasos para añadir
cámaras para bebés adicionales o si ha restablecido una
cámara para bebés.
1. Acceda al menú de conguración, vaya a Cámara -> Añadir
cámara y, a continuación, siga las instrucciones que aparecen
en la pantalla para iniciar el emparejamiento.
2. Mantenga pulsado el botón de emparejamiento de la parte
posterior de la cámara durante 1 segundo hasta que escuche
un sonido de noticación.
Si establece el volumen en Alto, el monitor emitirá
un sonido fuerte si se coloca cerca de la cámara. Este
fenómeno es normal y puede resolverlo colocando la
cámara lejos del monitor.
This manual suits for next models
1
Table of contents
Languages:
Other eufy Security Baby Monitor manuals

