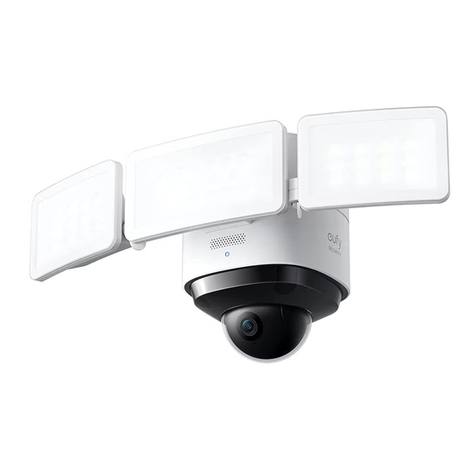
eufy Security T8424 User manual

Anker Innovations Limited. All rights reserved. eufy Security and eufy Security Logo
are trademarks of Anker Innovations Limited, registered in the United States and
other countries. All other trademarks are the property of their respective owners.
51005002628 V01
Quick Start Guide
QUICK
START GUIDE
Floodlight Camera 2K

01 EN EN 02
Getting Started
1. Shut the power off at the breaker in your house. Switch on/off the
lights to make sure the electricity in your house is properly shut off.
2. Determine the area you want to be lit and camera coverage is required.
Install your Floodlight Camera on the front wall or on a side wall of your
house. To get optimal detection and light coverage for the floodlight and
camera, install it on a side wall if possible. *
* The motion sensor is more sensitive to movements across the camera field of view than
movements towards or away from the sensor. We highly recommend you install the
floodlight camera on the side wall.
Safety Instructions
1. Shut off power at the fuse or circuit breaker before installing.
2. Do not install the device near flammable surfaces.
3. Must have a licensed electrician install the Floodlight Camera.
4. Do not use the device in environments where the temperature is too
high or too low, avoid exposing the device to direct sunshine or very wet
environments.
5. The suitable temperature for the product and accessories is -20°C to
50°C.
What's in the Box
Floodlight Camera 2K
(T8424)
Junction Box
Central Screw Cap Plate Screws
Installation Hook
Central Screw

03 EN EN 04
On the side wall:
Move towards or leave vertically
Move horizontally
Increased
detection range
for vertical
movement
up to 26ft (8m)
Increased detection
range for horizontal
movement
up to 33ft (10m)
On the front wall:
Move towards or leave vertically
Move horizontally
Detection range
for vertical
movement
up to 20ft (6m)
Detection range
for horizontal
movement
up to 26ft (8m)
Installing the Junction Box
1. Remove the rubber plugs indicated in the illustration below.
2. Run the existing wire through the hole.
If you don’t have existing wires outdoors, contact a licensed
electrician to run the wires.

05 EN EN 06
4. Unscrew the bolt with a flat-head screwdriver. Connect the Neutral (blue)
/
Ground (green / green and yellow) / Live (brown) wire to the Neutral
/ Ground / Live wire connector in the junction box respectively. Secure
the wires tightly to prevent wires from falling.
N
L
Neutral
Ground
Live
1 2
3. Install the junction box:
• Orientate the two mounting holes vertically to ensure stable
mounting.
• On wooden walls, DO NOT pre-drill holes. Use the screws provided to
fix the junction box onto the wall.
• On walls that are made out of hard materials, such as stucco, brick, or
concrete, drill holes with a 15/64 inch (6 mm) drill bit, and then insert
the anchors provided into the holes. Use the screws provided to fix
the junction box on the wall.
1 2

07 EN EN 08
Connect Wires
1. Connect Ground wire from the Floodlight Camera to the Ground wire from
the wire connector in the junction box.
2. Connect the Live / Neutral wire from the Floodlight Camera to the Live /
Neutral wire from the wire connector in the junction box respectively.
3. Secure the wires with a flat-head screwdriver.
Green / green and yellow, brown and blue wires must
connect to the matching colors. Never cross connect.
Mounting Floodlight Camera
Hang Floodlight Camera
Hang Floodlight Camera on the junction box with the hook provided.

09 EN EN 10
Restoring Power
Switch on the main circuit breaker in the house. To confirm whether the
Floodlight Camera is operating, check the LED indicator. If it is flashing red,
it is ready for Eufy Security App setup.
If Floodlight Camera is not powered on, switch off the circuit
breaker before checking the wiring of Floodlight Camera.
Using the Floodlight Camera on the Eufy Security
App
1. Download the Eufy Security app from the App Store (iOS devices) or
Google Play (Android devices).
2. Sign up for a Eufy Security account. Follow the onscreen instructions to
connect Floodlight Camera to your Wi-Fi network. Now you can check live
stream in the Eufy Security App.
The Floodlight Camera can be used only after your phone and the
Floodlight Camera are connected to the same wireless network.
Mount Floodlight Camera On the Junction Box
1. Align the hole on the junction box with the opening in the Floodlight Camera.
2. Screw the central screw through the center of Floodlight Camera to mount
it in position.
3. Cover the central screw with the central screw cap to prevent it from rusting.
Adjusting Floodlight Camera
1. After installation is complete, loosen the adjustment screws on the
camera and floodlight to adjust the camera and light position to the
desired angles.
2. Tighten the screws firmly to complete the installation.

11 EN EN 12
For troubleshooting, check the Help section in the Eufy Security app.
Refer to the app for information on the various LED status indications.
NOTICE
FCC Statement
This device complies with Part 15 of the FCC Rules. Operation is subject
to the following two conditions: (1) this device may not cause harmful
interference, and (2) this device must accept any interference received,
including interference that may cause undesired operation.
Warning: Changes or modifications not expressly approved by the party
responsible for compliance could void the user's authority to operate the
equipment.
Note: This equipment has been tested and found to comply with the limits
for a Class B digital device, pursuant to Part 15 of the FCC Rules. These
limits are designed to provide reasonable protection against harmful
interference in a residential installation.
This equipment generates uses and can radiate radio frequency energy
and, if not installed and used in accordance with the instructions, may
cause harmful interference to radio communications. However, there is
no guarantee that interference will not occur in a particular installation.
If this equipment does cause harmful interference to radio or television
reception, which can be determined by turning the equipment off and on,
the user is encouraged to try to correct the interference by one or more of
the following measures: (1) Reorient or relocate the receiving antenna. (2)
Increase the separation between the equipment and receiver. (3) Connect
the equipment into an outlet on a circuit different from that to which the
receiver is connected. (4) Consult the dealer or an experienced radio/ TV
technician for help.
FCC Radio Frequency Exposure Statement
The device has been evaluated to meet general RF exposure requirements.
The device can be used in fixed/mobile exposure condition. The min
separation distance is 20cm.
Notice: Shielded cables
All connections to other computing devices must be made using shielded
cables to maintain compliance with FCC regulations.
The following importer is the responsible party:

Anker Innovations Limited. All rights reserved. eufy Security and eufy Security Logo
are trademarks of Anker Innovations Limited, registered in the United States and
other countries. All other trademarks are the property of their respective owners.
51005002628 V01
Quick Start Guide
QUICK
START GUIDE
Floodlight Camera 2K
Table of contents
Other eufy Security Digital Camera manuals

eufy Security
eufy Security CAM 2C User manual

eufy Security
eufy Security eufyCam S330 User manual

eufy Security
eufy Security FLOODLIGHT CAM 2 PRO User manual

eufy Security
eufy Security T8151 User manual

eufy Security
eufy Security T8400 User manual

eufy Security
eufy Security S300 User manual

eufy Security
eufy Security SoloCam C210 User manual

eufy Security
eufy Security EUFYCAM 2C User manual

eufy Security
eufy Security eufyCam 2 Pro User manual