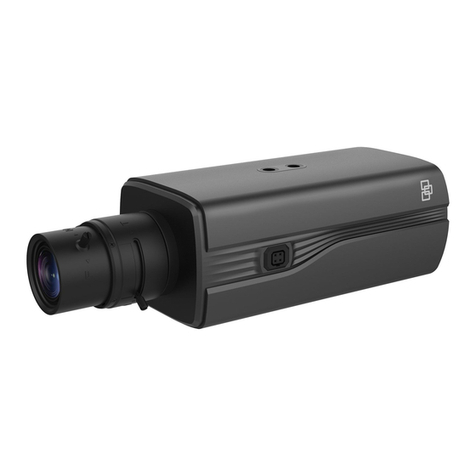
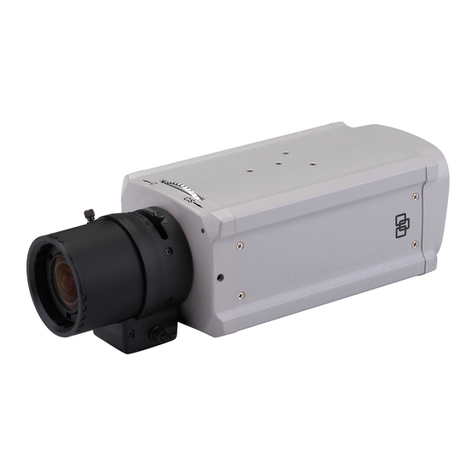
Interlogix TVB-6101 User manual

TruVision HD-TVI
Cameras Configuration
Manual
P/N 1073682-EN • REV A • ISS 06JAN20

Cop
yright
©
2020 United Technologies Corporation.
Interlogix is part of UTC
Climate, Controls & Security, a unit of United
Technologies Corporation.
All rights reserved.
Trademarks and
patents
T
rade names used in this document may be trademarks or registered
trademarks of the manufacturers or vendors of the respective products.
Disclaimer
Information in this document is subject to change without notice. No part of
this document may be reproduced or transmitted
in any form or by any
means, electronic or mechanical, for any purpose, without the express
written permission of UTC Fire & Security Americas Corporation, Inc.
Certification
Product warnings and
disclaimers
THESE PRODUCTS ARE INTENDED FOR
SALE TO AND
INSTALLATION BY QUALIFIED PROFESSIONALS. UTC FIRE &
SECURITY CANNOT PROVIDE ANY ASSURANCE THAT ANY PERSON
OR ENTITY BUYING ITS PRODUCTS, INCLUDING ANY “AUTHORIZED
DEALER” OR “AUTHORIZED RESELLER”, IS PROPERLY TRAINED OR
EXPERIENCED TO CORRECTL
Y INSTALL FIRE AND SECURITY
RELATED PRODUCTS
.
For more information on warranty disclaimers and product safety
information, please check www.firesecurityproducts.com/policy/product
-
warning/ or scan the following code:
Contact information
and manuals
Fo
r contact information and to download the latest manuals, tools, and
firmware, go to the web site of your region.
Americas: www.interlogix.com
EMEA: www.firesecurityproducts.com
Manuals are available in several languages.
Australia/New Zealand: www.utcfs.c
om.au

TruVision HD-TVI Cameras Configuration Manual 1
Content
Important information 2
Limitation of liability 2
Advisory messages 2
Introduction 3
Camera and recorder/encoder compatibility 4
Call up the camera OSD menu 5
Menu trees 6
Configure the cameras 8
Video Format 8
Exposure 9
Day/Night 9
Video Settings 11
Smart Light 12
Functions 13
Factory Default 13
Exit 13
Save & Exit 14

2 TruVision HD-TVI Cameras Configuration Manual
Important information
Limitation of liability
To the maximum extent permitted by applicable law, in no event will UTCFS be liable
for any lost profits or business opportunities, loss of use, business interruption, loss of
data, or any other indirect, special, incidental, or consequential damages under any
theory of liability, whether based in contract, tort, negligence, product liability, or
otherwise. Because some jurisdictions do not allow the exclusion or limitation of liability
for consequential or incidental damages the preceding limitation may not apply to you.
In any event the total liability of UTCFS shall not exceed the purchase price of the
product. The foregoing limitation will apply to the maximum extent permitted by
applicable law, regardless of whether UTCFS has been advised of the possibility of
such damages and regardless of whether any remedy fails of its essential purpose.
Installation in accordance with this manual, applicable codes, and the instructions of the
authority having jurisdiction is mandatory.
While every precaution has been taken during the preparation of this manual to ensure
the accuracy of its contents, UTCFS assumes no responsibility for errors or omissions.
Advisory messages
Advisory messages alert you to conditions or practices that can cause unwanted
results. The advisory messages used in this document are shown and described below.
WARNING: Warning messages advise you of hazards that could result in injury or loss
of life. They tell you which actions to take or to avoid in order to prevent the injury or
loss of life.
Caution: Caution messages advise you of possible equipment damage. They tell you
which actions to take or to avoid in order to prevent the damage.
Note: Note messages advise you of the possible loss of time or effort. They describe
how to avoid the loss. Notes are also used to point out important information that you
should read.

TruVision HD-TVI Cameras Configuration Manual 3
Introduction
This is the configuration manual for following camera models:
HD-TVI 720P Cameras
• TVB-6101 (720P Bullet, 2.7 to 13.5 mm lens)
• TVD-6101 (720P Dome, 2.7 to 13.5 mm lens)
HD-TVI 2MPx Cameras
• TVB-6102 (2MPx Bullet, 3.6 mm lens)
• TVB-6103 (2MPx Bullet, 2.7 to 13.5 mm lens)
• TVD-6102 (2MPx Dome, 2.8 mm lens)
• TVD-6103 (2MPx Dome, 2.7 to 13.5 mm lens)
HD-TVI 5MPx Cameras
• TVB-6104 (5MPx Bullet, 3.6 mm lens)
• TVB-6105 (5MPx Bullet, 2.7 to 13.5 mm lens)
• TVT-6101 (5MPx Turret, 2.8 mm lens)
• TVT-6102 (5MPx Turret, 2.7 to 13.5 mm lens)
• TVD-6104 (5MPx Dome, 2.7 to 13.5 mm lens)
HD-TVI 8MPx Cameras
• TVB-6106 (8MPx Bullet, 2.7 to 13.5 mm lens)
• TVD-6105 (8MPx Dome, 2.7 to 13.5 mm lens)
HD-TVI 2MPx Full Time Color Cameras
• TVB-6107 (2MPx Bullet, 3.6 mm lens)
• TVT-6103 (2MPx Turret, 3.6 mm lens)

4 TruVision HD-TVI Cameras Configuration Manual
Camera and recorder/encoder compatibility
Table 1 below shows the compatibility of the cameras with TruVision recorders and
encoders.
Table 1: Camera compatibility with TruVision recorders and encoders
TVR 12HD TVR 44HD TVR 15HD TVR 45HD
V1.2.j V1.2.j V2.0.e V2.1.b
Live
View Record Live
View Record Live
View Record Live View Record
720P Camera 960H √√√√√√√√
720P @25/30 fps √√√√√√√√
1080P
& Full Time Color
Cameras
960H √√√√√√√√
1080P @25/30 fps √√ (Only
12 fps) √√√√√√
5MPx Camera
960H √√√√√√√√
1080P @25/30 fps √√ (Only
12 fps) √√√√√√
4MPx @25/30 fps
5MPx @12.5 fps
√√√√
5MPx @20 fps (Default)
8MPx Camera
960H √√√√√√√√
1080P @25/30 fps √√ (Only
12 fps) √√√√√√
4MPx @25/30 fps
5MPx @20 fps
8MPx @12.5 fps
(Default)
TVR46 TVE-x10 TVE-120/TVE-420 TVE-820/TVE-1620
V1.0.c (under
development) V1.0 FP10 NA NA
Live
View Record Live
View Record Live
View Record Live
View Record
720P Camera 960H √√√√√√√√
720P @25/30 fps √√
√√√√
1080P
& Full Time Color
Cameras
960H √√√√√√√√
1080P @25/30 fps √√
√√√√
5MPx Camera
960H √√√√√√√√
1080P @25/30 fps √√
√√√√
4MPx @25/30 fps √√ (Only
15 fps) √ (Only
15 fps) √ (Only
15 fps) √ (Only
15 fps) √ (Only
15 fps)
5MPx
@12.5 fps/15 fps √√√√√√
5MPx @20 fps
(Default) √√ (Only
12 fps) √ (Only
12 fps) √ (Only
12 fps) √ (Only
12 fps) √ (Only
12 fps)
8MPx Camera
960H √√√√√√√√
1080P @25/30 fps √√√√√√
4MPx @25/30 fps √√ (Only
15 fps) √ (Only
15 fps) √ (Only
15 fps) √ (Only
15 fps) √ (Only
15 fps)
5MPx @20 fps √√ (Only
12 fps) √ (Only
12 fps) √ (Only
12 fps) √ (Only
12 fps) √ (Only
12 fps)
8MPx
@12.5 fps/15 fps
(default) √√ (Only
8 fps) √ (Only
8 fps) √ (Only
8 fps)
√ = Compatible

TruVision HD-TVI Cameras Configuration Manual 5
Call up the camera OSD menu
You can configure the camera settings via a TVI DVR. Select the PTZ protocol
TruVision Coax and click the menu button to call up the menu.
The TVS-C200 controller (Service Tool) does not support these TVI cameras.
When using the TVI output, the TVI cameras must be used with TVI DVRs. The higher
resolution TVI cameras may not be compatible with lower resolution TVI DVRs.
Note: The camera OSD is only available in English.
To set up the camera via the DVR:
1. Set up the camera hardware as described in the Installation Guide.
2. In Camera Settings of the DVR, access the PTZ menu and set the protocol for the
TruVision HD-TVI camera to TruVision-Coax.
3. In live view of the desired camera, click the PTZ Control icon on the live view toolbar
to access the PTZ control panel.
4. To call up the camera setup menu:
From the DVR, select Iris+.
5. Select the menu options:
From the DVR: To select an OSD item, click the directional buttons up/down. To
adjust the value of a selected item, click the directional buttons left/right.
6. Click Iris+ to enter the submenu or to confirm the selected item.
7. When the setup is complete, select Exit and click Iris+ to exit the camera OSD.

6 TruVision HD-TVI Cameras Configuration Manual
Menu trees
720P and 2MPx cameras:
5MPx and 8MPx cameras:
MAIN MENU
VIDEO
SETTINGS
FACTORY
DEFAULT
EXIT
EXPOSURE MODE
CONTRAST
SHARPNESS
SATURATION
3DNR
MIRROR
BACK
AGC
EXPOSURE
VIDEO
FORMAT
BACK
EXIT
SAVE & EXIT
WHITE
BALANCE
BRIGHTNESS
SAVE & EXIT
EXIT
SAVE & EXIT
DAY/NIGHT IR LIGHT
SMART IR
MODE
LEVEL
EXIT
SAVE & EXIT
SLOW SHUTTER
FUNCTIONS
MOTION DET
PRIVACY
BACK
EXIT
SAVE & EXIT
IMAGE
MODE
D->N THRESHOLD
N->D THRESHOLD
BACK
MAIN MENU
VIDEO
SETTINGS
FACTORY
DEFAULT
EXIT
EXPOSURE MODE
CONTRAST
SHARPNESS
SATURATION
3DNR
MIRROR
BACK
AGC
EXPOSURE
VIDEO
FORMAT
BACK
EXIT
SAVE & EXIT
WHITE
BALANCE
BRIGHTNESS
SAVE & EXIT
EXIT
SAVE & EXIT
DAY/NIGHT
MODE
BACK
EXIT
SAVE & EXIT
IMAGE MODE
FUNCTIONS
MOTION DET
PRIVACY
BACK
EXIT
SAVE & EXIT

TruVision HD-TVI Cameras Configuration Manual 7
Full time color cameras:
EXPOSURE
MAIN MENU
VIDEO
SETTINGS
FUNCTIONS
FACTORY
DEFAULT
EXIT
EXPOSURE MODE
AGC
SLOW SHUTTER
CONTRAST
SHARPNESS
SATURATION
3 DNR
MIRROR
BACK
BACK
SAVE & EXIT
BACK
FORMAT
EXIT
SAVE & EXIT
BRIGHTNESS
WHITE BALANCE
SMART
LIGHT
PRIVACY
MOTION
DPC
EXIT
SAVE & EXIT
EXIT
SAVE & EXIT
IMAGE MODE
LIGHT
BACK
EXIT
SAVE & EXIT
THRESHOLD
LEVEL
MODE

8 TruVision HD-TVI Cameras Configuration Manual
Configure the cameras
This section describes how to set up the menu settings for the TruVision HD-TVI
cameras.
Video Format
Move the cursor to FORMAT and select the desired video format.
• HD-TVI 720P cameras: 720P@25 fps or 720P@30 fps
• HD-TVI 2MPx cameras: 2MP@25 fps or 2MP@30 fps
• HD-TVI 5MPx cameras: 5MPx@20 fps, 5MPx@12.5fps, 4MPx@25 fps,
4MPx@30 fps, 2MP@25 fps, and 2MPx@30 fps
• HD-TVI 8MPx cameras: 8MPx@12.5 fps, 5MPx@20 fps, 4MPx@25 fps,
4MPx@30 fps, 2MPx@25 fps or 2MPx@30 fps
• HD-TVI Full Time Color cameras: 2MPx@25 fps or 2MPx@30 fps
Note: When switching the video output to 960H, you can set the video format as PAL,
or NTSC.
5MPx and 8MPx cameras
TVR 15HD and TVR 45HD recorders:
TVR 15HD and TVR 45HD cannot support some resolutions and frame rates used
in the 5MPx and 8MPx cameras.
In the OSD setting, there is no live view for the 8MPx camera when the 8MPx and
5MPx at 20 fps formats or the 4MPx format are selected.
In the OSD setting, there is no live view for the 5MPx camera when the frame rate is
set to 20 fps or the 4MPx formats are selected.
Both the TVR 15HD and TVR 45HD support a maximum of 5MPx at 12.5 fps. When
selecting 5MPx at 12.5 fps mode two additional menu options “NTCS/PAL” and
“INDOOR/OUTDOOR” will then appear in the display. These menus are used to
compensate for the strobing effect with certain lighting systems when using
12.5 fps.
DAY/NIGHT
VIDEO FORMAT
NTSC/PAL
INDO OR/OUTDOOR
EXPOSURE
DAY/NIGHT
VIDEO SETTINGS
FUNCTION
FA CTO RY DE FAULT
EXIT
SAVE&EXIT
5M P 12.5
NTSC
I NDOO R
TVR 12HD and TVR 44HD recorders:
The TVR 12HD and TVR 44HD recorders support a maximum of 2MPx resolution.
Selecting a non-supported resolution will cause video to be displayed incorrectly
and may prevent further changes to the settings via the on-screen display.

TruVision HD-TVI Cameras Configuration Manual 9
Exposure
Move the cursor to EXPOSURE and click Iris+ to enter the submenu.
This defines the brightness-related parameters. Adjust the image brightness using
EXPOSURE MODE,AGC and SLOW SHUTTER for different lighting conditions. The
function SLOW SHUTTER is not available for all camera models.
EXPOSURE
EXPOSURE MODE
AGC
SLOWSHUTTER
BACK
EXIT
SAVE & EXIT
GL OB AL
LOW
OFF
EXPOSURE MODE
Select GLOBAL, BLC, WDR or HLC from the menu.
GLOBAL: This is the normal exposure mode to use for a wide range of situations to achieve an
optimum image.
BLC (Backlight Compensation): This compensates light for the front object to make it clear, but
this may cause the over-exposure of the background, where the light is strong.
WDR (Wide Dynamic Range): The WDR helps the camera provide clear images even under
backlight circumstances. When both very bright and very dark areas simultaneously exist in the
image, WDR balances the brightness level of the whole image to provide clear images with
details.
HLC (High Light Compensation): Masks strong light sources that usually flare across a scene.
This makes it possible to see the detail of the image that would normally be hidden.
Note: The HLC function is not available in 5MPx and Full Time Color cameras.
AGC
The AGC (Automatic Gain Control) function optimizes the clarity of the image in poor lighting
conditions. The AGC level can be set as HIGH, MEDIUM, or LOW.
Note: The noise will be amplified when setting the AGC level. The higher the level, the more
obvious the noise.
SLOW SHUTTER
Note: This function is not available in 5MPx and 8MPx cameras.
This function increases the exposure time on a single frame, which makes a camera more
sensitive to the light so it can produce images even in low lux conditions.
You can set the SLOW SHUTTER function as OFF, x2, x4, x6, x8, x10, x12, x14, or x16
according to the different lighting conditions.
Day/Night
Move the cursor to DAY/NIGHT and click Iris+ to enter the submenu.
Note: This menu is not available in Full Time Color cameras.
This menu defines whether the camera is in day or night mode. The day (color) option
could be used, for example, if the camera is located indoors where light levels are
always good.

10 TruVision HD-TVI Cameras Configuration Manual
MODE
You can select one of three options to control Day/Night mode: COLOR, BW (Black White), or
AUTO.
COLOR: The image is colored in day mode all the time.
B & W: The image is black and white all the time. The IR LEDs turn on in poor lighting
conditions.
720P and 2MPx cameras:
DAY/NIGHT
MODE
IR LIGHT
SMART IR
LEVEL
BACK
EXIT
SAVE & EXIT
B & W
ON
M OD E 1
1
5MPx and 8MPx cameras:
DAY/NIGHT
MODE
IR LIGHT
SMART IR
BACK
EXIT
SAVE & EXIT
B & W
ON
2
AUTO: The camera automatically detects which mode to use depending on the lighting
conditions. This is the default mode. The menu options available are different when this
parameter selected.
720P and 2MPx cameras:
DAY/NIGHT
MODE
IR LIGHT
SMART IR
LEVEL
D àN THRESHOLD
N àD THRESHOLD
BACK
EXIT
SAVE & EXIT
AUTO
ON
M ODE 1
1
7
7
5MPx and 8MPx cameras:
DAY/NIGHT
MODE
IR LIGHT
SMART IR
D àN THRESHOLD
N àD THRESHOLD
BACK
EXIT
SAVE & EXIT
AUTO
ON
2
2
7
IR LIGHT
Turn on or off the IR LEDs depending on the lighting conditions. The IR LEDs are on by default.
SMART IR
The Smart IR function is used to avoid over exposure of an image due to IR LED glare. It can be
used in both indoor and outdoor conditions.
For 720P, 2MPx cameras, you can select MODE 1 or MODE 2. MODE 1 reduces over exposure
more than MODE 2. Mode 1 is default mode.
For 5MPx and 8MPx, you can select 1 or 2. Option 1 reduces over exposure more than option 2.
Option 1 is default mode.
LEVEL
Note: This function is not available in 5MPx and 8MPx cameras.
This is the light level for auto D/N mode switch.
The IR cut filter switches between DAY and NIGHT modes when the lighting conditions reach
this user-defined D/N sensitivity level. The LEVEL value can be adjusted between 0 and 3. The
higher the value, the higher the D/N sensitivity level.
DàN Threshold
Day to Night Threshold is used to control the sensitivity of switching from day mode to night
mode. You can set the value from 1 to 9. The higher the value, the more sensitive the camera is
to color.
This mode is only available when AUTO is selected under the MODE menu.

TruVision HD-TVI Cameras Configuration Manual 11
NàD Threshold
Night to Day Threshold is used to control the sensitivity of switching from night mode to day
mode. You can set the value from 1 to 9. The larger the value, the more sensitive the camera is
to switching from night mode to day mode.
This mode is only available when AUTO is selected under the MODE menu.
Video Settings
Move the cursor to VIDEO SETTINGS and click Iris+ to enter the submenu.
This menu defines the camera image using the functions image mode, white balance,
brightness, contrast, sharpness, saturation, 3DNR, and mirror.
VIDEO SET TINGS
IMAGE MODE STD
WHITE BALANCE
BRIGHTNESS
CONTRAST
SHARPNESS
SATURATION
3DNR
MIRROR
BACK
EXIT
SAVE & EXIT
5
5
5
5
5
OFF
IMAGE MODE
This function is used to adjust the image saturation. You can select STD (Standard), or HIGH-
SAT (High Saturation).
WHITE BALANCE
White balance, the white rendition function of the camera, adjusts the color temperature
according to the environment. It can remove unrealistic color casts in the image. You can select
AUTO or MANUAL.
AUTO: The white balance is adjusted automatically according to the current color temperature of
the lighting conditions.
MANUAL: You can manually set the R GAIN/B GAIN values from 1 to 255 to adjust the shades
of red and blue colors of the image.
WHITE BALANCE
MODE
R-GAIN
B-GAIN
BACK
EXIT
SAVE & EXIT
MANUAL
5
5
BRIGHTNESS
You can adjust the brightness value to darken or brighten the image. The higher the value, the
brighter the image. You can set the value from 1 to 9. The higher the value, the brighter the
image. Default is 5.
CONTRAST
Contrast is the degree of difference between the darker and lighter parts of the image. You can
set the value from 1 to 9. The higher the value, the stronger the contrast. Default is 5.

12 TruVision HD-TVI Cameras Configuration Manual
SHARPNESS
This function increases the image gain and sharpens the edges in the image to enhance image
details. You can set the value from 1 to 9. The higher the value, the stronger the effect. Default is
5.
SATURATION
Saturation indicates the brightness of the color. The higher the saturation, the brighter the color.
The value ranges from 1 to 9.
3DNR
(Digital Noise Reduction). The 3DNR function can decrease the noise effect, especially when
capturing moving images in poor lighting conditions, which delivers a more accurate and sharp
image. The larger the value, the less noise there will be in low lighting conditions. You can set
the value from 1 to 9. Default is 5.
MIRROR
This function lets you flip the camera image horizontally or vertically. This could be used, for
example, when the camera needs to be installed upside down. This the feature allows you to flip
the image so it looks right side up on the monitor. Select one of the options:
OFF: The mirror function is disabled.
H: The image flips 180° horizontally.
V: The image flips 180° vertically.
HV: The image flips 180° both horizontally and vertically.
Smart Light
The camera has warm white LEDs to improve image quality in low light conditions. The
LEDs are controlled by the Smart Light function, which automatically adjusts both the
exposure time and light sensitivity to avoid over exposure of the image.
Note: This function is only available in Full Time Color cameras.
SMART LIGHT
LIGHT
THRESHOLD
LEVEL
MODE
BACK
EXIT
SAVE & EXIT
AUTO
2
5
MODE1
LIGHT
You can select AUTO or OFF.
AUTO: This mode automatically turns on the white LEDs as the environmental lighting becomes
poor.
The THRESHOLD value controls the sensitivity of the white LEDs. The value ranges from 1 to 3.
The higher the value, the more sensitive the white LEDs.
The LEVEL value controls the brightness of the white LEDs. The value ranges from 1 to 5. The
higher the value, the brighter the white LEDs.
OFF: Disable the function. OFF is the default mode.

TruVision HD-TVI Cameras Configuration Manual 13
MODE
There are two mode levels, 1 and 2. Mode 1 has a warmer white light than mode 2.
Functions
Move the cursor to FUNCTIONS and click Iris+ to enter the submenu.
This menu defines motion detection and privacy.
MOTION DETECTION
In the user-defined motion detection surveillance area, the moving object can be detected and
the alarm will be triggered. Up to four motion detection areas can be configured.
MOTION DET
MODE
AREA 0
AREA 1
AREA 2
AREA 3
COLOR
SENSITIVITY
TRANSPARENCY
BACK
EXIT
SAVE & EXIT
OFF
RED
5
OFF
Select a MOTION area. Set the MODE as ON. Click the up/down/left/right button to define the
position, and the size of the area. Set the SENSITIVITY from 1 to 9.
PRIVACY
The privacy mask allows you to cover designated areas that you do not want to be viewed or
recorded. Up to four privacy areas are configurable.
PRIVACY
MODE
AREA 0
AREA 1
AREA 2
AREA 3
COLOR
TRANSPARENCY
BACK
EXIT
SAVE & EXIT
ON
RED
OFF
Select an area. Set the MODE as ON. Click up/down/left/right buttons to define the position and
the size of the area. You can also select the color of the area and if it is to be transparent or not.
Select SAVE & EXIT to save the changes and exit the menu.
Factory Default
Move the cursor to FACTORY DEFAULT and click Iris+ to reset all the settings to the
factory default.
Exit
Move the cursor to EXIT and click Iris+ to exit the menu without saving.

14 TruVision HD-TVI Cameras Configuration Manual
Save & Exit
Move the cursor to SAVE & EXIT and click Iris+ to save the settings, and exit the menu.
This manual suits for next models
14
Table of contents
Other Interlogix Digital Camera manuals

Interlogix
Interlogix UVD-XP4DNR User manual

Interlogix
Interlogix TVC-2401 User manual

Interlogix
Interlogix TruVision TVC-6110-1-N User manual

Interlogix
Interlogix TruVision Multi-Imager User manual

Interlogix
Interlogix UltraView UVC-6130-1 User manual

Interlogix
Interlogix TruVision HD-TVI 3MPX User manual

Interlogix
Interlogix UltraView UVC-6120-1 User manual

Interlogix
Interlogix Camera User manual

Interlogix
Interlogix TVC-2401 User manual

Interlogix
Interlogix TX-2344-03-1 User manual