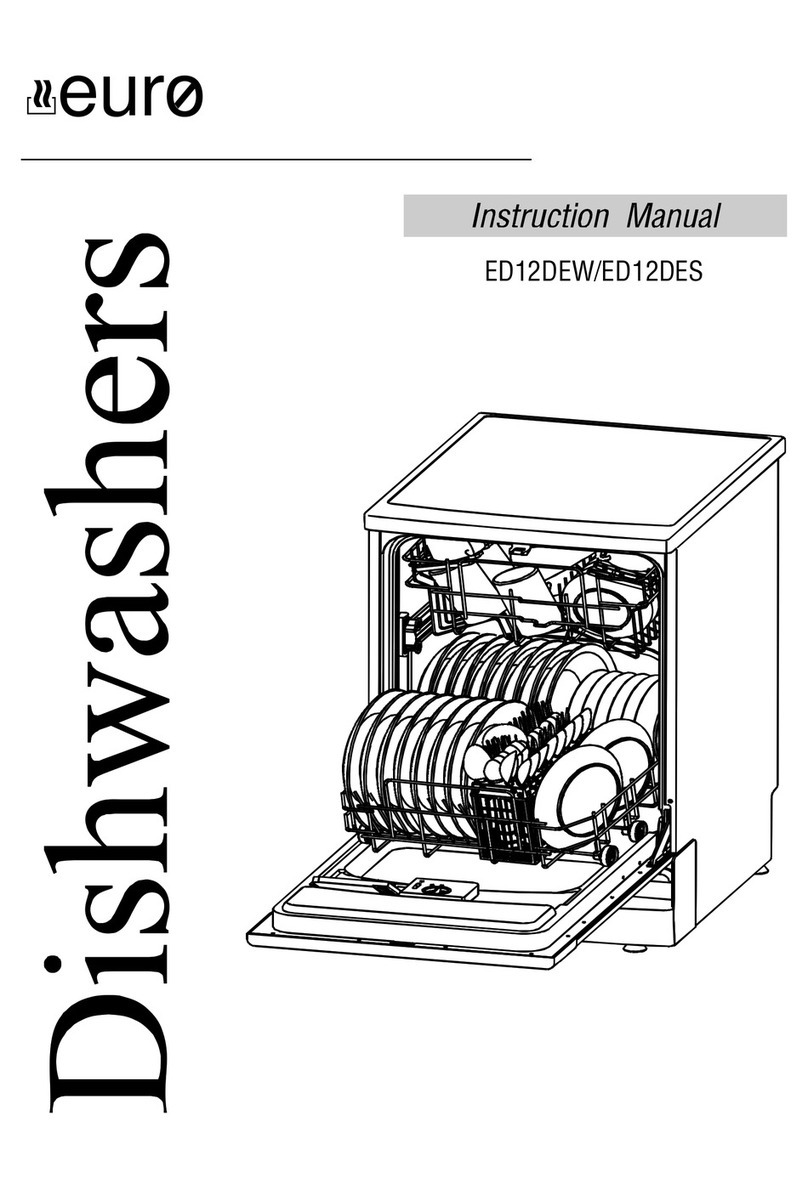
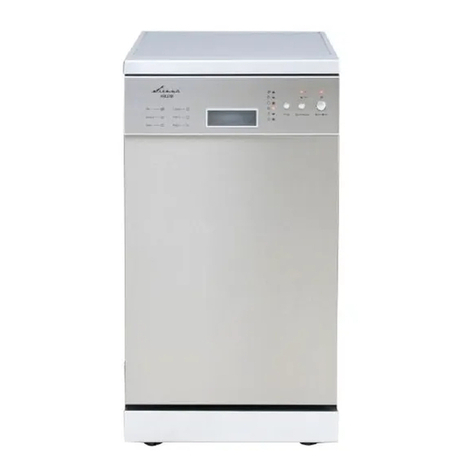
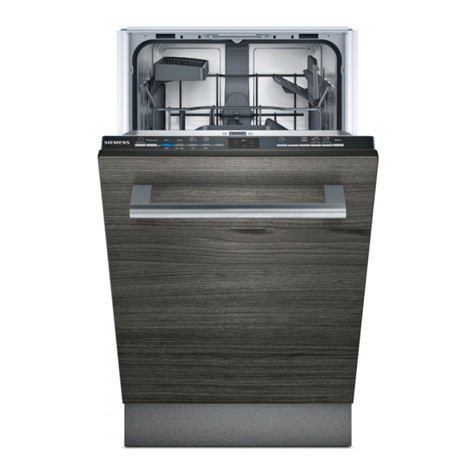
EURO EID14GSA User manual

EID14GSA
euro

Compartment
Witheachwashcycle.
Compartment
For programmes with pre-wash only.
(Follow the user instructions!)
Mechanical indicator
Check the rinse aid level
Load the baskets
Select a programme
Turn on the water tap, close the door, the machine will start working after about 10 seconds.
Running the dishwasher
Switch off the appliance
Turn off the water tap,
unload the baskets
Fill the detergent dispenser
Warning: wait a few minutes (about 15 minutes) before unloading the dishwasher to avoid handling
the dishes and utensils while they are still hot and more susceptible to break.
They will also dry better. Unload the appliance, starting from the lower basket.
Changing the programme
Add forgotten dishes in the
dishwasher.
Scrape off any large amount of leftover food. Soften remnants of burnt food in pans,
then load the baskets. Refer to the dishwasher loading instructions.
Press the Program button to select a desired program..
( See the section entitled Operationg instruction )“”
When the working cycle has finished, the buzzer of the dishwasher will sound 8 times, then stop.
Turn off the appliance using the ON/OFF button.
If the appliance is switched
off during a wash cycle.
Open the door carefully.
Hotsteam may escape
when thedoorisopened!
If the appliance is switched off during a wash cycle, when switched
on again, please re-select the washing cycle and operate the dishwasher
according to the original Power-on state ).
Switch on the appliance Open the door, press the On/Off button to switch on the appliance.
1.Open the door a little to stop the dishwasher.
2.After the spray arms stop working, you can open the door completely.
3.Add the forgotten dishes.
4.Close the door, the dishwasher will start running again after 10 seconds.
Electric indicator on control panel (if provided).
For detailed operating method read the corresponding content on the instruction manual.
1. Arunning cycle can only be modified ifit has been running for a short time. Otherwise the detergent
may have already been released and the water already drained. If this is the case, the detergent
dispenser must be refilled.
2. Open the door , then press the program button for more than 3 seconds
to cancel the running program.
3. Select a new program.
4. Close the door, the machine will start to work after 10 seconds..
alittletostopthedishwasher

Dishwasher Features.................................... ...2
Attention before or after loading the Dishwasher
Baskets..........................................................6
Filtering System............................................ 13
Caring for the Dishwasher...............................14
A、Fill the Rinse Aid Dispenser.........................3
B、Function of Detergent .................................4
Loading the upper Basket.................................6
Loading the Lower Basket.................................7
Cutlery Basket........................................... ...9.
Wash Cycle Table...........................................11
Turning on the Appliance................................12
Change the Programme.................................. 12.
At the End of the Wash Cycle........................... 12.
Before calling for service.................................22
Error codes...................................................23
Technical information.....................................24
Control Panel...................................................2
Water Connection...........................................21
Please carefully read the installation instruction
.....................................................................
....16Aesthetic panel's dimensions and installation
Tension adjustment of the door spring 18..............
Connection of drain hoses.......................................18
Dishwasher installation steps..........................19
To review the section on troubleshooting Tips
will help you to solve some common problems
by yourself .
Dear Customer,
Please carefully read this manual before using the
dishwasher, it will help you to use and maintain the
dishwasher properly.
Pass it on to any subsequent owner of the appliance.
This manual contains sections on safety Instructions,
Operating Instructions, Installation Instructions and
Troubleshooting Tips, etc.
The manufacturer, following a policy of constant
development and updating of the product, may
make modifications without giving prior notice.
Keep it to refer to it at a later date.
If you can not solve the problems by yourself ,
please ask for the help of professional technicians.
Cup shelves..................... ....7...........................
How to adjust the upper Basket.........................7
Lower basket with Extra Rack ....8.......................
Folding Spikes ...8.............................................
Loading the Cutlery basket........................... ..9.

1
This appliance must be grounded. In the event of a
malfunction or breakdown, grounding will reduce
theriskof anelectricshockbyprovidingapathof
least resistance of electric current. This appliance
is equipped with a cord having an equipment-
grounding conductor and a grounding plug.
The plug must be plugged into an appropriate outlet
that is installed and grounded in accordance with
all local codes and ordinances.
Keep children away from detergent and rinse aid, keep
children away from the open door of the dishwasher,
there could still be some detergent left inside.
Do not abuse, sit on, or stand on the door or dish
rack of the dishwasher.
Do not touch the heating element during or
immediately after use.
(This instruction is only applicable to machines
with a visual heating element.)
Do not wash plastic items unless they are marked
dishwasher safe or the equivalent. For plastic items
not so marked, check the manufacturer's
recommendations.
Use only detergent and rinse additives
designed for an automatic dishwasher.
Never use soap, laundry detergent, or hand
washing detergent in your dishwasher. Keep
these products out of the reach of children.
During installation, the power supply must not
be excessively or dangerously bent or flattened.
Do not tamper with controls.
Do not place any heavy objects on or stand on the
door when it is open. The appliance could tip
forward.
When loading items to be washed:
1) Locate sharp items so that they are not likely
to damage the door seal;
2) Warning: Knives and other utensils with
sharp points must be loaded in the basket
with their points down or placed in a
horizontal position.
When using your dishwasher, you should
prevent plastic items from coming into contact
with the heating element.(This instruction is only
applicable to machines with a visual heating
element.)
If the supply cord is damaged, it must be replaced
by the manufacturer or its service agent or a
similarly qualified person in order to avoid a
hazard.
Please dispose of packing materials properly.
Use the dishwasher only for its intended function.
Remove the door to the washing compartment when
removing an old dishwasher from service or discarding it.
Dishwasher detergents are strongly alkaline, they
can be extremely dangerous if swallowed. Avoid
contact with skin and eyes and keep children away
from the dishwasher when the door is open.
Check that the detergent comparment is empty
after completion of the wash cycle.
The appliance is to be connected to the water
mains using new hose sets and that old hose-sets
should not be reused.
The maximum number of place settings to be
washed is .14
The maximum permissible inlet water pressure is
1Mpa.
The minimum permissible inlet water pressure is
0.04Mpa.
Children should be supervised to ensure that they do
not play with the appliance.
This appliance is not intended for use by persons
(including children )with reduced physical, sensory or
mental capabilities, or lack of experience and
knowledge ,unless they have been given supervision
or instruction concerning use of the appliance by a
person responsible for their safety.
When using your dishwasher, follow the precautions listed below:
WARNING!
The door should not be left open,
since this could increase the risk of tripping.
Do not operate your dishwasher unless all
enclosure panels are properly in place. Open
the door very carefully if the dishwasher is
operating, there is a risk of water squirting out.
Improper connection of the equipment-grounding
conductor can result in the risk of an electric shock.
Check with a qualified electrician or service
representative if you are in doubt whether the
appliance is properly grounded. Do not modify the
plug provided with the appliance; If it does not fit
the outlet. Have a proper outlet installed by a
qualified electrician.

To get the best performance from your dishwasher, read all
operating instructions before using it for the first time.
2
10 11
Back View
1
2
3
4
5
6
7
8
9
on
Of f
Front view
Main Filter
Detergent Dispenser
Cup Shelf
Cutlery Basket
Coarse Filter
Rinse Aid Dispenser
Inlet pipe connector
Drain pipe connector
Lower Basket
Spray Arms
Upper Basket
1
5
6
7
8
9
10
11
3
2
4
5
Program button: To select one of the six programs.
2
3
4
3in1 function button: To selectandshow 3in1 function.
Display window: Program remaining time, delay time, running indicator, Program indicator,
rinseaid indicator, Error codes, etc.
Power switch: To turn on/off the power supply.
2
3
45
Delayed Start Button: To preset the wash timer and delay the starting timeup to 24 hours.
Every press of thisbutton increasesthetimebyone hour. for example: one pressforan
hour, two for two hours... ...
(
)

Before using your dishwasher for the first time:
3
A. Fill the rinse aid dispenser
B. Fill in detergent
The rinse aid is released during the final rinse to prevent water from forming droplets on your dishes, which can
leave spots and streaks. It also improves drying by allowing water to roll offthedishes. Your dishwasher is
designed to use liquid rinse aids. The rinse aid dispenser is located inside the door next to the detergent dispenser.
To fill the dispenser, open the cap and pour the rinse aid into the dispenser until the level indicator turns completely
black. The volume of the rinse aid container is about 110ml.
Rinse Aid Dispenser
Function of Rinse Aid
Rinse aid is automatically added during the last rinse, ensuring thorough rinsing, and spot and streak free drying.
Attention!
Only use branded rinse aid for dishwasher. Never fill the rinse aid dispenser with any other substances
(e.g. Dishwasher cleaning agent, liquid detergent). This would damage the appliance.
As the rinse aid diminishes, the size of the black dot
on the rinse aid level indicator changes, as illustrated below.
Full
3/4full
1/2full
1 / 4 full - Should refill to eliminate spotting
Empty
If there is no rinse-aid warning light in the control panel, you can judge the amount of rinse-aid by the color of the optical level
indicator "D" located next to the cap. When the rinse-aid container is full, the whole indicator will be dark .As the rinse-aid
diminishes, the size of the dark dot decreases. You should never let the rinse aid get below 1 / 4 full.
When to Refill the Rinse Aid Dispenser
RINSE AID DISPENSER
To open the dispenser, turn the cap to the "open" (left) arrow and lift it out.
Pour the rinse aid into the dispenser, being careful not to overfill.
Replace the cap by inserting it aligned with "open" arrow and turning it to the closed (right) arrow.
Be careful not to overfill the dispenser, because this could cause over sudsing.Wipeawayanyspills
with a damp cloth. Don't forget to replace the cap before you close dishwasher door.
Attention!
Clean up any rinse aid split during filling with an absorbent cloth to avoid excess foaming
during the next wash.
1
2
3

4
Adjusting Rinse Aid Dispenser
The rinse aid dispenser has six . Always start with the dispenser set on "4".
If spots and poor drying are a problem, increase the amount of rinse aid dispensed
by removing the dispenser lid and rotating the dial to "5". If the dishes still are not
drying properly or are show spots, adjust the dial to the next higher lever until your
dishes are spot-free. The recommended setting is "4". (Factory value is "4".)
scales
Increasethedoseiftherearedropsofwaterorlimespotsonthedishesafter washing.
Reduce it if there are sticky whitish stains on your dishes or a bluish film on glassware or
knife blades.
NOTE:
Detergentswith its chemicalingredients arenecessary to remove dirt,crush dirt and transport it out of the dishwasher.
Most of thecommercial quality detergentsare suitableforthis purpose.
Detergents
There are 3 sortsof detergents
1.With phosphate and with chlorine
2.With phosphate and without chlorine
3.Without phosphate and without chlorine
Based on their chemical composition, detergents can be split in two basic types:
The use of normal washing programs incombination withconcentrated detergents
reduces pollution and is good for your dishes; these wash programs are specifically matched
to the dirt-dissolving properties of the enzymes of the concentrated detergent. For this reason
normal wash programs in which concentrated detergentsare used can achieve the same
resultsthat can otherwise only be achieved using intensive programs.
“”
“”
“”
Detergenttablets of different brands dissolve at differentspeeds. For this reason some
detergent tablets cannot dissolve and develop their full cleaning power during short
programs.Therefore please use long programs when using detergent tablets, to
ensure the complete removal of detergent residuals.
The dispensermust berefilled before the start of each washcycle following the instructions
provided inthe wash cycle table . Your dishwasher uses less detergent and rinse aid than
Conventional dishwasher. Generally, only one tablespoon ofdetergent isneededfor
a normal washload. Moreheavily soileditems needmore detergent.Alwaysaddthe
detergent just before starting the dishwasher, otherwise it could get damp and will not
dissolve properly.
Concentrated Detergent
DetergentTablets
DetergentDispenser
conventional, alkaline detergentswith causticcomponents
low alkaline concentrated detergents with natural enzymes
Normally new pulverised detergent is without phosphate.Thus the watersoftener function of
phosphate is not given. In this case we recommend to fill salt in the salt container even when
the hardness of water is only 6 dH. If detergents withoutphosphate are used in the case of hard water
often whitespots appear ondishes andglasses.In this case please add moredetergent to reach
better results. Detergents without chlorine do only bleach a little. Strong and coloured spots will not
be removed completely. In this case please choose a program with a higher temperature.
°

5
AmountofDetergenttoUse
Proper Use of Detergent
Use only detergent specifically made for the usein dishwashers. Keep your detergent fresh and dry.
Don't put powdereddetergent into the dispenseruntil you're ready to wash dishes.
Dishwasher detergent is corrosive! Take care to keep it out of reach of children.
Always add the detergent just before starting each wash cycle.
Only use branded detergent aid for dishwasher.
If thelid isclosed: press release button.The lid will spring open.
Detergent tablet
Detergent powder
Fill the detergent dispenser with detergent.
The marking indicates the dosing levels , as
illustratedontheright:
The place of main wash cycle detergent placed.
The place of pre-wash cycle detergent placed.
Pleaseobserve the manufacturersdosing and storage
Recommendations as stated on the detergent packaging.
Close the lid and press until it locks in place.
Ifthedishes are heavily soiled, place anadditional
detergentdose inthe pre-washdetergent chamber.This detergentwilltakeeffectduringthepre-wash phase.
A
B
FillinDetergent
You find information about the amount of detergent for the single programme on the last page.
Please aware, thataccording to the level soiling andthe specific hardness of water differences are possible.
Please observe the manufacturer's recommendations on the detergent packaging.

6
For best performance of the dishwasher, follow these loading guidelines. Features and
appearance of baskets and cutlery baskets may vary from your model.
Attention before or after Loading the Dishwasher Baskets
Scrape off any large amounts of leftover food. Soften remnants of burnt foodinpans.
It is not necessary to rinse the dishes under running water.
Place objects in the dishwasher in following way:
1.Items such as cups, glasses, pots/pans, etc. are faced downwards.
2.Curved items, or ones with recesses, should be loaded aslant so that water can run off.
3.All utensils are stacked securely and can not tip over.
4.All utensils are placed in the way that the spray arms can rotate freely during washing.
Very small items should not be washed in the dishwasher as they could easily fall out of the baskets.
Removing the Dishes
To prevent water dripping from the upper basket into the lower back, we recommend that you
empty the lower basket first and then the upper basket.
Loading the Upper Basket
The upper basket is designed to hold more delicate and lighter dishware such as glasses, coffee
and tea cup and saucers, as well as plates, small bowls and shallow pans (as long as they are
not too dirty).
Position the dishes and cookware so that they do not get moved by the spray of water.
3
GlassesSaucers
2
1
Cups
Dessertdishes
4
4
The upper basket height is adjustable. There is an upper and lower position for the upper basket which is used to wash
dishes with different heights.You only need lift the basket,and thenit can realize the upper andlower position itself.
Longitems, serving cutlery, saladserversor knives should be placed on theshelf so that they do not obstruct the
rotation of the spray arms. The shelf can be rotated and lifted according to dishes. When not required, the shelf can be
folded back at the lower height.To adjust the height, advice you make sure the shelf on edge, and lift it in the different
height,then rotateto the properposition.

7
Loading the Lower Basket
We recommend that you place large items which are most difficult to clean into the lower basket:
pots, pans, lids, serving dishes and bowls, as shown in the figure to the right.
It is preferable to place serving dishes and lids on the side of the racks in order to avoid blocking
the rotation of the top spray arm.
Pots, serving bowls, etc. must always be placed top down.
Deep pots should be slanted to allow water to flow out.
The bottom basket feature fold down tine rows so that larger or more pots and pans can be loaded.
6
Dinner plates
5
Soupplates
Cutlery basket
7
Dessertdishes
4
4
Flip down cup shelves.
Place glasses upside down with stems resting in the “U” of the shelves. The shelves will fit for different cups or
glasses when put them in lower & higherposition. As shown in the following figures.

Additionally, if there aremuch
morecutlery just likefolks and
knives need to be washed,
setting theoptionalextra rack
can help you enlarge the
capacity oflowerbasket.
The right Figure shows
atypicalloadforthelower
basketwithextrarack.
To improve stacking of pots and pans, the spikes can be folded down. The left of the following Figures showspart of the
lower basketwith folding spikesunfold.The Right one shows a typical load for the lower basket with folding spikesunfold.

The whole silverware basket is made up of two different baskets, two small baskets
and a larger basket
According to your requirement, you can removethe smallbaskets,as following.
Step 1:
TurnA to each side.You can judge whether itis in position by your feeling.
Step 2:
Take the small basket away in the direction ,as the pictureshowing.
Of cause, you can assemble the basketstogether again following the opposite steps. But please
make sure all clasps should match with largebasket well.
For a high quality clean ,please put your cutleries into the cutlerybasket with handles down. Every
cutlery has lids. It ishelpful to stop the nesting of utensil and promote the clean performance effect.
There is an example of cutlery loading for 14 places below, it can prevent the silverware nesting
together. In order not to blocktherotation of upper sprayer, long cutlery like serving spoon should
be placed in the front of the cutlery basket,as the picture shown.
Soup spoon
Fork
Knife
Teaspoon
Dessertspoon
Do not let any item extend through bottom.
9

For washing in the dishwasher the following cutlery/dishes
Cutlery with wooden, horn china or
mother-of-pearl handles
Plastic items that are not heat resistant
Older cutlery with glued parts that are not
temperature resistant
Bonded cutlery items or dishes
Pewter or cooper items
Crystal glass
Steel items subject to rusting
Wooden platters
Itemsmadefromsyntheticfibres
Do not put in items that are dirty of cigarette ash, candle wax, lacquer or paint.
If you buy new dishes please make sure that they are suitable for dishwashers.
Some types of glasses can become
dull after a large number of washes
Silver and aluminum parts have a
tendency to discolour during washing
Glazed patterns may fade if machine
washed frequently
Please do not overload your dishwasher. Do not use dish that is not suitable for
dishwashers. This is important for good results and for reasonable energy consume.
Before loading the dishes, you should:
Remove large left-over
Soften remnants of burnt food in pans
Dishes and cutlery must not impede the rotation of the spray arms
Load hollow items such as cups, glasses, pans etc. with the opening downwards so that
water cannot collect in the container or a deep base
10
NOTE:
NOTE:
Are not suitable Are of limited suitability
Loading cutlery and dishes
When loading the dishes and cutlery, please note:
Di
To
T
shes and items of cutlery must not lie inside one another, or cover each other
avoid damage to glasses, they must not touch
Load large items which are most difficult to clean into the lower rack
he upper rack is designed to hold more delicate and lighter dishware such as glasses, coffee
and tea cups
Attention!
Long bladed knives stored in anupright position are a potential hazard!
Long and/or sharp items of cutlery such as carving knives must be positioned
horizontally in the upper basket.
Damage to glassware and other dishes
Possible causes:
Type of glass or manufacturing process. Chemical composition of detergent.
Water temperature and duration of dishwasher programme.
Suggested remedy:
Use glassware or porcelain dishes that have been marked dishwasher-proof by the
manufacturer
Use a mild detergent that is described as kind of dishes If necessary, seek further
information from detergent manufacturers.
Select a programme with as low a temperature.
To prevent damage, take glass and cutlery out of the dishwasher as soon as possible
after the programme has ended.

11
5/27.5g
5/27.5g
Pre-wash(50 )
Pre-wash
Wash (65 )
Rinse
Rinse
Rinse(55 )
Drying
℃
℃
℃
Pre-wash(50 )
Wash (50 )
Rinse
Rinse(65 )
Drying
℃
℃
℃
160
130
80
1.2
1.4
0.8
22
16
5/27.5g
Wash (55 )
Rinse
Rinse
Rinse
Drying
℃
(50 )℃
125 0.88 13.7
8.5
* AS/NZS 2007.1: This programme is the test cycle. The information for comparability test
in accordance with AS/NZS 2007.1,as follows:
Capacity: 14 setting
Position Upper basket: upper wheels on rails
Rinse aid setting: 6
Open the door slightly 50mm to assist indrying of the dishes after every wash
For heavy soiled loads,
such as , plates,glasses
and lightly soiled pans.
standard daily cycle.
pots
For the heaviest soiled loads,
such as pots,pans,casserole
dishes and dishes that have
been sitting with dried food
on them for a while.
For normal soiled loads,such
as plates,glasses,bowls and
lightly soiled pans.
For dishes that need to be
rinsed and dried only.
Intensive
Rinse
(AS/NZS 2007. 1 )
Means: need to fill rinse into the Rinse-Aid Dispenser.
()
/
150
11~14.5
1.1~1.4
Auto
Pre-wash(40 )
Autowash(50-60 )
Rinse
Rinse (70 )
Drying.
℃
℃
℃
For all soiled loads, such
as pots, pans, casserole
dishes and dishes that have
beensittingwithdriedfood
on them for a while.
5/27.5g
Wash (40 )
Rinse
Rinse(45 )
℃
℃
20g. 30 0.45 12
Ashorterwashforlightly
soiled loads that do not
need drying.
Rapid
For lightly soiled loads,
such as glasses, crystal
and fine china.
Glass
Pre-wash
Wash (40 ℃)
Rinse
Rinse (60 ℃)
Drying
20 g.
95
15
0.8
Wash (40 ℃)
Rinse (70 ℃)
Drying

12
It is dangerous to open the door when washing, because the hot water may scald you.
When the working cycle has finished, the buzzer of the dishwasher will sound for 8 seconds, then stop. Turn off
the appliance using the ON/OFF button, shut offthe water supply and open the door of the dishwasher.
Wait for afew minutes before unloadingthedishwasher toavoid handlingthedishes and utensils while they
are still hot and more susceptible to breakage. They will alsodry better.
Switch Off the Dishwasher
1.Switch off the dishwasher by pressing the ON/OFF button.
2.Turnoffthewatertap!
The program has ended, only if there appears a "0:00" in the digital display (remaining program time).
Open the door carefully.
Hot dishes are sensitive to knocks. The dishes should therefore beallowed to cool down around 15 minutes
before removing from the appliance.
Open the dishwasher's door, leave it ajar and wait a few minutes before removing the dishes. In this way they
will be cooler andthe drying will be improved.
Unloadingthe dishwasher
It is normal that the dishwasher is wet inside.
Empty thelower basket first and then the upperone.This will avoid water dripping from the upper Basket onto
the dishes in the lower one.
the machine will working after 10 seconds.continue
Ifyou open the door , the machine will pause. When you close the door ,during a wash cycle
Draw out the lower and upper basket, load the dishes and push them back.
It iscommendedtoloadthelowerbasketfirst,thentheupperone(seethe sectionentitled
Loading the Dishwasher ).
Pour in the detergent (see the sectionentitled Salt, Detergent and RinseAid ).
Insert the plug into the socket. The power supplyis 220-240 VAC /50 HZ, the specification of the
socketis 10A 250VAC. Make sure that the water supply is turned on to full pressure.
“”
“”
1
2
3
4Press the ON/OFF button, and the ON/OFF lightor the display will turnon. Press the program
button to select a desired wash cycle. fter 10 seconds, the machine will work.Closethe door,a
Acycle that is underway can only be modified if it has only been running for a short
time. Otherwise, thedetergent may have alreadybeen released, and theappliance may
have already drained the wash water. If this is the case, the detergent dispenser must
be refilled (see the section entitled " Loading the Detergent " ).
When you select Intensive/Normal/Eco.Programmes, you can select the 3in1 function.
1
2
3
Open the door alittleto stop the washing. Pressthe programmebutton more than 3 seconds to cancel therunning
programme. Then you can select other programmes (see the section entitled " Starting a wash cycle. . . " ).
Aforgotten dish can be added any time before the detergent cup opens.
Add forgotten dishes.
Close the door
After the spray arms stop working,you can open the door
completely.
2
3
Open the door a little to stop the washing.
14
5
The dishwasher will run after 10 seconds.
Premise

13
The filter prevents larger remnants of food or other objects from getting inside the pump.
The residues may block the filter, in this case they must be removed.
The filter system consists of a coarse filter, a flat (Main filter)
And a microfilter (Fine filter).
Main filter
Food and soil particles trapped in this filter are pulverized by a
special jet on the lower spray arm and washed down the
drain.
Coarse filter
Larger items, such as pieces of bones or glass, that could clog
the drain are trapped in the coarse filter. To remove an item
caught in this filter, gently squeeze the taps on the top of this
filter and lift it out.
Fine filter
This filter holds soil and food residues in the sump area and
prevents it from being redeposit on the dishes during a cycle.
2
3
1
2
3
1
step1:Turn the filter in anti-clockwise direction,
then lift it up
step2:lift the Main filter up
step 3: lift the Fine filter up
Filterassembly
The filter efficiently
For best performance and results, the filter must be cleaned regularly. this reason, it is a goodidea to
remove the larger food particlestrapped in the filteraftereach wash cycle by rinsing the semicircular filterand
cup under running water. To remove the filter device, pull the cup handle in the upwarddirection.
removes food particlesfromthewash water,allowingit toberecycledduring the cycle.
For
Thedishwasher mustneverbeused withoutthe filters.
Improper replacement of the filter may reduce the performance level of the appliance
and damage dishes and utensils.
1
2
3
When following this procedure from step1 to step 3, the filter system will be removed;
when following it from Step 3 to Step 1, the filter system will be installed.

14
The controlpanel can be cleaned byusing a lightly dampenedcloth.
After cleaning, make sure to dry it thoroughly.
For the exterior, use a good appliance polishwax.
Neverusesharp objects, scouring padsorharshcleaners onanypartofthe dishwasher.
ProtectAgainst Freezing
1.Cutoff the electrical power to the dishwasher.
2.Turnoff the water supplyanddisconnect the waterinlet pipe from the water valve.
3.Drain thewater from the inletpipeandwater valve. (Use a pan to catch the water)
4.Reconnect the water inletpipe to the water valve.
5.Removethe filterat the bottom ofthe tub and use aspongeto soakup water in the sump.
please take frost protection measures onthe dishwasher in winter. Every fter washing cycles,
please operate as follows timea
:
- Inspect the filters for blocking after every time the dishwasher has been used.
- By unscrewing the coarse filter, you can remove the filter system. Remove any food remnants and
clean the filters under running water.
Remarks:
Cleaning the Filter
Cleaning The Door
To clean thecoarse filterandthefinefilter, use a cleaningbrush. Reassemble the filterparts as shown in thefigures
on the last page and reinsert the entire assembly in the dishwasher, positioning it in its seat and pressing downwards.
The entire filter assembly shouldbe cleanedonce a week.
When cleaning the filters, don't knock on them. Otherwise,the filters could be
contorted andthe performanceof the dishwasher could be decreased.
Toclean theedge around the door, you should use only a soft warm, damp cloth.
To avoid penetration of water into the door lock and electrical components, do not
use a spray cleaner of any kind.
Neverusea spraycleanerto clean thedoor panel as itmaydamagethedoor lock
and electricalcomponents.
Abrasive agents or some paper towels should not be used because of the risk of
scratchingorleaving spotsonthestainlesssteelsurface.
Cleaning the SprayArms
If your dishwasher cannot work because of the ice,
please contact professional service persons.
It is necessary to clean thespray arms regularly for hard
water chemicals will clog the spray arm jets and bearings.
To remove the upper spray arm, screw offthe nut clockwise then
remove the arm.
To removethelowerspray arm,pullout the spray armupward.
Wash thearmsin soapyandwarm waterandusea softbrushto
clean the jets. Replace themafter rinsingthem thoroughly.

The installation of the pipes
and electrical equipments
should be done by professionals.
Electrical Shock Hazard
Disconnect electrical power before
installing dishwasher.
Failuretodosocanresultindeathor
electrical shock.
The installation position of dishwasher should be near the existing inlet and drain hoses and
power cord.
One side of the cabinet sink should be chosen to facilitate the connection ofdrainhosesof
the dishwasher.
Installation preparation
Note: please check the accompanying installation accessories(hook for aesthetic panel
,screw)
●
15
Itisrecommend thatyourun awashcycle with the
dishwasher emptyand then remove the plug from the
socket, turn off the water supply and leave the door of
the appliance slightly open. This will help the door
sealstolastlongerandprevent odoursfromforming
withintheappliance.
If the appliance must be moved, tryto keep it in the
verticalposition. Ifabsolutely necessary, itcanbe
positioned on its back.
Oneofthefactorsthatcauseodourstoforminthe
dishwasher is food that remains trappedin the seals.
Periodic cleaning with a damp sponge will preventthis
from occurring.
After every wash, turn off the water supply to the
appliance and leave the door slightlyopen sothat
moisture and odours are not trapped inside.
Before cleaning or performing maintenance, always
remove the plug from the socket.
Tocleantheexteriorandrubberparts ofthedishwasher,
donot use solventsor abrasivecleaningproducts.
Only use acloth with warm soapy water.
To remove spots or stains from the surface of the
interior,usea clothdampened withwater ana little
vinegar, ora cleaning product madespecifically for
dishwashers.
After EveryWash
Remove the Plug
No Solvents orAbrasive Cleaning Moving theAppliance
Seals
When not in Use for aLongTime

16
Minimum space when
thedoorisopened
【Figure2】
Cabinet dimensions
【Figure1】
Cabinet
Dishwasher
Door of
dishwasher
Minimum space of 50mm
Less than 5mm
between the top
of dishwasher and
cabinet and the
outerdooraligned
to cabinet.
90 °
90 °
600 mm
820mm
100
580mm
80
Space between cabinet
bottom and floor
Electrical, drain and
water supply line
entrances
1
The aesthetic wooden panel could be processed according to the Figure 3.
The aesthetic panel should
be processed in accordance
with the illustrated dimensions
【Figure3】
●Aesthetic panel's dimensions and installation
(Unit: mm) 594
568
254
38
540 15
250

Installation of aesthetic panel
【Figure4a】
2
Install the hook on the aesthetic wooden panel and put the hook into the slot of the outer door of
dishwasher(see figure 4a). After positioning of the panel , fix the panel onto the outer door by
screws and bolts(See figure 4b) .
Installation of aesthetic
wooden panel
【Figure4b】
. take away the cover
.pinupthescrew
. get back the cover
1
2
3
Hop hook
St4 countersunk
head screw
Lower hook
17
Furniture door
Hook for dooraesthetic
Outerdoorof
dishwasher
Spacer for furniture door
Cover
4X18 screw
Table of contents
Other EURO Dishwasher manuals


