4
ELECTRICAL CONNECTION
GAS CONNECTION
Check gas pressure, note the correct setting from the data plate
sealed inside the front appliance drawer .
*
VERY IMPORTANT FOR THE INSTALLER
o not attempt to turn or stress threaded elbow of the manifold:
you risk damage to this part of the gas appliance which may void
the manufacturers warranty.
IT IS RECOMMENDED THAT A SERVICE TAP AND UNION BE
FITTED ADJACENT TO THE APPLIANCE INLET TO FACILITATE
FUTURE SERVICING.
5 burner models: set the burner pressure to 1kPa for Natural Gas
and 2.75kPa for U-LPG with the wok burner operating a full rate.
For commissioning of the appliance with the Bromic regulator for
Natural Gas , the test point pressure should be 1.00kPa with all
burners operating on HIGH.
Apply a manometer to the test nipple and reset the regulator if
necessary. o not forget to replace the test nipple screw and to
leave the instruction book with the user.
This appliance from the factory suitable for NATURAL gas but, if
necessary, can be adjusted for U-LPG by authorised person.
other relevant statutory code band regulations. If you have some
doubts, please contact the authorities for confirmation concerning
the characteristics of the gas and electricity output.
The appliance is generally preset for natural gas (so no other
adjustment is necessary) ensure regulator is fitted for N.G.
Ensure that all foreign matter has been cleared from the gas
supply line and also purge all air from the gas system. Connect
to regulator, tighten and check the installation to ensure no gas
leaks occur.
accordance with the manufacturers installation instructions,
relevant local fitting regulations, municipal building regulations,
the AS5601 code for gas burning appliances and equipment and
The appliance shall be installed by an authorized person in
For the adjustments to U-LPG please operate as specified in the
paragraph GAS CONVERSION AN A JUSTMENT (pag 4).
The Gas Connection is male 1/2" BSP and is situated at the right or left,
hand rear of the appliance, approximately 40mm from the side
Gas Installation must be made in accordance with AS5601;
also refer to rangehood manufacturers recommendations.
Before Leaving Check all connections for gas leaks.
O NOT use a naked flame for detecting leaks. Ignite all
burners to ensure correct operation of gas valves, burners and
ignition. Turn gas taps to low flame position and observe
stability of the flame.
When satisfied with the cooker, please instruct the user on the
correct method of operation.
In case the appliance fails to operate correctly after all checks
have been carried out, refer to the authorised service provider
in your area.
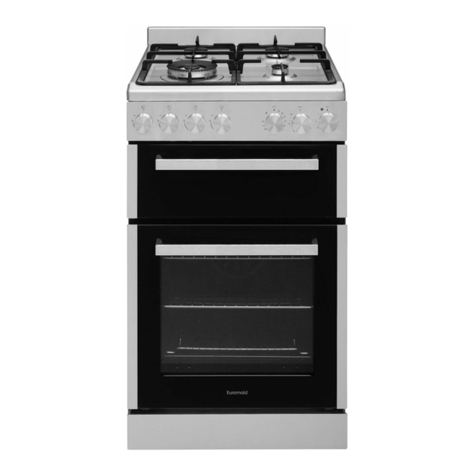
Installing the Gas Cooker:
(Flexible connections are NOT permitted with this
appliance)
· An inlet manifold extension pipe must be fitted to the
appliance. Part supplied in the drawer of the appliance.
· Ensure that the pipe is connected using the washer provided
and that the bracket is screwed to the appliance as shown in
the diagram below.
· Fit the supplied pressure regulator. Ensure the arrow is pointing
towards the appliance and that the pressure test point is
accessible from under the appliance when the product is pushed
back into the final position.
Push the cooker back and install the stabilizing chains.
Connect the appliance inlet manifold to the fixed consumer
piping outlet using only fixed piping. This final connection is
made when the product is pushed back into position by access
under the cooker.
Inlet Manifold Extension.
Supplied with product.
To be fitted by installer
Regulator
Fixed Pipe to
Connection Point
Washer
Screw
The appliance must be installed by a suitably qualified person in
accordance with these instructions and with the requirements of
the Australian Wiring Rules AS/NZS 3000.
Fixed wired installations are to be provided with suitable isolation
means in accordance with the said rules.
Any plug socket installed for the purpose of connecting the appliance
to supply must be readily accessible when the appliance is installed.
Before making the connection, make sure that:
1) the safety circuit-breaker and the electrical system are able to
withstand the load of the appliance (see nameplate).
2) the power supply system has an earth connection in good
working order in accordance with the regulations in force;
IMPORTANT
The wires in the mains lead are coloured in accordance with the
following code:
GREEN & YELLOW.........................................................EARTH
BLUE...........................................................................NEUTRAL
BROWN ...............................................................................LIVE
Electric power ..1,5 mm2 3 core cable (15 amp. Fuse required).
Should conform to local authority requirements.
Also refer to rangehood manufacturers recommendations.
This appliance is supplied with a plug & cord, simply plug into a
3 pin household socket outlet witch is properly earthed.
WARNING: THIS APPLIANCE MUST BE EARTHED.
The flexible mains lead and plug must not be in contact with hot
surfaces.
