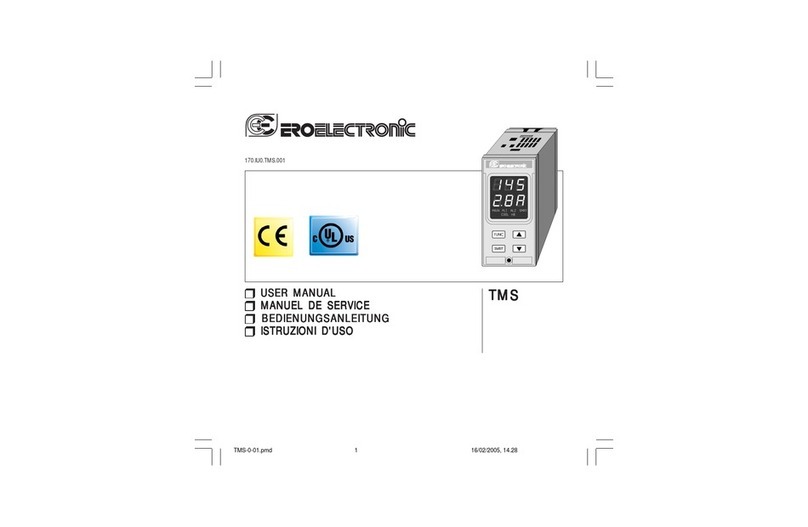
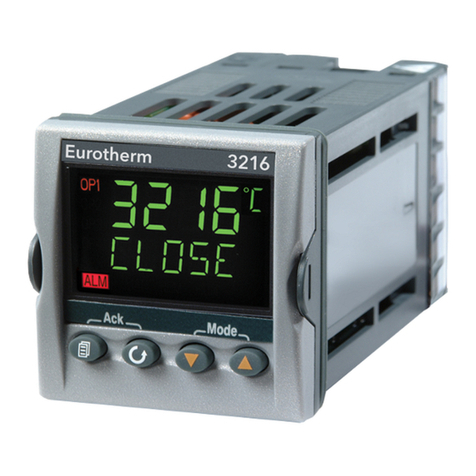
Eurotherm controls 808 User manual

.*
N
w
ffi
b:
@
@
CONTROLLER
ffiffi
EIII.IE

Contents
t
r
Wsrnlng Nolo Page
'1.0 Gonora1................,.........,...., I
l.'l S@ps.............,..,..,...,........... 1
'1.2 Op1i6s...................'............'l
2,1 Pml-rcunling lnshllalion.l
2.2 Preoduts,..........,.......,.....,.. t
3.0 Estrlcal lnthll.thn.......,.2
3.1 GseEl lnlomation
and PcEuiions........,.....'.... 2
3.2 Suppv ed Eanh
(bmhds 5,6 ud 4...........3
9.3 lnputs ................,...,......,.,.....3
3,4 Oulp!|s...,........,..,.,,...........,.3
3.5 4m....................................4
3,6 Communl€|ions....,.............5
4.0 Dl!pl.y!..............................6
4.,l Uppor dsplay turclims .....,.6
4,2 LwEr dsphy tunqlims .......6
5.0 Output lndlEllonr...,.,...,...7
s.l OPI md OP2 ......................7
5.2 communi@lionsrssmisslm
in prcgEss.........,.,............,,. 7
5.3 Ramp-lGsetsoint h
prcgres8..........,.................... 7
5.4 Meuql modo.........,..........,..7
6,1 Pametsr (PAR)......,..........7
6.2 UpsdDmffis,.....,...,7
6,3 Aulo/lvtanual
(t/M opoEdon seleqliil).....8
7.0 Fronl Prrel Pio€dut!!....8
7.1 ltodilying ho seFoin!....,.....8
7.2 L@ling ed modfyino
e aqustablg pamotsr ...... I
7,3 Mausl mode prc@dures'...9
7.4 Aubmatic mode
(wih mp-to-$Point) '
prc€dures,...,.,...............,....9
7.5 Annurciation...........,....-......9
7.6 Modifi€lim ot mping
pffie|grs........,...........,.,....9
7.7 Ramping spsed....,...............9
7.8 Taroot sstsoint.....................9
Page
6.0 Alsrm...-.......................,...,,10
g.l Annunc1a1i0n.....,...,..,.........10
8.2 Acknwledgement...,..,...... 10
9.0 Ssnsor 8ro0k.........,.,........'l0
9.,l Annunciat'Dn...................,.. l0
9.2 Automalictranslolto
opeft hop modo...............,, I 0
10.0 Scll Tuno................,.......... 1 I
l0.l Pamot€rs €lc!14t0d.,.,...'l I
,l0.2 Pffietqrs sd
Annmclati@ ...................... I 2
10.3 Operalion...,......,.--.-...,.. t3
,l0.4 Abod Conditions .---....... l5
ll.0 Ljrer lnput (Optlon OL..) t7
I l.t Hardwam.........,.......,,........ 17
I 1.2 Sot-up and ConfiguEtim...l0
I 1.3 S€ling Prcedm.............18
,l1.4 Fi|brVa|uo...,.....................,l9
lZ0 Sotpolnl Programmlng
(optlq OP).......................21
lZl Progmms/@nlrolltr....,..2l
,l2.2 PrcgEmmtr 8lates ....,.......22
123 PrcgEm ontol m€hods..23
12.4 PrcgEm P8metero ...,.,...26
125 Prcltram Annundalo6...,...27
12.6 Opd8|ioa.....,.,....--.--,.,.,. 28
12.7 Lossofpowsduing
a prog8m.,...,...,...,,..........,30
128 Cheging pogm
pffi otsE......................... 3l
129 A1ms........................,......32
Typlql Wrlng Schomrtlc........3i)
ocryhM Euem !;ld t9r'

APPLlcANON NOTE
STANDABD PRECAUTIONS TO BE TAKEN WHEN USING
rlu!.EE4[u BE_99NrBollEEg
\rrh€n dosignlng any @n[ol sy6toms h is osssntisl to Mslddwhal willhappon ll dny lndividual
pan ol hc system malluclions.'
ln a tempmluE @nrrol appliatlm,ltr oxmple,lho dangerls hat lot somo reaen lho hosting
systom iomoins pomMeidy Ewilcll€d on.
' This @uld h6pp6n lll
'l- Thom@uolg or 6onsq b@mo6'd€hchod' lrm tho Eyslom
l.e, is no lodgor moasulino tho 6chr6, bmp€Eture adllovod.
2, Them@uplo ot lhom@oupls wlring b@mes thort.jr@ilod.
3, Oomponont failuE wifiin ths cmltolld in srch a way as lo l66w the oulPul 6witchod on'
4. Mqop@essd or EolMee lajluG ln a sysf€m.
s. faitffi a vave moEmenl q valvs linkags. . , -
6. Remolo Eelpolnt lo @ntroll€ri3 laulty.
7. o6Etim bv unouthodsed mrEonngl.
ed, (a) C&rbllerloltin MMulwih hlgh @iPUI power Bet. . i. I
- (b, Selpoint sol t@ high.
8. Any hck ol maintgnan@ ln sowl€ablo pans.
......,..4d msy ohd unloresom 6iluations.
ll laEvlno tho hoslot on tll tho tlmc c.n cauto dEma9.
or llo co'ntonto, thon.n lndopondant Plotoctlon dovlce olthor to tho plent lltoll
mu!t b. provldod.
Thls
alam isa
will aeo&alo
puI out the marn
o.g,
(\,
A ruibble mli-@mn is ttE EuD$m l06 ovenemp€Eluro alam.
Nolo thal e dam retay ln he @nlrollsr is rct sulfi.jenl p.olsction lor all ovenluatitles.
l
)
I
I

This maual @ntains intormation for th; instatlation, op€ralion, of tho Modgls 808 and 847
MicDprccesrbas€d Digilal Temp€rature Conlrcllers manufactured by EuDthErm l-td.
Forrunhar dstails orth's inslrument r€f€rlo:
Tho hadb@k (forlurthsrop€Eting inslructions and ths @nliguralionand elbration)
Pan No. HA021429.
The manud (f6icircuit d'ngnms ad circuit deuiption) Parl No. HAOzl4ilo
1.2 Options
The lP-54 gasket kitfff l/&DlN size instruments can be orderod separately:,- 2i
Order: 808/847 Mounting G6kst - Part No. LA022339
', '' '.' ' '
2.0 MECHANICAL |NSTALLATI9N .
2.1 Panel-mounting lnstallatlor ;''' '
The inslrumont sl€Bve munts into a 45x92.2min culout, and is seored frcm the rea with
ths 2 enclossd mounting brack€ls. Behind ths panel provido for sutl'Eienl wiring spaco in
ordgrtosgparaleproporlythepower and s'rgnal eblos. -t
1.77'18fi : -.
- (+s,"tj.!-l
I<_|l'-i'
Muimumpaner WTg'B'i8:88
rh'rcknss; o.2s- (6mm' ffiffi| f**:*e8
z.i pro&auie Panel Cutout
Propare lh€ panel dlout s abovo. Slid€ tho
instrumeni sle8vo into th€ cutout tom ths
lront i
lnslall the mounling brackets lrom the roai.
Verify that tho 4 tinos of lhE brackets are
lirq,y ssaled in the slots on the sls€ve;
@r€c1ly lnslallEd brackets will notlall out.
lighten lhe screws tirmly. A torque limlter in
each bracket prEvents ov€rt'Eht€ning.
I
Pmei

3.0 ELECTRICAL INSTALLATION
q R€lay
2gVac
RS{22
Modols 808 and A7 extemal connections.
Ovofireor@lmn&4hG
RTD.3
3.1 General
cAunoN!
CAtmONl Damagc to tha lnstrument en rasult l, output channals
llnod wlth loglc or OC outpul modules sra wlrad 8s ll lh6y
. wer. rlttod wlth trlac or ralay modulos.
Mako input and outputieimination"toin.trrrEntwilhpowsroFF.'' i' -f
Retor to liguro abovo and to lhs rest o, this paagraph ,or rgil tetminal designdions ild lor
wiring thB power, oulputs, and signal inputs,
, Th€ rear scrow lerminals do not rsquirE lhe use ot lugs tor prcper wire relEnt'Pn. lf sPade
lugs aro used th6y should havs a self-retainingf€ature.
Unussd t€rminals should!9t be usod 6 tie poinls as lhBy may b€ inlomally onnsc-t€d.
I . . .1,.i,,..
lnformatlon and Precautlons .,: . ',,.};iftj
, . r.Jt
It ls your responslblllty to €ldlate lho msxlmum posluie{
curont ln .ach eblo. Ilo nol oxcood tho ratod durr3nt lor I
8ny partlcutar eblr slz. permhtdb by th; .toEl wlrlnd i
rogulatlons. Ovolh€atod mblss End damsgod lnsulatlony
may rosutt trom ov€rl$dlng. ' ' j, i t a
.'i.
I
2
V€rify in th6 Sp€ciliations that lhs ralings of thg @nt ollsr oJiput dsvic$ trd lho inPuls
arenot€xcesded, ! ..{
I
"' 'i!,

b
I
I
i
I
t
I
Lino
Neulral
Earth
3.2 Supply and Earth (terminals
5, 6, and 7)
ThE instrument may bd pow6r6d from an AC voltage
bstween 80 ild264vac,50or60 Hz.
Conn8cl tho noutral to terminal 6. Connecl the lins b
t€rminal 5; place a 1-Amp luss In the lino sid€ ol thg
AC suppt. The power wiring should be run separatsly
fDm th€ s'rgnalwiring.
The wire size should not bo smallsr thil 0.5162; bcal
whing speifi€tion may rsquiro, however, a larger
cable sizo. ThB type o, inslallation must bo ln
a€lrdancs wilh the lmlwiring odes.
The instrumBnt,ground (terminat 4 should bo directt
@nnect€d to 6arth. Do not pass by lhB earlh lerminal
of olher inslrumonts ('daisy€hain, @nneciion).
3.3 Inputs T'
The instrurlgnt a@pls th'srmoouple and RTD
inpuls. For lhb types and ranges of the lnput devices,
soe lheSpecifi€lions
\-
Thermoouplc li'put
Connecl tolominals 19C) ild 20(+) as shown.
Use appropriate @mpensling eble (lhermmuplE
€xtension wire) having ths sam9 lhsrmal aml as tho
them@uple to which it is @nnec't€d; vedty that
orsct polarity is rgspocled at both tho thormmupl&
end and instrumBnt-end olthe eble.
BTD lnput
Only the 3-wire onneclion should be ussd. Connecl
ths msasur€m9nt leads to tsrminal 19 G) and 20 (+).
ThB excilalion curent is available at tsrmiridl t8.
Use tho sam6 gauge and length opper wire on all 3
leminals. ,.
'\.
Llnasr lnputs and DC lnputs
CommonG) is connrclsd to terminal 19 and lhe
s'rgnal (+) is connoct€d to t6rminal 20.
3.4. OutDuts
Ralay Ji.'
Relay oulputs are @nnect€d to lerminals I and 2 lor
oulpul 1 and"3 and 4 for oulput 2. Th€ relay @ntacts
are shown h lhe do.€nBrgised state. The rBlay will
€nBrgise when lhe measured value is bolow setpoint
lor O/P1 and abovo sstpoint lor O/P2. in ths aulo
, CAUTION! ObseruE
'praciices to eliminale
o, earth loops. '
7
proper wiring
the possibility
..ra
No conneclion l8
't9
'19
N
I
i
iltr
&;
N/o
lully';;,-
lsolated
N
Load

Load mode. The rolay @nlaci ae ralad at zNAO-zgV e
r.m,s. 5O/60H2. lt is r@mmended lhat a 2 amp tuse is
. used to ploled the r8lay @nteis.
I
Loglc
Logic ouipuls ar€ onneclsd to teminals 1 ad 2 d
oulpul 1 and 3 and 4 for output 2. Thsse outpuB ile not
- isolated lrom lhe senpr ciroit. The oulpul ls 18 volt a
1omA.
DC Ouput
DC outputs are @nnocted to tominals 1 and 2, Vdc,
0-20mAor4-20mA. '
Trlac
Tdac outputs are @nn8cled lo tsrminal I and 2 lor
output 1 and 3 and 4 lor oulput 2. Tho tdac is ratEd al
11,/80-264V e r.m.s. 5c[60H2. lt is r@mmonded that
a 1 ffip luse ls used lo prclecl lh6 triaa
Output 2 ls @nligured I eith€r the Cool cliannel orthe
Alarm 2 channel. I it is mfigursd I m alam chann€l
thsoulputmodulsshouldnotbealrie . "".:"
Warnlng!
Output 2 onfigurEd 6 ff dam channel is not failials:
the oulpul dEvicd is adivat€d during ths alarm
alarm dovico in a system. For lailsale operat'pn, use
lhs Aam Output.
3.5 Alarm
Ths ;ltrm oulput a be eilher a relay or logic as shown
below.
Rslay
Ths relay oulput'E wired to lerminals 8, I and 10. The
conlacts are Et€d at 2A,|80-264V e [m,s.50/60H2. tt
is rsommended lhat a 2 amp ruse is rined to pDlecl
lhg rslay @nlacts,
oFn
Fully
lelatod
ielated
Fully
lslated
Not isolated from
Thsm@uplE cirdit
NotisolatEdfrcm
thBrmmuple ctcuit
Nol isolated lom
Thermo@uple citoit
Load
otPl
Lins Fully
Load
oP2
1A
Fully
4
OF hM
lsolated
I
.t

tBbdcdh)
118V@ rm
ov t.)
mffib g
3.6 Communications
lot
(opdonal)
Loglc
Tho log'r oulput is wirgd to tominals g and 'lo. This
output is nol isolated rrom the s6nsq input or log'E
outpd fin€d in O/Pl, and ot OlPz, The log'rc oulput is
'l8Val1omA
Ths Alam output is _Iallsfe: the oulpn devhe b de.
€nergis€d during th€ alar,ti ondit'ton or powsr down.
:[he attach€d alarm circuil should be lused and
designed lo haVe lailsatdoperation EvEn in tho casg
ofablownfusE.. ;.- ,
Not isolaled lDm therm@uplE
Warnlng! The alarm oulpul channel should lgyel be
fined wilh a lriac oulput module For crilical alarm
apptications a parallsl rsdundant syst€m should
always bo installedi use a separate alarm unil, e'9.
Eurctherm Model 106 or equfualEnt and a separals
ioputssnsor.
RS232 , '
Uso 3 @nduclor,22 gauge, slrandod with $reening. Atlach tha screoning to earth at tho
suPervier6ndolthe link. Muimumeblo l€ngthmustbE50leet(l5m). I
-:'
commt @ntaol 17
Frmr p&d
onablo

RS 422
Use 2 lwistod pairs separalely scr€€nsd (22 gaugg, strandsd). Attach tho $r€sns lo tho
oanhd$6suporuborBndolthe link Maimumcabls lsngth mustb€4000lest(1200m).
ComM 1l
l6
l(.yrwlrch lil
lockout
(opllonal) F ml pmol
anablo
Lockoul ovsrldo swltch
ll a superircry ffiput€r h programmed to lock ou the lrcnt-pmel pushbutlons, a 2-
position keyswildr may bo installed on tho front panel lo lGlly onable ths lrcnt panel if it
has bs6n romot€ly disabled by lho @mmunicat'bns link. [An altelnative m€lhod of
regaining loel @ntrol altei a lrcnt-panel lockoul by lho snmunications link is to lurn the
suppv OFFand ON againJ
Tho koyswitch koy should b€ captivs and ths ontacls opsn ln th6 'lEntranel enablE
posilion,
I l@l@nlpl b always dgsired, jumpertsrminab 16 and l7t€sther.
ll either ot th8 ommun'Et'pns boards is mt installsd, then no @nneclion n€ed bo made lo
lerminals 16 and 17.
4.0 DISPLAYS
4.1 Upper display lunctions
Me6ured value whsn lntho automaticormilual mdss;
Parameter mnemoniG when viewing the parai€lsr list wilh lhE PAR button.
Ths mesursd value displayed flashes if lhs @ntrollsr enloB tho dam @ndilion algl i, thg
ALl oulput has switched into th€ alarm slale. ltf lho onlrcller enlors tho alam @ndition
and HAO, LAO, and dAO havo bsen set lo OFF, the mecured valuo display do€s
nolllash.l
4.2 Lower dlsplay lunctlons
TemPerature selpoint whgn in lho automat'rc mode;
Oulput l€vel setpoint (%)when in tho manual mod€;
Pilamotervalus when viewing the paramelgr list with lhE PAR butlon.
ll ths m€asured valuo snlsrs one or mors alarm @nditions, lhe appropriate mnemonic(s)
(HhL, LoAl and d AL) ahemato with the displayod selpoinl.
6

s.0 OUTPUT tNptcAnoNq , :: .
5.1 OPI and OP2
Each yellffi LEo is llluminated whsn the oresponding oulpul channel is ON.
Wh€n Oulput 2 ls conligured as an alarm channEl (AL2), lamp OP2 is illuminatsd whsn AL2
hs switchsd into thealam onditbn.
5.2 Communications transmission in progress
Lmted ln the upp€r-lEft comor ot the upper display (with no lEg€nd), this grssn LED dot is
illuminated whsn ths odroll€r is transmining information lo lhe hosl 6mputor. Ths lighl
can bo operativsonv il a ommunbalionsboard isinstallod.
5.3 Rampto.setpoint in progress
ldEntiliad by tho legsnd 'R' in the upper display, this greon LED dot ls illuminaled dudng thg
p€dod when ths ontrcller'rs ramping rrcm the aclual msasur6d value lo thE new selpoinl.
This lamp can only be seen llluminatod il ramFto-s8lpoint opention has been enabled in
tho inslrumsnt onfiguration. Tho lamp llahes during inspsclion ol lhs inslantanaous
setpoint during ramping when PAR is dopressed,
5.4 Mahual mode
The manual light{ndsmealh lhe 'M' in the upp€r.right @rner of ths upp€r dbplay-..is
illuminat€d whsn tho instrument is in lhe manual mode. A flashing manual l'Eht indi€tss
the sensorbr€ak mode.
6.0 PUSHBUTTONS
There are 4 fmnf.panel pushbuttons:
6.1 Parameter (PAR)
;. :
Tho PARAMETER pushbutlon has2 funclions:
To advarce to lhs next paramstarwhon exmining the parameter lisl; r
To acknowledgo an alarm with a latchEd oulput when the @ntrolle, is annuncialing an
6.2 UP and DOWN arrows
The UP ad DOWN ilrcrc have the sote ,unc.tions o{ inssasing md dffieasing,
respoclively, the valus of lhe param8ler cuilently displaysd. Mosl parmeleE havs
continuously variable numeric valuos; examples o, lhess includs setpoint, integral time
@nslant, otc Othgrs €n be assigned only discretB valu8s that ars prosentsd in a list;
ihesg are mainlythomnfiguralion param€lsc: ConlroltypE, output@nfiguration, stc
For the numBric vatugs, defle$ing the UP (DOWN) button once ircrEasEs (decr€ases)
I
I

the displayed valus by 1 least signifimt digit. Holding a bu[on down momenlaiv euses
the valuo to increaso or decroaso automatically as long as the button is deprossed. The
operation ls idsnti€l lor discr€le values, sxcspt that each buton push rgvgats ths next
value in the list.
6.3 Auto/Manual (A/M operation.selection)
ogprEssing ths A,lM button when lhe @ntDller ls ln the automat'rc mode places lhe
@ntoll8r in lhe manual modo. .,Dspro$ing tho button again retums the @nt ollgi' to
automal'rc, The transilion is bumpless: whon lranstsring from automatic to manual, the
oulpul,lBvel in manual is dgtgrmingd by the most rsent steady-slato requirgments ln
aubmetic; whsn transfsrring lrom m.gnual lo automatic, tho oulput lovgl required to attain
thB dsshed sElpoinl is smoothly reached by lntegral aclion.
This button H be disabled wh8n @nliguring lhs inslrumsnl; the ontrcller reriralhs
pemanenlly in the aulomalicmodo unl€s the onfiguration paramEteris chang6d. '
,;
Erch and evsry button press is @mpanied immediately by ome sort ol vhual
fe€dback{ change in a paramster valus or a chmgo of stato ol a lamp. There are no
double PIess sequener
Vgrity lhal the lront pan€l has nol been disabled r€molgly by the @mmuniet'pns link or
lhat modilicat'pn ol all the paramEtEE hs nol been lockod out if lhsre is no response.
7.1 Modifying the selpoint ': -.'"-' I '
ThB setpoint€n belroely modifiedwithin the limils ot tho setpoint h'Eh and low limis.
Wilh the m€asured valug in tho upper display and tho lomponluro sElpoint in the low€r
display, uso lhe UP and DOWN pushbuttons tochange lhe sElpoint valug,
ln the manual modg, th€ p€rcent power oulput is the pametsr mniiilied by th's sme
praedure; itsupp€rlimitmayhaveaceilingplmedonitbyHPl-(highpoworlimit).
:'.7.2Loca|ingandmodifyinganadiustaLlepara;jer
Wilh the instrument dbplaying tho meaured valuo and lhe s'elpoinl, depressing PAR once
rovsals the display unils (C or D. Dsprossing PAR orce again shom th8 noxt €nabled
pilameter and its qrrrsnt value on thg display. The paramolff valuo €n eih€r bs modified
with lhg UP and DOWN pushbuttons, or lgft unmodilisd. ''Pressing PAR again diiplais
lhe nerlparamElsrand its orrentvaluB ild son.
tl lhe PAB buflon is untouch€d whgn viewing a parlicular parametEra tho display rsturns to
' lhe mesurod value irnd the sslpoint atter 6 seonds. l-lolding down on PAR ov8rrides this
6.smndtimmut and psrmits viEwing asbng s dEsired.
To modily a erlain parmeter, ontinue presing PAR until its mn€monic app€a6 in lhe
upperdisplay, then fiEdily lho valuo with tho UP and DoWN pushbuuons.
These prmadures are valid in eilhgl the automatic or manual rcdgs; or if tho mgasured
Soms parameter valuos may mt respond to tho UP ad DOWN butlons; thsse havo bsen
.i ,.,:
8

I
I
@nligured fff viewing only and rct fq opsrato, modit'Htion. OlhoE may bE @mpletEly
hudenlrcm tho opsratil.
7.3 Manual mode procedures
With PID onlrol, tho manual mode b aclivalod by the A,/M pushbutlon ad indicalsd by
the grE€n 'M'LED dot. ln the manual mode, lhe mecur€d value appem in the uppel
display and th€ percont output lovel ln the lowsr display. When €nloling lhs mmual mode
from automatic, tho Inilial odprn lovel ls lho most tffint elculated outpul lev€|. Adiust
the output lEvsl with thri UP and DOWN buttns
The A/M pushbutton oporales ln a similil ,sh'pn wilh ONr'OFF @nlD[ siePl lor lhe
adjustmenl ol lho output with tho UP and DOWN bunons. HeI6, the OFF dtsln stale h
seledsd by the DOWN pushbutton (0.096 in the disPlay), and the ON oulPtt slals lhe UP
pushbulon (100.0P4 in the dbplay).
Accesstothe manual modsm bo inhibiled in th€ configuralion''
7.4- Automatic mode (with ramPto-setpoint) procedures
Rampto-selpoint opsrdlon insuros bumPless s€tpoint modili€lion' BamPing is lnitiated
onv by one ol 2 onditions: power-up ad a change in setpoint. Ths inslantanmus
setpoint tollows a sla'rght line Fining the oliginal measursd valuo to lhe taryel sotPoint.
Tho sp€ed at whidr the rmping progreses (in'F/min or "cymin) is sglsctable by tho SPr
(sstpoint Bmp ratg) paamoler trd r€mains onstill tor all ramps unlilSPr is cha-ngod. l
7.5 Annunciation
During Emping, lhe upper display shorE lhs measured valuo (s in mlmal, automatic q
manual op€ration); tho low€r display shils ths tatget setpolnt. During ramPing sggmsnts
the 'B' lahp is ilhiminated. Aftsi lh; now taEst sgtPoint hai been r€ached; the lamP goes
oul. To vi€w lho instantamus setpoinl during a lamPlng sEgmsnl, deptoss the PAF
button--lhe 'R' lamp flshes to Indl5e lhat tho value in the lowor display ls lhs curent
instmtansus sstpoinl. flhe inslantansus selpoint disPlay repla6s thB.msasured value
unils display (c or R norm ally vi€wed afior tho fitst butlon push.l
7.6 Modilication ot ramping parameters , .
tl lhe targEl solpoint or the mFing sp€ed are changed in mid-Prcgress of a IamP segm€nt,
the etl€ds on th€ instanlanmus sstpoinl aI6 lmm€diats.
7.7 Ramping speed.
Th€ moment thal lho mping 6p€ed (sPr) b ianged the sPeed at whlch the selpoint
rlses or lalls changes. This aordlngly shorlens ot longthsns lhe lime ,equirsd to reach
thetaEsl sslpoint.
7.8 Target setpoint.
lf the largst sslpoint is lncrE8€d (dsesed) lo a.hvel-beydhd lhe drEnt,hslanltr€bus
selpoint, lhe ramp segmenl ontinuss until the nsw talgot is ,EachEd lf tho tatgBt s€lPoint
is dmr€asod (increased) to a level tha ha already.been crossed by the lamp, ths slopo
chagessign and the inslantansous setpoint ramPstowaldsthe newlalgeisgtpoinl
9

8.0 ALARM
8.1 Annunciation
ThEre are 2 lEvEls of alam annunciation
Lilsr display Indicatgs H!dl- !aAl- trd/or dAL allernating whh tho s€tpoint: tho
mecured value ha ent€ted analam condition,
Upper display llashs the moasur€d value: AL1 has bsen configured to r€spond lo at least
ons d the 3 alam selpoinls, a&l ALI has switchsd into an alarm state. rt ls po$ibtE to
qfigurg thB onlrcllor s thal ths alarms as simply annurciated by the display ild that
no action is tal(en ry ALI . ln rh'E €s€ ths m€asured value dbplay does Ogl llch.l
When AL2 annunciat€san alm ondition, theyellowOP2lamp ls illuminated,
8.2 Acknowledgement
.The alarm oulputs can b€ onfigured as lalching or rcnJatchitg. Latching outpuls require
acknowl8dg€mEnt to deil the display ol the alarm indications. (Nonlatching oulputs do
not-as s@n as the alam @ndition has cl€ared, the display and output r€lurn to th€
nomal, non.alarm @ndition.)
To *knowledge a latching alam, dsFess ths PAR pushbutton after the alarm onditlon
h6 clBared.
9.0 SENSOR BREAK
9.1 Annunciation I ''
9.1.1 Overrange condition
A broken thermmuple or op€n ckcuit input is indi€tEd by the mnemon'E Sn b (s6nsor
break).
The mesured value n'sos rapidly beforo the sEn$r break indi€tion murs. The open
circuit input is detscled by an overrange input signal excseding ths milimum of ths
linearizalion tablE.
Tho @ntrcller th€n onleE the opsn.l@p mode and oulputs lhs.sensor break power
soleled by tho SnbP paamBler. *
9.'1.2 Underrange condition
A ondilion in wh'Eh the input lalls balow tho minimum ot lhe linearization tabte will causs
thg display ur (underange) to app€ar. Examplos ol such situations include: inorr€ci
therm@uple, r€vBEBd @nnedion, stc
The ontrcllEr th€n onteE the op€n.loop mode and outputs tho sensor break powsr
sel€dod ry th€ glbP peamEteL
9.2 Automalic transrer to open.loop mode
This mode is indicatEd by a flshing .M' light. When the faulty input condition is repaired,
the @ntrcllo, reinstates automatic op€ration (if it is not placed into ths manual mode by lho
op€rats).
There are 2 operating procedur€s depending on whelh€r or nol manual operalion has been
prEvbusly authorked with thgA Hparameter in th€ instrumont@nliguration:
10

ll manual oporation h6 bEon authorized, the opeEtor cff modify lhe s€nsor break powor
with tho UP and DOWN pushbuttons. By pushing on lhe Ar'M buuon, thg op€Etor €n
entEr delinhively lho milual modg. Trtrsf€r lo thE aulomatic mode is then po$ible only
by depressing ths A/M button again (dep€ndant on if the input laull has beBn 6rsclsd). l,
the ontrollEt remains ln thE opEnl@p mode and the input fault is Ispaired, it.esumes
aulomatic opsration,
lf only aul6mailc opsralion hs b€on authoriz€d,'ths UP,.DoWN, and ry'M butlons ate
d'Eablsd and lhs conlrollel uansfsre lrom the open-loop mode to automatic s $on s lhe
input ondilion is rsclilied.
10.0 SELF TUNING (Option QS)
Types ol self tuning i
Tho Models 808 and 847 feature 2 types of sell luning:
(A) Tuno ,rom amblent
A self.tuns procedurs from ambisnt is psrformed if the measured valus is not
sglpoint. This can apply to a "normdl" heat-up condition or luning a load
predominantly in @ling, i.s. tho setpoint is well below ambiont.
neartho mnlrol
wh'rch opsralos
B) Tune lrom setpolnt
A sell-tune prcedurB from setpoint is psrlormed
s€lpoint. This cm applyto either an endothErm'Eor
must b€ moled lo mainlain @ntrol point.
il tho measur€d value is nsar lhg @ntDl
an gxothermicpreEssoraprocesswhich
10.1 Parameters calculated
Both typ€s of self tuning calculats valuBs for the PID parameters:
" ProP prcportional band
. lnt.t intsgraltime @nslant
" der.t derivalivo timE 6nslant.
ln addilion, the tune{rom-ambienl opgralion calculates the cutback levsls:
. H cb highcutback
. L cb lowcutback.
Th6 tune.from-selpoint veriliEs that tho cutback values are not wilhin the proportional
Culback values lying within lhg proportional band are moved out to tho edge. band.
NOTE!R6vlslctn level 3.28 ot the selt-tunlng software does not calculate thE value o, the
relallvo cool galn, rEl.C, but assumes lhat tho setting selected by the user ls correcl.
When tunlng a load whlch ls prlnclpally @oled, as in cryogenic or exothermic applica-
tlons, lhe cool channel proportional band ls eslablished by the algorlthm. The value o,
tho relatlve cool galn ls used to calculale the heat channel proportional band. Thls
lmplles that, under thes condltlons, ll the the value o, rEL.C is not set correctly, tha
unlt may nol control properly ln heating.
'tl

CAUTION! On watercooled evaporatlvo systems tuned wilh the $lt-tuning algo-
rlthm, damags en result lo the syslem l, OP2 ls lmproperly sat to FAN, OIL or 0.05.
Bo suro lhat H20 ls selected ,or OP2 ln thls case,
10.1.1 Conditions ,or self tuning
Self.tuning op€ratos undff the lollowing @ndilions ' .
. A@ess lovel = op€ralor
. Opsrating mode - automatic (Auto)
. Controllyps - any PID seletion: Pld, r SP or Prog
. Controlaction = reveEe (tEv),{ption OL... only.
The following overrides and exclusions prevail:
o Manual@sratino mode. Tuning is tsmporarily halted when the controller is placed inlo
manual (HAnd).Switching rrcm manualto aulomalic wilh tuning ON r€slans sEll.tuning lrom
lhe b€gining-il does nol rssums lrom whsre it left olr.
o Power failurE. A powEr failur€ causes the t u n E paramel€r lo revsrt backlo n o. ll tuning
is a result of tho th€ t Su being s6t lo YES, luning r€starts ahEr a powsr failure.
. PID contr6lwith solmint oroorammino (ootion OP...l. SElf.tuning does not run whilo a
4-segment program is running. The pDgram musl be placed intoldl Eor Hold bslore intiating
sell-luning.
o PID @ntrolwith ramoed setmint modificat'pn. Self.tuning ovsrddes ramping if the unil
CAUTIONI l, lho unlt ls conflgured ln lhls way tor tho r6a$n ol preventlng shock to
tho load, sell-lunlng should not bB used asth€ 808/847 sell-tunlng algorilhm puryosely
shocks ths syslam.
'10.2 Parameters and Annunciatlon
Two ditlerent param6tErs can bB used to launch a tuno opsralion. Both d€it€rmina to porform
a tune from ambienl or lunE lrom sBtpoinl, whichever is appropriatg.
10,2.1 Tune on demand
. t u n E. This paramst€r has two possiblo setlings. lt is used both as a requsst lo perform
aiunB operation at any timB and as an annunciation of the luning status,
. OFF. As an annunciation, tho unit is not prosently self.luning; this means lhat atuning
operation was neverlaunchEd, orthat it has sumesslully or unsuoessfully lerminated aluning
opsration.
As a@mmand, it terminales a tuning operalion in progr6ss. ThE valuos currently assignsd to
lhe PID and cutback paamelers in the scroll list are used for the ontrol.
. o n. As an annuncialion, this indicates that tho @nlroller is presenlly in tuning operalion.
As a command, the unit begins tuning lhe @nlrol loop.
12

10.2.2'lune on start-up
. no. As an annurciation,lhis indimtesthat a
upon slart-up, and thal when power is apPliedJto
attemPted.
settlngs. h is usod both as a
of aswce$fultuning
i
oporation was psrformed
future, no tuning will bs
During tunE
duing
display.[[there
alt€rnanlVwith
belore starling ths sell-tune
the unit in
ol
As a @mmand, soloclno $thal the unitdoes not porlsm atune upon application
mwer.
YES. As an anhurciation,lhis means thal has everbsen
pedormed upon start-up and that the next limE Powet is applisd to the tinit, a sell-tuning
operalion will be launched. : - - -... ., .. -- .. I r
As a 6mmand, solecl Y ES to €nablo a tuns opetat'pn uPon lhs nExl aPPlicat'pn ol Pow€r.
f.il' ,.!:!()ir,;l 1r..,, i
'10.3 Operatlon r .:,:,:
Possiblo senarios ol s€ll-tuning op€rations are pr€s€nted her€.
llashes inlhe lowerdisplay. Do not make any adjustmsntsto the
this period. Ths self -tuning isjinished whent u
are alarm annuncialions (Hl AL, Lo ALord
tunEl
Th6 value of r€lalivg 60l
op€ration, ls assumsd to gain, rEL.
be @rrEcl c,
nEno
AL) tn
t rhe
2O9/
non-evaporative@ling). - -. , . :.,
' tltl
10.3,1 Start-up tune '*:r ...1 rr,: tr'-r 1 q:. i'i
Figure 1 illuslratss thg hgat-up
The outputs f om lha conlrollgr €se lor a starl-up tuns, and Figure 2 the cooldown case,
ds turned OFF and lhe lempstatule is monilorsd lor 1 minute.
Heat (or 6oling) is appligd and the roaction drue is evaluat€d, Ths
appopriate values aro slored lor lal€r
Aswitch-off
Oscillat'Dns CP power is set to 0%.
as shown. ' --i
Valuss lorlho PID terms and the high and low cutback l€v€ls are sdlculated lrom the various
criticalpointsof thsodcillal'on. - - ; '- ":!.'n.
t
-1 l i!..i1r-'ir l.'"!.+:ll,t'.{ t,.l1i:l_'
..13

Figu@ 1 Stad-up tune - heat-up
Pmt Figurc 2 stdl-up ture - c@l d@n
e
CP
r
14
Figurc 3 Tmo al filptint - endohmic p@ess

10.3.2 Tune at setpoint
Figuro 3 illustrat€s solt.tuning o, a €ndoth€rm'E pr@ss, and Figure 4 an oxothermic
prccoss.
Upon inilialing a lune al sslpoint the.oulput power is tixed lor ono minuls.
Bolh outputs are tumed off and th€ direction ol tho rssponso notsd. Wh€n lhe temporalure
drops (or rises), o*illalions are induced around lhg ontrol pointCP by addilion o, hsaling (or
mling).
Values lor ths PID terms aro eldlated frm the various sit'El poinls ol the o$illal'Dn, Tho
high md lowculback lov€ls are notcalculated bul il€ checked to insur€ thatthey ate not insido
the prcponionalbmd
10.4 Abort Condltlons
10.4.'l Start-uD tune abort-heat-onlv
ll lho tompErature does nol cresl al PV2 and r€lurn io the the @nlrol point CP (Figurs l ) bul
is hetd upby$mE Exlernal inlluence (Figure 5)thes€ll-luns rculine'aborts.Ths algorithm waits
lor a time b€rors aborting; this time is variable ad depsnds on many faclors. oata gathsred
from ths p@e$ r€aclion curvo aro used aslhE $ur@ lordetermining the PID parameters in
lieuordalarrcmtho ffiillations.Thislomot aborl@uld osurin amulti-zoneappl'Eationwhot€
an adiacent zon€ is adding hoat which Bl8vates ths t€mporature of thE zono being lunsd.
1 0.4.2 Start-up tune abort-heaucool
Fora heat€olontDller, ilthotemp€ralurodoes notcreslatPV2 and r€lurnto lhglheontrol
CP (Frgure 1) bul is hEld up
as shown and thB PID l6rms ars
temp€ralurs €nnot bs brought down to CP even by the appli€t'pn ol @ling, tho PID terms
ate calolaled from dala acquted lrom the prmBss r€elion curvo.
10.4.3 Tune at setpoint abort
Similarabortsoquencesarefollowed lortuning atselpoinl i,ths oscillations are unsuccessful.
tl, howevor, thsre is a heatool abort m calculations willbe p€dormgd.
I
I
15

-s.Fohl -
CP
Figun 4 Tuno at serpint - exohmic pto@ss
Figun 5 Statt-up tuno atf,n - h@t only
I
l
I
a
16
Fig!rc 6 S/€n up Tqe abort - heatl@o!

I
t,
11.0. LTNEAR TNPUT (OPTION OL...)
11.1 Hardware
lnput adapter
V€rify lhat tho inpul adapter modgl 1A... ls apprcprlat€ly sksd lorth6 ant'EipatEd input signal:
largo Enough lhat lhe input adapter rangE iust €mmpasses tho input s'Enalswing but small
onough that rg$lulion doos not sutfer. Tho nominal ranggs oltho input adapters alrEady have
a 20% overdrivE latq d€slgn€d Into thsm (on lho positivg side only) so that an IAIOV en bo
sal€ly us6d for a signal wilh a +'l0V mdimum.
NOTET Ttolnpuladapterlncroas€sthapanoldopthotthecontroltartoZ..l05lnchsg
(180.5mm).
Wrlng
Refer to 3.3 for ths onneclion and wiring of thg input signal.
@( lto
I
t
9
E.
100$
hElfl lnF]r 6lgd (hV) {
ua
@( tt.
€l l.lt.
Figuro 7 Ureil input set up and @figuatlon
17
This manual suits for next models
1
Popular Temperature Controllers manuals by other brands
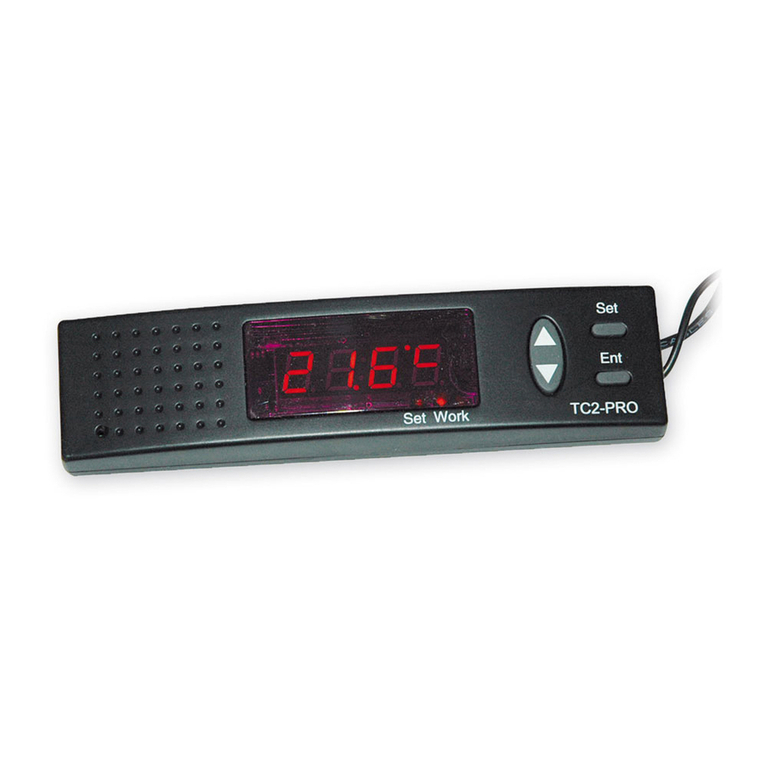
Lucky Reptile
Lucky Reptile Thermo Control Pro II operating instructions
Trotec
Trotec BZ06 operating manual
Siemens
Siemens 1000 Series installation instructions
METER
METER RT-1 quick start guide
tiko Energy Solutions
tiko Energy Solutions Sense-3 user manual
Advantage
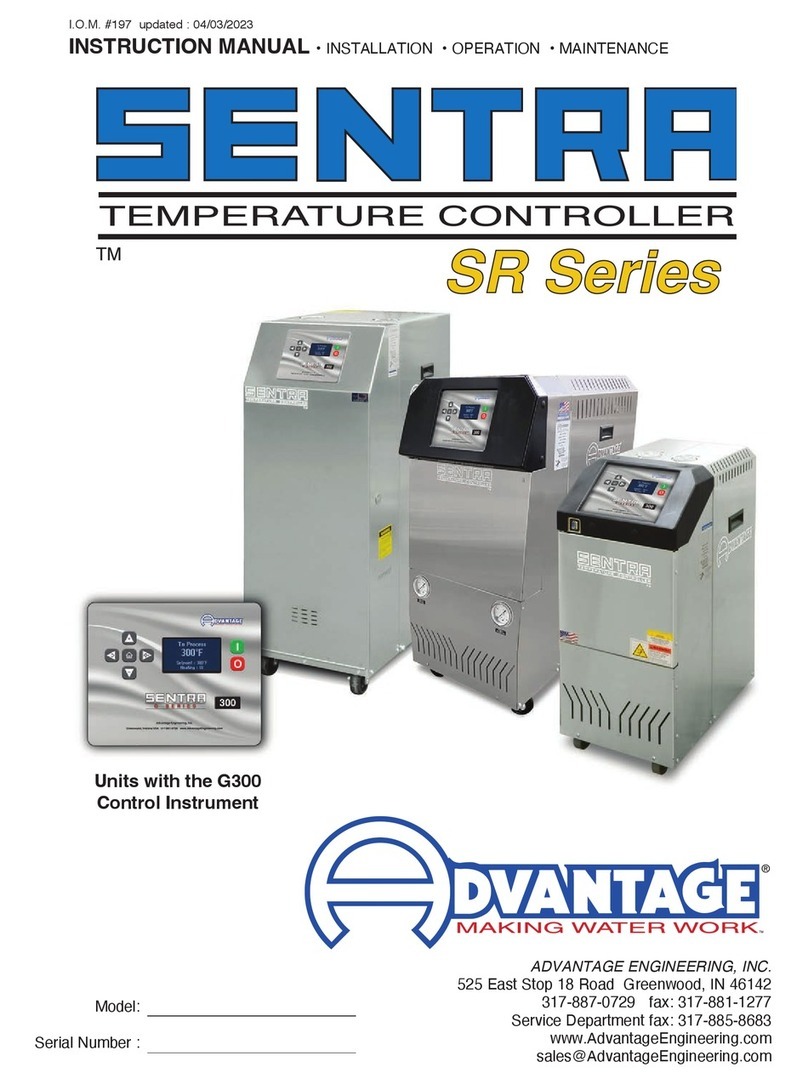
Advantage SENTRA SR Series instruction manual
