Everybot EDGE RS350 User manual


2
Quick Guide
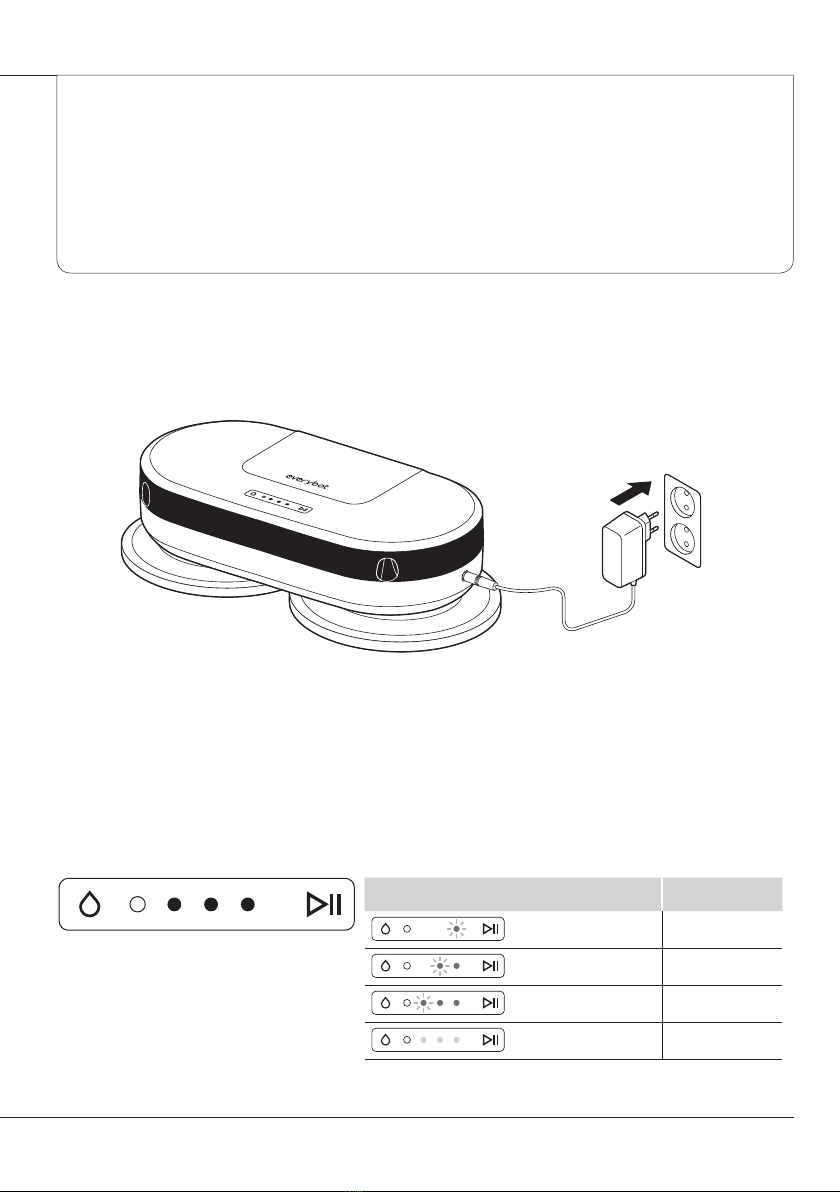
Charging
Preparing to clean
1 2
54
3
6
Charging status lights Battery status

3
Starting to clean
Conducting maintenance
power
start/pause
or
1
1
2
2
4
3

4
Table of Contents
》
Pre-usage
Safe Usage Instructions
5
Component Checklist
8
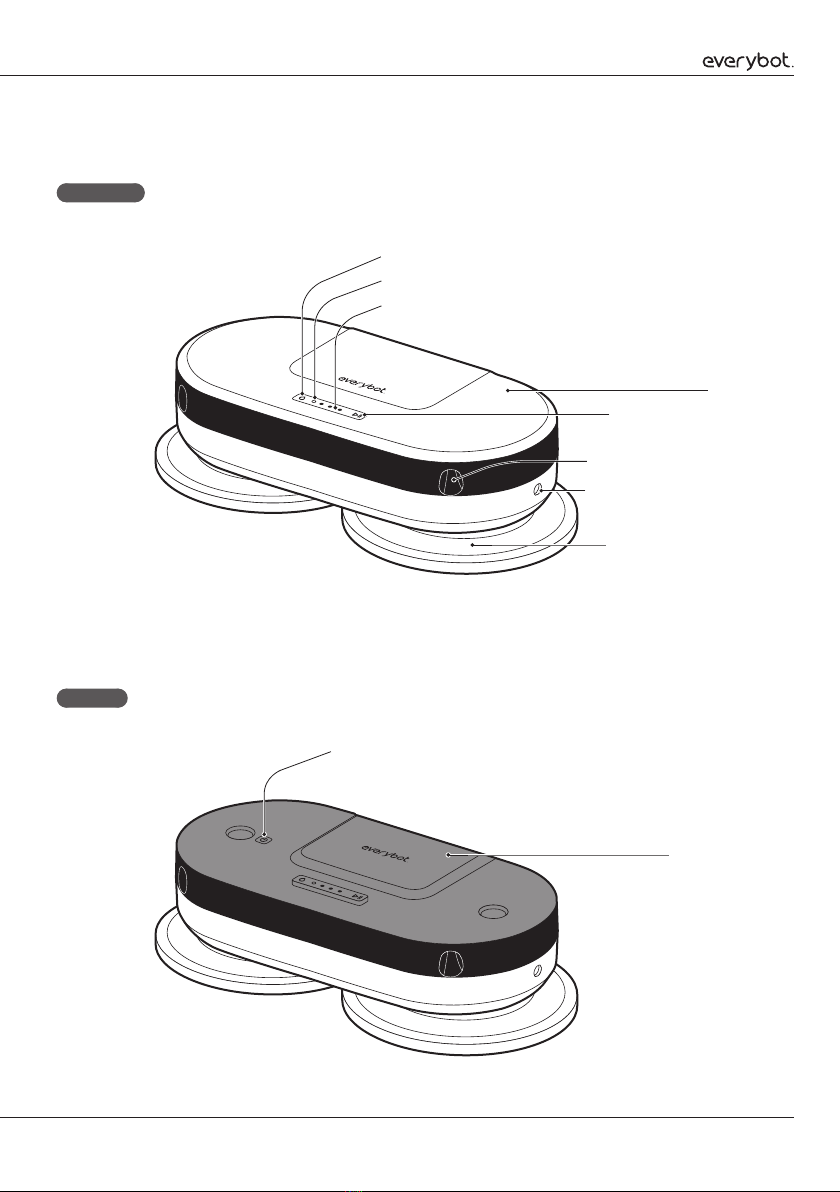
Name and Function of Each Part
9
Inserting Batteries into the Remote Control
10
》
Preparations
Charging
11
Status Lights When Charging
11
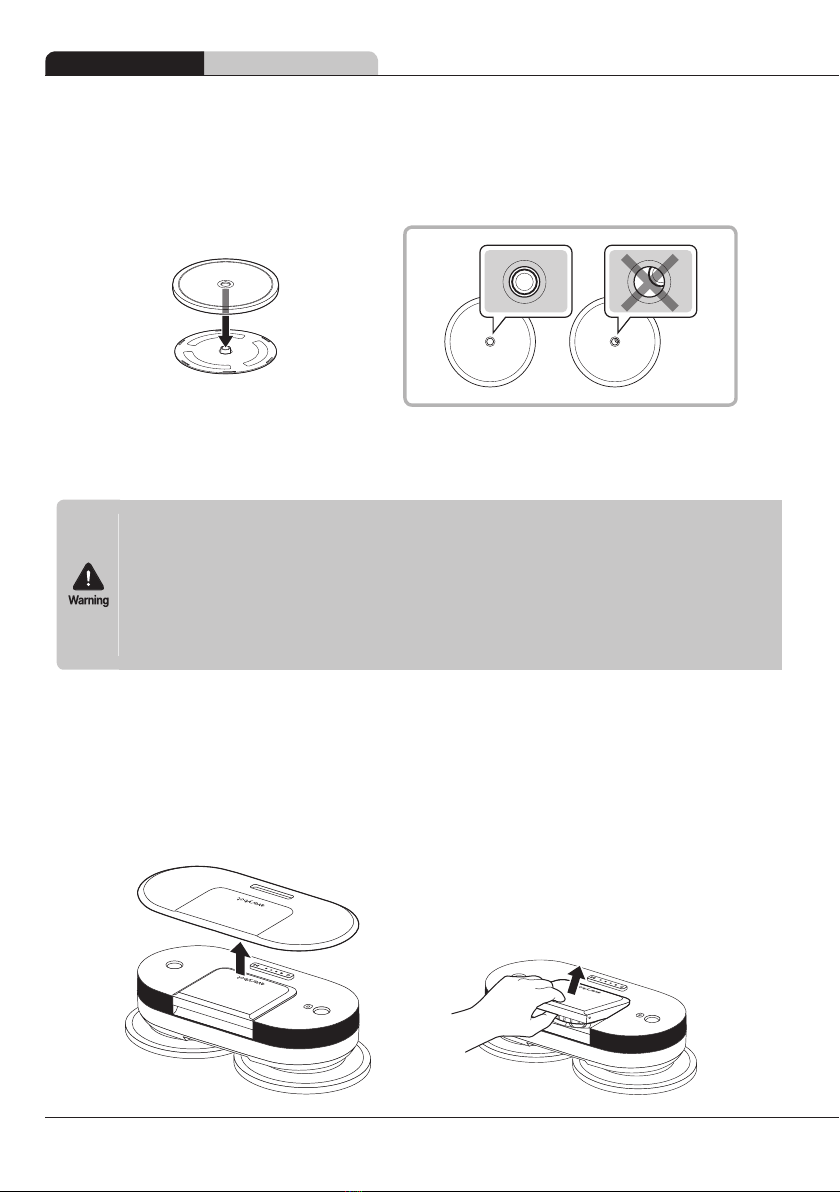
Attaching the Mop
12
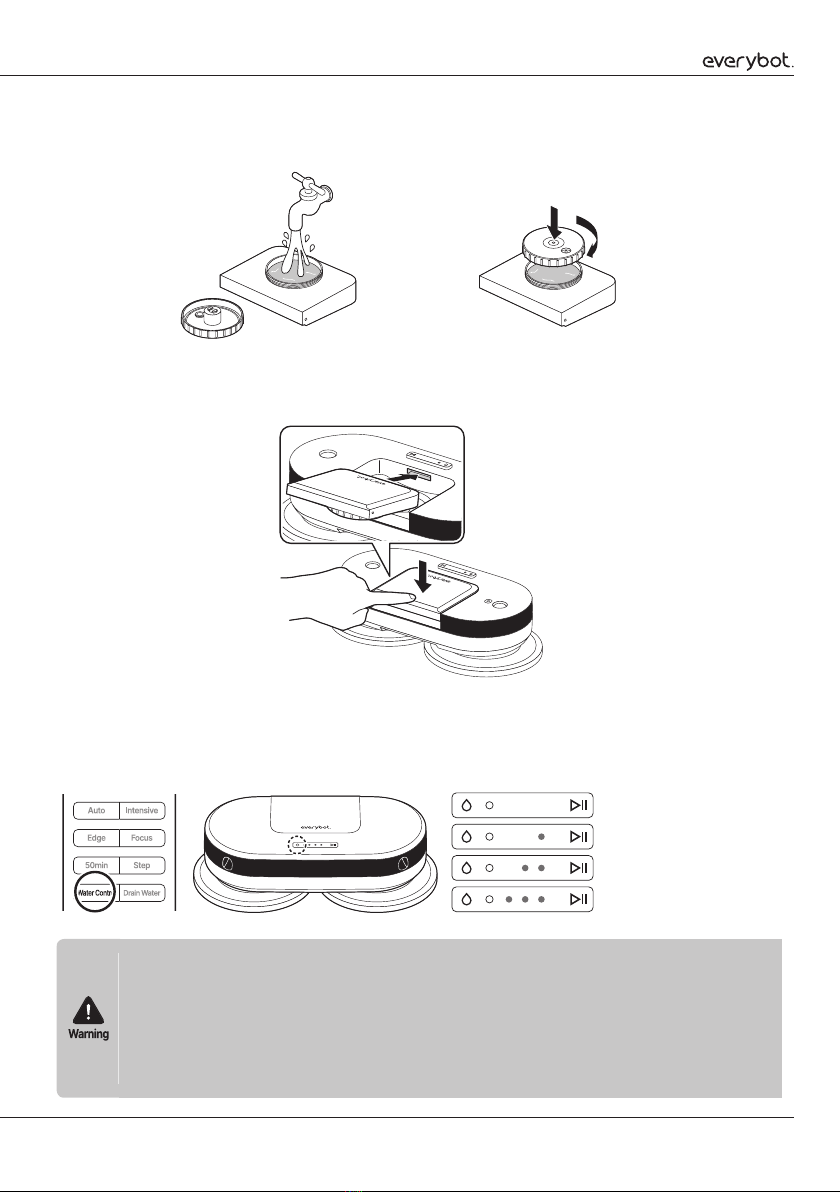
Attaching the Water Tank
12
》
Usage (or How to use)
Starting to Clean
14
Changing the Cleaning Mode
15
》
Maintenance
Draining the water
16
Washing the mop
17
Cleaning the water tank
18
Cleaning the water tank inlet
19
Cleaning the sensor window
19
》
Customer Support and Product Specifications
Checklist before reporting a malfunction
20
Product Specifications
22
Product Warranty Certificate
23

5
Pre-usage
Safe Usage Instructions
Power-related
Pre-usage

6
Pre-usage Safe Usage Instructions
During usage
After usage

7
Battery-related
Copyright and related guidelines

8
Pre-usage Component Checklist
Component Checklist
Main unit Charging adaptor Remote control
(includes two AAA batteries)
Mother yarn mop (gray) Microfiber mop (light green) Instruction manual
Mother yarn mop (gray)
Microfiber mop (light green)
9
Name and Function of Each Part
Top side
Inside
Charging adaptor jack
Rotating mop panel
Cover
Start/pause button
System status display
Fall prevention sensor
Water control button
Brightness sensor
Water tank
Power switch

10
Pre-usage Inserting Batteries into the Remote Control
Remote control
Direction button
Water drainage button
Intensive cleaning button
Focused cleaning button
Step cleaning button
Start/pause button
Edge cleaning button
Automatic cleaning button
50-min cleaning button
Water control button
Inserting Batteries into the Remote Control
1
Separate the battery cover underneath the remote control.
2
Insert the 2 AAA batteries provided with the product into the correct polarity.
3
Close the remote control battery cover.
11
Charging
Status Lights When Charging
Preparations
Status lights while charging Battery status
12
Preparations Attaching the Mop
Attaching the Mop
Attaching the Water Tank
1
Use the groove at the back to open the cover and use the groove under the water tank to
separate the water tank as illustrated.
13
2
Open the water tank lid to fill it with water up to the inlet, then turn the lid clockwise to close
it (max. 210ml).
3
Insert the fixture rib of the water tank into the groove on the main unit, then press
downward to fix it into place and insert the main unit cover.
4
Press the water control button on the remote control or the top side of the main unit to
adjust the water supply level and wet the mop accordingly.
Water supply level status light
Off
One segment on
Two segments on
Three segments on

14
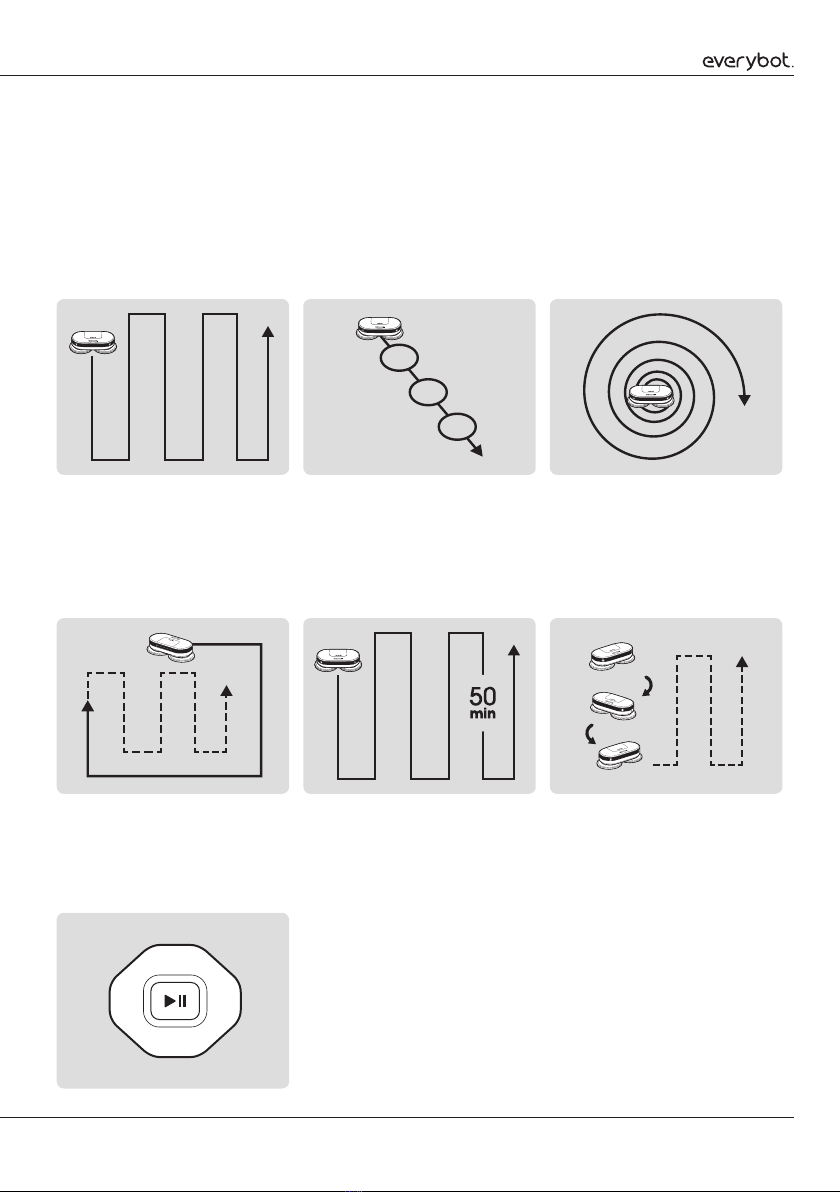
Starting to Clean
1
Open the cover and press the power button for at least three seconds.
2
Close the cover and lightly press the start/pause button ( ) on the main unit, or press
the start/pause button ( ) on the remote control to start cleaning.
or
Usage (or How to use)
15
Changing the Cleaning Mode
Manual cleaning
Focused cleaning
Automatic cleaning
Intensive cleaning
Step cleaning
Edge cleaning
50-min cleaning

16
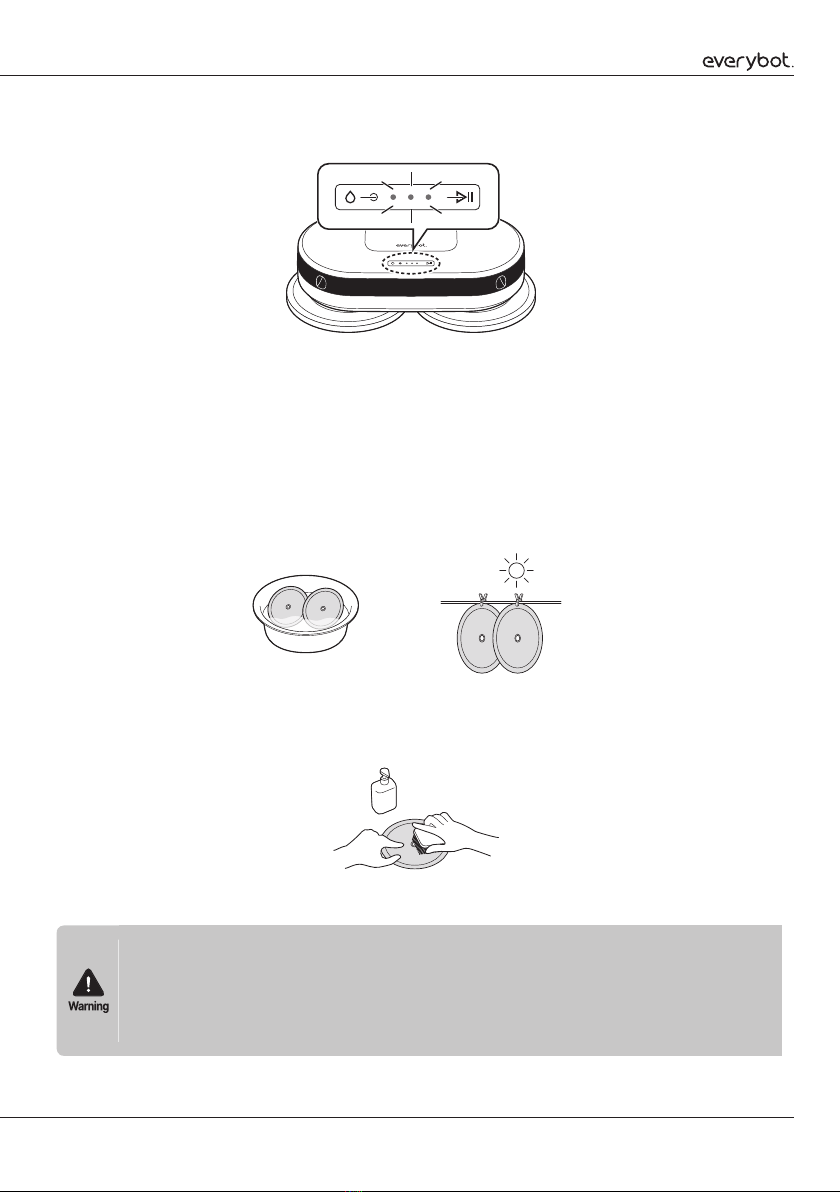
Draining the water
1
When finished cleaning, separate the water tank and empty out the water.
2
Since water may splash in the vicinity, place the robot on the floor while the mop is still
attached and press the Water Drainage button on the remote control. It will then discharge
water from inside the product for about 20 seconds.
Maintenance
17
3
The water supply level display light will flicker while the water is being drained.
Washing the mop
1
Use a neutral detergent to wash the mop by rubbing it gently, wring out the moisture in the
washed mop, then dry it in sunlight.
2
Using a mop-washing silicon brush (sold separately) makes the washing process easier.
18
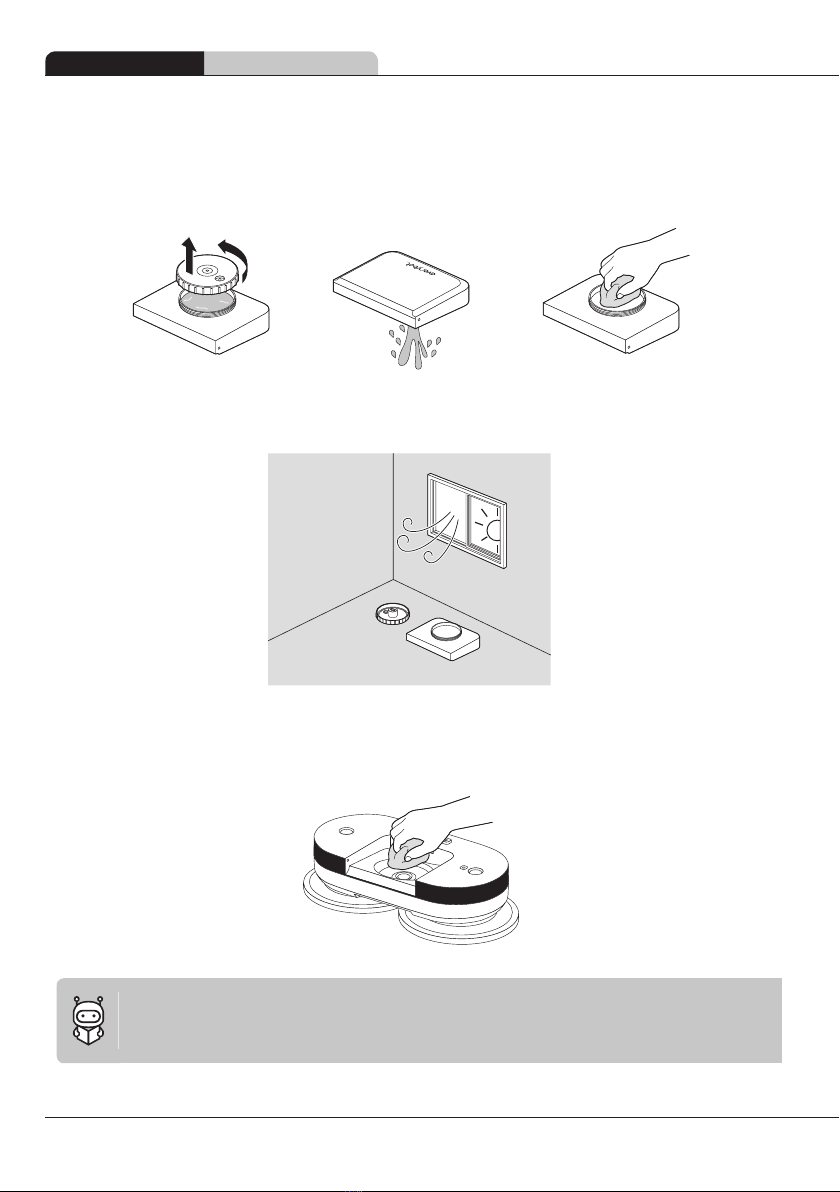
Maintenance Cleaning the water tank
Cleaning the water tank
1
Separate the water tank and empty out the remaining water.
2
Fully dry it in a well-ventilated, shaded area.
3
Regularly wash the water tank attachment point on the main unit of the robot to prevent
contaminants from entering.

19
Cleaning the water tank inlet
1
Remove the rubber packing from the water tank inlet, separate the water filter, then wash it
clean.
2
Insert the rubber packing into the water tank inlet first, make sure that the protruding part
of the water filter points upwards, then press down to fix it into place. If the water filter is
pointed the opposite way, the water supply will not operate properly.
Cleaning the sensor window
20
Customer Support and
Product Specifications
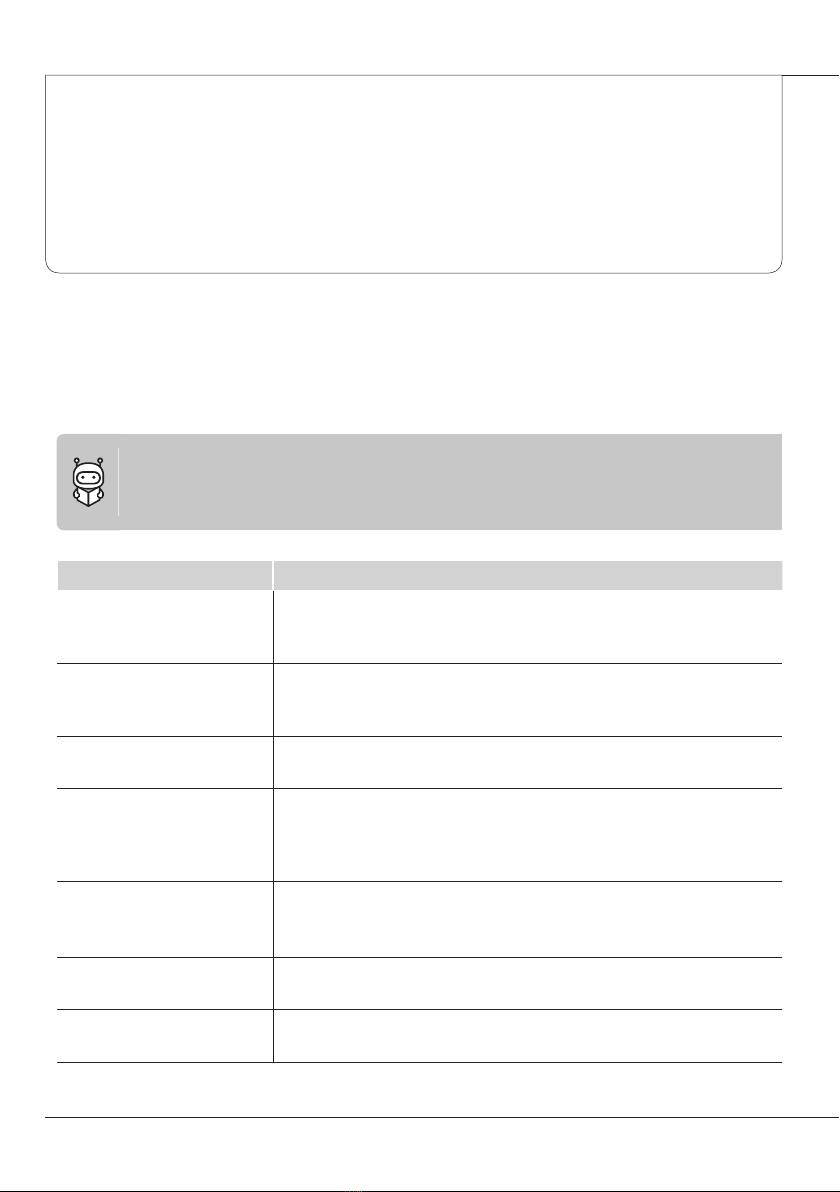
Checklist before reporting a malfunction
Issue Verification and response
The robot isn’t working
power
The robot isn’t charging
The robot makes a weird
noise when cleaning
The robot is making louder
noises
The remote control isn’t
working
The rotating mop panel isn’t
rotating
The robot keeps colliding
with walls and furniture
Table of contents


