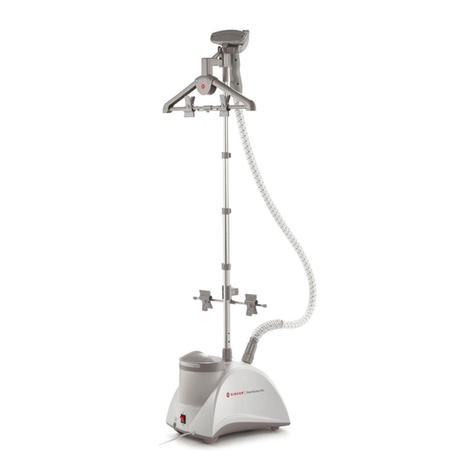
Singer SteamWorks Pro SWP User manual

SteamWorks™Pro
Garment Steamer
Instruction Manual
MODEL SWP
English
Please read all instructions before use.

IMPORTANT SAFETY INSTRUCTIONS
2 – ENGLISH
PLEASE READ THIS MANUAL CAREFULLY BEFORE USING AND KEEP IT
FOR FUTURE REFERENCE. FOR INDOOR HOUSEHOLD USE ONLY.
When using electrical appliances, especially when children are present,
basic safety precautions should always be taken, including the following:
READ ALL INSTRUCTIONS BEFORE USING - KEEP AWAY FROM WATER
DANGER Any appliance is electrically live even when the switch is off.
To reduce the risk of death by electric shock:
1. Always turn off and unplug Steam Press immediately after using.
2.Do not place or store appliance where it can fall or be pulled into a tub or sink.
3.Do not immerse appliance, plug or power cord in water or other liquid.
4.If appliance falls in water, unplug it immediately. Do not reach into water.
WARNING7RUHGXFHWKHULVNRIEXUQVHOHFWURFXWLRQÀUHRULQMXU\
to persons:
1. This appliance should never be left unattended when plugged in.
2.Close supervision is necessary when this appliance is used by or near children or the
SK\VLFDOO\FKDOOHQJHG8QVXSHUYLVHGXVHFRXOGUHVXOWLQÀUHRUSHUVRQDOLQMXU\
3.Use this appliance only for its intended use as described in this manual. Do not use
attachments not recommended by the manufacturer.
4.This appliance is not intended for use by persons (including children) with reduced
physical, sensory or mental capabilities, or lack of experience and knowledge, unless
they have been given supervision or instruction concerning use of the appliance by a
person responsible for their safety.
5.If the supply cord is damaged, it must be replaced by the manufacturer, its service
DJHQWRUDVLPLODUO\TXDOLÀHGSHUVRQLQRUGHUWRDYRLGDKD]DUG
6.Never operate this appliance if it has a damaged cord or plug, if it is not working
properly, if it has been dropped or damaged, or it has been dropped in water. Do not
attempt to repair the appliance. Incorrect reassembly or repair could cause a risk of
ÀUHHOHFWULFVKRFNRULQMXU\WRSHUVRQVZKHQWKHDSSOLDQFHLVXVHG5HWXUQDSSOLDQFH
WRDQDXWKRUL]HGVHUYLFHFHQWHUIRUH[DPLQDWLRQ
'RQRWSODFHWKHQR]]OHGLUHFWO\RQDQ\VXUIDFHRUDSSOLDQFHSRZHUFRUGZKLOHLWLVKRW
or plugged in.
%HFDXWLRXVDERXWVWHDPVSUD\LQJRXWIURPWKHQR]]OH'RQRWGLUHFWVWHDPDWSHRSOH
or animals, or use steamer on garments while they are being worn. While emitting
steam, this appliance may cause burns if held too close to the skin, scalp or eyes, or
if it is used incorrectly. To reduce risk of contact with hot water or steam from steam
vents, test appliance before each use by holding and testing it away from body.
$OZD\VNHHSWKHKRVHDQGQR]]OHHOHYDWHGDERYHWKH:DWHU7DQN'RQRWOD\KRVHRQ
WKHJURXQG'RQRWZLQGKRVH1HYHUGURSRULQVHUWDQ\REMHFWLQWRDQ\RSHQLQJ
'RQRWXVHRXWGRRUVRURSHUDWHZKHUHÁDPPDEOHPDWHULDOVRUFKHPLFDOVDUHEHLQJ
used or where oxygen is being administered.
11. Do not use an extension cord to operate appliance. If an extension cord is used, the
power cord must be more than 15A electrical current. Using any power cord under
15A may cause the electric wire to overheat. Do not share the extension cord with
other electrical appliances.

ENGLISH – 3
'RQRWRSHUDWHVWHDPHUZLWKRXWSURSHUO\ÀOOLQJWKH:DWHU7DQN7XUQRIIDQGXQSOXJ
DSSOLDQFHEHIRUHÀOOLQJZLWKZDWHU'RQRWRYHUÀOO
13. Always turn off, unplug and allow appliance to cool for at least thirty minutes before
UHÀOOLQJRUGUDLQLQJ:DWHU7DQNFOHDQLQJPRYLQJVWRULQJRUZKHQXQLWLVQRWLQXVH
14. Do not move appliance without unplugging it.
6WHDPRQO\LQDYHUWLFDOPRWLRQ1HYHUXVHVWHDPHULQKRUL]RQWDOSRVLWLRQRUWLOWHG
backwards - doing so may result in hot water discharge.
16. Never yank cord to disconnect from electrical outlet. Instead, grasp plug and pull to
disconnect.
17. USE CAUTION - burns could occur from touching hot parts, or proximity to hot water
or steam. Do not turn unit upside down - there may be hot water in Tank.
18. To reduce likelihood of circuit overload, do not operate another high wattage appli-
ance on the same circuit.
8VHGLVWLOOHGRUGHPLQHUDOL]HGZDWHULQ6WHDP3UHVV
20. Do not allow cord to contact heated surfaces. Do not pull or twist cord. Let appliance
cool completely before storing. Loop cord loosely around appliance when storing.
21. Always put appliance on a secure, level surface, such as a table or counter, when
using.
22. Do not cut or attempt to extend the steam hose or power cord.
23. Before plugging in Steam Press, be sure electrical information on the label agrees
with your power supply. Connecting to the incorrect voltage may cause irreparable
damage to the appliance and will invalidate the warranty.
SAVE THESE INSTRUCTIONS!
FOR HOUSEHOLD USE ONLY

4 – ENGLISH
Components
The following features and accessories are included with your steam press. Carefully
inspect packaging material as some parts are shipped inside Styrofoam packaging. To
obtain possible missing parts, refer to Consumer Support section of this manual.
PRODUCT SPECIFICATIONS
Model: SWP
Water Tank Capacity: 2.5L
Steam Output Time: 45 seconds
,QSXW9ROWDJH9a9a+]
2XWSXW3RZHU:DWWV
*Please refer to product for actual rating, depending on region.
Folding Hanger Steam Hose and
Hose Connector Swivel Connector
Pole Connector
and
Telescopic Pole
Drain Plug
Glove
Ironing Board
Fabric Brush
Water Tank
with Cap

cd
e
c
d
c
d
e
ENGLISH – 5
Set Up Your SteamWorks™Pro
Garment Steamer
STEP 1
Loosen the Pole Connector and
insert Telescopic Pole. Tighten
Pole Connector to secure
Telescopic Pole in Place.
STEP 3
Install the Steam Hose and tighten the Hose
Connector.
STEP 2
Attach Folding Hanger to the top of Telescopic
Pole. Extend Telescopic Pole to desired height
and lock in place.
STEP 4
Fully extend Hanger Arms and hang the Steam
1R]]OH
Insert
Unscrew
to loosen Tilt the Pole at
slight angle
Unlock
Insert
Swivel
Connector
Lock
Screw Pull
WARNING: $/:$<6+$1*7+(67($0+($'217+(67($0+($'+$1*(5:+(1
127,186(7235(9(17,1-85<$1'685)$&('$0$*(
0$.(685(7+(7(/(6&23,&32/(,6)8//<(;7(1'(''85,1*86(72(1685(
$60227+67($0)/2:7+528*+7+(+26(
'212738//7+(+26(:,7+(;&(66,9()25&(25029(,7%<38//,1*217+(
+26('$0$*(25,1-85<0$<5(68/7

c
d
45
seconds
c
d
6 – ENGLISH
Instructions for Use
STEP 1
5HPRYH:DWHU7DQN5HPRYH&DSDQGÀOO7DQN
ZLWKZDWHU5HSODFH:DWHU7DQNDQGWLJKWHQ&DS
STEP 3
Heats up in 45 seconds.
STEP 2
Plug in and turn on.
STEP 4
5HDG\IRU6WHDPLQJ
ON

c
d
50%
Vinegar
50%
Water
c
d
40
minutes
ENGLISH – 7
Maintenance & Cleaning
Remove Mineral Build-Up
STEP 1
Turn off the unit and unplug it. Wait for at least
30mins until unit cools down completely.
STEP 1
Turn off and unplug the unit and cool for at least
PLQV5HPRYH:DWHU7DQN0L[ZDWHUDQG
vinegar solution and pour into water reservoir.
STEP 2
Unscrew Drain Plug and empty water reservoir.
Collapse and remove the Telescopic Pole and
6WHDP1R]]OH
STEP 2
Wait 40mins, unscrew Drain Plug and drain the
water reservoir. Pour clean water in reservoir
and let it drain. After reservoir is empty, replace
Water Tank and tighten the Drain Plug.
OFF
Clean water
Attention: Screw in
Drain Plug after water
reservoir is empty.
Make sure Drain Plug
is in place and tight-
ened before each use.

360°
c
d
8 – ENGLISH
Accessory Assembly & Use
WARNING:
23(5$7(7+(*$50(1767($0(5217+()/225$7$//7,0(6
7+(+26(0$<0$.($*85*/,1*12,6('85,1*86(7+,6,61250$/$1',6&$86('
BY CONDENSATION IN THE HOSE. HOLD THE HOSE UP TO ALLOW CONDENSATION TO FLOW
BACK INTO THE TANK.
1(9(567($0$*$50(17:+,/(,7,6%(,1*:251%8516$1',1-85<0$<5(68/7
38//,1*21$*$50(17:,7+72208&+)25&(0$<&$86(7+(*$50(1767($0(5
TO TIP.
'212723(5$7(7+(*$50(1767($0(5:,7+287:$7(5,17+(7$1.
'212723(5$7(7+(*$50(1767($0(5)25025(7+$1+2856$7$7,0(
'2127/,)77+(*$50(1767($0(5%<7+(:$7(57$1.+$1'/(
360° Swivel
Folding Hanger
Press the Support
Arms to collapse
Hanger Arms
Press
Collapse the
Hanger Arms
Fabric Brush

ENGLISH – 9
Steaming Instructions
HOLD
HOLD
HOLD
HOLD HOLD
*IMPORTANT*
SMART AUTO SHUT-OFF
Turns the steamer off when water tank is empty.

Troubleshooting
This electrical appliance complies with directive 2002/96/EC (Waste Electrical and Electronic
Equipment – WEEE).
The meaning of the crossed-through waste bin symbol on the appliance is the
product must be disposed of separately to other household waste at the end of
the useful life of the appliance. The user is responsible for delivering appliance
to an appropriate collection center at that time.
Appropriate separate collection for environment-friendly treatment and recycling prevents or
reduces harmful effect on the environment and human health. You can obtain information on
available collection services in your area by contacting your local Council waste collection
department, or the retailer from which you bought the appliance.
10 – ENGLISH
PROBLEM POSSIBLE CAUSE SOLUTION
Unit fails to steam. Indicator Unit is not plugged in. Plug into electrical outlet.
Light does not illuminate.
Household Circuit Breaker/Ground Reset Circuit Breaker/Ground Fault
Fault Interrupter has tripped or Interrupter, or replace fuse. If you need
blown a fuse. assistance, contact a licensed electrician.
Unit fails to steam. Indicator Mineral Build-up. Follow “Remove Mineral Build-Up”
Light illuminates. using procedure found in this manual.
Water Tank is empty. Refill Water Tank using procedures
found in this manual.
Noise in Steam Hose. Steam Water drops gather in Steam Hose. Straighten the Steam Hose.
Hose stops spraying steam.
Steam Burst output is weak or Mineral Build-up in Water Tank. Follow “Remove Mineral Build-Up”
intermittent. using procedure found in this manual.

Warranty
LIMITED WARRANTY
IMPORTANT: SAVE THIS DOCUMENT AND KEEP IT IN A SAFE PLACE!
The SteamWorks Pro is warranted to be free from defects in material and workmanship.
7KHZDUUDQW\IRUWKH6WHDP:RUNV3UR·VZLULQJDQGHOHFWURQLFSDUWVLVIRUDSHULRGRIRQH\HDU
from the date of purchase.
The warranty for all other parts of the SteamWorks Pro is for a period of ninety (90) days from the
date of purchase.
,IWKHHOHFWURQLFSDUWVDQGRUWKHRWKHUSDUWVLQWKH6WHDP:RUNV3URDIWHULQVSHFWLRQE\6,1*(5
prove to be defective during the applicable warranty period(s), the electronic parts and/or the other
SDUWVZLOOEHUHSDLUHGRUUHSODFHGDW6,1*(5·VRSWLRQZLWKRXWFKDUJHH[FHSWIRUDQ\H[SHQVHDV-
VRFLDWHGZLWKVHQGLQJWKH6WHDP:RUNV3URWR6,1*(5
,I6,1*(5VHQGVDUHSODFHPHQW6WHDP:RUNV3URLWZLOOFDUU\WKHUHPDLQLQJZDUUDQW\RIWKHRULJL-
nal SteamWorks Pro.
This warranty may only be used by the original consumer owner of the SteamWorks Pro and may
not be transferred or assigned.
Exclusions or Limitations
• Service under this warranty may only be obtained within the 48 contiguous states, Alaska,
Hawaii and Canada.
• The SteamWorks Pro is warranted only for normal household (non-commercial) use. This war-
ranty does not cover defect(s) caused by abuse, lack of maintenance or other neglect, failure
to follow the care, cleaning or other instructions for the SteamWorks Pro, misuse, or events
beyond our control.
$1<,03/,(':$55$17<$33/,&$%/(727+(67($0:25.6352,1&/8',1*
:,7+287/,0,7$7,217+(:$55$17,(62)0(5&+$17$%,/,7<$1'25),71(66)25
$3$57,&8/$5385326(,6/,0,7(',1'85$7,212)7+,6:5,77(1:$55$17<
6,1*(56+$//127%(/,$%/()25&216(48(17,$/(&2120,&'$0$*(65(68/7-
,1*)520%5($&+2)7+,6:$55$17<25$1<,03/,(':$55$17<
6,1*(5GRHVQRWDXWKRUL]HDQ\SHUVRQWRFUHDWHIRULWDQ\REOLJDWLRQRUOLDELOLW\LQFRQQHFWLRQ
with the SteamWorks Pro and any of its parts beyond those set forth in this warranty.
6,1*(5GLVFODLPVOLDELOLW\XQGHUWKLVZDUUDQW\IRUDQ\GDPDJHRUGHIHFWUHVXOWLQJIURPWKHXVH
RIRWKHUWKDQ6,1*(5SDUWVDQG6,1*(5DSSURYHGVHUYLFHLQWKHUHSDLUDQGPDLQWHQDQFHRIWKH
SteamWorks Pro.
7KLVZDUUDQW\JLYHV\RXVSHFLÀFOHJDOULJKWVDQG\RXPD\DOVRKDYHRWKHUULJKWVZKLFKYDU\
from state to state.
• Some states do not allow limitations on how long an implied warranty lasts, so the above limita-
tion may not apply to you.
• Some states do not allow the exclusion or limitation of incidental or consequential damages, so
the above limitation or exclusion may not apply to you.
Service under the Warranty may be obtained by returning the SteamWorks Pro with:
1. This original warranty document; and
2. Proof of purchase (such as the purchase receipt) to:
SVP Sewing Brands LLC
ATTN: Service Department
+HLO4XDNHU%RXOHYDUG
LaVergne, TN 37068
If you have any questions regarding these warranties, please contact:
SVP Sewing Brands LLC
6,1*(5
E-mail: talktoUS@singer.com
ATTN: Consumer Affairs
+HLO4XDNHU%RXOHYDUG
LaVergne, TN 37068
Or, visit the Consumer Support Area of our website at: www.Singer.com
ENGLISH – 11

SWP (English) 9/11/2019
SVP19 - 012
Singer and the Cameo “S” Design are trademarks of
7KH6LQJHU&RPSDQ\/LPLWHG6DUORULWV$IÀOLDWHV
© 2019 The Singer Company Limited S.a.r.l. or its
$IÀOLDWHV$OOULJKWVUHVHUYHG

SteamWorks™Pro
Plancha de Vapor Para Ropa
Manual de Instrucciones
MODELO SWP
Lea todas las instrucciones antes de usar.
Español

INSTRUCCIONES DE SEGURIDAD IMPORTANTES
14 – ESPAÑOL
LEA ESTE MANUAL DETENIDAMENTE ANTES DE USAR Y CONSÉRVELO PARA
FUTURA REFERENCIA. PARA USO CASERO EN INTERIORES SOLAMENTE.
Cuando use aparatos eléctricos, especialmente cuando hay niños presentes, de-
berán tomarse las precauciones básicas de seguridad, incluyendo las siguientes:
LEA LAS INSTRUCCIONES ANTES DE USAR Y MANTENGA LEJOS DEL AGUA
PELIGRO
Cualquier aparato está eléctricamente activo incluso cuando el
interruptor está apagado. Para disminuir el riesgo de muerte por descarga eléctrica:
1. Siempre apague y desconecte la central inmediatamente después de usarla.
2.No coloque ni guarde el aparato donde se pueda caer o se pueda tirarse a una tina o
un lavabo.
3.No sumerja el aparato, el enchufe o el cordón en el agua o en otro líquido.
4.Si el aparato cae en el agua, desconecte inmediatamente. No toque el agua.
ADVERTENCIA
-
cución, incendio o lesiones a las personas:
1. Este aparato nunca debe dejarse sin atención cuando está conectado.
2. Es necesaria una estrecha supervisión cuando este aparato sea utilizado por o cerca
de niños o personas con impedimentos físicos. El uso no supervisado podría resultar
en un incendio o una lesión personal.
3. Utilice este aparato únicamente para el uso previsto, tal como se explica en este
manual. No utilice accesorios no recomendados por el fabricante.
4. Este aparato no ha sido diseñado para utilizarse por personas (incluyendo niños) con
alguna discapacidad física, sensorial o mental o sin la experiencia y los conocimien-
tos necesarios, salvo que hayan sido supervisados o recibido instrucciones sobre su
uso por parte de una persona responsable de su seguridad.
5. Si el cable eléctrico está dañado, el fabricante o su agente de servicio o una persona
6. No utilice nunca este aparato si el cable o el enchufe están dañados, si no funciona
adecuadamente, si se ha caído o se ha dañado, o si ha caído al agua. No intente
reparar el aparato. El rearmado o la reparación incorrectos podrían provocar un
incendio, una descarga eléctrica o lesiones personales cuando se utiliza el aparato.
Regrese el aparato a un centro de servicio autorizado para su examen.
7. N
encuentre caliente o enchufada.
8. Tenga precaución con el vapor que sale de la boquilla. No dirija el vapor directa-
mente a la gente o a los animales ni use la central con la ropa que lleva puesta.
Mientras emite vapor, este aparato puede causar quemaduras si se mantiene de-
masiado cerca de la piel, el cuero cabelludo o los ojos, o si se usa incorrectamente.
n de reducir el riesgo de contacto con el agua caliente que emana de las salidas
de vapor, pruebe el aparato antes de cada uso sosteniéndolo y probándolo fuera del
cuerpo.
9. Mantenga la manguera y la boquilla elevadas sobre el depósito de agua en todo
momento. No ponga la manguera en el piso. No enrolle la manguera. No deje caer ni
introduzca objetos en las aberturas.
10. N -
tancias químicas o dónde se administre oxígeno.

ESPAÑOL – 15
11. No use un cable de extensión para operar el aparato. En caso de que se use exten-
sión eléctrica, debe soportar corriente de 15A. Si usa extensión de menos de 15A
puede provocar que el alambre se sobrecaliente. No comparta la extensión con otros
aparatos eléctricos.
12. No haga funcionar la central sin llenar correctamente el tanque de agua. Apague
y desenchufe el aparato antes de llenarlo con agua. No llene de más.
13. Siempre apague el aparato, desconéctelo y deje que se enfríe por al menos treinta
minutos antes de volverlo a llenar o drenar el depósito de agua, limpiarlo, moverlo,
almacenarlo o cuando no lo use.
14. No mueva el aparato sin desenchufarlo primero.
15. Use el aparato solamente en posición vertical. Nunca use la plancha de vapor en
posición horizontal ni inclinada hacia atrás, ya que puede escapar agua caliente.
16. Nunca tire del cable para desenchufarlo del tomacorriente. En lugar de eso, tome el
enchufe y jale para desconectar.
17. PRECAUCIÓN: si toca las partes calientes o se acerca demasiado al agua caliente o
al vapor, puede causar quemaduras. No ponga la unidad al revés, puede haber agua
caliente en el tanque.
18. Para reducir la probabilidad de sobrecarga del circuito, no opere otro aparato de alto
vataje en el mismo circuito.
19. Use agua destilada o desmineralizada en la plancha de vapor.
20. N
que el aparato se enfríe completamente antes de almacenarlo. Enrolle el cable suelto
alrededor del aparato cuando lo almacene.
21. S
o mostrador, cuando lo use.
22. No corte ni intente extender la manguera de vapor o el cordón.
23. Antes de enchufar la plancha de vapor, asegúrese de que la información eléctrica en
la etiqueta concuerde con su fuente de alimentación. Si conecta el aparato al voltaje
incorrecto, puede causarle daño irreparable e invalidar la garantía.
GUARDE ESTAS INSTRUCCIONES!
SOLO PARA USO EN EL HOGAR

– ESPAÑOL
Componentes
Las siguientes características y accesorios se incluyen con su plancha de vapor.
Inspeccione cuidadosamente el material de empaque ya que algunas piezas se envían
dentro de un empaque de espuma de poliestireno. Para obtener posibles piezas fal-
tantes, consulte la sección de Soporte al consumidor de este manual.
Gancho
Plegable
Manguera y
Conector de Vapor Conector del Pivote
Conector del
Poste y Poste
Telescópico 'HSyVLWRGH
Agua con Tapa
Tapón de
'UHQDMH
ESPECIFICACIONES DEL PRODUCTO
Modelo: SWP
Capacidad del Tanque de Agua: 2.5L
Tiempo de Salida de Vapor: 45 segundos
Voltaje de Entrada: 100-120V~ / 220-240V~, 50-60Hz*
Potencia de Salida: 1260-1500 Watts*
&RQVXOWHHOSURGXFWRSDUDFRQRFHUODFDOLÀFDFLyQUHDOVHJ~QODUHJLyQ
Guante
Tabla de planchar
Cepillo de tela

ESPAÑOL – 17
SteamWorks™ Pro
PASO 1 –
inserte el poste telescópico.
Apriete el conector del poste
para asegurare el poste
telescópico en su lugar.
PASO 3 –
Instale la manguera de vapor y apriete el conec-
tor de la manguera.
PASO 2 –
Sujete el gancho plegable a la parte superior del
poste telescópico. Extienda el poste telescópico
a la altura deseada y asegúrelo en su lugar.
PASO 4 –
Extienda completamente los brazos del gancho
y cuelgue la boquilla de vapor.
Inserte
Desatornille Incline el Poste
un poco
Desbloquee
Inserte
Conector
del Pivote
Bloquee
Atornille Halar
ADVERTENCIA: SIEMPRE CUELGUE EL CABEZAL DE VAPOR EN SU GANCHO CUANDO
NO USE EL APARATO PARA EVITAR LESIONES Y DAÑOS A LA SUPERFICIE
ASEGÚRESE DE QUE EL POSTE TELESCÓPICO ESTÉ COMPLETAMENTE EXTENDIDO DU-
RANTE LA OPERACIÓN PARA GARANTIZAR QUE EL VAPOR FLUYA POR LA MANGUERA
SIN PROBLEMA.
NO JALE LA MANGUERA CON FUERZA EXCESIVA NI LA MUEVA AL JALAR LA MANGUERA.
PUEDE PROVOCAR DAÑOS O LESIONES

45
segundos
18 – ESPAÑOL
Instrucciones de Uso
PASO 1 –
Retire el depósito de agua. Retire
la tapa y llene el depósito con agua. Reemplace
el depósito de agua y apriete la tapa.
PASO 3 –
Se calienta en 45 segundos.
PASO 2 –
Conecte y encienda.
PASO 4 –
Listo para planchar.
EN

50%
Vinagre
50%
Agua
40
minutos
ESPAÑOL – 19
Mantenimiento y Limpieza
Retire los Residuos de Minerales
PASO 1 –
Apague la unidad y desconéctela. Espere al
menos 30 minutos hasta que la unidad se enfríe
por completo.
PASO 1 –
Apague y desenchufe la unidad y
deje enfriar por al menos 30 minutos. Retire el
depósito de agua. Mezcle el agua y la solución
de vinagre y viértala en el depósito de agua.
PASO 2 –
Desatornille el enchufe del drenaje y vacíe el
depósito de agua. Contraiga y retire el poste
telescópico y la boquilla de vapor.
PASO 2 –
Espere 40 minutos, desenrosque el
enchufe de drenaje y drene el depósito de agua.
Vierta agua limpia en el depósito y deje drenar.
Después de vaciar el depósito, reemplace el
depósito de agua y apriete el enchufe del drenaje.
APAGADO
Agua
Limpia
Atención: Atornille el
enchufe de drenaje
después de vaciar el
depósito de agua.
Asegúrese de que el en-
chufe de drenaje esté en
su lugar bien apretado
antes de cada uso.

360°
c
d
– ESPAÑOL
Conjunto de Accesorios y Uso
2SULPDORV%UD]RV
de Soporte para
contraer los Brazos
del Gancho
2SULPD
Contraiga los
Bbrazos del
Gancho
ADVERTENCIA:
23(5(/$3/$1&+$'(9$325(1(/3,62(172'2020(172
(6326,%/(48(/$0$1*8(5$+$*$8158,'2'(*25*27(2$/86$5/$(672
(61250$/</2&$86$/$&21'(16$&,Ð1'(1752'(/$0$1*8(5$6267(1*$
/$0$1*8(5$(1326,&,Ð1(/(9$'$3$5$48(/$&21'(16$&,Ð15(*5(6($/$
MANGUERA.
181&$3/$1&+(523$48(//(9(38(67$38('(35292&$548(0$'85$62
/(6,21(6
6,-$/$/$523$&21'(0$6,$'$)8(5=$/$3/$1&+$'(9$3256(38('(/$'($5
1223(5(/$3/$1&+$'(9$325&21(/'(3Ð6,72'($*8$9$&Ì2
1286(/$3/$1&+$'(9$3253250É6'(+25$6&217,18$6
12/(9$17(/$3/$1&+$'(9$325'(/$0$1,-$'(/'(3Ð6,72'($*8$
Gancho Plegable
Giratorio a 360°
Cepillo de tela
Table of contents
Languages:
Other Singer Steam Cleaner manuals

Singer
Singer SteamWorks Pro User manual

Singer
Singer SteamWorks Classic User manual

Singer
Singer SteamWorks Pro User manual

Singer
Singer Garment Steamer User manual

Singer
Singer SteamWorks Pro User manual

Singer
Singer SG50 User manual

Singer
Singer SP-550 User manual

Singer
Singer SteamWorks Pro User manual

Singer
Singer ESP36T1 User manual