Evluma ROADMAX Series User manual

ROADMAX SERIES LUMINAIRES
INSTALLATION INSTRUCTIONS
PLEASE READ AND FOLLOW ALL SAFTEY INSTRUCTIONS!
Verify that supply voltage is correct. RoadMax RX1 operates at 120-277 VAC, 60 Hz current.
Do not exceed maximum voltage marked on luminaire label.
LED luminaires should be powered directly from a switched service unless specification indicates otherwise.
Do not connect directly to control devices, such as occupancy sensors, timing devices or dimmer packs.
Follow all National Electrical Codes (NEC) and any applicable local code requirements for electrical and
grounded connections. Wiring connections should be capped with UL listed or recognized connectors.
Wear gloves and safety glasses when removing luminaire from carton, during installation, or while performing
maintenance.
Avoid direct eye exposure to an LED light source while in operation.
Disconnect power before wiring the fixture. High voltage may be
present even when the photocontrol is removed.
If not qualified, consult an electrician.
PRODUCT DESCRIPTION
The RoadMax RX1 has been listed to
U.S. and Canadian safety standards
CSA per Met Labs. It is suitable for use
in wet locations. Temperature operation
range is -40°C min to 50°C max.
This luminaire is designed for outdoor lighting
purposes. It should not be used in an area with
limited ventilation or an enclosed area with a high
ambient temperature. Store in a dry location prior to
installation. Do not expose luminaire to the weather
without a shorting cap or photocontrol installed
unless the luminaire has been ordered with the
Evluma integrated photocontrol.
This device complies with Part 15 of the FCC Rules.
Operation is subject to the following two conditions:
(1) this device may not cause harmful interference, and
(2) this device must accept any interference received,
including interference that may cause undesired
operation.
TOOLS REQUIRED
• 1/2 inch drive socket, or box wrench for tenon bolts
• #2 Phillips screwdriver for photocontrol socket, or photocontrol
• 5/16 inch drive socket, or 1/4 inch slotted screwdriverfor lens,
or shields
• 1/4 inch slotted screwdriver for conductive wires
PN-101047-001 REV A01 3600 Lind Ave SW, Suite 140, Renton, WA 98057 425-336-5800 evluma.com
install direction photocontrol socket
access panel knob
access panel mounting arm
If you are installing a secondary lens or light trespass shields, attach to the luminaire prior to hanging the luminaire.
Please see the separate instructions for installing these accessories in the field. Installing a photocontrol, steps
8 and 9 may be easier to perform on a workbench than on a pole. Likewise, setting the FAO (Field Adjustable
Output switch), step 7, can be done in advance, prior to installation.
1. Disconnect the power to the luminaire.
2. Open the access panel using the access panel knob by rotating approx. 2 turns. Panel will hang securely.
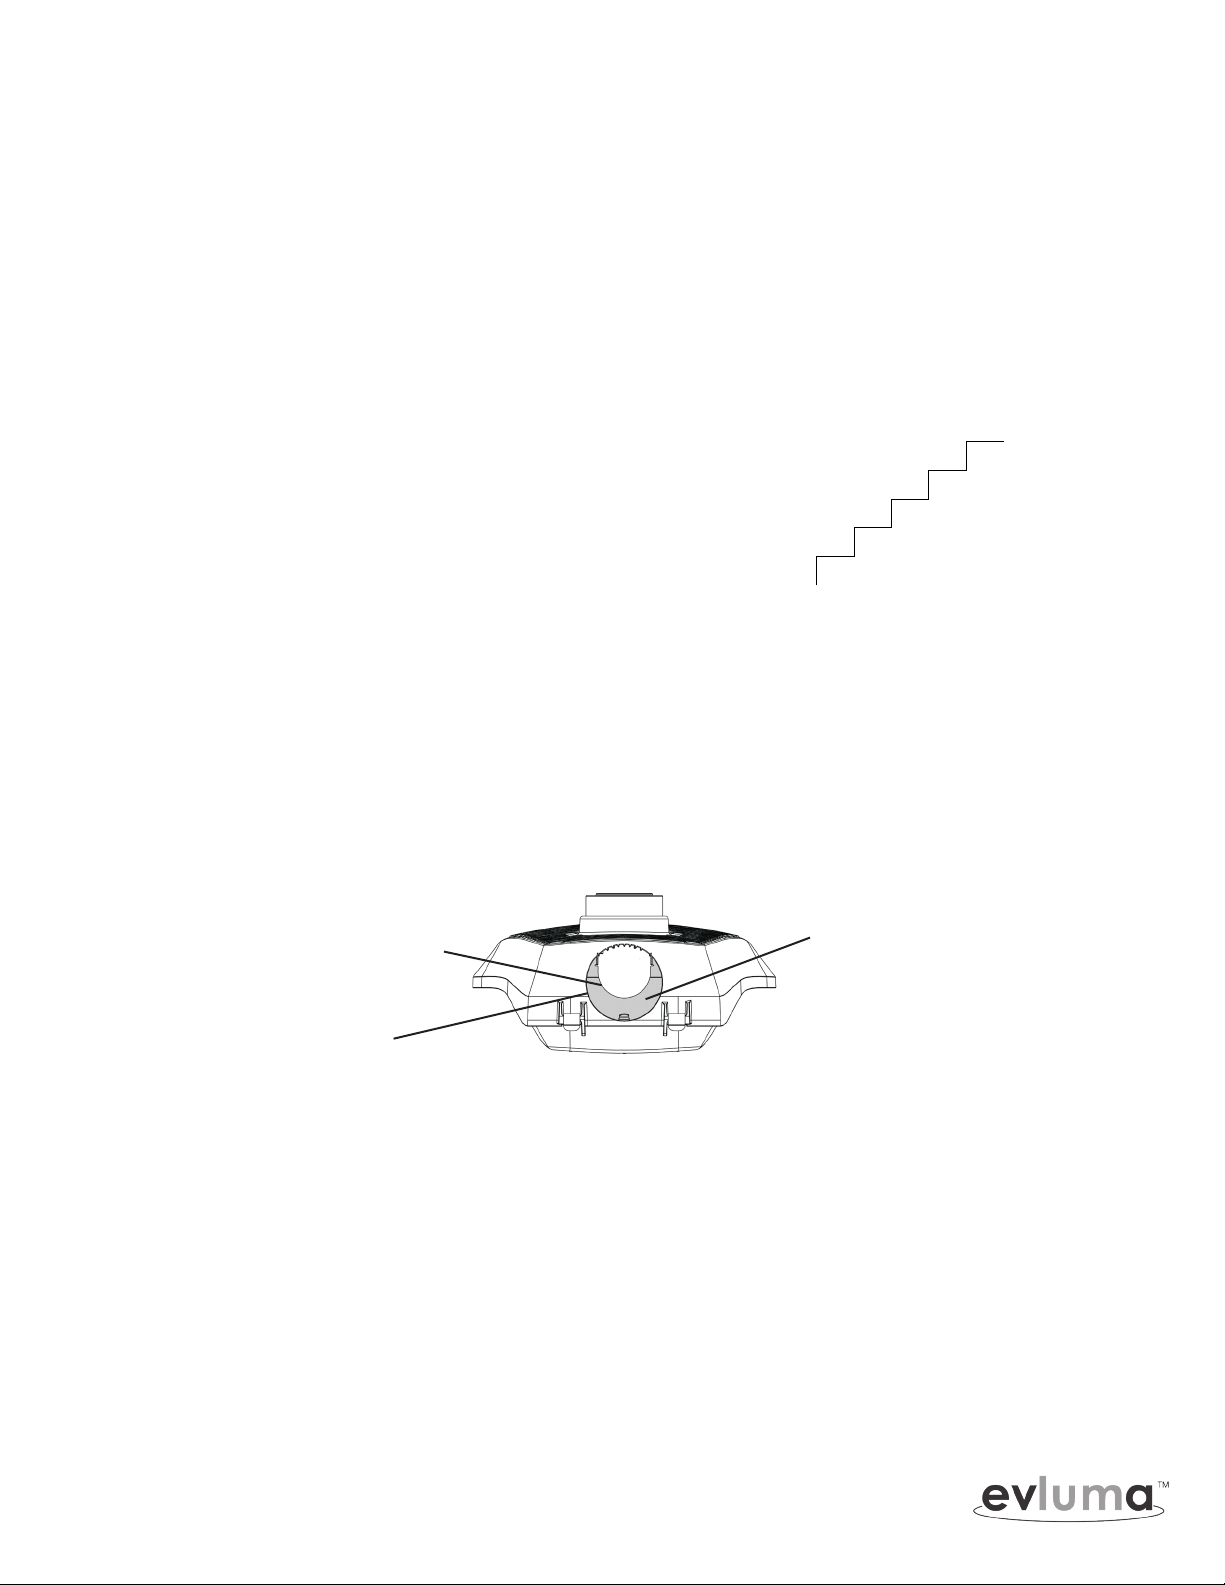
3. Using the ½ inch drive socket, loosen (do not remove) the
two tenon clamp bolts enough to allow the mounting arm
(not included) to slide into the service cavity. Mounting arm
should be placed upon or ‘stopped’ against the leveling steps.
Use caution and avoid striking internal components with
the mounting arm.
Leveling steps are +/- 5° tilt: +5, +2.5, 0, -2.5, -5 degrees.
4. RoadMax RX1 accepts mounting arms with a maximum outside diameter of 1-5/8 & 2-3/8 inch.
Luminaire is set at the factory to accept 1-1/4 inch mounting arm.
Note: A wildlife guard is provided for use with a 1-1/2 inch diameter mounting arm. If using a
mounting arm larger than 1-1/2” remove the wildlife guard. See instructions for Installing or
Removing the RoadMax Wildlife Guard.
5. Tighten the bolts to 75 in-lbs, alternating from bolt to bolt. Refrain from tilting the clamp or unevenly
tightening the bolts to avoid cross-threading.
6. Pull the wires through the mounting arm. Allow for enough length to easily attach to the three-position
terminal block. Loosen the terminal block screws prior to connecting wires. Use 1/4 inch slotted
screwdriver for securing conductive wires in the terminal block, torque to 15 in-lbs.
a.Connect the green wire, or ground, to the terminal block at the GND location
b.Connect the black wire, or hot, to the terminal block at the L1 location
c.Connect the white wire, or neutral, to the terminal block at the L2(N) location
Note: A reference wiring diagram can be found inside the access panel. RoadMax is sold with pigtail
options. Exact steps may vary depending on if pigtails (white and black wires} are sold with the luminaire
vs. a no pigtail option.
3600 Lind Ave SW, Suite 140, Renton, WA 98057 425-336-5800 evluma.com
ROADMAX SERIES LUMINARIES
INSTALLING THE ROADMAX LUMINAIRE
REAR VIEW
wildlife guard
dia. 2-3/8
dia. 1-5/8
-5
-2.5
0
+2.5
+5

7. If you have ordered a luminaire with an FAO (Field Adjustable Output switch) installed and you intend to
use this to set a lower wattage, do so at this time if you have not done so already. Please refer to the RX1
datasheet for details.
8. Rotate the photocontrol socket if position requires adjustment. By default, North is oriented to the front of
the luminaire. Use a #2 Philips screwdriver for photocontrol socket or photocontrol only if rotation is
required. Torque to 25 in-lbs.
9. Insert a twist lock photocontrol (not provided) or network node (not provided) into the photocontrol socket
and install in accordance with the manufacturer’s instruction.
10. Close the access panel. Tighten the access panel knob. Do not over tighten.
11. With power on, test the photocontrol.
Note: Photocontrols and photocontrol test response times may vary. Some photocontrols may turn the
light off and on over the first few minutes after power is applied. This does not indicate a defect. A
defective photocontrol will operate with the light on at all times regardless of the time of day. Allow several
minutes for the photocontrol to turn the fixture off. A small number of photocontrols fail off. Test according
to the type of photocontrol in use.
If the luminaire comes with the Evluma integrated photocontrol, “XP” model, allow up to 5 seconds for the
luminaire to respond.
PHOTOCONTROL FAILSAFE
If the RoadMax has been ordered with Photocontrol Failsafe the luminaire will flash once to indicate that power is
connected, and luminaire is in operation. The RoadMax begins collecting data immediately. Short daytime tests of
the photocontrol will not affect the gathering of this data.
WARRANTY
Warranty information may be found at evluma.com.
Components inside the fixture are not serviceable.
Copyright © 2022 Express Imaging Systems, LLC. Evluma, RoadMax, ConnectLED, and Photocontrol Failsafe are trademarks of Express Imaging Systems, LLC. All rights reserved. Content is subject to
change. MET labs logo is a registered trademark of MET labs.
NEED ASSISTANCE?
Table of contents
Other Evluma Lantern manuals

Popular Lantern manuals by other brands


Platinum Customer Care
Platinum Customer Care GX-2476-Twin Care and use instructions

Acuity Brands Lighting
Acuity Brands Lighting RUBIK 9CS installation instructions

Wetelux
Wetelux 96 11 26 Original instructions

olympia electronics
olympia electronics WEATHER LIGHT Series quick start guide

WAGNER
WAGNER VERONA manual

Chalmit
Chalmit SOLAS Installation, operation and maintenance instructions


