Evolis QUANTUM User manual

Evolis Card Printer © 2009. All rights reserved.
October 2009.
Item KU15E Rev A0

ä
ä
ä
ä
ä
ä
ä
ä
ä
ä
ä
1

This user guide details the operation of the Evolis multifeature encoding module.
This highly exible module encodes all types of conventional-sized cards: cards with magnetic
stripes, contact smart cards and contactless smart cards.
Furthermore, this unique encoding module is reversible. Thus, it enables the user to ip the module
over in a snap, enabling printing of the magnetic stripe side without having to use a dedicated,
time-consuming and laborious system for ipping each and every card over. This feature makes it
possible to speed up the full encoding process and printing cycle.
The encoding module is very conveniently located between the ’s feeder and print
head.
The autonomous module manages the full encoding process, in parallel of the printing job
executed by the other module.
It thereby enables personalization in runs within the concurrent operation time, which greatly
speeds up the delivery of a ready-to-use personalized card in comparison with any traditional
printer.
The reversible module makes it very convenient to encode and print any type of card, with
optimized throughput and efciency.
The encoding module has a motherboard with multiple connectors to link up to the contact and
contactless smart card encoders. Such encoders can be placed in a dedicated area located
behind the Quantum, and subsequently, be connected to the printer.
2

The encoding module has a xed electronic component that is installed below the mechanical
area. This also comes with a read/write head for magnetic stripes, a contact station for smart
cards and a housing for contactless encoders with or without a remote antenna.
In its factory conguration, the module comes with the following:
l An ISO 7811 encoding unit, a 3-track HiCo/LoCo
l An ISO 7816-2 contact station for smart cards
l An antenna bracket
l 2 x internal USB ports to connect a contact smart card encoder and a contactless smart card
encoder
l 1 x MAX232 dual I/O to connect a contact smart card encoder and a contactless smart card
encoder
l Internal power supply connectors to power the encoders
l 2 x female DB9 plugs on the external connecting panel to directly link the encoders or smart
coupler to the PC
l A connector that links the motherboard to the reversible encoding unit
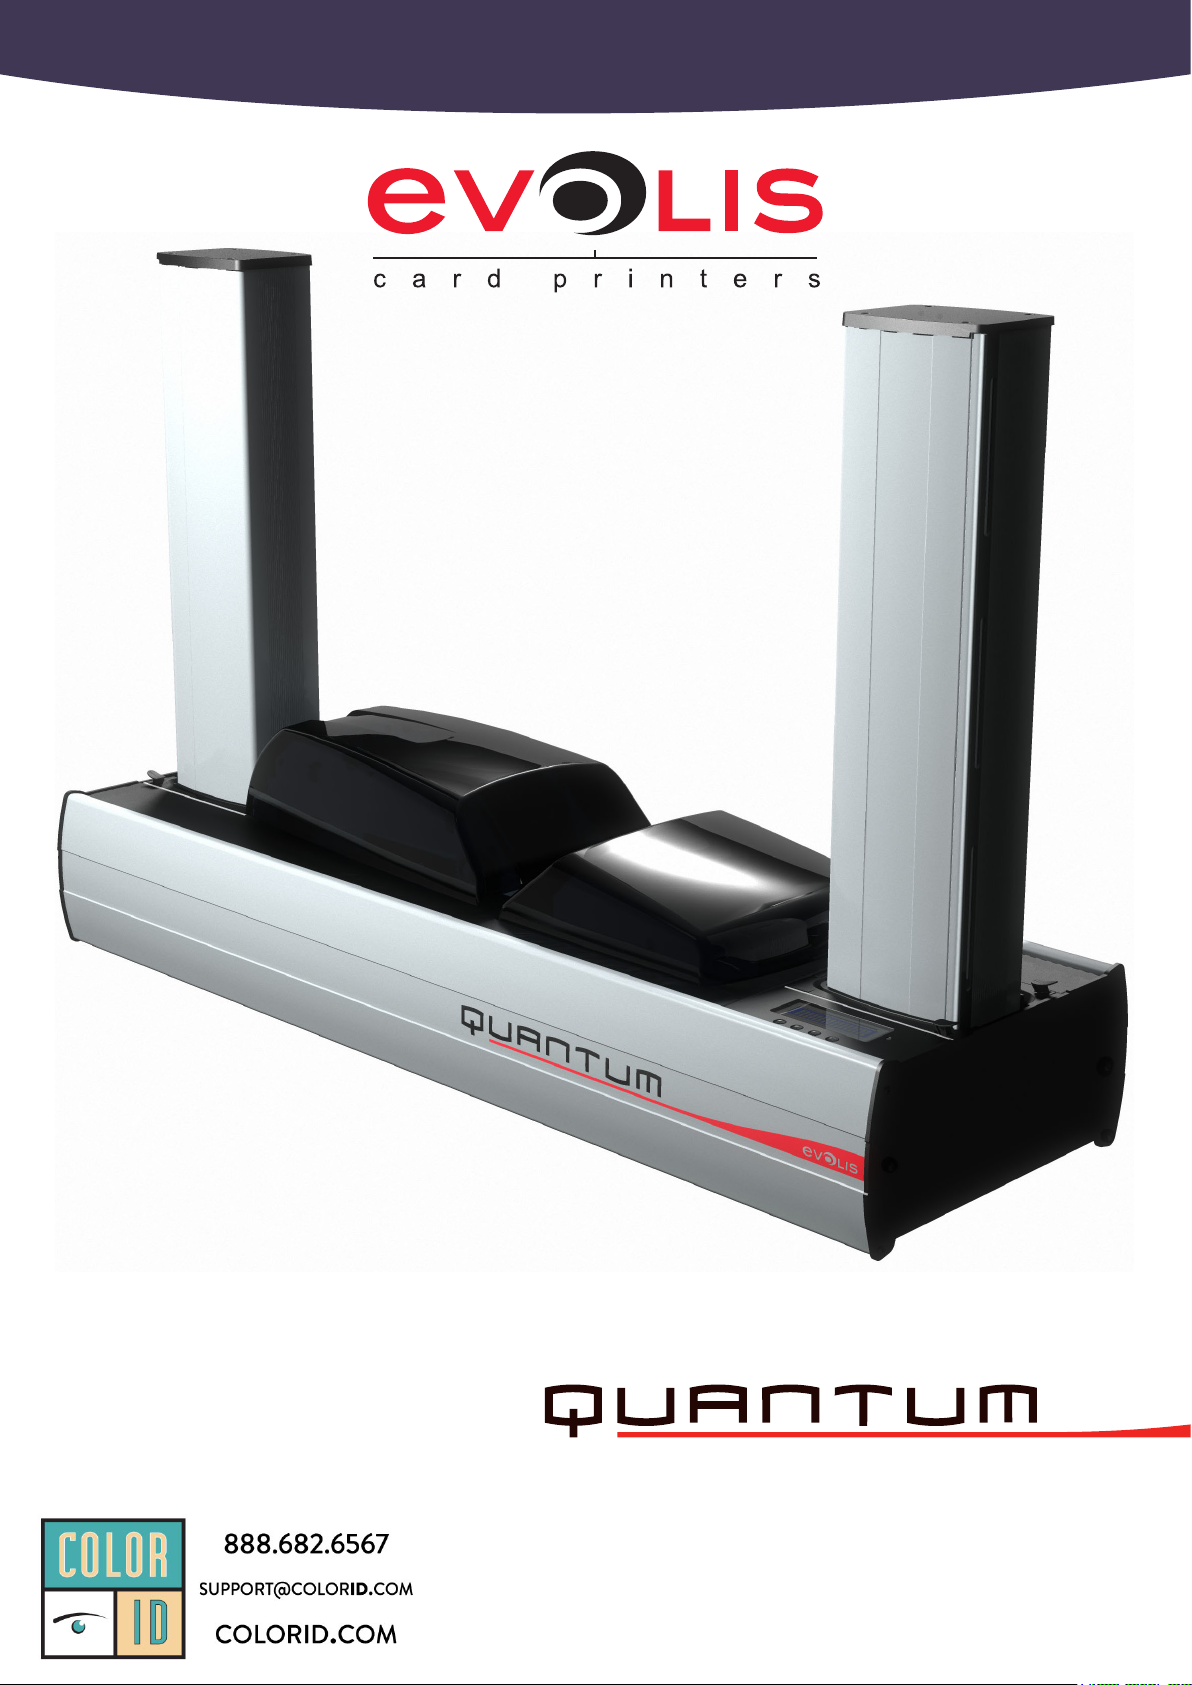
l A system to ip the encoding unit over and enable the following:
l Magnetic encoding on the reverse side and chip encoding on the front side (factory settings),
with the encoder in A position
l Or, magnetic encoding on the front side and chip encoding on the reverse side, with the
encoder in B position
On demand, this encoding module can be tted with the following features:
l JIS2 (Japan) encoding unit in replacement of the ISO encoder
l Smart card encoder (contact or contactless). The list of supported encoders is available upon
request
For maximized exibility, the encoding module can be recongured within minutes and by the
users themselves.
Integration can be easily achieved, thanks to the information and advice provided in this
document, and to the available extension kits and the connectors from Evolis.
In compliance with the safety, quality, assembly and connections guidelines, users can customize
the Quantum to their specic needs, when, for example, switching from a Mifare encoder to a
device that manages HID Prox cards.
You must strictly comply with the instructions and guidelines on assembling
and disassembling an encoder to ensure user safety and prevent your
Quantum from being compromised.
3

The encoding module is reversible. This means it can turn over and proceed to card encoding
and printing in a single pass, without having to ip each and every card over:
l Encoding position A: Magnetic encoding on the reverse side, and chip encoding on the front
side (factory settings), or
l Encoding position B: magnetic encoding on the front side and chip encoding on the reverse
side
Flipping the encoding module over requires that the machine be switched off, and that the power
cable be disconnected to avoid any damage to the electronic boards and the encoders.
Flipping the encoding module over requires that the machine be switched
off, and that the power cable be disconnected to avoid any damage to the
electronic boards and the encoders.
Despite the attention paid to the manufacture and quality of our products, the need to replace
the encoding module may arise over the lifetime of the machine.
The module can be replaced by the user with no tools needed, simply by following the instructions
very carefully.
Before doing anything else, please contact your Evolis dealer in order to check the advisability of
replacing the encoding module. The dealer will supply a new encoding module if need be.
Under these circumstances, the following procedure will need to be scrupulously carried out, in
order to keep very high quality encoding, copying the properties and settings for the replacement
module in the printer.
4

Replacing the encoding module should only be done after turning the
machine off and unplugging the mains power cable.
Ê
Ë
Ì
Í
Î
Ï
Ð
Ñ
where x = the encoding module kit code number that you noted in Step 3.
For example, if the encoding module kit number is 89012700009321234567, the
command to be entered is: Pmn;89012700009321234567
If the encoding module kit number is not entered correctly, machine
malfunctions may occur and the warranty may be voided.
5

Connecting an encoder to the electronic board requires advanced skills.
A connector kit with cables and connectors is available from the Evolis product list. It is recommended
that the use of any connectivity accessories, other than those provided by Evolis, is totally avoided
in order to prevent damages (e.g. low quality cables with substandard insulation, quality of welds
and contacts, polarizing, etc.).
Connecting an encoder to the electronic board must be carried out by
technically trained personnel, and only after unplugging the printer’s power
cable.
The user is fully responsible for the process of connecting/integrating an
encoder.
Evolis disclaims any liability for material damage or failures related to this
integration. In particular, Evolis reserves the right to waive all or part of the
product warranty in the event of modications or damages caused by
erroneous integration.
6

ä
The connectors required for integrating an encoder are provided on the motherboard of the
encoding module.
The following gure (top view taken from the back) shows all available connectors, as well as their
purpose and type.
Each connector has a reference number, stated in the technical charts, to identify each and
every cable terminal.
Grouped by colors, each connection item has a specic function which is highlighted in the
following colors:
Red : Power supply
Brown : of the smart card contact station (external DB9 connector), and of its encoder
(RS232)
Blue : Monitoring of the contactless smart card encoder (RS232 or TTL)
Yellow : Monitoring of contact and contactless smart card encoders using the internal USB
hub
Orange : lectrical or electronic components required for operating the module and
connecting the encoder
The plug board chart is available in Appendix 1. Please review it carefully before undertaking any
intervention.
Factory setting:
l Flat cable between J17 and J18
l Flat cable between J9 and J11
l Jumper positioned between J22-1 and J22-2
7

ä
The number « 1 » located next to the
white circle identies the marker for each
connector.
For connectors with two
rows, you must pay attention
the numbering of all pins!
ä
(Items colored orange)
SW1 On/Off power switch
Switches the printer on or off
NOTE:
Always turn the printer off before
working on its electrical and
electronic parts
J35 Connecting the external power
supply
NOTE:
Always unplug the power cable
before working on the electrical
and electronic parts of the
printer
J28 USB port (onto the USB hub)
Enables a USB device to be
plugged into the printer’s internal
USB hub
J10 Connector for the reversible
encoding unit
This connector facilitates
communication between
the electronic board and the
encoding module.
Do not use this connector. It is
dedicated to monitoring the
encoding module.
U23 MAX232 component
TTL/RS232 – ST3232E converter
TTL signal: J12
RS232 signal: J9
8

ä
(Items colored red)
It is suggested to power the contactless encoder from one connector, and the encoder for
contact smart card from the other encoder, so that the power supply is distinct for each encoder.
For example:
l J24: Encoder for contactless smart cards
l J27: Encoder for contact smart cards
The choice between these two connectors is left to the technician.
To avoid failures, check that the intensity during operation does not exceed
the maximum intensity delivered by Quantum (see Consumption chart in
Appendix 2).
ä
(Items colored yellow)
Connecting a smart card encoder or any other additional component (barcode reader, for
example) may be done using one of the two ports from ’s internal USB hub.
Generally, such accessories are self powered through the USB port. To avoid
any failure, check that the intensity during operation does not exceed
the maximum intensity delivered by Quantum (see Consumption chart in
Appendix 2).
J24
J24-1: GND (Masse)
J24-2: GND (Masse)
J24-3: GND (Masse)
J24-4: GND (Masse)
J24-5: + 3,3V
J24-6: + 5V
J24-7: + 5V
J24-8: + 24V
Type: HE14 – 1 x 8
J27
J27-1: GND (Masse)
J27-2: GND (Masse)
J27-3: GND (Masse)
J27-4: GND (Masse)
J27-5: + 3,3V
J27-6: + 5V
J27-7: + 5V
J27-8: + 24V
J27-9: + 24V
J27-10: + 3,3V
Type: HE14 – 1 x 10
J6 and J31
J6-1: +5V
J6-2: D-
J6-3: D+
J6-4: GND (Ground)
Type: HE14 – 1 x 4
9

ä
(Items colored brown)
J17
J17-1: Smart C1 Vcc
J17-2: Smart C2 RST
J17-3: Smart C3 CLK
J17-4: Smart C4 Reserved
J17-5: Smart C5 GND (Masse)
J17-6: Smart C6 Vpp
J17-7: Smart C7 I/O
J17-8: Smart C8 Reserved
J17-9: Smart OPTO+
J17-10: Smart OPTO-
Type: HE10 – 2 x 5
OPTO+ and OPTO- : Signals the
presence of a card
J18
J18-1: DB9-1
J18-2: DB9-2
J18-3: DB9-3
J18-4: DB9-4
J18-5: DB9-5
J18-6: DB9-6
J18-7: DB9-7
J18-8: DB9-8
J18-9: DB9-9
Type HE10 – 2 x 5
Connected to J19
(DB9 Contact external
connector)
OPTO- is grounded (GND)
J21 J21-1: Smart OPTO+
J21-2: Smart OPTO-
Type: HE14 – 1 x 2
OPTO+ and OPTO-: Signals the
presence of a card
J22
Jumper from J22-1 to J22-2
Card in contact with Smart
station = OPTO closed
Card is not available = OPTO
open
Factory setting
Jumper from J22-2 to J22-3
Card in contact with Smart
station = OPTO open
Card absent = OPTO closed
Type: HE14 – 1 x 3
Specication of how card-
presence signal is performed
OPTO open :
OPTO closed :
J19 DB9 external connector (female)
10

A contact smart card station can be connected in multiple ways. The most common ones are the
following:
- Use of an external smart card encoder. The encoder is plugged into the external DB9
(factory settings, if the printer is shipped without the encoder)
This mode supports all Evolis products that come with a smart card encoder option
(Pebble, Dualys, Securion)
- Use of an internal smart card encoder. The smart station is connected to the encoder,
and the encoder is connected to the external DB9 socket
- Use of an internal smart card encoder. The smart station is connected to the encoder,
and the encoder is connected to the internal USB hub
The connecting cable
J17 – J18, available as
a factory setting for
standard models
DB9/RS232 connection
USB connection
11

ä
(Items colored blue)
This chapter describes how to connect a contactless smart card encoder with an integrated or
remote antenna.
The antenna-connecting process varies according to the encoder prole and is therefore not
addressed in the manual.
J11 and J14 are directly wired to the DB9 connector (J15).
The user can choose to connect one HE 14 (9-pin connector), or 2 HE10 (5-pin connector). This has
no impact on features and signals.
J12
J12-1: RXD1 TTL (In)
J12-2: TXD1 TTL (Out)
J12-3: TXD2 TTL (Out)
J12-4: RXD2 TTL (In)
J12-5: GND (Masse)
Type: HE14 – 1 x 5
TTL signals of the MAX232 (U23)
component
J9
J9-1: Ne pas utiliser
J9-2: TXD1 RS232 (In)
J9-3: RXD1 RS232 (Out)
J9-4: Ne pas utiliser
J9-5: GND (Masse)
J9-6: Ne pas utiliser
J9-7: RXD2 RS232 (Out)
J9-8: TXD2 RS232 (In)
J9-9: Ne pas utiliser
J9-10: Ne pas utiliser
Type: HE10 – 2 x 5
RS232 signals of the MAX232
(U23) component
On the computer side:
J9-2 = R x D
J9-3 = T x D
J9-7 = RTS
J9-8 = CTS
J11
J11-1: DB9-1
J11-2: DB9-2
J11-3: DB9-3
J11-4: DB9-4
J11-5: DB9-5
J11-6: DB9-6
J11-7: DB9-7
J11-8: DB9-8
J11-9: DB9-9
J11-10: Ne pas utiliser
Type: HE10 – 2 x 5
Directly wired to J15 (DB9
connector)
J14
J14-1: DB9-1
J14-2: DB9-2
J14-3: DB9-3
J14-4: DB9-4
J14-5: DB9-5
J14-6: DB9-6
J14-7: DB9-7
J14-8: DB9-8
J14-9: DB9-9
Type: HE14 – 1 x 9
Directly wired to J15 (DB9
connector)
J15 Directly wired to J15 (DB9
connector)
12

A contactless smart card station can be connected in various ways. The most common ones are
the following:
- Use of an internal smart card encoder with a TTL interface that requires a TTL ä
RS232 conversion. Output to the DB9 connector
- Use of an internal smart card encoder that has a RS232 data interface. Output to the
DB9 connector
- Use of an internal smart card encoder with a USB interface that also powers the
system. Connection to a USB port from the internal USB hub
Connecting cable J9 –
J11, available as a factory
setting for standard
models
DB9/RS232 connection
USB connection
13

ä
14

ä
ä
15

ä
16

17
+24 V 500 mA max
+5V 650 mA max
+3,3V 300 mA max
+3,3V_USB Not used
+3,3V 300 mA max
+VAUX Not used
+VUSB1
+VUSB2
+VUSB3
Please refer the technical document of the PC-
powered USB
Generally, 500mA max overall
Other manuals for QUANTUM
2
Table of contents