KDS-DEC6 – Contents i
Contents
1Introduction 1
2Getting Started 2
2.1 Achieving the Best Performance 2
2.2 Safety Instructions 3
2.3 Recycling Kramer Products 3
3Overview 4
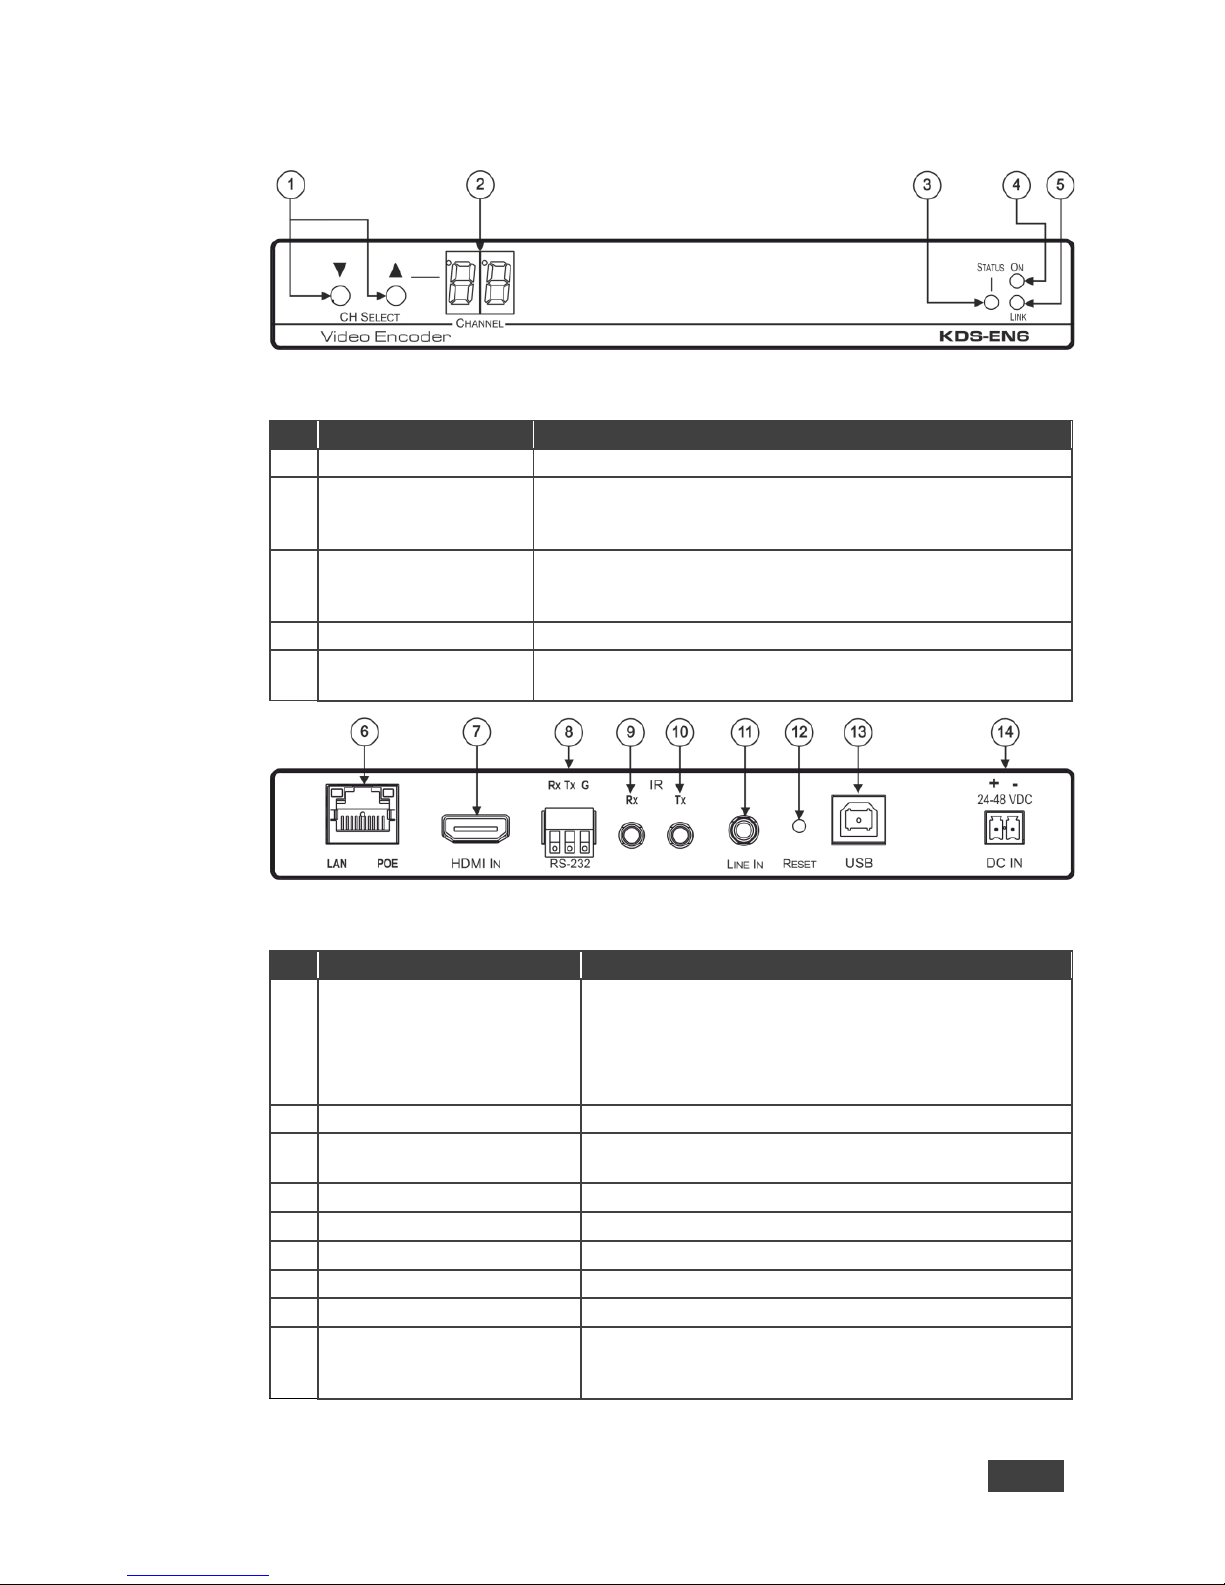
3.1 Defining KDS-EN6 5
3.2 Defining KDS-DEC6 6
4Initial Setup 8
4.1 Initial Setup via Channel Buttons 8
4.2 Initial Setup via Web Pages 10
5Connecting the KDS-EN6 and KDS-DEC6 12
5.1 KDS-DEC6/KDS-EN6 Unicast Installation 13
5.2 One-to-Many Configuration 16
5.3 Matrix Configuration 17
5.4 Video Wall Setup 18
5.5 KVM Setup 22
6Using the Embedded Web Pages 23
6.1 Modifying and Viewing the System 23
6.2 Setting the Video Wall 31
6.3 Setting Up the Network 37
6.4 Setting the Operation Functions 38
7Operating the KDS-EN6 and KDS-DEC6 45
7.1 Setting Up RS-232 over IP 45
7.2 Setting Up USB over IP 50
7.3 Setting Up IR over IP 50
7.4 Fast Video Switching 50
7.5 Resetting the KDS-EN6/ KDS-DEC6 to Factory Default Values 51
8Technical Specifications 52
Figures
Figure 1: KDS-EN6 Video Encoder Front Panel 5
Figure 2: KDS-EN6 Video Encoder Rear Panel 5
Figure 3: KDS-DEC6 Video Decoder Front Panel 6
Figure 4: KDS-DEC6 Video Decoder Rear Panel 7
Figure 5: Connecting an Encoder and Decoder System 15
Figure 6: Connecting a One-to-Many System 16
Figure 7: Connecting a Daisy-Chain System 17
Figure 8: Connecting the KDS-EN6, KDS-DEC6 Video Encoder 18
Figure 9: Video Wall Setup 20
Figure 10: KVM Setup 22
Figure 11: The System Tab – Version Information 24
Figure 12: The System Tab – Firmware upgrade 25
Figure 13: The System Tab – selecting the Firmware File 25
Figure 14: The System Tab – Utilities for KDS-DEC6 26
Figure 15: The System Tab – Utilities Window for KDS-EN6 27