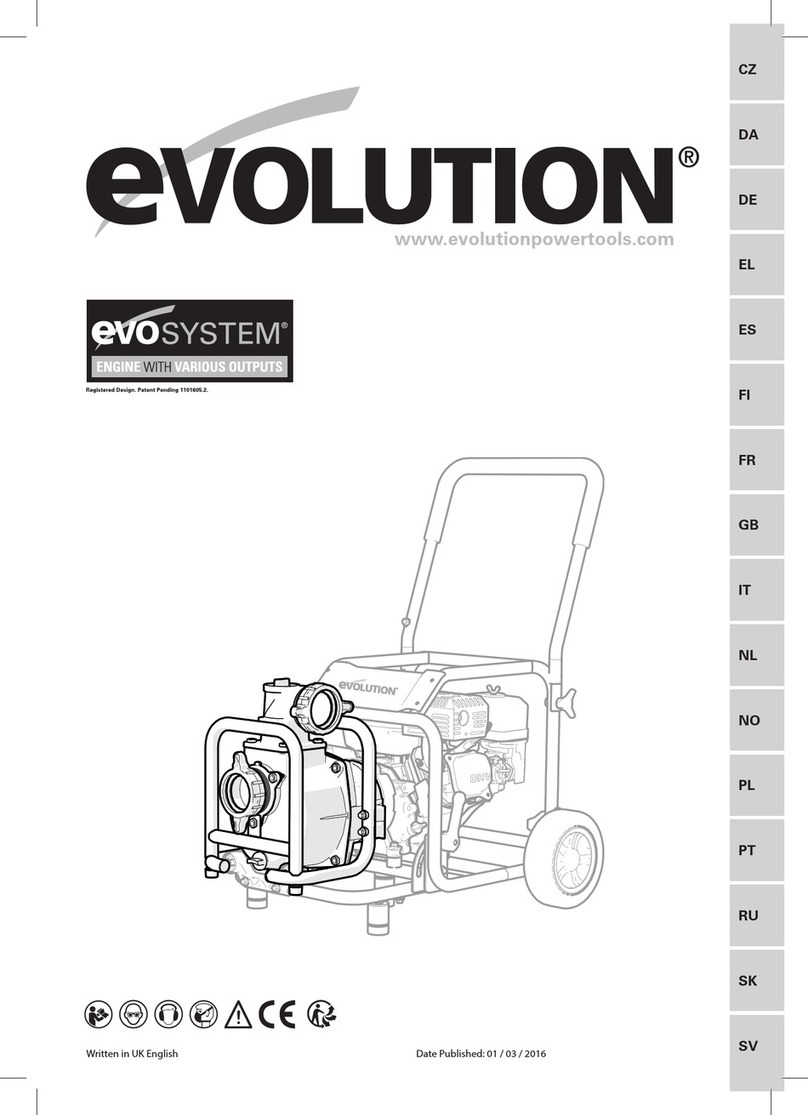
Evolution DWP1000 Operation instructions

®
ORIGINAL MANUAL
Please read instructions before operating this tool
DWP1000 DIRTY WATER PUMP
®
®
SV
SK
RU
PT
PL
NO
NL
IT
GB
FR
FI
ES
EL
DE
DA
CZ

®
CONNECT OUTPUT
QUICK REFERENCE GUIDE
STEP 1...
LINE-UP 3 LOCATING PINS,
AS ARROWS INDICATE
STEP 3...
APPLY GENTLE HORIZONTAL PRESSURE
WITH AN OPEN-HANDED FLAT-PALM,
AS ARROW INDICATES AND LOCK-IN
DO NOT...
APPLY SEVERE DIAGONAL DOWN-WARD
PRESSURE AS ARROW INDICATES. DOING
SO MAY DAMAGE THE EVO-SYSTEM!
STEP 2...
LINE-UP 2 REAR STABILISER PINS,
AS ARROWS INDICATE
®

Download a FREE QR READER APP
and scan the QR CODE (below).
Instantly watch the HD Evo-System Video on your Smart Phone.
Make sure the HD setting is on.
If you don’t have a Smart Phone, you can also watch all Evolution’s videos online.
QR CODE
SEEING IS BELIEVING!
SV
SK
RU
PT
PL
NO
NL
IT
GB
FR
FI
ES
EL
DE
DA
CZ

118
www.evolutionbuild.com
®
TABLE OF CONTENTS
EC - Declaration of Conformity 118
Important Information 119
Evolution Limited Guarantee 119
General Safety Rules 119
Engine Driven Water Pumps 121
Additional Specific Safety Rules 121
Symbols & Labels 122
Specifications 122
Machine Overview 123
Assembly 125
Operation 127
Maintenance 129
Environmental Protection 129
EC - DECLARATION OF CONFORMITY
We, manufacturer and importer
Evolution Power Tools Ltd.
Venture One
Sheffield
S20 3FR
Declare that the product;
Evolution DWP1000 Dirty Water Pump
Part numbers:
DWP1000
Complies with the essential requirements of
the following European Directives:
89/336/EEC – EMC Directive
2006/95/EC – Low Voltage Directive
98/37/EEC - Machinery Directive
2000/14/EC – Noise Directive
The following standards
have been applied:
EN 809/A1: 2009
EN ISO 1498: 2009
Authorised by
Mr Matthew J Gavins
Managing Director
1 September 2011
All documentation is held on file at the
above address and is available, on request
for review.
NOTICE:
A parts diagram can be downloaded from
www.evolutionpowertools.co.uk/evosystem.html

119
www.evolutionbuild.com
®
SV
SK
RU
PT
PL
NO
NL
IT
GB
FR
FI
ES
EL
DE
DA
CZ
IMPORTANT
Please read these operating and safety
instructions carefully and completely. For
your own safety, if you are uncertain about
any aspect of using this equipment please
access the relevant Technical Helpline,
the number of which can be found on the
Evolution Power Tools website. We operate
several Helplines throughout our worldwide
organization, but Technical help is also
available from your supplier.
WEB
www.evolutionpowertools.com
EMAIL
EVOLUTION DWP1000 WATER PUMP
Congratulations on your purchase of an
Evolution Power Tools DWP1000 WATER
PUMP. Please complete your product
registration online to validate your machine’s
warranty period and ensure prompt service if
needed. We sincerely thank you for selecting
a product from Evolution Power Tools.
EVOLUTION LIMITED GUARANTEE
Evolution Power Tools reserves the right
to make improvements and modifications
to the product design without prior notice.
Please refer to the guarantee registration
leaflet and/or the packaging for details of
the terms and conditions of the guarantee.
Evolution Power Tools will, within the
guarantee period, and from the original
date of purchase, repair or replace any
goods found to be defective in materials or
workmanship. This guarantee is void if the
tool being returned has been used beyond
the recommendations in the Instruction
Manual or if the machine has been damaged
by accident, neglect, or improper service.
This guarantee does not apply to machines
and / or components which have been altered,
changed, or modified in any way, or subjected
to use beyond recommended capacities
and specifications. Electrical components
are subject to respective manufacturers’
warranties. All goods returned defective
shall be returned prepaid freight to Evolution
Power Tools. Evolution Power Tools reserves
the right to optionally repair or replace it with
the same or equivalent item.
There is no warranty – written or verbal – for
consumable accessories such as (following
list not exhaustive) blades, cutters, drills,
chisels or paddles etc. In no event shall
Evolution Power Tools be liable for loss or
damage resulting directly or indirectly from
the use of our merchandise or from any
other cause. Evolution Power Tools is not
liable for any costs incurred on such goods
or consequential damages. No officer,
employee or agent of Evolution Power Tools
is authorized to make oral representations of
fitness or to waive any of the foregoing terms
of sale and none shall be binding on Evolution
Power Tools.
Questions relating to this limited guarantee
should be directed to the company’s head
office, or call the appropriate Helpline number.
GENERAL SAFETY RULES
WARNING: Read all instructions. Failure to
follow all instructions listed below may result
in electric shock, fire and/or serious injury.
SAVE THESE INSTRUCTIONS
1. Work area safety
a. Keep work area clean and well lit.
Cluttered and dark areas invite accidents.
b. Do not operate power tools in
explosive atmospheres, such as in the
presence of flammable liquids, gases or
dust. Power tools create sparks which may
ignite the dust or fumes.
c. Keep children and bystanders away
while operating a power tool.
Distractions can cause you to lose control.
2. Electrical safety
a. Power tool plugs must match the
outlet. Never modify the plug in any way.
Do not use any adapter plugs with earthed
(grounded) power tools.
Unmodified plugs and matching outlets will
reduce risk of electric shock.

120
www.evolutionbuild.com
®
b. Avoid body contact with earthed
or grounded surfaces such as pipes,
radiators, ranges and refrigerators. There
is an increased risk of electric shock if your
body is earthed or grounded.
c. Do not expose power tools to rain or
wet conditions. Water entering a power
tool will increase the risk of electric shock.
d. Do not abuse the cord. Never use the cord
for carrying, pulling or unplugging the power
tool. Keep cord away from heat, oil, sharp
edges or moving parts. Damaged or entangled
cords increase the risk of electric shock.
e. When operating a power tool outdoors,
use an extension cord suitable for outdoor
use. Use of a cord suitable for outdoor use
reduces the risk of electric shock.
f. If operating a power tool in a damp
location is unavoidable, use a residual
current device (RCD) protected supply. Use
of an RCD reduces the risk of electric shock.
3. Personal safety
a. Stay alert, watch what you are doing
and use common sense when operating
a power tool. Do not use a power tool
while you are tired or under the influence of
drugs, alcohol or medication. A moment of
inattention while operating power tools may
result in serious personal injury.
b. Use safety equipment. Always wear
eye protection. Safety equipment such as
dust mask, non-skid safety shoes, hard hat,
or hearing protection used for appropriate
conditions will reduce personal injuries.
c. Avoid accidental starting. Ensure the
switch is in the off-position before plugging
in. Carrying power tools with your finger on
the switch or plugging in power tools that
have the switch on invites accidents.
d. Remove any adjusting key or spanner
before turning the power tool on. A spanner
or a key left attached to a rotating part of the
power tool may result in personal injury.
e. Do not overreach. Keep proper footing
and balance at all times. This enables better
control of the power tool in unexpected
situations.
f. Dress properly. Do not wear loose
clothing or jewellery. Keep your hair, clothing
and gloves away from moving parts. Loose
clothes, jewellery or long hair can be caught
in moving parts.
g. If devices are provided for the connection
of dust extraction and collection facilities,
ensure these are connected and properly
used. Use of these devices can reduce dust
related hazards.
4. Power tool use and care
a. Do not force the power tool. Use the
correct power tool for your application.
The correct power tool will do the job better
and safer when used at the rate for which it
was designed.
b. Do not use the power tool if the switch
does not turn it on and off. Any power tool
that cannot be controlled with the switch is
dangerous and must be repaired.
c. Disconnect the plug from the power
source before making any adjustments,
changing accessories, or storing power
tools. Such preventive safety measures reduce
the risk of starting the power tool accidentally.
d. Store idle power tools out of the reach
of children and do not allow persons
unfamiliar with the power tool or these
instructions to operate the power tool.
Power tools are dangerous in the hands of
untrained users.
e. Maintain power tools. Check for
misalignment or binding of moving parts,
breakage of parts and any other condition
that may affect the power tools operation.
If damaged, have the power tool repaired
before use. Many accidents are caused by
poorly maintained power tools.
f. Keep cutting tools sharp and clean.
Properly maintained cutting tools with sharp
cutting edges are less likely to bind and are
easier to control.
g. Use the power tool, accessories
and tool bits etc., in accordance with
these instructions and in the manner
intended for the particular type of power
tool, taking into account the working
conditions and the work to be performed.
Use of the power tool for operations
different from intended could result in a
hazardous situation.
5. Service
Have your power tool serviced by a
qualified repair person using only genuine
replacement parts.
This will ensure that the safety of the power
tool is properly maintained.

121
www.evolutionbuild.com
®
SV
SK
RU
PT
PL
NO
NL
IT
GB
FR
FI
ES
EL
DE
DA
CZ
SAFETY INSTRUCTIONS FOR
ENGINE DRIVEN WATER PUMPS
a. Petrol or diesel powered engines must
never be used in unventilated closed
spaces. The exhaust fumes produced
are highly toxic and can cause ‘Carbon
Monoxide Poisoning’ which will cause
drowsiness and ultimately death. It is only
permissible to run a petrol engine indoors
if the building can be very well ventilated
and the exhaust fumes can be captured and
ducted to the outside through an exhaust
extraction/scavenger system
b. The Engine/Water Pump should be
positioned on a firm level surface. The
wheels should be locked, so that the engine
cannot move during operation.
c. The engine should not be run at speeds
that exceed the maximum speed on
the rating plate. Operating an engine at
excessive speeds increases the likelihood of
component failure and consequent accidents.
d. Do not tamper with components that
regulate the engines speed. You may alter
the factory set running parameters.
e. Use only the type of fuel listed in the
Evo-System Evo200 Engine Instruction
Manual. Using fuel with an octane rating
less than that specified can lead to excessive
engine wear and premature engine failure.
f. Keep the area around the engine clear,
clean and tidy. Never allow any combustible
material (timber, plastic, cardboard, canvas
etc) near a running engine.
g. Do not use in or near to potentially
explosive atmospheres. Dust laden
atmospheres as can be found in some
industrial buildings (Flour Mills, Timber Mills)
have an explosive potential.
h. Regularly check the fuel system for
leaks. Hoses and unions should be
checked for deterioration or chafing.
Check the fuel tank for damage or for a
poorly fitting or worn fuel cap. Any defects
must be rectified before the engine is used.
i. Always stop the engine and allow it
to cool down before refuelling. Try to
avoid any fuel spillage (often caused by
‘overfilling’ the tank) and clean up any spilt
fuel immediately. The application of dry sand
is an effective way of neutralising fuel spills.
j. Do not allow the engine to run out
of fuel. Surging of the engine as it uses
the last of the fuel could cause damage to
connected equipment.
k. When transporting the engine in a
vehicle ensure that the fuel tap is turned
off. To minimise the risk of fuel spillage the
engine should be secured by ropes etc to the
load area of the vehicle so that it cannot move
during transportation. The engine should be
secured in as level an attitude as possible.
l. For long term storage we recommend
that the fuel system of the engine is
drained. During long term storage additives
in modern fuels can precipitate from the fuel
and block jets and valves in the fuel system.
m. Store the machine in a secure and well
ventilated area. Unauthorised personnel
should not have access to this machine.
ADDITIONAL SPECIFIC SAFETY RULES
a. Position the pump carefully and ensure
that it cannot move during operation.
It may be desirable to chock the wheels in
addition to applying the wheel brake.
b. Keep the immediate area around the
pump clear. Ensure that no combustible
materials can come into contact with the
engine.
c. Always fit an inlet strainer to the inlet
hose. This will prevent large stones or other
debris from being drawn up into the pump
body and causing damage.
d. Keep the inlet filter clean. During
operation the inlet filter could become
blocked, restricting water flow and
imposing additional strain on the engine.
e. Position the water discharge (outlet
pipe) well away from the pump. Keep the
pump and the engine as dry as possible.
f. Do not use this equipment to pump
petrol (or any other flammable liquids)
or other corrosive liquids. This pump is
designed to pump Water Only.
g. Never run the pump dry. Always fill the
pump (prime) with water before starting.
h. Never direct the discharged water
towards electrical equipment or wiring.
Water can severely damage electrical
equipment can potentially pose a serious
fire hazard.
i. Always use at least 300mm of flexible
hose to couple any rigid piping to the
pump. Coupling rigid piping directly to the
pump can impose stresses and strains

122
www.evolutionbuild.com
®
beyond the pumps designed capacity.
j. Observe all safety rules for the operation
of the engine as outlined in the relevant
Instruction Manual. Observe particularly the
refuelling procedures and safety rules.
SYMBOLS & LABELS
WARNING: Do not operate machine if
warning and/or instruction labels are missing
or damaged. Contact Evolution Power Tools
for relacement labels.
Symbol Description
Read the Manual
Wear Safety
Goggles
Wear Ear Protection
Wear Dust Protection
Warning
CAUTION:
Hot exhaust
Do not touch
CAUTION: This is a
4 stroke engine. Fill
with unleaded petrol
only. Do not fill with
diesel oil.
Allow motor to cool
before opening the
fuel cap.
The vapour is
extremely flammable
and may ignite on
contact with a hot
surface or flames.
DWP1000 WATER PUMP SPECIFICATION
Inlet & Outlet Diameter: 75mm
------------------------------------------------------------
Pump Lift: 28 metres
------------------------------------------------------------
Suction Height: 8 metres
------------------------------------------------------------
Flow Rate: 1000 Litres/min
------------------------------------------------------------
Optional Accessories:
Suction Hose (Rigid)
Discharge Hose (Lay Flat)
Inlet Strainer
------------------------------------------------------------
Weight: 10.7kg
Note: The Evo-System Engine Driven Water
Pump is designed for pumping water. It will
also pump water containing small solids in
suspension (max grain structure 8mm).
It is not designed to pump slurry, sludge,
sand or mud. The pump is fitted with an
open impellor. A suction filter should always
be used on the inlet hose to ensure that
large stones or debris etc are not sucked up
into the pump body. Damage can result if
large particles are drawn into the pump body.
CAUTION
HOT SURFACE. DO NOT TOUCH.
UNLEADED
PETROL ONLY!
HIGHLY FLAMMABLE.

123
www.evolutionbuild.com
®
SV
SK
RU
PT
PL
NO
NL
IT
GB
FR
FI
ES
EL
DE
DA
CZ
1. Evo-System Engine
2. DWP1000 Water Pump
3. Inlet Port
4. Outlet Port
5. Filler Plug
6. Drain Plug
2
1
3
4
5
6
Machine Overview
General view of Water Pump connected to the Engine Unit.

124
www.evolutionbuild.com
®
1. Evo-System Engine
2. DWP1000 Water Pump
3. Filler Plug
4. Pump Drain Plug
5. Fuel Tap Switch / Choke on/off
6. On/Off switch
7. Foot brake
6
7
5
2
1
3
4
Machine Overview
General view of Water Pump connected to the Engine Unit.

125
www.evolutionbuild.com
®
SV
SK
RU
PT
PL
NO
NL
IT
GB
FR
FI
ES
EL
DE
DA
CZ
Fig 1a
(LH view of 3 locating pins)
Fig 1b
(RH view of 3 locating pins)
Fig 1c
(showing 2 rear stabiliser pins)
ASSEMBLY
1. Connecting the DWP100
Water Pump to the Evo-System Engine
Note: Your Evolution Pump is designed to be connected
to and powered by the Evo-System Engine. Do not try to
connect this machine to any other power source. Your Evo-
System Engine has a unique patented coupling that enables
a variety of Evo-System accessories to be connected to and
be driven by this machine.
This coupling is engineered to very fine tolerances and must
be kept clean and free from dirt, debris etc.
A cover for coupling protection is provided with each
accessory and should be used whenever the accessory is
‘remote’ from the engine.
If you experience difficulty in accessory connection, it could be
because the accessory location pins, or the annuli of either the
accessory or the engine are contaminated or damaged.
Preparing the Engine for accessory connection:
Note: The Evo-System Engine has a micro switch
incorporated within the coupling design that senses
when an accessory has been successfully attached to the
machine. The engine will not start without an accessory
being successfully connected. It cannot be run as a ‘stand
alone’ machine.
• Lock the Transportation Wheels using the wheelbrake.
• Release the Accessory Mounting Frame by rotating the
locking levers to their unlocked (down) position and push
levers in.
• Deploy the Accessory Mounting Frame.
• Lock the frame into position by pulling out and returning
the locking levers to their locked (upright) position.
Pump connection
Note: The Pump is equipped with 3 locating pins and 2
rear stabilising pins. The 3 locating pins lock into the ‘Uni-
coupling’. The other 2 stabilising pins slide into the sockets
in the Accessory Mounting Frame.
• Hold the accessory by its external frame and offer it up to the
engine. Visually align the 3 locating pins (Fig.1a & Fig.1b)
and 2 rear stabilising pins (Fig.1c). Enlist competent help
if necessary.
• Holding onto a convenient part of the external engine
frame can aid the operator achieving and maintaining
alignment when connecting an accessory.
• Gently push the accessory into the engine. Keep the
3 locating pins and the 2 stabilising pins aligned with
their respective docking positions. The internal coupling
between the engine and the accessory will be made

126
www.evolutionbuild.com
®
Fig 2
automatically. No component alignment or adjustments are
necessary.
• Be gentle and patient, the coupling is precisely engineered
and no great force is required to connect the accessories.
Once the operator has mastered the ‘technique’,
accessory connection will become straight forward.
• Firmly push the engine and accessory together until the
‘click’ of docking is heard. The Uni-coupling release lever
will return to its neutral position. (Fig. 2)
2. Connecting the Hoses
Note: Hoses should be independently supported. They
should not be carried by the pump.
• Check the integrity of the hoses. There must be no
damage to either the inlet or discharge hose.
• Connect the hoses to the pump body using the hose
clamps and gaskets supplied. (Fig. 3)
Check that the gaskets are correctly seated.
Note: Any air leak in the inlet (suction) hose could prevent
priming and reduce the flow rate of the pump.
• If using fixed steel pipework always ensure that the
connection to the pump body is made with a piece of
flexible hose at least 300mm long.
• Keep all pipes and hoses as short and straight as possible,
and try to avoid sharp turns.
• Ensure that the discharged water has an adequate
drainage channel.
• If any flexible hose is laid across a roadway or similar, protect
the hose from vehicular traffic with wooden planking.
• A suction strainer should be attached to the end of the
inlet hose. It is important to prevent large pieces of debris
or stones etc from being drawn into the pump body and
damaging the impellor.
• The inlet hose may need to be weighted down to keep it
in position in the pond or excavation pit etc.
Note: If a vehicle were to run over an unprotected flexible
hose, the instant crushing of the hose, and consequent
stoppage of the water flow could cause ‘hydraulic shock’.
This could damage the pump and/or its fittings.
Fig 3

127
www.evolutionbuild.com
®
SV
SK
RU
PT
PL
NO
NL
IT
GB
FR
FI
ES
EL
DE
DA
CZ
3. Check Valve
If the discharge hose has a vertical lift of more than 10
metres, we recommend that a check valve (not supplied)
is installed in the hose near the pump. This will prevent
potentially destructive water hammer occurring when the
pump is shut down.
OPERATION
1. Siting the Equipment
Note: The Evo-System Engine with the pump attached
should be sited with reference to the instructions given
in the Evolution Engine Instruction Manual (SAFETY
INSTRUCTIONS FOR EVO-SYSTEM ENGINE).
Site the equipment and check:
• The equipment is as level as possible.
• The wheel brake is applied.
• The surface is firm and stable.
• No combustible materials are close by.
• The area is well ventilated, and that there is no danger
from the expelled exhaust gases.
Note: The Evo-System Engine is fitted with a low oil level
shut down feature which protects the engine from damage
due to lack of lubrication. This feature could be activated if
the machine is sited on a slope of greater than 100.
2. Initial Priming of the Pump
Note: The pump is self-priming only when the pump body is
filled with water.
• Remove the filler plug from the top of the pump. (Fig. 4)
• Fill the pump fully with water. Do not leave any air gap.
• Replace the filler plug. Refilling is only necessary if the
pump has been drained or the water supply has been lost.
Note: All water pumps can be ‘temperamental’ when
priming. Initial priming can sometimes be assisted by
temporarily restricting the output flow (the operator could
place a foot on the outlet hose) until priming is achieved.
Never allow the pump to run ‘dry’ for any prolonged period.
Fig 4

128
www.evolutionbuild.com
®
3. Starting the Evolution Evo-System Engine
The procedure for starting the engine can be found
in the Instruction Manual for the Evolution Engine.
4. Pump Output
Note: Output of the pump is determined by the speed of the
engine and by the length and elevation of the pipe runs.
5. Shutting Down
To shut down pumping operations:
• Stop the Engine by turning the ignition switch to the
‘OFF’ position. (Fig. 5)
• Close the fuel tap. (Fig. 6)
OFF
ON
Fig 5
Fig 6

129
www.evolutionbuild.com
®
SV
SK
RU
PT
PL
NO
NL
IT
GB
FR
FI
ES
EL
DE
DA
CZ
MAINTENANCE
Note: The maintenance schedule for the Evolution Evo-System
Engine can be found in the dedicated Instruction Manual.
• Keep the pump clean and regularly check the tightness of
all bolts and fastenings.
• Keep the annular ring scrupulously clean and free
from debris. (Fig. 7)
• Keep the 3 locating pins and 2 stabilising pins clean and
occasionally lightly spray with a silicone oil based spray.
(Fig. 8)
• Keep all Uni-coupling mating surfaces clean and free from
dirt or debris.
• At every connection or disconnection check the accessory
drive cog for dirt or debris contamination, particularly between
the teeth. Clean and lubricate as per the instructions for the
engine drive clutch (found in Engine Instruction Manual).
Do not spray lubricant onto the ‘drive cog’.
• If the pump has been used to pump salty or contaminated
water of any kind, it should be thoroughly flushed with
clean water (both the inside and the outside) as soon as
possible after use. The pump body should be drained,
allowed to dry and the drain plug replaced.
• Whenever the accessory is ‘remote’ from the engine the
coupling protection cover (provided) should be used to
protect the coupling.
LONG TERM STORAGE
We recommend that both hoses (water input and water
output) are removed from the pump. Drain the pump body
of any residual water by removing the drain plug. Store in a
secure, dry location, covered by a clean cloth to prevent the
ingress of dirt, debris etc.
ENVIRONMENTAL PROTECTION
Was electrical or mechanical products should not be
disposed of with household waste. Please recycle where
facilities exist. Check with your Local Authority or retailer for
recycling advice.
Fig 7 (arrows show inner wall of
annular ring)
Fig 8 (3 locating pins & 2
stabilishing pins highlighted)

®
Did you know
you can also buy...
...with more outputs
available SOON!
®
PRESSURE WASHER OUTPUT
®
EVO-SYSTEM ENGINE
®
GENERATOR OUTPUT
®
WATER PUMP OUTPUT
Other manuals for DWP1000
1
Table of contents
Other Evolution Water Pump manuals
Popular Water Pump manuals by other brands

SAINT-GOBAIN
SAINT-GOBAIN PFD4 AstiPure operating instructions

Wilo
Wilo Drain TM 32 Installation and operating instructions

wb compagnie
wb compagnie XC100009 manual

Atlas Copco
Atlas Copco GHS 350 VSD+ Instruction book

EINHELL Bavaria
EINHELL Bavaria BPW 48 operating instructions

Rotech
Rotech ANSI Series Installation, operation & maintenance manual

ASP
ASP FSPO Installation, operation and maintenance instructions

Carver Pump
Carver Pump G2S Installation, operation and maintenance instructions

blueZPring
blueZPring SOLIDA C instruction manual

Espina
Espina XTP105 instruction manual

STA-RITE
STA-RITE 10DOM05221 owner's manual

Bavaria
Bavaria BWW 830 Original operating instructions