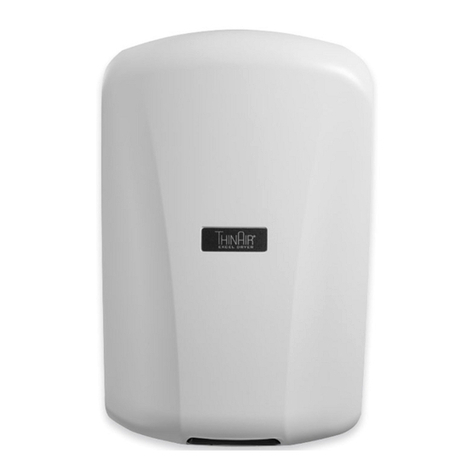
Excel Dryer ThinAir TA-ABS Installation instructions

EXCEL DRYER, INC 1.800.255.9235 EXCELDRYER.COM ADMIN@EXCELDRYER.COM
357 CHESTNUT STREET, EAST LONGMEADOW, MA 01028 3/2018 1
READ AND SAVE THESE INSTRUCTIONS
ThinAir®HAND DRYER
INSTALLATION AND OWNER’S MANUAL
Dryer Model
Serial Number
Date Of Purchase
MODELS: TA - ABS
5-YEAR LIMITED WARRANTY (U.S. Only)
1. Thisproductiswarrantedtobefreeofmanufacturingdefectsforve(5)years(one[1]yearonPre-Filter)fromthedateofshipment
fromtheManufacturer’sfactoryat357ChestnutSt.,EastLongmeadow,Massachusetts01028.Thiswarrantyexplicitlyexcludes
normalwearandtearontheFilterorPre-Filter,aswellasfaultyinstallation,accident,misuseorvandalism.
Intheeventofabreachofthewarrantydescribedabove,theOwnershallhaveeitheroneofthefollowingremedies:
a.TheOwnershallreturnthedefectiveproducttotheManufacturer,postageprepaid,andtheManufacturershallrepairsaidproduct
withinareasonabletimeandfreeofcharge,providedthatsaidproductisreturnedwithinthestatedperiodabovefromthedateof
originalshipmentfromtheManufacturer’sfactoryinEastLongmeadow,Massachusetts;and,providedfurtherthatsaiddefectis
notduetofaultyinstallation,accident,misuse,orvandalism;or
b.TheOwnermaynotifytheManufacturerbytelephoneorinwritingofthedefectand,withinareasonabletime,theManufacturer
shallsendasuitablereplacementparttoremedysaiddefect,andOwnershallbechargedforsaidpartatthecurrentpricelevel.
TheOwnermayreturnthedefectiveparttotheManufacturer,postageprepaid,alongwiththeserialnumberofthedefective
productandtheManufacturerwillthenissuetotheOwnerafullcreditfortherepairpart,includingoutgoingpostage(withinthe
ContinentalU.S.only).Saidremedyisavailableonlywithinthestatedperiodstatedabovefromthedateoforiginalshipmentof
theproductfromtheManufacturer’sfactoryinEastLongmeadow,Massachusetts;andprovidedfurtherthatsaiddefectisnotdue
tofaultyinstallation,accident,misuse,orvandalism.
2.Anyimpliedwarrantiesofmerchantabilityortnessforaparticularpurposeareherebylimitedtothedurationoftheexpress
writtenwarrantycontainedinparagraphone(1);namely,ve(5)years(one[1]yearPre-Filter)fromthedateofshipmentfromthe
Manufacturer’sfactoryinEastLongmeadow,Massachusetts.
3. IfyouresideoutsideoftheU.S.,pleasecontactthedistributoryoupurchasedtheThinAirfromforwarrantysupport.
4.Therearenootherwarrantiesandremediesexceptascontainedherein.ThiswarrantyshallinuretothebenetoftheOwners,
SuccessorsandAssigns.
Hand Dryer Tamper-ProofWrench
Knockout Gasket
Installation and Owner’s Manual
CONTENTS OF BOX
1 2 3
120V 8Amp
MODEL INFO
208–240V 4Amp
230V 3.9Amp
SB

EXCEL DRYER, INC 1.800.255.9235 EXCELDRYER.COM ADMIN@EXCELDRYER.COM
357 CHESTNUT STREET, EAST LONGMEADOW, MA 01028 3/2018 2
READ AND SAVE THESE INSTRUCTIONS
WARNING: For proper electrical connections, check your local building codes.
Your unit must be installed by a qualied, licensed electrician.
PRE-INSTALLATION WIRING
• Checkthattheelectricalsupplycorrespondstothatshown
on the rating sticker of unit. If the dryer is connected to any
electrical supply other than that stated on the rating sticker of
theunit,permanentdamageorimproper,unsafeoperationof
the unit may result.
• Make sure electricity is switched off at the main panel before
installing,maintainingorcleaningthishanddryer.Dryer
must be installed in accordance with current local wiring and
building regulations.
• Do not wire this hand dryer into the lighting circuit. It must be
protected by an independent circuit.
• Dryer is intended to be permanently connected to power
supply,andmustbeproperlygrounded.
SAFETY
• Troubleshooting and internal maintenance must be performed
byqualiedservicepersonnel.
• Do not use any power wash equipment for cleaning on or
near this unit.
• Do not use for drying hair.
• Do not obstruct air inlets or outlets.
1. Disconnectthepowersourcepreviouslybroughttothehand
dryerlocation(seepre-installationwiringabove).
2. UsetheTamper-ProofWrenchsuppliedandremovethe
Tamper-ProofBoltonbottomofcoverliftingupwardsto
removecoverfrombaseplate.
3. Ifelectricalwiringentryistobemadefromtherear,remove
theappropriatepre-formedknockoutonthebaseplate.
Ifentryistobemadefromtheside,knockoutthepreformed
areaontherightsideofcoverforyoursupplyconnection
usingknockoutgasketprovided.Arigidconduitmustbeused.
4. Select the appropriate mounting height for dryer (Table 1)
andfastener,asrecommended(Table2).Thereshould
benoobstructionbetweenthehanddryerandtheoor.
Ifmountingoveracountertop,distancefromcountertodryer
mustbe15”(381mm)minimum.
CAUTION: Do not use Base Plate as a guide when drilling.
Make sure no pipe work (gas, water, air) or any electrical cables
or wires are located directly behind the area to be drilled.
5. AttachBasePlateatthefourcornerstosmoothwall.
Identifythevoltageofyourdryerfromtheratingstickerof
the unit. Then connect to a dedicated branch circuit not
exceeding20Amp.
6. Useoneof2knockoutsprovidedforserviceentryonbackof
BasePlate.Ifusingsurfacewiringuseknockoutinrightside
ofcover.UseKnockoutGasketsuppliedaroundconduitfor
water seal. See Mounting Details.
7. Secureelectricalwiringtoterminalsasindicatedbythe
schematicafxedtoblowerhousing.Anidentiedground
connectionpointissuppliedontheBasePlateforyour
equipment ground wire. Dryers should be installed per local
code requirements.
8. CarefullyreplaceCoverbyinsertingtopofcoverover
bracketandtiltingdownward.UseTamper-ProofBolt
previouslyremovedinstep2.
9. Restorepowerandtestforproperoperation.Inmultiple
installations,makesuretheserialnumbermarkedonthe
insidematchesthecovernumber.
10.ReturnTamper-ProofWrenchtoowner.
SUGGETSTED MOUNTING HEIGHT
from oor to bottom of dryer:
Men 45"(114cm)
Women 43"(109cm)
Teenagers 41"(104cm)
SmallChildren 35"(89cm)
Accessible 37"(94cm)
MOUNTING HARDWARE
Recommended Fastener (not supplied):
MasonryWall ½”ExpansionSleevewith¼”LagBolt
HollowWall ¼”WingTypeToggleBolt
WoodenWall ¼”LagScrewWithWasher
1 2
INSTALLATION INSTRUCTIONS
TABLE1 TABLE2
IMPORTANT SAFETY INSTRUCTIONS

EXCEL DRYER, INC 1.800.255.9235 EXCELDRYER.COM ADMIN@EXCELDRYER.COM
357 CHESTNUT STREET, EAST LONGMEADOW, MA 01028 3/2018 3
READ AND SAVE THESE INSTRUCTIONS
WARNING: TO REDUCE THE RISK OF FIRE, ELECTRIC SHOCK OR INJURY TO
PERSONS, OBSERVE THE FOLLOWING:
A. Use this unit only in the manner intended by the manufacturer.
B. Before servicing or cleaning unit, switch power off at service panel and lock the
service disconnecting means to prevent power from being switched on accidentally.
When the service disconnecting means cannot be locked, securely fasten a
prominent warning device, such as a tag, to the service panel.
CLEANING / MAINTENANCE
OUTSIDE: GentlywashCover(includingairinlet
holes) using a soft cloth or sponge and
a mild soap or detergent with lukewarm
water to loosen dirt and grime.
INSIDE: Excelrecommendsinspectingtheinside
of the dryer and cleaning as required at
leastonceperyear,orifperformance
diminishes.Heavierusage,oran
environmentthatcontainsexcessivelint,
dustorotherparticles,requiresmore
frequentcleaning.Lintontheairinlet,the
Pre-Filter,orotherinternalpartsofdryer
willreduceefciencyandshortenthelife
of the working parts.
TO CLEAN: Shutoffpowertodryeratservice
connection.UsestheTamper-Proof
Wrenchsuppliedandremovethe
Tamper-ProofBoltonbottomofcover
liftingupwardstoremovecoverfrom
base plate. Gently clean all parts using
asmall,softbrush.UnclipthePre-Filter,
rinsewithwateranddry.Re-install.
TROUBLESHOOTING
Dryer does not turn on
1.Checkpowertotheunitandconnections.Verifydryeris
receivingvoltageatTerminalBlock.
2. CheckREDserviceLEDlightforthefollowing:
Light is ON–PlacehandsunderSensor.Iflightstayson,
thenreplaceSensor.Iflightgoesoff,checktomakesure
wiringiscorrect.IfOK,checkwireconnectingtoMotor.
IfbothareOK,replaceMotor.
Light is OFF–Checkforloose,disconnectedorimproper
wiring(SeewiringschematicinsidedryerCover),orreplace
ControlAssembly.
Light is FLASHING–SeeerrorcodesinCODEchart.
SENSOR RANGE ADJUSTMENT: If dryer will not turn on,
stays on, or stops working, it may be mounted too close to
a counter or object and has gone into lockout. If relocating
appliance is not possible, adjust the range of the Sensor.
Turn off power to dryer then turn the range adjustment on
the Control Assembly counterclockwise towards L (-) low to
decrease Sensor range.
Dryer does not shut off
1. May be mounted too close to a counter or object (adjust
Sensor range).
2. Checkforloose,disconnectedorimproperwiring(Referto
wiringschematicafxedtoblowerhousing).
3. ReplaceControlAssembly.
MOUNTING DETAILS
Dryer does not always turn on, or turns on by itself
1. May be mounted too close to counter or object (adjust
Sensor range).
2. CheckforforeignmaterialonOpticalSensornexttoAirOutlet.
3. CheckforloosewiresonControlAssembly.
4. ReplaceControlAssembly.
Dryer heats up but no air comes out
1. CheckwireconnectiontoMotor.
2. ReplaceMotor.
Dryer blows only cold air
1. Checkheatsettingoncontrol.
2. CheckforlooseconnectionstoHeatingElement.
3. ReplaceHeatingElement.
Dryer has a loss of air volume
1. Checkmotorspeedsettingoncontrol.
2. CheckforslowrunningMotororburningsmell.
Ifso,replaceMotor.
3. CheckPre-Filterforlintbuildup.Cleanbyremoving
Pre-FilterandrinseinwarmwaterthendryPre-Filter
before reinstalling.

EXCEL DRYER, INC 1.800.255.9235 EXCELDRYER.COM ADMIN@EXCELDRYER.COM
357 CHESTNUT STREET, EAST LONGMEADOW, MA 01028 3/2018 4
READ AND SAVE THESE INSTRUCTIONS
TA-1 Cover(includesnameplate)
TA-2 Tamper-ProofBolt
TA-3 Tamper-ProofWrench
TA-4 KnockoutGasket
TA-5 BracketCoverHook
TA-6 Nozzle
TA-7 OpticBracket
TA-8 OpticAssembly
TA-9 FingerGuard
TA-10 HeatingElementAssembly
TA-11 MuferHousing(output)
TA-12 MuferFoam(output)
TA-13 MotorGasketRing
TA-14 ClamshellUpper
TA-15 BracketCover
TA-16 ControlAssembly
TA-17 Motor
TA-18 MotorGasket
TA-19 Pre-lter(includesscreen)
TA-20 MuferFoam(input)
TA-21 MuferHousing(input)
TA-22 Clamshell(lower)
TA-23 BasePlate
TA-24 Nameplate
TA-25 Tube(pressure)
TA-26 TerminalBlock
PARTS LIST
Ref.No. Description
TROUBLESHOOTING (Continued)
If problem cannot be resolved with the above, please call the manufacturer at 1-800-255-9235
and one of our trained technicians will be happy to assist you.
CODE CHART
Codes are displayed by ashing the red LED in the sensor behind air outlet. Normal operation will be indicated by the red LED
being on when not drying and off when hands are under the sensor.
Dryer Maintenance Codes
1Short/1Longash CloggedPre-Filter CleanPre-Filter Dryer will still run
2Short/1Longash In lockout mode Clearobstruction Dryer stops until obstruction cleared
Motor Problem Codes
1Long/3shortashes Motorovercurrent Replacemotor Dryer will stop
1Long/4shortashes Motor under current Replacemotor Dryer will stop
Heater Problem Codes
2Long/3shortashes Shorted or incorrect heater Replaceheater Dryer will stop
2Long/4shortashes Open/broken heater Replaceheater Dryer will still run
Voltage Problem Codes
3Long/3shortashes Mainpanelovervoltage Checkincomingvoltage Dryer will stop
3Long/4shortashes Mainpanelundervoltage Checkincomingvoltage Dryer will stop
TIME TO THROW IN THE TOWEL
®
EXCEL DRYER INC • 1.800.255.9235 • EXCELDRYER.COM
2018
MARCH
18TAM0343
TA-1
TA-23
TA-2
TA-16
TA-15
TA-14
TA-24
TA-25
TA-26
TA-9
TA-7
TA-8
TA-22
TA-19
TA-20
TA-18
TA-21
TA-17
TA-3
TA-6
TA-5
TA-12
TA-13
TA-4
TA-10
TA-11
TA exploded view 4.cdr 12/13/2016 tek
TA exploded view
This manual suits for next models
1
Table of contents
Other Excel Dryer Dryer manuals
