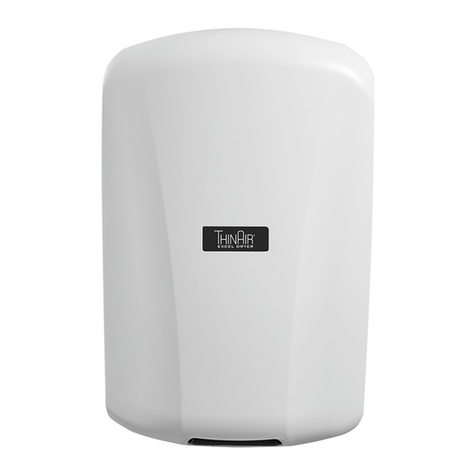
Excel XL-BW Installation instructions

EX CEL DRY ER, INC 1 . 8 0 0 . 2 5 5 . 9 2 3 5 EX CEL DRY ER. COM ADM IN@ EX CEL DRY ER. COM
3 5 7 CHESTNUT STREET, EAST L ONG M EADOW , M A 0 1 0 2 8 02/2016 1
READ AND SAVE THESE INSTRUCTIONS
X L ERATOR®AND X L ERATOReco®HAND DRY ER M ODEL S
INSTAL L ATION AND OW NER’ S M ANUAL
Dryer Model
Serial Number
Date Of Purchase
MODELS: X L - B W W G R C SB SI SP WITH OR WITHOUT SUFFIX:
5 - Y EAR L IM ITED W ARRANTY (U.S. Only)
1. Thisproductiswarrantedtobefreeofmanufacturingdefectsforve(5)years(one[1]yearonHEPAFilter&Pre-Filter)fromthe
dateofshipmentfromtheManufacturer’sfactoryat357ChestnutSt.,EastLongmeadow,Massachusetts01028.Thiswarranty
explicitlyexcludesnormalwearandtearontheFilterorPre-Filter,aswellasfaultyinstallation,accident,misuse,orvandalism.
Intheeventofabreachofthewarrantydescribedabove,theOwnershallhaveeitheroneofthefollowingremedies:
a. TheOwnershallreturnthedefectiveproducttotheManufacturer,postageprepaid,andtheManufacturershallrepairsaid
productwithinareasonabletimeandfreeofcharge,providedthatsaidproductisreturnedwithinthestatedperiodabove
from thedateoforiginalshipmentfromtheManufacturer’sfactoryinEastLongmeadow,Massachusetts;and,providedfurther
thatsaiddefectisnotduetofaultyinstallation,accident,misuse,orvandalism;or
b. TheOwnermaynotifytheManufacturerbytelephoneorinwritingofthedefectand,withinareasonabletime,the
Manufacturershallsendasuitablereplacementparttoremedysaiddefect,andOwnershallbechargedforsaidpartatthe
currentpricelevel.TheOwnermayreturnthedefectiveparttotheManufacturer,postageprepaid,alongwiththeserial
numberofthedefectiveproductandtheManufacturerwillthenissuetotheOwnerafullcreditfortherepairpart,including
outgoingpostage(withintheContinentalU.S.only).Saidremedyisavailableonlywithinthestatedperiodstatedabovefrom
thedateoforiginalshipmentoftheproductfromtheManufacturer’sfactoryinEastLongmeadow,Massachusetts,and
providedfurtherthatsaiddefectisnotduetofaultyinstallation,accident,misuse,orvandalism.
2. Anyimpliedwarrantiesofmerchantabilityortnessforaparticularpurposeareherebylimitedtothedurationoftheexpresswritten
warrantycontainedinparagraphone(1);namely,ve(5)years(one[1]yearonHEPAFilter&Pre-Filter)fromthedateofshipment
fromtheManufacturer’sfactoryinEastLongmeadow,Massachusetts.
3. Therearenootherwarrantiesandremediesexceptascontainedherein.ThiswarrantyshallinuretothebenetoftheOwners,
SuccessorsandAssigns.
Hand Dryer Tamper-ProofWrench Installation and Owner’s Manual
CONTENTS OF B OX
1 2 3
M ODEL INF O
HVECO
110–120V11.3–12.2A
208–277V5.6–6.2A
110–120V4.3–4.5AXLERATOReco
208–277V 2–2.2A XLERATOReco

EX CEL DRY ER, INC 1 . 8 0 0 . 2 5 5 . 9 2 3 5 EX CEL DRY ER. COM ADM IN@ EX CEL DRY ER. COM
3 5 7 CHESTNUT STREET, EAST L ONG M EADOW , M A 0 1 0 2 8 02/2016 2
READ AND SAVE THESE INSTRUCTIONS
W ARNING : F o r p r o p e r e l e c t r i c a l c o n n e c t i o n s , c h e c k y o u r l o c a l b u i l d i n g c o d e s .
Your unit must be installed by a qualied, licensed electrician.
P RE INSTAL L ATION W IRING
• Checkthattheelectricalsupplycorrespondstothatshown
ontheratingstickerofunit.Ifthedryerisconnectedtoany
electricalsupplyotherthanthatstatedontheratingstickerof
theunit,permanentdamageorimproper,unsafeoperationof
the unit may result.
• Makesureelectricityisswitchedoffatthemainpanelbefore
installing,maintainingorcleaningthishanddryer.Dryermust
be installed in accordance with current local wiring and
building regulations.
• Do not wire this hand dryer into the lighting circuit. It must be
protected by an independent circuit.
• Dryer is intended to be permanently connected to power
supply,andmustbeproperlygrounded.
SAF ETY
• Troubleshooting and internal maintenance must be performed
byqualiedservicepersonnel.
• Do not use any power wash equipment for cleaning on or
near this unit.
• DonotusetheXLERATORdryerfordryinghair.
• Do not obstruct air inlets or outlets.
1. Disconnectthepowersourcepreviouslybroughttothehand
dryerlocation(seepreinstallationwiringabove).
2. UsetheTamper-ProofWrenchsuppliedtoremovethe2
covermountingscrewsandliftcovertoremovefrombase
plate.
3. Ifelectricalwiringentryistobemadefromtherear,remove
theappropriatepre-formedknockoutonthebaseplate.If
entryistobemadefromthebottom,knockoutthe
pre-formedareaonthecoverforyoursupplyconnection.
Arigidconduitmustbeused.
4. Selecttheappropriatemountingheightfordryer(Table1)
andfastener,asrecommended(Table2).Thereshouldbe
noobstructionbetweenthehanddryerandtheoor.If
mountingoveracountertop,distancefromcountertodryer
mustbe15”(381mm)minimum.
CAUTION: Do not use Base Plate as a guide when drilling.
Make sure no pipe work (gas, water, air) or any electrical cables
or wires are located directly behind the area to be drilled.
5. AttachBasePlateatthefourcornerstosmoothwall.
For mostsecureinstallation,use2additionalmountingholes
asshownindrawing.Fornon-HEPAunits,removeControl
Assemblytoaccesstherightsidemountinghole.
For HEPAunits,removelteronlytoaccesstherightside
mounting hole.
6. Identifythevoltageofyourdryerfromtheratingstickerofthe
unit. Then connect to a dedicated branch circuit not
exceeding20Amp.
7. Secureelectricalwiringtoterminalsasindicatedbythe
schematicafxedtoblowerhousing.Anidentiedground
connectionpointissuppliedontheBasePlateforyour
equipment ground wire. Dryers should be installed per local
code requirements.
8. CarefullyreplaceCoverusingthe2screwspreviously
removedinstep2.Restorepowerandtestforproper
operation.Inmultipleinstallations,makesuretheserial
numbermarkedontheinsidematchesthecovernumber.
9. It is highly recommended that a bead of silicone sealant be
placedaroundtheoutsideofthecoveratthewalltoprotect
dryer from internal corrosion caused by wash water and
cleaning solutions.
10.ReturnTamper-ProofWrenchad er aal toowner.
SUG G ESTED M OUNTING HEIG HT
from oor to bottom of dryer:
Men 45"(114cm)
Women 43"(109cm)
Teenagers 41"(104cm)
SmallChildren 35"(89cm)
Handicapped 37"(94cm)
M OUNTING HARDW ARE
Re c o m m e n d e d F a s t e n e r (not supplied):
MasonryWall ½”ExpansionSleevewith¼”LagBolt
HollowWall ¼”WingTypeToggleBolt
WoodenWall ¼”LagScrewWithWasher
1 2
INSTAL L ATION INSTRUCTIONS
TABLE1 TABLE2
IM P ORTANT SAF ETY INSTRUCTIONS
ADJUSTING THE HEAT OUTPUT AND MOTOR SPEED
The dryer is shipped set at maximum heat and motor speed.
To adjust, turn the corresponding knob (H=heater, M=Motor)
on the control assembly counterclockwise to desired setting.

EX CEL DRY ER, INC 1 . 8 0 0 . 2 5 5 . 9 2 3 5 EX CEL DRY ER. COM ADM IN@ EX CEL DRY ER. COM
3 5 7 CHESTNUT STREET, EAST L ONG M EADOW , M A 0 1 0 2 8 02/2016 3
READ AND SAVE THESE INSTRUCTIONS
W ARNING : TO REDUCE THE RISK OF F IRE, EL ECTRIC SHOCK OR INJ URY TO P ERSONS,
OB SERVE THE F OL L OW ING :
A. Us e t h i s u n i t o n l y i n t h e m a n n e r i n t e n d e d b y t h e m a n u f a c t u r e r .
B . B e f o r e s e r v i c i n g o r c l e a n i n g u n i t , s w i t c h p o w e r o f f a t s e r v i c e p a n e l a n d l o c k t h e s e r v i c e
d i s c o n n e c t i n g m e a n s t o p r e v e n t p o w e r f r o m b e i n g s w i t c h e d o n a c c i d e n t a l l y . W h e n t h e
s e r v i c e d i s c o n n e c t i n g m e a n s c a n n o t b e l o c k e d , s e c u r e l y f a s t e n a p r o m i n e n t w a r n i n g d e v i c e ,
s u c h a s a t a g , t o t h e s e r v i c e p a n e l .
CL EANING / M AINTENANCE
OUTSIDE GentlywashCover(includingairinletholes)usingasoftclothorspongeandamildsoapordetergentwith
lukewarmwatertoloosendirtandgrime.
INSIDE Excelrecommendsinspectingtheinsideofthedryerandcleaningasrequiredatleastonceperyear,orif
performancediminishes.Heavierusage,oranenvironmentthatcontainsexcessivelint,dustorotherparticles,
requiresmorefrequentcleaning.Lintontheairinlet,thePre-Filters(DryerorHEPAifsoequipped),orother
internalpartsofdryerwillreduceefciencyandshortenthelifeoftheworkingparts.
Toclean,shutoffpowertodryeratserviceconnection.RemoveCoverbyunscrewingthe2Tamper-ProofBolts
from sideofCoverwiththespecialTamper-ProofWrenchprovidedwitheachdryer.Useasmall,softbrushto
gentlycleanallparts.IfyourunitcontainsadryerPre-lterorHEPAFiltrationSystem,unclipthePre-Filter,rinse
thePre-Filterwithwateranddry.Re-install. DO NOT CL EAN THE HEP A F IL TER OR AL L OW IT TO COM E INTO
CONTACT W ITH W ATER.
TROUB L ESHOOTING
SIDEVIEW FRONTVIEW
FACINGWALL
Dryer does not turn on
1. Checkpowertotheunitandconnections.Verifydryerisreceivingthe correct
voltage at the TerminalBlock (check dryer label).
2. CheckREDserviceLEDlightnexttoairoutletonbottomofdryerfor
L i g h t i s ON–PlacehandsunderSensor.Iflightstayson,thenreplaceSensor.
Iflightgoesoff,checktomakesurewiringiscorrect.IfOK,checkwire
connectingtoMotor.IfbothareOK,replaceMotor.
L i g h t i s OF F –Checkforloose,disconnectedorimproperwiring(Seewiring
schematicinsidedryerCover),orreplaceControlAssembly.
L i g h t i s F L ASHING –SeeerrorcodesinCODEchart
SENSOR RANG E ADJ USTM ENT: If dryer will not turn on, stays on, or stops
working, it may be mounted too close to a counter or object and has gone into
lockout. If relocating appliance is not possible, adjust the range of the Sensor.
Turn off power to dryer then turn the range adjustment on the Control Assembly
counterclockwise towards L (-) low to decrease Sensor range.
Dryer does not shut off
1. May be mounted too close to a counter or object (adjust Sensor range).
2. Checkforloose,disconnectedorimproperwiringatControlAssembly(referto
wiringschematicafxedtoblowerhousing).
3. ReplaceControlAssembly.
Dryer does not always turn on, or turns on by itself
1. May be mounted too close to counter or object (adjust Sensor range).
2. CheckforforeignmaterialonOpticalSensornexttoAirOutlet.
3. CheckforloosewiresonControlAssembly.
4. ReplaceControlAssembly.
READ AND SAVE THESE INSTRUCTIONS

TROUB L ESHOOTING ( Co n t i n u e d )
*Does not apply to XLERATOReco models
**Only applies to HEPA models
If p r o b l e m c a n n o t b e r e s o l v e d w i t h t h e a b o v e , p l e a s e c a l l t h e m a n u f a c t u r e r a t 1 - 8 0 0 - 2 5 5 - 9 2 3 5
a n d o n e o f o u r t r a i n e d t e c h n i c i a n s w i l l b e h a p p y t o a s s i s t y o u .
XL1 Cover(includesNameplate)
XL2 Nameplate
XL3 Tamper-ProofBolt
XL4 Tamper-ProofWrench
XL5 AirOutlet(includesgasket)
XL6 TerminalBlock(includesscrews)
XL7 ControlAssembly&Sensor
XL8 HeatingElementAssembly*
XL 9 Motor
XL10 BasePlateAssembly
XL11 CoverMountingBrackets
XL12 HousingGrommet
XL 13 Housing Retainer
XL15 OpticsAssembly(Sensor)
XL16 Fuseholder(ifsoequipped)
XL17 Fuse(ifsoequipped)
XL18 HEPAPre-Filter**
XL19 HEPAFilterAdapter**
XL20 HEPAFilter**
XL21 Pre-Filter
P ARTS L IST
ef o escrition
XL1
XL
2
(Location)
XL6
XL3
XL4
XL9
XL7
XL
11
(2)
XL13 (4)
XL10
XL12(4)
XL8
XL16
XL17
XL18
XL5
XL20
XL19
XL16
XL17
XL7
XL15
XL21
W / HEP
A
W / HEPAW / HEP
FILTER OPTION
DRY ER M AINTENANCE CODES
1SHORT/1LONGFLASH CloggedPre-Filter CleanPre-Filter Dryer will still run
1SHORT/2LONGFLASH SeverelycloggedPre-Filter CleanPre-Filter Dryer will stop
1SHORT/3LONGFLASH No pressure detected Airsensortubemissingor
control not mounted correctly Dryer will still run
2SHORT/1LONGFLASH Inlockoutmode Clearobstruction Dryer stops until obstruction
cleared
M OTOR P ROB L EM CODES First verify that dryer is receiving correct voltage at Terminal Block (check dryer label)
1LONG/3SHORTFLASH MotorOverCurrent Replace Motor Dryer will stop
1LONG/4SHORTFLASH MotorUnderCurrent Replace Motor Dryer will stop
HEATER P ROB L EM CODES First verify that dryer is receiving correct voltage at Terminal Block (check dryer label)
2LONG/3SHORTFLASH Shorted or incorrect heater Replace Heater Dryer will stop
2LONG/4SHORTFLASH Open/brokenheater Replace Heater Dryer will still run
EX CEL DRY ER, INC 1 . 8 0 0 . 2 5 5 . 9 2 3 5 EX CEL DRY ER. COM ADM IN@ EX CEL DRY ER. COM
3 5 7 CHESTNUT STREET, EAST L ONG M EADOW , M A 0 1 0 2 8 02/2016 4
Dryer blows only cold air (non-ECO dryers)
1. Checkheatsettingoncontrol.
2. CheckforlooseconnectionstoHeatingElement.
3. Replace Heating Element.
Dryer has loss of air volume
1. Checkmotorspeedsettingoncontrol.
2. CheckforslowrunningMotororburningsmell.Ifso,replaceMotor.
3. CheckPre-Filterforlintbuildup.CleanbyremovingPre-Filterandrinseinwarm
waterthendryPre-Filterbeforereinstalling.
CODE CHART
CodesaredisplayedbytheflashingoftheredLEDlightinthesensoradjacent to theairoutlet.
Normal operation will be indicated by the red LED being on when not drying and off when hands are under the sensor.
This manual suits for next models
6
Other Excel Dryer manuals
Popular Dryer manuals by other brands

Bosch
Bosch WPG23100IN User manual and installation instructions

Maytag
Maytag MDE2400AY Series Service guide

Electrolux
Electrolux EIGD55H - Gas Dryer With 8.0 cu. Ft.... instructions

Mitsubishi Electric
Mitsubishi Electric JT-S1AP-W-NA installation manual

Double K Industries
Double K Industries Challengair 850 instruction manual

SPL
SPL SUPREME AIRFORCE Installation & maintenance instructions