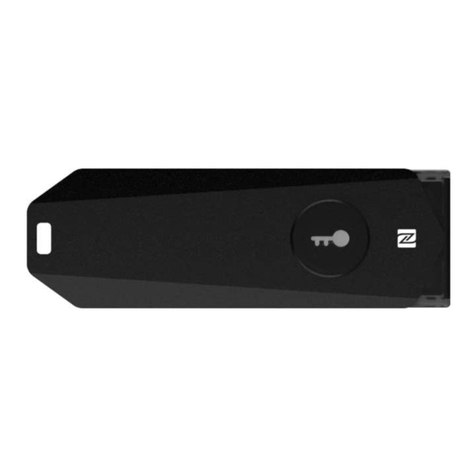
Excelsecu Data Technology eSecu FIDO2 Pro+ Fingerprint Key User manual

www.excelsecu.com
eSecu FIDO2 Pro+ Fingerprint Key
User Manual
(V1.2)
Excelsecu Data Technology Co., Ltd.

www.excelsecu.com
CONFIDENTIAL information of Excelsecu Data Technology Co., Ltd.
NO WARRANTIES OF ANY NATURE ARE EXTENDED BY THIS DOCUMENT. Any product and related
material disclosed herein are only furnished pursuant and subject to the terms and conditions of a duly
executed Program Product Licence or Agreement to purchase or lease equipment. The only warranties
made by Excelsecu Technology, if any, with respect to the products described in this document are set
forth in such Licence or Agreement. Excelsecu Technology cannot accept any financial or other
responsibility that may be the result of your use of the information or software material, including
direct, indirect, special or consequential damages.
You should be careful to ensure that the use of this information and/or software material complies with
the laws, rules, and regulations of the jurisdictions with respect to which it is used. All rights reserved.
Copyright © 2020 Excelsecu Data Technology Co., Ltd.

www.excelsecu.com
Table of Contents
1. Important Instructions ..............................................................................................................4
2. Product Overview......................................................................................................................4
3. Product Picture..........................................................................................................................4
4. FIDO2 Fingerprint Key Management.........................................................................................5
4.1. eSecu FIDOManager.....................................................................................................5
4.2. Windows Settings.........................................................................................................5
4.3. Chrome Browser...........................................................................................................6
5. The Basic Operation of FIDO2 Pro+ Fingerprint Key .................................................................7
5.1. Register (First Time Only) .............................................................................................7
5.2. Signing-In (After Completing Registration)...................................................................7
5.2.1. Bluetooth Pairing Mode (First Time Only) .......................................................8
5.2.2. Bluetooth Mode (Paired Before)......................................................................8
5.2.3. USB Mode........................................................................................................9
5.2.4. NFC Mode ........................................................................................................9
6. How to use FIDO2 Pro+ Fingerprint Key with Microsoft for passwordless login.......................9
6.1. Register the FIDO2 Pro+ Fingerprint Key......................................................................9
6.2. Sign in with FIDO2 Pro+ Fingerprint Key ....................................................................11
7. How to use FIDO2 Pro+ Fingerprint Key with Google for 2-Step Verification .........................12
7.1. Register.......................................................................................................................12
7.2. Sign in (USB Mode).....................................................................................................16
7.3. Sign in (Bluetooth + Android Mobile Device).............................................................18
7.4. Sign in (NFC + Android Mobile Device).......................................................................21
7.5. Sign in (Bluetooth + iPhone).......................................................................................22
7.6. Sign in (NFC Mode + iOS 13.3 and Above)..................................................................26
8. FAQ..........................................................................................................................................27
8.1. I have two gmail accounts, how many FIDO2 Pro+ Fingerprint Keys do I need to protect
two gmail account. Do I need 2 keys?.....................................................................................27
8.2. What should I do if I lost my FIDO2 Pro+ Fingerprint Key? ........................................27
8.3. Can I use my FIDO2 Pro+ Fingerprint Key on PC over Bluetooth?..............................27
8.4. What applications support FIDO2 Pro+ Fingerprint Key?...........................................28
8.5. Why does GitHub say “this browse doesn't support security key” on my iPhone?...28
8.6. Can I register a FIDO2 Pro+ Fingerprint Key over my smart phone?..........................28
8.7. How can I know when to charge my FIDO2 Pro+ Fingerprint Key?............................28
9. Product Specs..........................................................................................................................28

www.excelsecu.com
1. Important Instructions
Thank you for using eSecu FIDO2 Pro+ Fingerprint Key!
Please read this manual before operating your eSecu FIDO2 Pro+ Fingerprint Key and keep it
for future reference.
2. Product Overview
eSecu FIDO2 Pro+ Fingerprint Key is a hardware authenticator supporting FIDO2 standard and
FIDO U2F standard, as well as Bluetooth, NFC and fingerprint module. It can be used on FIDO2-
enabled or U2F-enabled services and applications’ two-factor authentication, multi-factor
authentication or passwordless authentication. The fingerprint module and multiple
interfaces make it easier and safer for you to complete authentication on PCs and mobile
devices.
3. Product Picture
The key has the following lighting states:
Steady red light: Insert the FIDO2 Pro+ Fingerprint Key in the computer’s USB port. /
Fingerprint verification fail.

www.excelsecu.com
Flashing red light: Need to touch. / low power state. Blinking red light every 5 seconds. Please
charge it in time.
Flashing green light: Fingerprint enroll / Need to verify fingerprint.
Steady green light: When the FIDO2 Pro+ Fingerprint Key is placing on an NFC card reader or
on the NFC sensor of a mobile device.
Steady blue light: long press the fingerprint sensor for 5 seconds to enter the Bluetooth
pairing mode for the first time. After paired successfully, the steady blue light turns to flashing
blue light.
Flashing blue light: short press the fingerprint sensor to enter the Bluetooth mode.
4. FIDO2 Fingerprint Key Management
Before using FIDO2 Pro+ Fingerprint Key, fingerprint is always required to be enrolled via USB.
Currently, there are three methods to manage FIDO2 Pro+ Fingerprint Key: eSecu
FIDOManager, Windows settings and Chrome Browser.
4.1. eSecu FIDOManager
The Software used to configure the FIDO and OTP (HOTP/TOTP) and fingerprint’s enrollment,
test, remove, reset is described in document of “Excelsecu Manager User Manual”, you can
refer to it for more details.
4.2. Windows Settings
You can set up your eSecu FIDO2 Pro+ Fingerprint Key straight from Setting page if the
platform is Windows 10 version 1903 (build 18298) or above. In Setting -> Accounts -> Sign-
in options -> Security Key, you are able to manage fingerprint, PIN or reset your eSecu FIDO2
Pro+ Fingerprint Key.

www.excelsecu.com
4.3. Chrome Browser
Chrome Version 79 or above on Windows, Mac or Linux are able to manage eSecu FIDO2
security keys. Here we take Windows as an example.
Note: if you are using Chrome on Windows 1903, you need override this by running Chrome
as Administrator with the command line flag:
--disable-features=WebAuthenticationUseNativeWinApi.
Go to chrome -> settings -> Privacy and security -> more -> Manage security keys, or directly
visit the link: chrome://settings/securityKeys, then you are able to manage PIN, sign-in data,
fingerprints and reset.

www.excelsecu.com
5. The Basic Operation of FIDO2 Pro+
Fingerprint Key
5.1. Register (First Time Only)
1. Enter the username and password to log in to any application that supports FIDO
U2F/FIDO2.
2. Insert the FIDO2 Pro+ Fingerprint Key in your computer over USB connection.
3. Add the FIDO2 Pro+ Fingerprint Key to your account(s).
5.2. Signing-In (After Completing Registration)
1. Open the website you want to log in.
2. Enter your usual username and password (for U2F-enabled services).
3. Connect the registered FIDO2 Pro+ Fingerprint Key to a mobile device (Bluetooth/NFC
mode) or PC (USB mode).
4. When prompted, authenticate with a simple touch of the fingerprint module to sign in
or tap the Key on an NFC sensor.

www.excelsecu.com
5.2.1. Bluetooth Pairing Mode (First Time Only)
1. Long touch metal edge of the sensor for 5 seconds to enter the Bluetooth pairing mode
for the first time. The indicator light is steady blue. If there is no pairing request received
in 60 seconds, the indicator light goes out and the FIDO2 Pro+ Fingerprint Key exits
Bluetooth pairing mode.
2. Scan Bluetooth devices on your client side (e.g. a smart phone). Connect to the device
which has the same SN as printed on the back of the FIDO2 Pro+ Fingerprint Key.
3. Input 6-digits PIN as printed on the back of the FIDO2 Pro+ Fingerprint Key. When paired
successfully, the blue light should start blinking.
4. When an authentication request is received, the light blinks red, place the finger on
sensor to verity to complete the authentication.
5.2.2. Bluetooth Mode (Paired Before)
1. Touch metal edge of the sensor to enter the Bluetooth pairing mode. The indicator light
blinks blue.
2. When an authentication request is received, the light blinks red, place the finger on
sensor to verity to complete the authentication.
For security purpose, the FIDO2 Pro+ Fingerprint Key will be forced to shut down after 30 seconds.
For security purpose, the FIDO2 Pro+ Fingerprint Key will be forced to shut down after 30 seconds.

www.excelsecu.com
5.2.3. USB Mode
1. Insert the registered FIDO2 Pro+ Fingerprint Key to the computer’s USB port. The
indicator light is red on all the time.
2. When an authentication request is received, the light blinks red, place the finger on
sensor to verity to complete the authentication.
5.2.4. NFC Mode
1. Please make sure NFC of the mobile device is turned on.
2. Tap your registered FIDO2 Pro+ Fingerprint Key on the NFC sensor of mobile device when
it’s asking for a security key.
3. When an authentication request is received, the light blinks red, place the finger on
sensor to verity to complete the authentication.
6. How to use FIDO2 Pro+ Fingerprint Key
with Microsoft for passwordless login
6.1. Register the FIDO2 Pro+ Fingerprint Key
1. Click “My Microsoft account” after signing in.
2. Select “Security”.

www.excelsecu.com
3. Click “more security options”.
4. You will be asked to verify your identity.
5. After the verification is passed, enter the “Additional security options” page, and click
“Set up a security key” under “Windows Hello and security keys”.

www.excelsecu.com
6. Identify what type of key you have (USB or NFC) and click next.
7. Insert your key into the USB port and touch your key to verify the fingerprint when the
key flashes green light.
8. Name your FIDO2 Pro+ Fingerprint Key, and the registration is finished.
6.2. Sign in with FIDO2 Pro+ Fingerprint Key
1. Click “Sign in”.
2. Click “Sign in with a security key”.

www.excelsecu.com
3. Insert your key into the USB port and touch your key to verify the fingerprint when the
key flashes green light.
4. Sign in successfully.
7. How to use FIDO2 Pro+ Fingerprint Key
with Google for 2-Step Verification
7.1. Register
Register FIDO2 Pro+ Fingerprint Key with your Google account to make it become the second
authentication factor.
1. Log in to the website: https://www.google.com/ and click Login in the top right corner.
Enter your account name and password.

www.excelsecu.com
2. Once you have successfully logged in, click on your Google Account.
3. Select security->2-step verification.
4. You will be asked to log in again.

www.excelsecu.com
5. Click ADD SECURITY KEY.
6. Click NEXT to continue.

www.excelsecu.com
7. You will be prompted to insert your FIDO2 Pro+ Fingerprint Key into a USB port.
8. When the red light of the key is flashing, it means you are required to touch the key. Press
the fingerprint module on FIDO2 Pro+ Fingerprint Key.
9. Rename the FIDO2 Pro+ Fingerprint Key, click DONE to finish.

www.excelsecu.com
10. The FIDO2 Pro+ Fingerprint Key becomes the default second authentication factor of
your account. You will be asked to use it to complete 2-Step Verification when sign in to
Google in the future.
7.2. Sign in (USB Mode)
1. Log in to the website: https://www.google.com/ and click Login in the top right corner.
Enter your account name and password, then click “Next”.

www.excelsecu.com
2. You will be prompted to insert your FIDO2 Pro+ Fingerprint Key into a USB port. When
the red light of the key is flashing, press the fingerprint module on FIDO2 Pro+ Fingerprint
Key.
3. Click Next to login.
Note:
⚫By default, “Don’t ask again on this computer” is checked. After checking the box, the
next login will skip the two-step verification and log in directly with the user name and
password.

www.excelsecu.com
⚫You can undo trusted devices in settings to restore the use of two-step verification. Click
“Revoke All” to clear the trusted device.
7.3. Sign in (Bluetooth + Android Mobile Device)
When using the FIDO2 Pro+ Fingerprint Key on an Android mobile device for the first time
with Bluetooth connection, you need to pair them first.
1. Make sure the FIDO2 Pro+ Fingerprint Key is registered to your Google account.
2. Turn on the Bluetooth connection on your Android device. Open the Chrome browser,
and go to https://www.google.com, click the Sign in button on the top right corner, then
enter the username and password.
3. If the 2-step Verification of your Google account is turned on, you will be asked to use
your Security Key for verification. Click on Pair another Security Key.

www.excelsecu.com
4. Press the fingerprint sensor on your FIDO2 Pro+ Fingerprint Key for over 5 seconds to
active the Bluetooth pairing mode, the blue indicator light on the key shall steady on.
5. When the Android device detects the signal of the key, the serial number printed on the
back of the key will show on the page. Select the serial number, click on CONTINUE and
enter the 6-digit PIN as printed on the back of the FIDO2 Pro+ Fingerprint Key for pairing.
When paired successfully, the indicator light on the key shall flashing blue, and the
Google service will automatically verify your security key.

www.excelsecu.com
6. When the FIDO2 Pro+ Fingerprint Key receives an authentication request, the indicator
light changes to flashing red from flashing blue, short press the button on the key to
confirm the authentication, then you will be authorized to login with your account.
7. When you are asked to do the 2-Step Verification on a paired Android device again, go
through the Step 1~3 above, no need click on Pair another Security Key, just short press
Table of contents
Other Excelsecu Data Technology Adapter manuals
Popular Adapter manuals by other brands
WifiTrax Model Science
WifiTrax Model Science FWA-20 Getting started guide

Kensington
Kensington K33988 quick start guide
Sygonix
Sygonix 2336878 operating instructions
Devolo
Devolo 200 AVdesk user guide
Karls Tech
Karls Tech BFP1 instruction manual

Northern Telecom
Northern Telecom CTA 150i installation guide
