manuals.online logo
Brands
  1. Home
  2. •
  3. Brands
  4. •
  5. Exposure
  6. •
  7. Amplifier
  8. •
  9. Exposure 30I0S2D User manual

Exposure 30I0S2D User manual

3010S2
D
Pre-Amplier
Quick Start
Thank you for purchasing the Exposure 3010S2D Pre-Amplier
high delity engineering
since 1974 1Installation
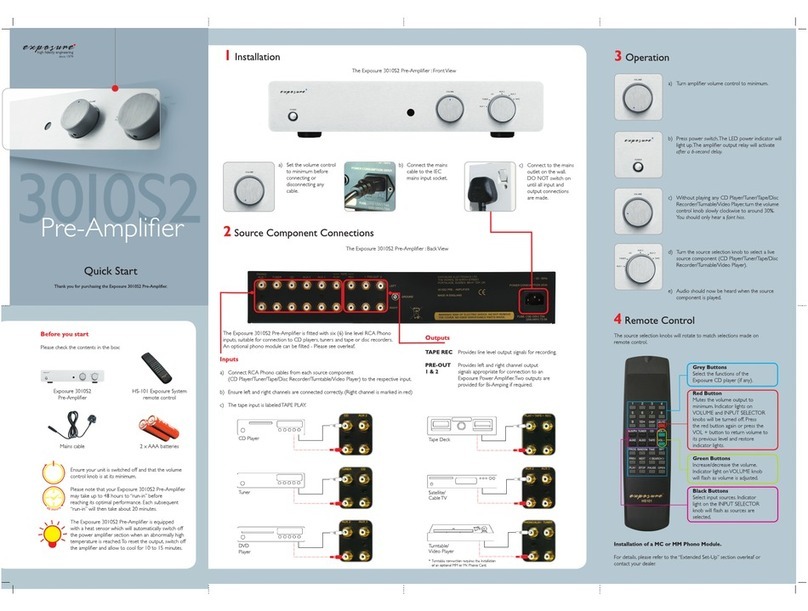
The Exposure 3010S2D Pre-Amplier : Front View
b) Connect the mains
cable to the IEC
mains input socket.
c) Connect to the mains
outlet on the wall.
DO NOT switch on
until all inputs and
output connections
are made.
a) Set the volume control
to minimum before
connecting or
disconnecting any
cable.
2Source Component Connections
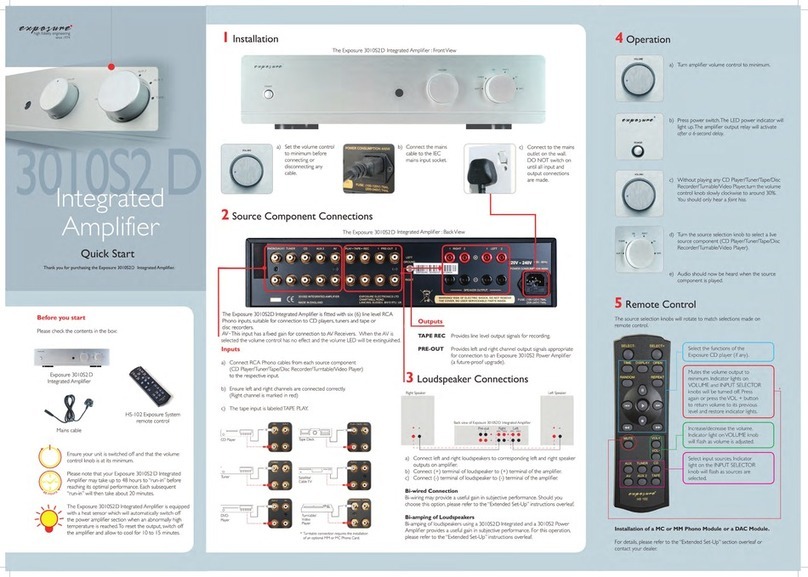
The Exposure 3010S2D Pre-Amplier is tted with six (6) line level RCA Phono
inputs, suitable for connection to CD players, tuners and tape or disc recorders.
An optional phono module can be tted - Please see overleaf.
AV - This input has a xed gain for connection to AV Receivers. When the AV is
selected the volume control has no effect and the volume LED will be extinguished.
Outputs
TAPE REC Provides line level output signals for recording.
PRE-OUT Provides left and right channel output
1 & 2 signals appropriate for connection to an
Exposure Power Amplier. Two outputs are
provided for Bi-Amping if required.
The Exposure 3010S2D Pre-Amplier : Back View
Inputs
a) Connect RCA Phono cables from each source component
(CD Player/Tuner/Tape/Disc Recorder/Turntable/ Video Player) to the respective input.
b) Ensure left and right channels are connected correctly. (Right channel is marked in red.)
c) The tape input is labelled TAPE PLAY.
Exposure 3010S2D
Pre-Amplier
Mains cable
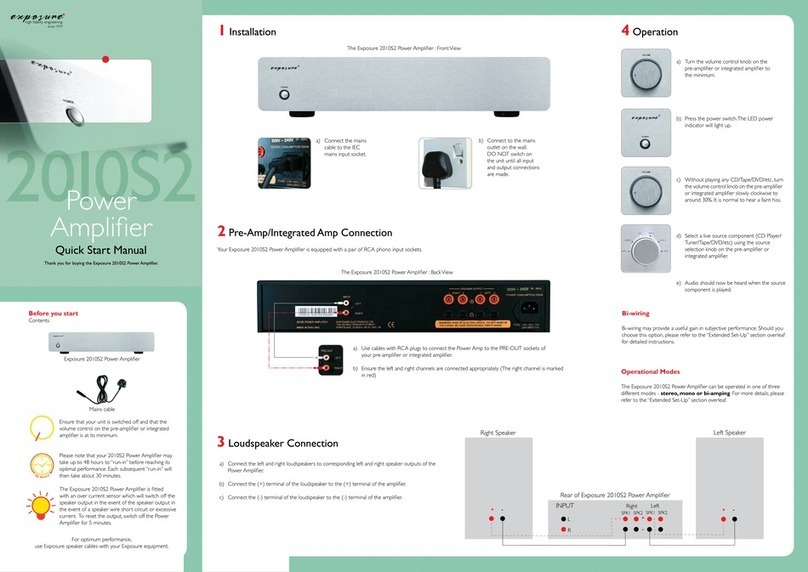
Ensure your unit is switched off and that the volume
control knob is at its minimum.
Please note that your Exposure 30I0S2D Pre-Amplier
may take up to 48 hours to ‘run-in’ before
reaching its optimal performance. Each subsequent
‘run-in’ will then take about 20 minutes.
The Exposure 30I0S2D Pre-Amplier is equipped
with a heat sensor which will automatically switch off
the power amplier section when an abnormally high
temperature is reached.
To reset the output, switch off
the amplier and allow to cool for 10 to 15 minutes.
HS-102 Exposure System
remote control
Before you start
Please check the contents in the box:
3Operation
a) Turn amplier volume control to minimum.
b) Press power switch.The LED power indicator will
light up.The amplier output relay will activate
after a 6-second delay.
c) Without playing any CD Player/Tuner/Tape/Disc
Recorder/Turnable/Video Player, turn the volume
control knob slowly clockwise to around 30%.
You should only hear a faint hiss.
d) Turn the source selection knob to select a live
source component (CD Player/Tuner/Tape/Disc
Recorder/Turnable/Video Player).
e) Audio should now be heard when the source
component is played.
4Remote Control
Select the functions of the
Exposure CD player (if any).
Mutes the volume output to
minimum. Indicator lights on the
VOLUME and INPUT SELECTOR
knobs will be turned off. Press
again or press the VOL + button
to return volume to its previous
level and restore indicator lights.
Increase/decrease the volume.
Indicator light on VOLUME knob
will ash as volume is adjusted.
Select input sources. Indicator
light will change as sources are
selected.
Installation of a MC or MM Phono Module or a
DAC module.
For details please refer to the ‘Extended Set-Up’ section overleaf or
contact your dealer.
Turntable*
Safety
Incorrect installation or inappropriate use of the Exposure 30I0S2D
Pre-Amplier may result in injury due to electrical shock.
• Ensure that the voltage rating on the rear panel of this unit matches that
of your local mains supply.*
• Ensure that the mains cable and plug supplied with this unit are also
correct. (Contact your dealer immediately if this is not the case.)
• This unit is protected by a mains fuse, which is accessible as part of the
IEC socket on the rear panel.
• Fuse replacement specications:
220/240V units T2.5AL fuse
I10/120V units T5AL fuse
• Protect the unit against all forms of liquid. Never expose unit to dripping
or splashing, or place objects lled with water, such as vases, on the unit.
• Unplug unit from mains when not in use for prolonged periods.
• Do not open this unit - there are NO user serviceable parts inside
(except to install or change a phono card).
• Set the volume control to minimum before turning this unit on or off.
• Ensure that this unit is switched off when connecting or disconnecting
speaker and interconnect cables.
* Contact your Exposure dealer or distributor for advice on moving your
equipment to another country or territory.
Caution
For a long and trouble-free life of your Exposure 30I0S2D Pre-Amplier,
please ensure the following:
• Do not remove the cover of the Pre-Amplier or dismantle the
case (except to install or change phono card).
• Protect unit against all forms of liquid. Never expose unit to dripping or
splashing, or place objects lled with water, such as vases, on the unit.
• Do not operate the Pre-Amplier in damp environments or allow
liquids to enter the unit.
• Do not attempt to bypass the mains fuse or replace the fuse with one
of a different specication.
• Do not use abrasive or solvent-based cleaning uids on the
Pre-Amplier’s case.
Failure to observe these precautionary measures may void your warranty.
Technical Specications
Gain (at I KHz) : + 18dB
Sensitivity : 250mV
Maximum output : > 10V RMS
Frequency response : -3dB at I Hz and 56KHz, ref I KHz, max volume
Total Harmonic Distortion : < 0.0I % @ 1.6V RMS output, I KHz
Signal to Noise ratio : >96dB, A weighted, ref 1.6V RMS output, I KHz
Channel Separation : >60dB 20Hz to 20KHz (Typically> 85dB@ I KHz)
Outputs : 2 pairs RCA, pre amp output, I pair for tape
output
Mains Supply : I10/120V or 220/240V, 50/60Hz (Factory set)
Power Consumption : <25W
Dimensions (H x W x D) : 90mm x 440mm x 300mm
Nett Weight (Unpacked) : 7Kg
Gross Weight (Packed) : 9Kg
Exposure Warranty Policy
1. The Exposure warranty entitles you to FREE repair of this unit for the rst
three (3) years from the date of purchase.
2. This warranty is valid only if the unit is purchased from an authorised
Exposure dealer, registered with the authorised agent in your country
of residence and (the following is optional but recommended) registered at
www.exposurehi.com
3. The agent accepts no responsibility for defects arising from accident, misuse,
abuse, wear and tear, neglect or through unauthorised adjustment and or
repair or replacement of any components, nor will they accept responsibility
for damage or loss occurring during transit to or from the person making a
claim under warranty.
4. The Exposure warranty covers:
Parts and labour costs for three (3) years from the date of purchase.
Please retain your original receipt as proof of purchase and purchase date.
The guarantee is extended only to the original purchaser and is not
transferable.
When making claims under this warranty:
1. The unit should be suitably packed and returned to the dealer from whom
it was purchased, or directly to the local distributor, together with proof of
purchase or a copy of the dated sales receipt.
2. If necessary the unit should be sent carriage pre-paid by a reputable carrier,
NOT by post.
3. No responsibility is accepted for the unit whilst in transit to the dealer or
agent. Customers are advised to insure the unit against loss or damage
whilst in transit.
4. Any tampering or alteration made to the warranty card or to the serial
number on the unit will invalidate the warranty.
5. The dealer or the agent shall notify the customer when the repairs have
been completed. The customer must claim the goods within fourteen (14)
days from the date of notice, failing which, the Company reserves the right
to impose storage charges.
6 The Company reserves the right to dispose of the unit after 90 days from
the date of notice in a manner that it sees t and without compensation
to the customer.
Back view of Exposure 3010S2D Pre-Amplier
Back view of Exposure 3010S2 Stereo Amplier
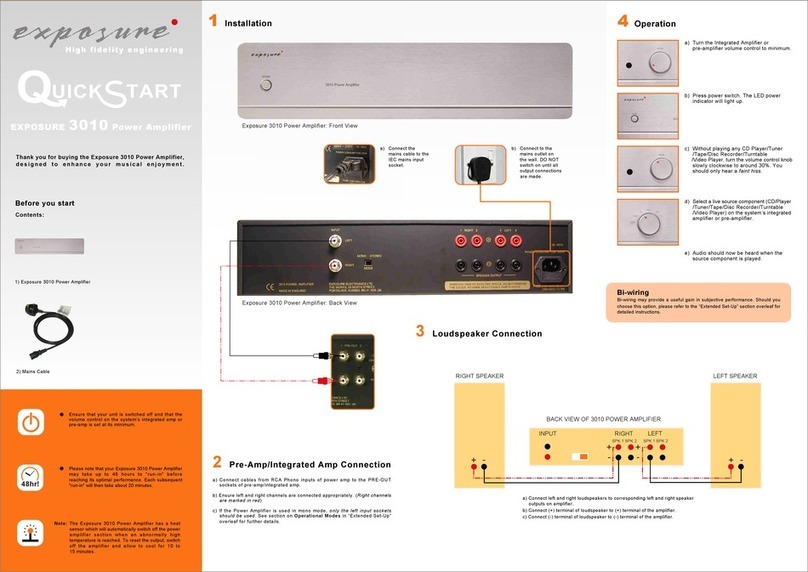
a) Connect the left output of the 3010S2D Pre-Amplier to the left input of the Power Amplier.
b) Connect the right output of the Pre-Amplier to the right input of the Power Amplier.
Connection
Installation of a MC or MM Phono Module or a DAC module
This is best carried out by your dealer. However if you wish to attempt installation yourself
Fit the three M3 bolts that are supplied
with the phono card. Fit the three M3
bolts provided with the DAC card as
well as the large nut and washer to the
BNC socket on the outside of the unit.
Switch off the unit. Remove the mains cable from
the wall and the IEC socket.
Remove the small jumper board
that is tted on the right hand
side at the back.
Remove the four cover screws.
Observe the position of the plug on
the phono card and carefully plug it in,
ensuring that all the pins are inserted
correctly into their connectors.
Product Disposal Instructions
The symbol shown here and on the product means that
the product is classed as electrical or electronic waste
and should not be disposed of with other household
waste at the end of its working life.
The Waste of Electrical and Electronic Equipment (WEEE) Directive
(2002/96/EC) has been put in place to recycle products using the best
available recovery and recycling techniques to minimize the impact on the
environment, treat any hazardous substances and avoid increasing landll.
When you have no further use for this product, please remove any
batteries and dispose of them and the product as per your local
authority’s recycling process. For more information please contact your
local authority or the retailer where the product was purchased.
Slide the cover back about 2cm
until it is free to move upwards
to reveal the main circuit board.
Replace the cover and screws.

Other Exposure Amplifier manuals

Exposure 2010S2 Instruction manual

Exposure

Exposure 2010S2 Instruction manual

Exposure XXIII Instruction manual

Exposure

Exposure XXIII Instruction manual

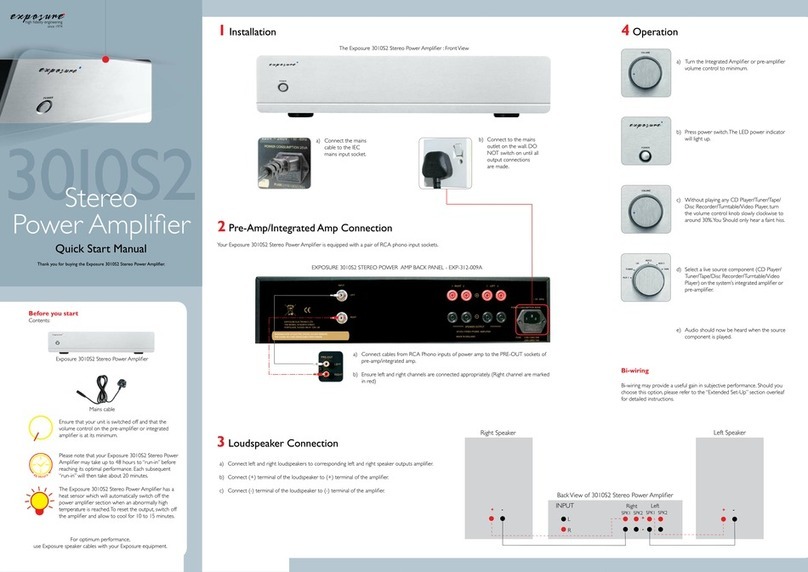
Exposure 3010S2 Instruction manual

Exposure

Exposure 3010S2 Instruction manual

Exposure 5010 User manual

Exposure

Exposure 5010 User manual

Exposure 3010S Instruction manual

Exposure

Exposure 3010S Instruction manual

Exposure XM HP Instruction manual

Exposure

Exposure XM HP Instruction manual

Exposure 3010S2 User manual

Exposure

Exposure 3010S2 User manual

Exposure 3010 User manual

Exposure

Exposure 3010 User manual

Exposure 1010 Instruction manual

Exposure

Exposure 1010 Instruction manual

Exposure 2010S Instruction manual

Exposure

Exposure 2010S Instruction manual

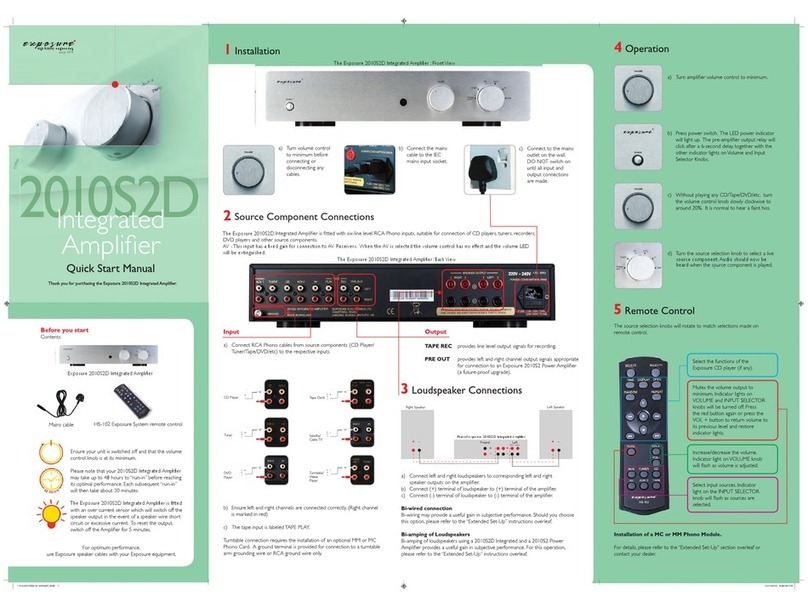
Exposure 2010S2D Instruction manual

Exposure

Exposure 2010S2D Instruction manual

Exposure 3010S2 Instruction manual

Exposure

Exposure 3010S2 Instruction manual

Exposure 30I0S2 User manual

Exposure

Exposure 30I0S2 User manual

Exposure XXXV Instruction manual

Exposure

Exposure XXXV Instruction manual

Exposure 2010S Instruction manual

Exposure

Exposure 2010S Instruction manual

Exposure XXVIII Instruction manual

Exposure

Exposure XXVIII Instruction manual

Exposure 3010S2 D User manual

Exposure

Exposure 3010S2 D User manual

Exposure 2010S2 Instruction manual

Exposure

Exposure 2010S2 Instruction manual

Popular Amplifier manuals by other brands

McIntosh MC-60 instruction manual

McIntosh

McIntosh MC-60 instruction manual

RM V-ULA 50 manual

RM

RM V-ULA 50 manual

NAD CI9120 Service manual

NAD

NAD CI9120 Service manual

Vitus Audio SM-101 manual

Vitus Audio

Vitus Audio SM-101 manual

Inter-m PMU-240NA Operation manual

Inter-m

Inter-m PMU-240NA Operation manual

Toa A-9060DH Installation and operating instructions

Toa

Toa A-9060DH Installation and operating instructions

Lynx D VD 3020 Reference manual

Lynx

Lynx D VD 3020 Reference manual

MOOSE CA1000 user manual

MOOSE

MOOSE CA1000 user manual

Rotel RB-993 owner's manual

Rotel

Rotel RB-993 owner's manual

Nova DXP6000 user manual

Nova

Nova DXP6000 user manual

Stanford Research Systems SR865A Operation manual

Stanford Research Systems

Stanford Research Systems SR865A Operation manual

Tisbury Audio Challenge Amp 1 instruction manual

Tisbury Audio

Tisbury Audio Challenge Amp 1 instruction manual

Wavtech link500.1mini owner's manual

Wavtech

Wavtech link500.1mini owner's manual

MTX RT501 owner's manual

MTX

MTX RT501 owner's manual

Extron electronics Fiber Optics Fox 4G DA8 Specifications

Extron electronics

Extron electronics Fiber Optics Fox 4G DA8 Specifications

Manley STEREO 75+75 WATT AMPLIFIER owner's manual

Manley

Manley STEREO 75+75 WATT AMPLIFIER owner's manual

Autonics BF5 Series manual

Autonics

Autonics BF5 Series manual

NAD D 3020 user manual

NAD

NAD D 3020 user manual

manuals.online logo
manuals.online logoBrands
  • About & Mission
  • Contact us
  • Privacy Policy
  • Terms and Conditions

Copyright 2025 Manuals.Online. All Rights Reserved.